Tutorial: A lazy garden that works with weeds without disturbing soil organisms
Recently we will serialize a series of permaculture landscape elements suitable for courtyards, community gardens, and campuses, and describe how to build and maintain them.
These landscape elements can stand alone or be linked together to form a more productive system that ensures less work and zero waste.
If possible, it is a good idea to involve users in the project from the very beginning, at the decision-making stage, so that the designer acts as a facilitator rather than an expert.
Thick Soil Garden
Thick soil planting is also called no-dig planting. It is a classic component of the permaculture system and reflects these concepts of permaculture:
Work with nature, not against it.
Maintain life in the soil by not turning the soil over and exposing it to the sun.
Collaborate with weeds to turn them into dynamic batteries that store lost nutrients from the soil.
It reflects the experience of dead branches and leaves piling up on the ground in the forest in nature.
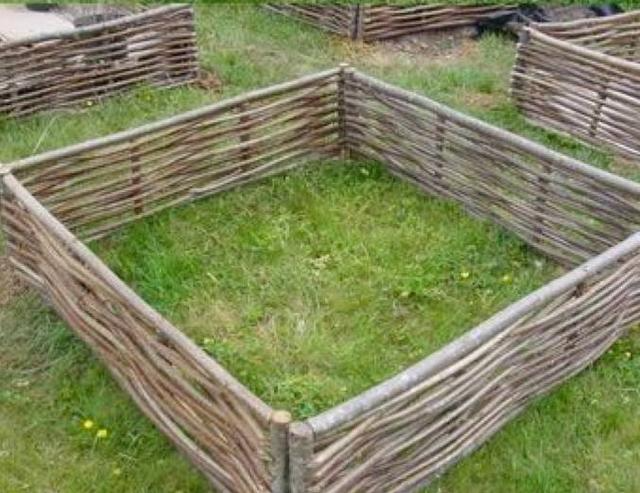
Untill gardens are a useful technique in schools because they can;
Built very quickly at a low cost
Easy to remove or expand
Sustained high production for many years without any hardware infrastructure required
Once the site and watering scheme for the garden have been decided, it is time to start creating the layered garden, a concept first described in Ester Deans' Gardening Book: Growing Without Digging (1997) and subsequently in much of the permaculture literature.
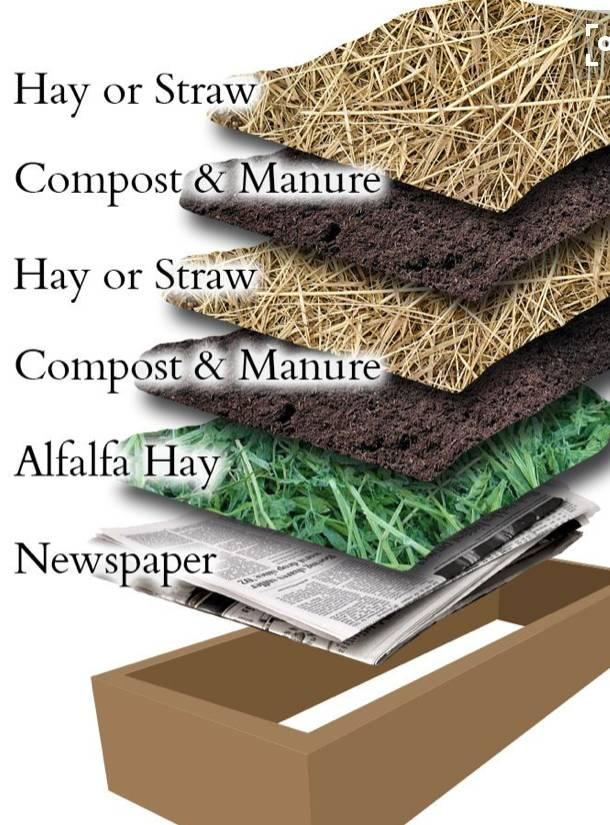
From bottom to top: newspaper, alfalfa, compost, hay or straw, compost, hay or straw
01
| Select Venue |
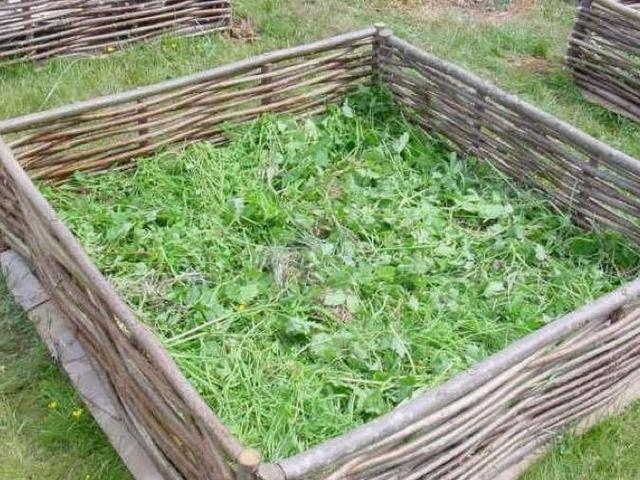
Don’t worry about the number or vigor of weeds, as these will be mowed down to become a nutritious mulch.
02
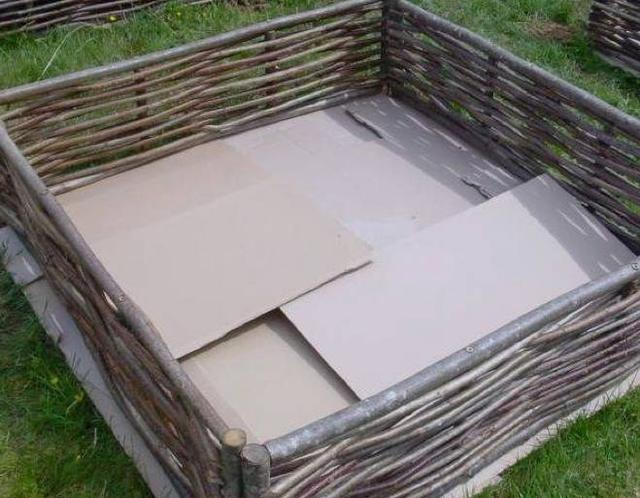
| Cleaning the site |
When you mow, mow as low as possible. Throw anything into the soil that will bring it into balance (check the pH and add lime if it's low, gypsum if it's too sticky, and always add manure, blood, bones, or anything that will attract worms). This is a nutrient-rich layer that will feed the life in the soil and attract a multitude of little helpers from the surrounding soil that you can use as a fertile resource.
03
| Weed Suppression Layer |
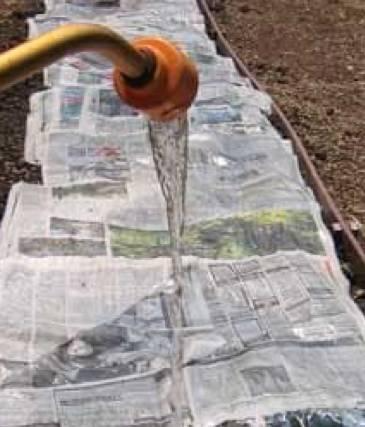
Cover the area with a thick layer of damp newspaper (at least 6 folded sheets). The tougher the weeds, the thicker the newspaper layer. Make sure to stack them tightly on top of the woody weeds, otherwise they are likely to be punctured. If you want to use cardboard, place it under the newspaper or old natural fiber fabric. Don't place it on a road with even the slightest slope, as it will become slippery when wet.
Give this layer a final watering.
Some people are very concerned about inks and dyes in prints and fabrics. It is best not to use glossy surfaced publications, but most inks today are plant based and many of the chemicals are broken down and altered by soil organisms and earthworms. Earthworms are used in brownfield cleanups and are effective in remediating soil damage from oil and gasoline spills. So, the more unreliable the material used, the more earthworm attractant you need to add to this layer.
If there are concerns about newspaper or cardboard in your school, there is a simple alternative that permaculture practitioners have used for decades - use leaves from broadleaf plants such as bananas, arrowroots, and palm branches as a weed barrier when newspaper or cardboard is not readily available. Anything thick, light-blocking, and slow to decompose will work. I have even used coconut husks for this layer. The beauty of permaculture is that you can choose what is readily available, as long as it aligns with your concerns or health issues.
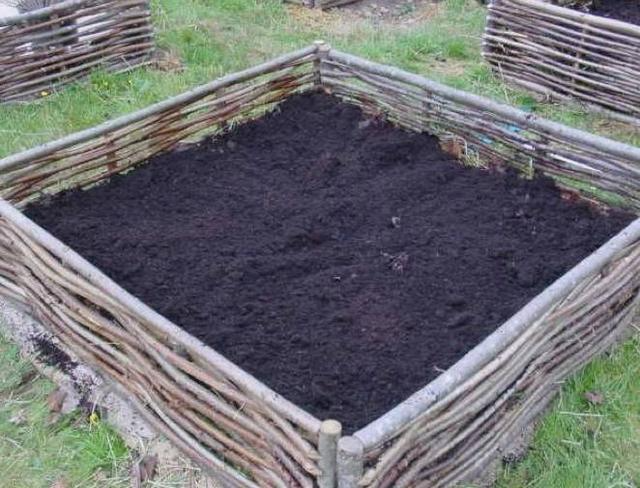
04
| Compost Layer |
Add a layer of compost (carbon/nitrogen nutrient layer). This can be any fertilizer, dry leaves, sawdust, straw, or anything else you would use to make healthy compost. This layer should be about 2-3 inches thick, the deeper and more fertile the compost is, the more productive your garden will be for a long time to come. You can also choose to add rock minerals here, which will provide slow-release minerals in the living soil for months or even years.
07
| Fill with mixed planting medium |
Fill in the planting mix between the mulch and compost layers. This mix should be able to retain moisture and drain well. Because you will be planting on top of the soil and newspaper layers:
Do not break through the newspaper layer for 1-2 years (depending on the vigor of the weeds being covered)
My favorite growing medium is a clay-based aggregate, which Mark Fry taught me - river sand, compost, worm-made fertilizer and gravel dust mixed in. If your soil is already sandy loam, you need to add a little clay. Dissolve some clay in a bucket of water and pour the liquid into the mixture.
This will help to hold the minerals in the growing medium. The ratio you add will depend on the water and nutrients your plants need and the climate. If you get the ratio wrong, it will show up quickly as the plants will wilt from poor nutrition or from overly acidic soil, so test a small number of plants in the growing medium for a while before planting a large area.
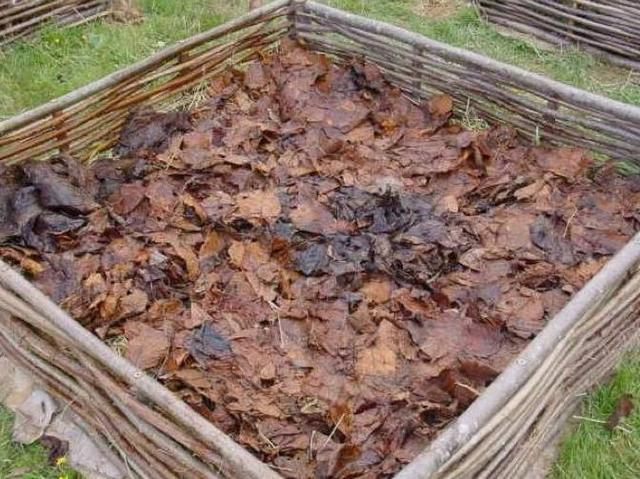
05
| Overlay |
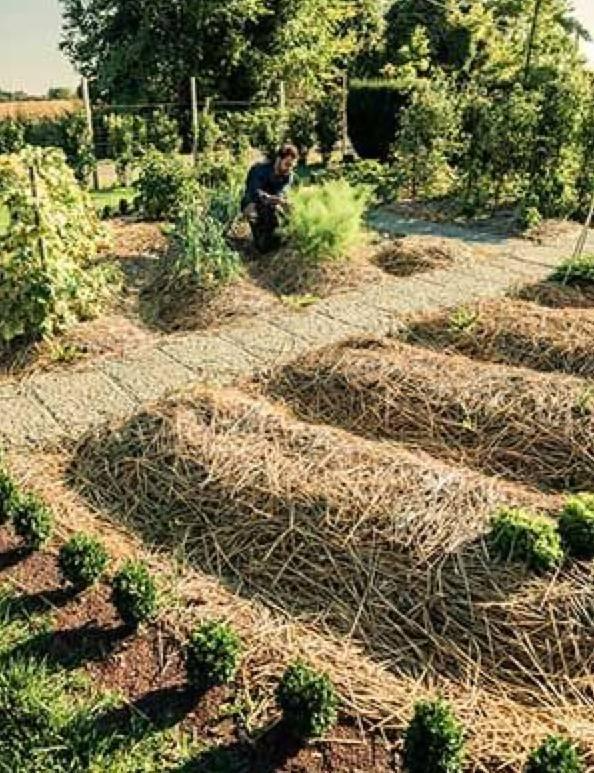
It should be at least 10cm thick and preferably 15cm thick. This could be hay or straw, sugar cane or bamboo leaves, which are added to suppress weeds that may spontaneously grow over the top of the garden and provide shade and shelter for the plants, their roots and the soil. Plants planted around the planting beds provide material for the mulch layer, and border plants are selected to provide shade, form a weed seed barrier, and provide wind protection for the plants inside, while also providing material that can be "chopped and discarded" and used directly in the garden.
06
| Wet all layers |
Wet all the layers without saturating them. You need moisture and oxygen to get the process started.
08
| Planting Plants |
Make holes in the mulch and fill it with your planting mix. Plant your seedlings or more mature plants in it. It's best not to try to start plants from seed in a no-till garden in the early spring. Soon you'll find that the seedlings you planted earlier are now big enough to self-seed, and you'll be amazed at how much growth you can get without tilling. At this stage, you only need to thin out the seedlings if they get too dense.
09
| Maintenance |
Maintaining a no-till garden requires only a few minutes every few days. In the early days, the main task is to keep an eye on getting enough water, as the plantings sit above the ground. Later, the compost layer will decompose and sink, and maintenance thereafter is determined by your planting strategy. At any given time, some or all of the garden can be used to grow a cover crop that can be turned into the soil or harvested and composted. Or you can harvest the entire crop, add a new layer of compost, some earthworms, and a thick layer of mulch; perhaps you'll cover it with sacks or shade cloth, leave the garden for a six-week break in the heat of summer, and when you return for the new school year, the garden will be ready to plant.
10
| Design |
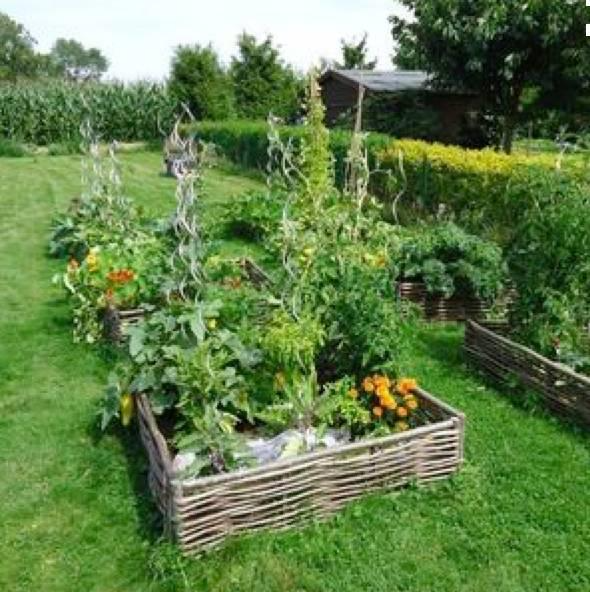
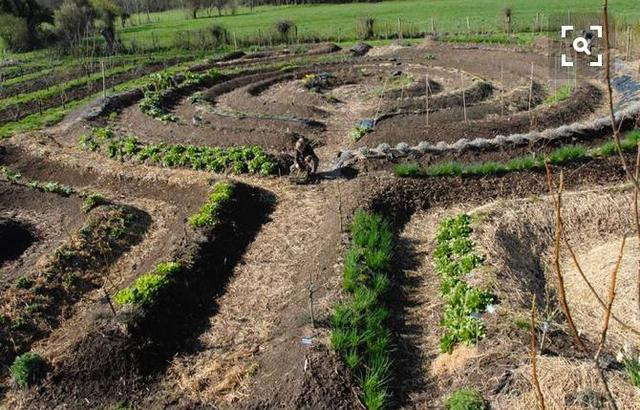
Thick soil cultivation is very flexible in form. In addition to using this method in the one-meter vegetable garden planting box in the above example, you can also use thick soil on a lawn to make ridges, rings or more wonderful shapes. Stacking patterns directly on the ground is very simple and easy.

▼
The above tutorial description on thick soil cultivation mainly comes from our translation of "Outdoor Classroom - School Garden Guide".
The Chinese version of this book is now available.