Those creative bookshelves that are going viral on WeChat Moments, are they made this way?
The creative bookshelves that went viral on WeChat Moments a few days ago really opened my eyes! These bookshelves are not only creative in appearance, but also make people more interested in reading. How are these bookshelves made? Today, I saw the whole production process and must share it with everyone!
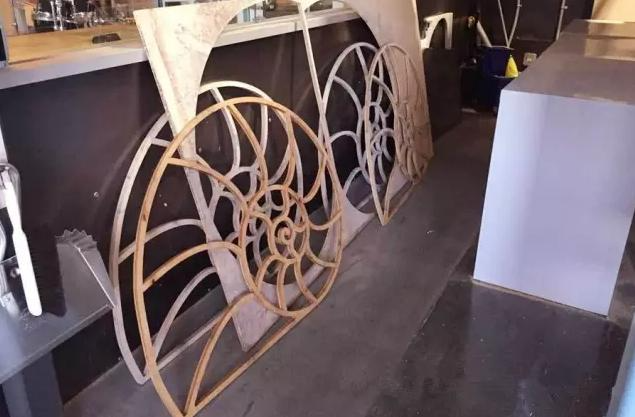
1. Nautilus Bookshelf
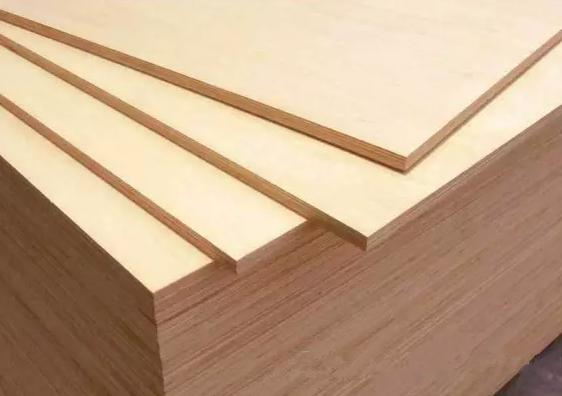
Main materials: wood board, CNC cutting machine, F clamp, handheld sander, workbench, woodworking glue, hammer, tape measure, paint, etc.
The production process of Nautilus bookshelf:
Step 1: Design Diagram
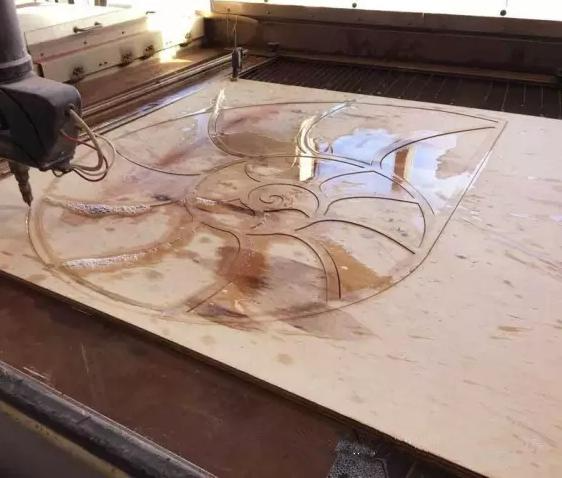
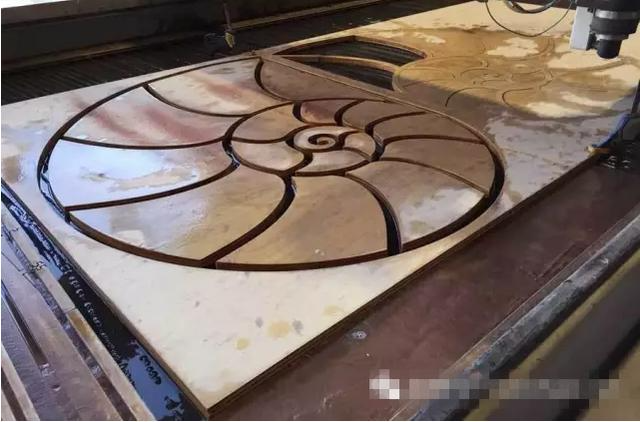
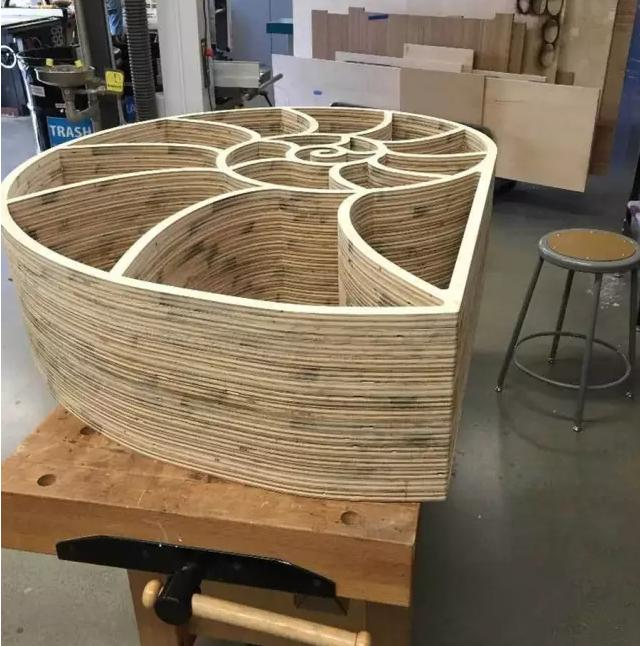
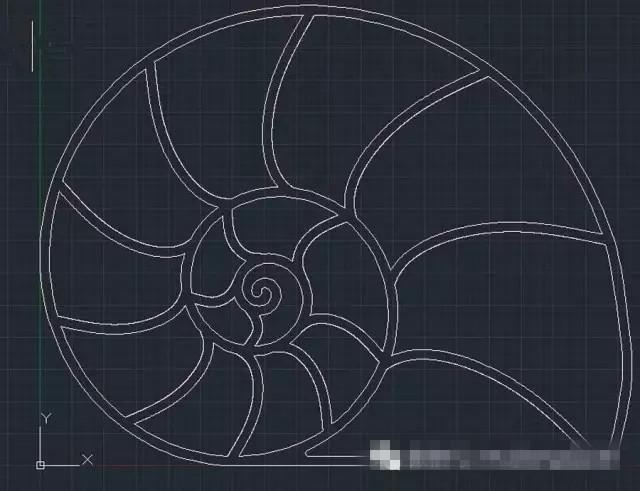 Step 2: Cutting of wood boards Place 15 wood boards (width 1220mm, length 2440mm) on the CNC cutting machine respectively, then design the pattern to be cut in the design software, output the path file (path: cutting machine tool movement path), import the path file into the cutting machine control software, and then control the cutting machine to cut the wood boards.
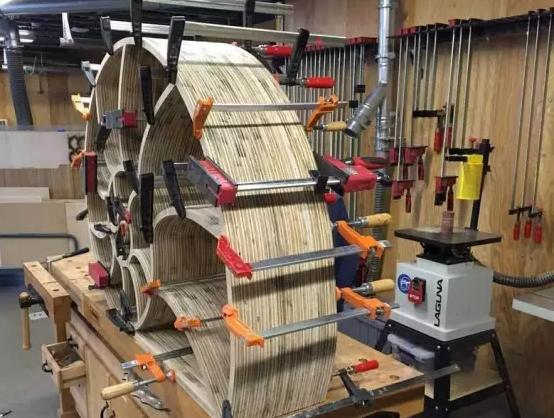
Step 3: Glue bonding First, treat the surface of the cut wood board to make sure it is free of oil, dust and other impurities. Apply glue after cleaning, spread the glue evenly, and immediately stick it together and fix it with F clamps.
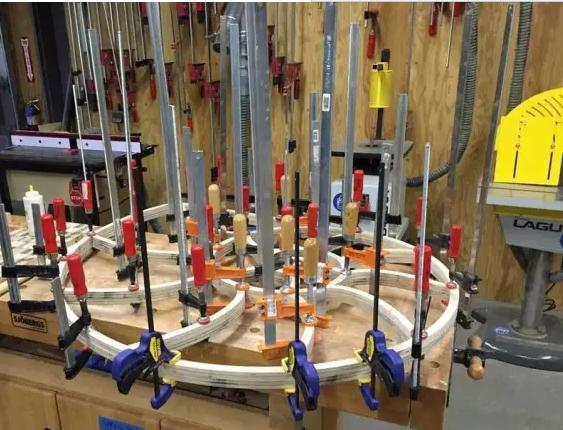
The clamping time is more than 2 hours, and then the next layer of wood board is applied after the clamp is removed, and so on. In order to achieve a better bonding effect, it is best to leave it for 24 hours after removing the clamp before processing.
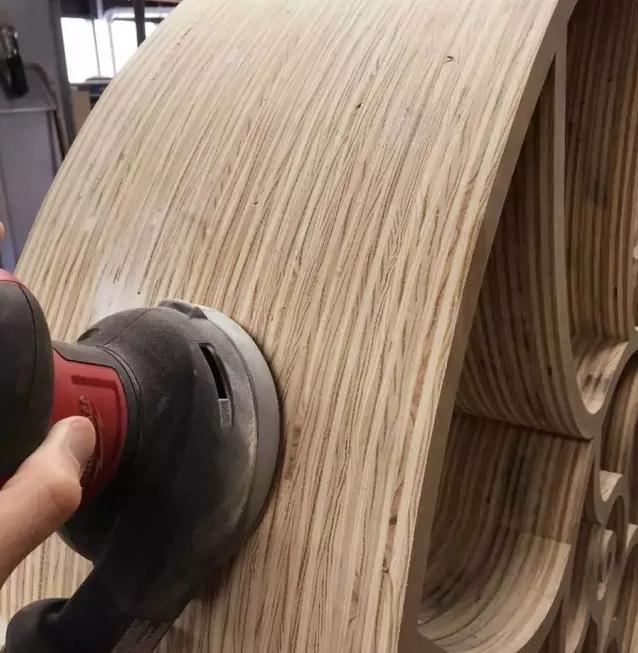
Step 4: Sanding and painting When sanding, use a sander to sand from top to bottom, from outside to inside. At the corners, shapes and details of the bookshelf, use sandpaper to sand coarsely and then finely. If the unevenness is too big, you can try to change a piece. The wood holes should also be fully filled with putty. Finally, scrape the putty completely to level all the places.
Finally, paint. Use a brush to spread the paint. Apply it side by side, not in patches. The paint layer should be neither too thin nor too thick. If it is too thick, there will be water ripples or small lumps of paint. The first coat of paint should be completely dry. After the first coat, let it sit for two or three hours before applying the second coat.
Step 5: Finished! 2. Bookshelf Chair
Main materials: plywood, pine strips, hand saw, hand drill, F clamps, wood screws, pencils, angle squares, tape measures, wood glue, paint, etc.
Step 1: Make the chair base Use a hand saw to cut the blockboard for the chair base, and then use pine boards to make the overall frame of the chair. Nail two horizontal wooden blocks on both sides of the chair to facilitate the placement of the chair base and play a fixing role.
Step 2: Make the bottom bookshelf The outer bookshelf of the bookshelf chair is divided into three layers, and all three layers can be used to place books. Now make the first layer of bookshelf, add small pine wood strips around each other, and fix them on the horizontal frame with wood screws. The interval between the pine wood strips is about 10-15cm, which can also be determined according to your needs.
Step 3: Splice the seat board. Place the cut blockboard on the first-layer horizontal frame and fix it with glue. Add supporting wooden pillars in the middle, usually under the bottom of the seat. After the seat board is completed, start making the backboard and the armrests on both sides, and add pine wood strips to the outside of the armrests.
Step 4: To make a two-layer bookshelf, first cut a 1.5-times-long pine strip of the first layer, and make the upper partitions in the symmetrical position of the first layer of pine strips, with the spacing position vertically symmetrical. Apply glue when making it, and after everything is made, use woodworking clamps to make external corrections.
Step 5: Make a three-layer bookshelf Measure the width of the third-layer bookshelf, backrest and armrest after correction, and then cut three long pieces of blockboard. Fix the three blockboards on the third-layer shelf with wood screws and wood glue. After it is done, fix it with F clamps and wait until it dries.
Step 6: Sanding and painting When sanding, first horizontally and then vertically, first up and then down, first outside and then inside, the sandpaper should be coarse first and then fine. On the one hand, it is to remove impurities on the chair, and on the other hand, it is to increase the adhesion of the paint.
After sanding, check if there are any uneven spots on the furniture. If there are, use putty to level them and sand them again until they are smooth. Then use a brush to spread the paint and brush them side by side. It is recommended to paint from the inside to the outside. If the inside is not painted well, no one will notice it, but if the surface is not painted well, it will look ugly.
Step 7: Done!
-------------END----------------------
Follow the home decoration public account: jia-qb, home decoration cases are updated every day!
Expert number: qijia-duoduo, easy consultation on decoration issues, to create the most beautiful home decoration for you!