Practical flowergrowing tips 16

Do you envy other people's balconies full of flowers? But the flowers you buy are always hard to grow. Have you ever thought about trying cuttings? Not only can you experience the fun of cuttings, but I heard that the flowers you cut yourself are easier to grow! As for why? Those who have experienced it will know!
Here are 5 kinds of flowers and plants that can survive by burying their branches (preferably with stems and leaves) in the soil. You can try it after the Chinese New Year. If nothing goes wrong, it will grow into a large pot of flowers this spring!
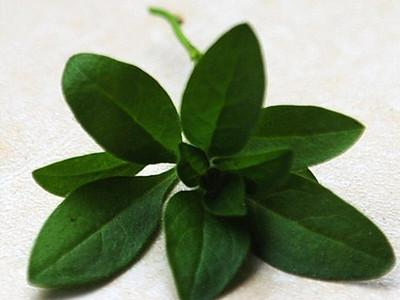
1. Cow
① Cut the top 5 to 7 cm of strong weeping cowberry branches.
② For pure perlite cuttings, spray water frequently to keep the substrate moist.
③Then arrange the cuttings neatly and insert them into the substrate. After about half a month, when the root system is formed, they can be potted.
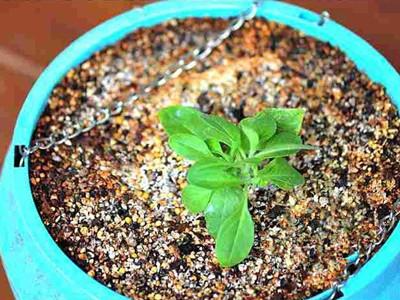
One pot can make the pot burst.
④ Choose a pot with a diameter of no less than 20cm, and one pot with a diameter of 20cm. The substrate requires good air permeability. I have a special liking for perlite, so I use pure perlite mixed with compound fertilizer, and apply enough base fertilizer at the bottom of the pot.
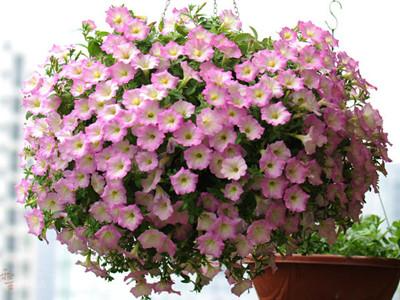
The final bloom is like this
⑤Usually manage thin fertilizer frequently, and expose to more sunlight to promote branching. Because perlite has no fertility, I add a very small amount of Biwang every time I water. About 0.3-0.5 grams of Biwang per kilogram of water, it will fill the pot in about a month. During this period, if you see that the plant shape is not round, you can pinch a small amount of the tip. When it grows out of the pot, trim it along the edge of the pot once to promote the fullness of the plant.
2. Hydrangea
① Select strong young branches from young mother trees as cuttings. The base of the cuttings must have nodes and be dipped in mud. They should be about 20 cm long and the lower leaves should be removed.
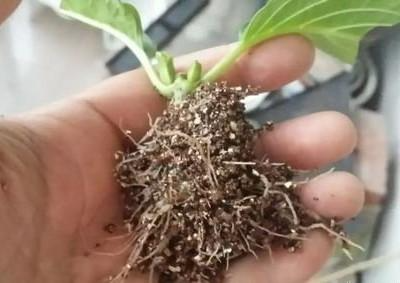
②The suitable temperature for cuttings is 13-18 degrees. After cutting, shade is needed and the soil should be kept moist. It will take 15 days to 1 month for the roots to grow and the plants can be transplanted in the second year after they survive.
3. Geranium
① Cutting selection: Choose strong branches and start above the buds you want to keep. See the picture for the cutting position. You can break them by hand or cut them with scissors. Fast action will cause less damage to the branches. Eyebrow trimming scissors are recommended, which are thin and fast.
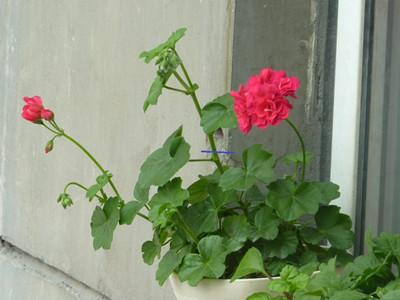
② Cutting medium: Loose media such as peat and perlite are particularly suitable.
③After the cuttings are done, if the pot soil is moist, you don’t need to water it. If the pot soil is dry, you should water it thoroughly immediately. After that, manage it together with the mother plant and water it thoroughly when it is dry. With the mother plant helping to absorb water, you don’t have to worry about the soil being too wet and the branches rotting.
4. Kalanchoe
① Healthy and strong branches and leaves can be used for cuttings, but one-year-old tender branches are best.
② The best cutting media are generally plain sand, plain soil, and sawdust.
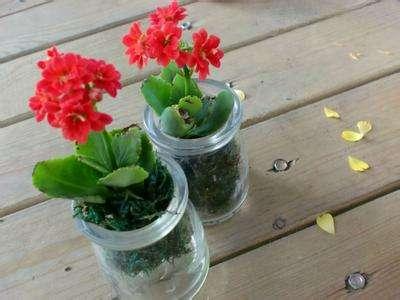
③If you want it to grow roots faster, you can cover it with a film. Generally, it will take about 15 to 18 days to take root.
5. African Violet
① For African violet cuttings, choose fully grown leaves as cuttings.
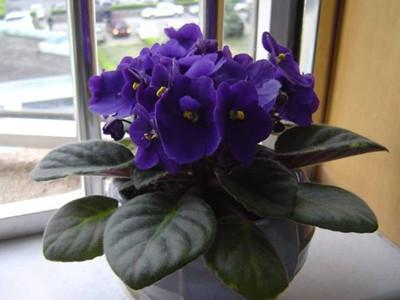
②Insert the petiole into sand or gravel, maintain a high air humidity, and provide appropriate shade after cuttings. Generally, roots will grow in about 20 days.
Every household will inevitably buy a few bottles of good wine to entertain guests during the Chinese New Year, especially in the north, where people can drink a lot. Under normal circumstances, we throw away the waste wine bottles after drinking, but the "Boiled Water" flower lovers in Rizhao, Shandong Province reuse these wastes. What do they do? Make them into flower pots! Let's appreciate the wine bottle flower pots of flower lovers, most of which are potted with flowers:
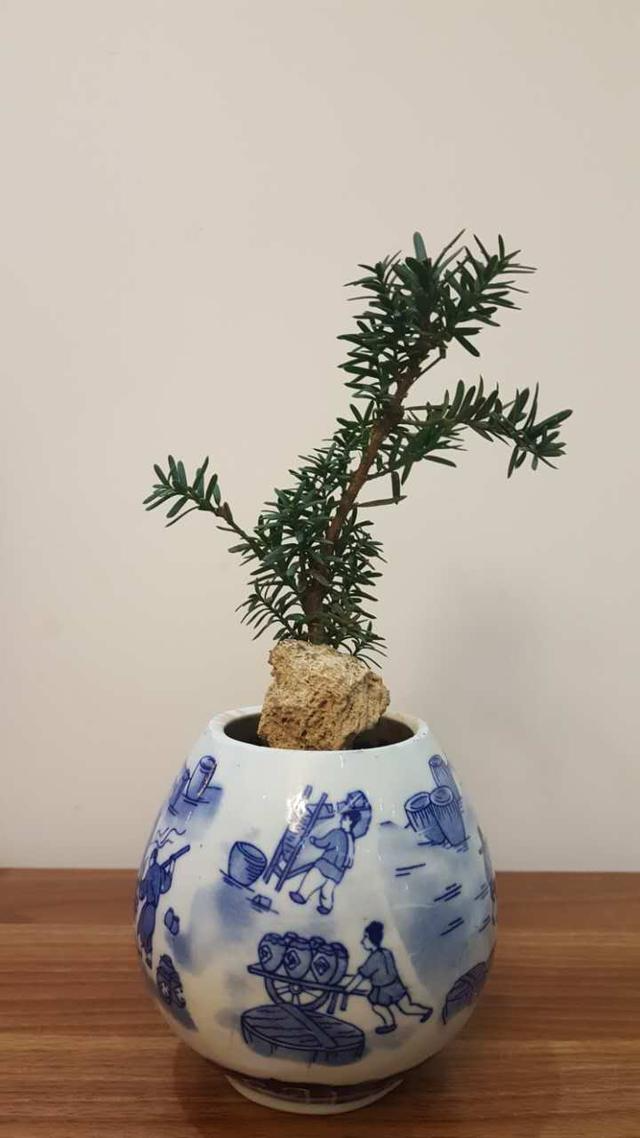
Podocarpus
Flower lovers who have seen these wine bottles all give them high praise. Do you too? The production method is at the bottom of the article!

asparagus
"It's amazing to turn waste into treasure. A bottle becomes a work of art in the hands of the poster. It's so delicate and has a lot of artistic conception. I like it so much."
"The bonsai is beautiful, it would be even better if you could share the process of making the vase"
Royal
"It's a work of art. Haha, did you use an angle grinder to grind it?"
Chlorophytum
"Flower lovers are so interesting and love life!"
"This is the first time I've seen so many flower pots made from wine bottles of all kinds. The craftsmanship is amazing. I admire you very much."
Small Banyan Tree
“Great! A strong classical style”
"So talented, these are all works of art. It's not easy to cut a wine basin so round! You can't even buy this flower pot if you want!"
Succulents
"Just a quick question, how long does it take to cut a lace wine bottle?"
No potted plants yet
"The flower friends drink so much wine!"
Sun Wukong is handsome
"The wine bottle is transformed beautifully. May I ask if the aluminum wire used for the bonsai shape is what size?"
Flower lover Bai Kaishui: This is done by using a emery cutting disc to roughly cut off large useless areas, and then using a emery column to finely grind small areas. You can buy jade processing tools of various shapes and sizes outside and install them on an ordinary electric drill. Small emery jade processing tools are not expensive at 2 to 10 yuan, but the grinding operation is very slow and dust will fly.
I often hear flower lovers say that the flowers in my balcony are the same as those in other people’s pots, and the maintenance methods are the same, but the flowers still don’t grow well. In fact, if you want to grow flowers well, it is not only a matter of maintenance, the environment is also very important. Take the balcony for example, the flowers grown will have different results if they face different directions!
Balcony Garden
So before you start building a balcony garden, you must first figure out one thing, that is, the environment of the balcony. If you know nothing about your balcony, and you just move your favorite flowers and plants into it, you will definitely end up in failure.
The correct approach is to first understand the balcony's orientation, sunlight exposure, and indoor temperature before deciding what plants to plant. This way, the chances of success will be greatly increased. Here are 6 potted flowers that are very suitable for south-facing pots.
1. Rose
When planting roses on the balcony, pots or containers are generally used, so the key is to prevent the soil from drying out. Roses must be planted in a sunny place, with 2 to 5 hours of sunshine in the morning, which is the same as garden cultivation, so it is suitable to be planted on a south-facing balcony.
2. Pansy
Pansy planting generally selects flowering plants and transplants them into flower pots. Mix 30% to 40% leaf mold or peat soil into field soil or red soil as soil. The roots will grow a lot, and cultivating it in a large flower pot is the trick to keep it blooming for a long time. It is best to place it outdoors in a well-ventilated place. It is ideal to face the sun all day long. It is also slightly tolerant of semi-shade, so it is suitable for planting on a south-facing balcony.
3. Geranium
Geraniums are the number one balcony plant and are resistant to harsh environments, so it doesn't matter if you forget to water them occasionally. There are countless varieties of geraniums. Geraniums prefer a sunny environment, so they are suitable for planting on south-facing balconies.
4. Carnation
Carnation is a Sino-Japanese flower. It grows well in an environment with sufficient light. It prefers a dry and well-ventilated environment and avoids high temperature and humidity. It has strong cold resistance and can overwinter at temperatures above 5°C. It likes clay loam with strong fertilizer retention, good ventilation and drainage, and rich in humus. The soil should be kept moist and avoid waterlogging.
5. Fuso
Hibiscus has strong vitality and is very easy to grow. It has few diseases and insect pests throughout the year and is highly resistant to adversity. Hibiscus likes to grow in a warm and humid environment. It is not cold-resistant and requires sufficient light throughout the year. It can grow well in areas with an average temperature above 10℃.
Below is a corner of my terrace. It is not very big but it is almost full of potted plants. I started from scratch and it has been more than three years. Don't think that I am a spendthrift to raise so many flowers and plants. In fact, I spend very little money, especially the fertilizer for flowers. Almost all of it is homemade fertilizer made by myself with kitchen waste (leftovers, leftover bones, egg shells, vegetable and fruit peels, etc.).
Roof Garden
It turns out that homemade fertilizers made from these garbage are better than those bought. You can see that the plants in my house are particularly easy to bloom, and the flowers are fresher than those of my neighbors. How to make your own?
Composting
This large jar of fertile soil was fermented last summer and is ready for use.
Fertilizer
Don’t think that this soil is ugly, flowers and plants love it. You can plant directly on it, use it as base fertilizer when repotting, or add it directly to the flowerpot.
Kitchen waste
Okay, now let’s talk about how to make your own flower fertilizer. First, collect it in a big basin like this. My cat will come over to steal some because it contains a lot of its favorite fish bones and chicken bones.
start
Then pour the garbage and soil into a foam box. Any container that can be sealed will do. Finally, cover it with a lid and let it ferment. Isn’t it easy?
Bougainvillea
Don't think it will stink, it does stink a little in the summer, but almost no in the winter. There are fewer insects in the winter, so you can pour it directly on the flowers to ferment, and cover them with paper (is my flower pot a little ugly?).
Are the flowers blooming brightly?
This is how I have been growing my bougainvillea. Every year I would pile up a bunch of garbage for it, and it would ferment and absorb the garbage by itself. This is how I have always been violent in growing flowers, but instead of being destroyed by me, they all grow very well!
"I clearly watered them well, why did they still die?" Many flower lovers have this question. In fact, most of these plants did not die of desiccation, but of waterlogging. The basic principle of watering plants is "water only when the topsoil is dry." This principle applies whether in cold winter or hot summer.
1. Touch it with your hands
Everyone must be familiar with the saying that "it takes three years to water the soil". Indeed, potted plants need at least three years of nourishment before they can officially "grow up". The trick to watering is to "use your fingers frequently". Fingers are an important tool for us to understand the timing of watering. Europeans call the practice of using fingers to test the timing of watering the soil the "Finger Test".
The specific method of the finger test is to put one or two fingers into the soil of the flower pot and then take them out, and judge whether to water it based on the soil attached to the fingers. According to the tutorial, the basic principles that should be followed when watering are "watering when the topsoil is dry" and "watering when the top layer of soil turns white". However, these statements are a bit difficult for beginners to understand, so you might as well learn the finger test method directly, so that you can ensure that you don't make mistakes when watering.
2. Remember to water a little at a time
When watering, you must "water enough at once", that is, to the extent that water flows out of the drainage holes. Watering "a little at a time" is harmful to plants and has no benefits. If you do it for a long time, it will inevitably lead to root rot. You must ask, why is this? This starts with the purpose of watering.
In fact, watering is not simply to "quench the thirst" of plants, but to provide oxygen to the soil in the flowerpot and promote the discharge of waste and excess nutrients. Proper watering can keep the soil healthy and make the roots of plants stronger and stronger. Therefore, when watering, we must water from the "head" to the "tail" to ensure that the soil is fully moist.
3. Don’t forget that plants also have their homeland
No matter how far we go, we will always retain the imprint of our hometown. Animals, like people, have a strong sense of hometown. Plants that originally lived in humid areas always like humidity, and plants that originally lived in arid areas always adapt to drought.
If you are unsure how to water a particular plant, take a look at how it lives in its native habitat. This way, you can easily understand how much water it likes.
4. Occasionally, bottom watering is required
Watering from the top down is the most common practice. But sometimes, plants also need bottom watering, that is, watering from the bottom up. Bottom watering comes in handy when you encounter plants whose leaves do not like to be exposed to water, when plants dry up because you forgot to water them, or when you are traveling or on a business trip and cannot take care of the plants for a long time. The bottom watering method is very simple.
First, pour water into the potting pad at a certain height until the top layer of soil in the pot is moist. Then, pour out the remaining water. You can also use a plastic bottle to make a special pot for bottom watering. Plants like violets, gloxinia, carnivorous plants, cyclamen, etc. are very suitable for bottom watering.
Have you learned how to water potted plants after reading this? Only proper watering will not kill the flowers, but will promote their growth. If you add a little fertilizer, your potted plants will easily bloom!
If you want the Clivia to grow well and bloom every year, you have to change its pot and soil. Because after a certain period of time, the soil in the pot will change, the nutrients will be depleted, and the soil will become hardened, which will seriously affect the normal growth of the Clivia. Here we will introduce how to change the pot of the Clivia.
1. Time to change pots
If you want the Clivia to grow well, it is best to change the pot once a year. The best time is spring or autumn because the temperatures in these two seasons are most suitable. However, it mainly depends on your actual situation. Some will be earlier, some will be later, usually in March to April or August to September.
The interval between repotting of Clivia is generally two years for seedlings and mature plants. Repotting too frequently will damage the root system of Clivia plants and is not conducive to their growth. Clivia plants of flowering age should generally be repotted and soiled once a year after flowering.
2. How to repot Clivia
① When repotting, first take out the Clivia plant from the pot, hold the pseudobulb with your left hand, turn the flowerpot upside down, use your right fingers to push the drainage hole outwards, hold the soil in the pot with your left palm, and gently pat it with your right hand to tip the plant out.
② After pouring the plant out, shake off the old soil on the roots, remove rotten roots and shriveled old roots with no absorption ability, and remove some old roots without root hairs to promote the vigorous growth of new roots after changing the pot.
③When planting, first cover the drainage holes at the bottom of the pot with broken pot pieces, and leave a gap before filling the pot with 2 to 5 cm thick nutrient soil, and then put the roots of the plant into the pot. If the roots are very long, you can also coil the roots and then fill them with nutrient soil. For large plants in the mature stage, you should also fill the hollow part of the roots outside the pot with soil before putting them into the pot to avoid poor filling in the pot.
④Fill the soil. When the pot is filled with soil, press it lightly or shake it up and down a few times to fill each part. However, do not compact it too tightly to avoid affecting the looseness and air permeability.
3. Maintenance of Clivia after repotting
After repotting, water the Clivia thoroughly, and limit the water to the bottom of the pot. After repotting, place the Clivia in a shaded place and keep the pot soil moist. After 10 to 15 days, move it to a semi-shaded place and resume normal management.
4. Things to note when repotting Clivia
Do not water the flowers that need to be repotted about a week before repotting. The purpose of doing this is to keep the roots of the flowers in a semi-dry, semi-dehydrated and softened state to avoid damage to the roots when changing the soil.
Many flower lovers told me that they carefully cared for their Christmas cactus and finally waited for it to bloom, but it kept dropping buds. What's going on? Some flower lovers' Christmas cactus didn't even have buds and were about to lose confidence in it. When I told these flower lovers that other people's Christmas cactus bloomed several times a year, they were surprised and asked: How do you grow it? Well, I grow it like this:
Any potted flowers and trees, including Christmas cactus, should be given nutrition in time before and after flowering. The purpose of doing so is to replenish the nutrients that the mother plant has consumed and restore its vitality, and to help it grow branches and leaves again and bud and bloom; otherwise, not only will it grow poorly, with yellowing branches and leaves, it will also affect the growth of buds and flowering in the future.
Fertilization methods can be generally divided into two types: base fertilizer and top dressing.
The so-called "base fertilizer" refers to adding a certain amount of organic fertilizer to the bottom of the pot or soil when repotting and changing the soil after flowering, such as bean cake crumbs, fish bone meal, black sesame seeds and milk powder that have gone bad and cannot be eaten, as well as self-fermented organic liquid fertilizers, all of which can be added as base fertilizers.
But be careful about the amount you add. It should not be too much or too concentrated. Generally, one spoon is enough for a 13 cm pot. If you don't repot and change the soil at the same time, you only need to dig up the surface of the pot soil, add these fertilizers and then cover the soil.
The so-called "top dressing" refers to a temporary nutritional supplement needed by potted flowers in different growth stages. It is mostly liquid fertilizer, applied 1 to 2 times a month. For example, when growing branches and leaves, apply liquid fertilizer combining nitrogen, phosphorus, and potassium with nitrogen as the main component. When forming buds, apply liquid fertilizer combining nitrogen, phosphorus, and potassium with phosphorus and potassium as the main component.
You can also use organic compound fertilizers or nutrient solutions or granular fertilizers available on the market. You can also use organic liquid fertilizers made by yourself and mix them with water. However, you must insist on light fertilizers rather than heavy fertilizers. The fertilization time is generally from May to before flowering, and it is suspended in midsummer. In addition, the potting soil of Christmas cactus can be used like other succulents, with 50% mountain mud, 30% sand, and 20% rice husk ash mixed and used.
If you take care of your Christmas cactus in this way, it will be hard for your Christmas cactus to be unhappy, and its branches and leaves will be lush and green!
For those who don’t have time, it would be great if there were potted flowers that don’t need too much care as long as the water is not dry and can still live well. What’s more, there are such plants! Here are 5 kinds of plants that are very suitable for hydroponic enthusiasts to be the first pot of plants. You can also experience the fun of lazy plants very easily, and you don’t have to worry about killing plants due to watering.
1. Synthetic sweet potato
Syngonium is a plant that can be placed in water without care. It can be placed indoors or outdoors. Even if the light is too poor, it will only grow slowly or lose one leaf among several. It doesn't matter if you forget to water it occasionally. You can wait for a few days and then fill it with water when you remember. It will recover its energetic appearance overnight. It does not need nutrient solution but can produce many clones. If it grows too much, you can split half of it and it will become a pot again.
2. Pothos
The green ivy is known as the "king of hydroponics". The green ivy grown in soil is easily restricted by the potting soil. If cultivated for too long, the plant will age, the leaves will become smaller and fall off. It must be repotted and pruned after two or three years of cultivation. Moreover, it is easy to kill it if you don't know how to water it. The green ivy grown in water does not have these problems. You can just cut off a branch and insert it into the water and it will survive. It can be used in various containers, such as white porcelain pots, glass cups, earthenware bowls, hanging pots, etc. It can grow into a very fitting shape in 10 days or half a month to form a harmonious small bonsai with the container.
3. Chlorophytum
Chlorophytum is one of the easiest potted flowers to grow hydroponically. It has low requirements for containers and can be used in containers without bottom holes. You can choose according to your personal aesthetic taste. Select a small leaf cluster that has sprouted aerial roots about 1 cm long, cut it from the stolons, fix it with foam plastic or rock wool, and then plant it in a planting cup. You can also directly immerse the young plants in a container with nutrient solution and let it grow naturally. As the root system elongates and fleshy fibrous roots grow on the thick taproot, you can appropriately lower the liquid level to submerge 2/3 of the root system.
4. Coin Grass
The pennywort is a very good plant for hydroponics. Just remove the soil from the plant, wash it, and place it in a water-filled container. The pennywort is suitable for extensive and rough cultivation. As long as it is given enough sunlight and water, it can grow very fast. It likes a warm and humid environment and is also very shade-tolerant. The suitable growth temperature is 22 to 28 degrees Celsius.
5. Philodendron
Remove the potted, soil-cleaned Philodendron plants and immerse them in clean water, covering 1/2 to 2/3 of the roots. Add a small amount of carbendazim aqueous solution for preservation and disinfection, and induce the growth of aquatic roots. You can also use the division method for hydroponics. Philodendron is relatively tall, so choose a deeper container for hydroponics.
Among the flower lovers I know, those who have raised azaleas have complained to me that azaleas are difficult to raise. They buy a pot and one dies. They buy another pot and the result is still the same. Are azaleas really that difficult to raise? No, in fact, many people's azalea potted plants die because of overwatering. How can you raise azaleas well if you don't know the correct way to water potted plants?
First of all, azaleas are relatively tolerant to moisture, so the soil in the pot should not be too dry, and more water is needed during the flowering period. If there is a lack of water, the petals will become limp, which will shorten the flowering period and affect the brightness of the flowers. If it is too dry during the growth of new leaves, the leaf tips will burn. Too much rain or poor drainage will also cause the leaves to turn yellow, the heart leaves to curl, and the growth will be poor or even die.
Therefore, watering according to different growing periods and different climatic conditions is the key to growing azaleas well.
December of the current year to February of the following year:
Azalea enters dormancy and once it is overwintered indoors. The water requirement is not much in the first stage, but a certain humidity should be maintained. Generally, watering is done every 2 to 3 days, between 10 am and 3 pm. The amount of watering depends on the room temperature and the dryness of the pot soil. If the room temperature is high, watering should be more frequent. On the contrary, less and sparse watering is preferred. In a cold room environment of 0℃ to 5℃, the soil only needs to be slightly moist, and watering should be done once every 5 to 7 days.
March:
As azaleas take root and sprout, their water requirements increase. Summer azaleas grow and develop a little later, so the amount of watering should be less than that of spring azaleas. Generally, water once in the morning every 1 to 2 days (water small pots once a day, large pots once every two days).
April to June:
Azaleas are gradually blooming and their branches and leaves are beginning to grow. They need more water at this stage. Generally, they should be watered once every morning or evening, and the amount of water should be sufficient. On days with strong sunshine or strong winds, water should be applied as soon as the soil in the pot is dry. Any negligence will often lead to serious consequences. In addition to watering the bottom, the leaves should also be sprayed with water around noon and in the evening to cool down and remove dust, keeping the leaves clean. When there is a lot of rain, pour water in time to avoid root rot.
July to early September:
This is a hot and dry season, so it is best to water once in the morning and evening, but the amount of water should not be too large. If necessary, sprinkle water on the leaves and around the pot to maintain a moist environment.
Mid-September to November:
The weather is gradually getting cooler, which is the right time for azalea to grow. To prevent autumn shoots and enhance cold resistance, the amount of watering should be reduced appropriately. Generally, water once a day in the early morning. Just keep it moist.
Where is spring? February 3rd is the seventh day of the Chinese New Year, but looking around, there is no trace of spring in the city or the suburbs and villages. After seeing the balcony of the flower lover below, I realized that spring has sneaked here. Let's appreciate the red flowers and green grass in her house.
Flower friend Lazy Cat 871227: 2016 has been so busy! Flower friends, long time no see!
It’s the eighth day of the first lunar month in the blink of an eye. People say that the period before the fifteenth day is the Chinese New Year. I wish all my flower lovers a new year with a garden full of blooming flowers, branches full of flowers, and finally a full moon!
Taking advantage of the New Year, I’d like to show off the potted flowers and plants on the balcony in the spring during the New Year period!
My balcony is not very big, but I have planted a lot of flowers and plants. The photos are a bit messy, but the neighbors are drooling after seeing them. Would you envy and drool? Hahaha, thank you for your appreciation!
Everyone knows the benefits of growing flowers, but not all flowers can be grown. You must clearly know whether this flower is suitable for you to grow? Because many flowers contain harmful substances to the human body or cause allergies in some people, generally speaking, the flowers that are not suitable for placement or long-term placement in the room include the following categories:
Poinsettia
1. Flowers containing substances harmful to the human body
These flowers or plants are poisonous, or one or more of their flowers, branches, leaves, roots, and seeds are poisonous. Examples include poinsettia, oleander, red holly, dieffenbachia, thornberry, bullfinch, trumpet creeper, yellow azalea, croton, and swallowtail palm. Do not break, touch, or eat these flowers at will to avoid poisoning.
Tuberose
2. Flowers that produce odor
For example, pine and cypress plants can emit a strong smell of rosin oil. When it reaches a certain concentration, it can cause a loss of appetite and make pregnant women feel nauseous. The large amount of fragrance emitted by night-blooming jasmine at night can stimulate the sense of smell and make people with high blood pressure and heart disease feel uncomfortable. The odor emitted by lilac can make people breathless, depressed, nauseous, and dizzy.
Five-color plum
3. Flowers that can cause allergic reactions
For example, geraniums, hydrangeas, and jasmine can cause skin allergies if touched. Pollen from certain flowers, such as Bauhinia, can cause nasal congestion, runny nose, and asthma in some people with allergic constitutions. Trumpet creeper pollen that gets into the eyes by mistake can cause itching, redness, and swelling, leading to corneal inflammation.
Crassula
4. Oxygen-consuming flowers
Generally speaking, the carbon dioxide emitted and oxygen absorbed by flowers at night are limited. However, some flowers, such as tuberose and lilac, consume a lot of oxygen during photosynthesis, which significantly reduces the indoor oxygen content and rapidly increases waste gases such as carbon dioxide.
Euphorbia pilosa
5. Flowers that have just been treated with pesticides and undecomposed organic fertilizers
Such flowers should not be brought into residential houses to avoid the smell of medicine and fertilizer polluting the indoor air. If the flowers to be moved indoors have diseases and insect pests, the diseased leaves, rotten leaves and dead branches should be cut off first to kill the pests.
Christmas cactus flowers bloom beautifully and the plant shape is beautiful, but if you want to make the Christmas cactus plant bigger and more disease-resistant, it is best to graft it onto a cactus. This will also improve the shape and allow more flowers to bloom. However, most people don’t know how to graft it. Here is a detailed introduction to grafting Christmas cactus onto a cactus.
1
Choose older Christmas cactus leaves and use a blade to cut out the leaf stems.
Step 1: Use a blade to cut downward from the upper part of the cactus areole, cutting through the areole.
Step 2: Use a blade to pry open a gap and insert the Christmas cactus leaves into it.
Step 3. Pull out the blade and use your hands to insert the Christmas cactus leaf downwards so that the two are tightly combined.
If conditions permit, you can graft several more layers, and then place them in a cool place for one to two weeks. Generally, they will start to sprout. Mine grew new shoots in a week.
The new buds are growing bigger and bigger, and it is alive. In fact, if the leaves are no longer wilted within two weeks of grafting, it is definitely alive and can be placed outdoors for normal care.
Grafting precautions
① Grafting should be carried out in May, June and July, because cacti and Christmas cacti begin to grow in this season, making grafting easier to succeed.
② When grafting, try to complete it with one cut. Do not grind it back and forth to avoid damaging the plant tissue.
③The insertion direction of Christmas cactus should be consistent with the direction of the areoles to allow the juice to flow.
④Be careful because the blade is very sharp!