Knowledge of various flower cultivation (Spring flower 1)
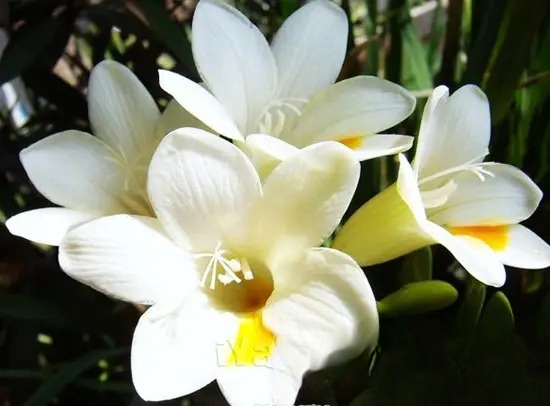
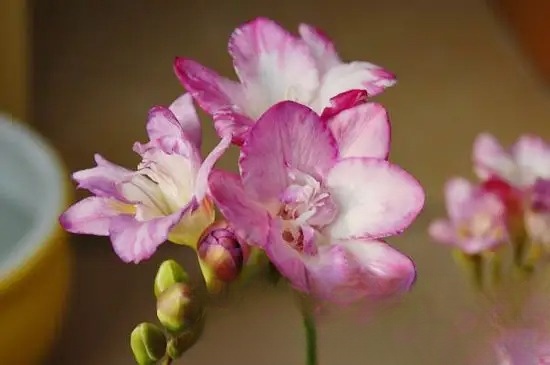
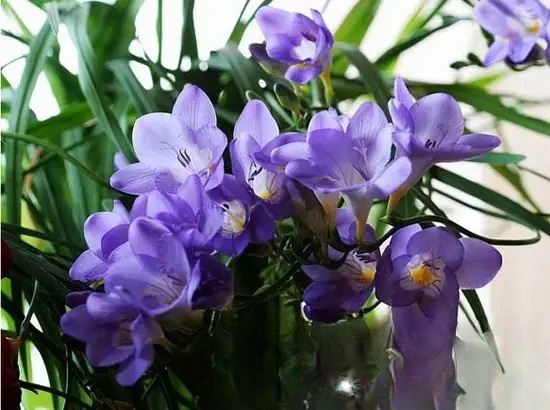
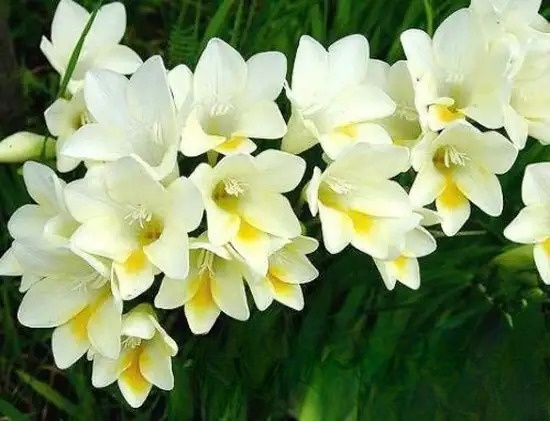
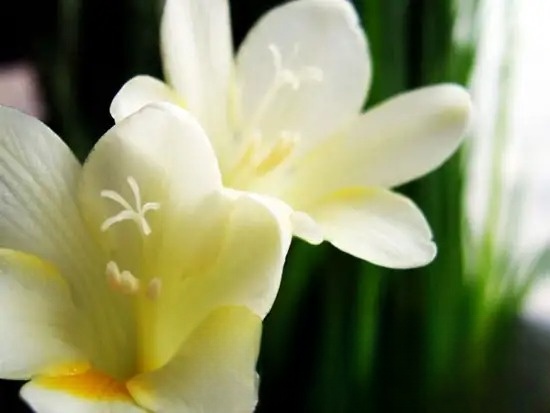
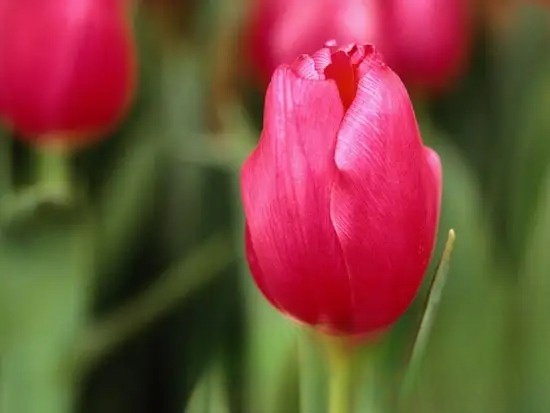
Spring Flowers
Origin: Cape of Good Hope in southern Africa
Type: Flowering plant
Flowering period: February-May
Sunlight: Light-loving plant
Temperature: Likes warmth, afraid of both cold and heat
Soil: Suitable for loose, fertile and well-drained soil
Water: Strict requirements for water, afraid of both humidity and drought.

When potting, store the bulbs in a ventilated and cool place and plant them in loose, fertile and well-drained potting soil in early September. Use a flower pot with a diameter of 18-22 cm, plant 5-7 bulbs with a diameter of no less than 1 cm in each pot, and cover them with soil 1-2 cm thick after planting. Do not water too much, just keep the pot soil moist, and they will start to germinate after about 10 days.
When the plant grows 3-4 leaves, it begins to enter the flower bud differentiation stage. Apply thin bean cake water once every 10-15 days and shorten the light hours (only 10 hours of light per day) to facilitate flower bud differentiation. After the stems are pulled out, apply 0.5% superphosphate or other phosphorus-rich fertilizers 2-3 times.
Do not water too much in the early stages of growth, generally water once a week. Water sufficiently when the flower stems are growing, but the soil in the pot should not be waterlogged, otherwise the roots will easily rot.
The suitable temperature for the growth of freesia is 18-20℃ during the day and 14-16℃ at night. It goes dormant in the hot summer, and the bulbs begin to sprout, grow, and bloom when the weather cools down. Freesia is a light-loving plant that requires plenty of sunlight, but it is prone to leggy growth under strong light and high temperature conditions. Its flower buds are formed under short-day conditions. After the flower buds are formed, long days promote its flowering. According to the growth habits of freesia, it is generally brought indoors before the frost falls and cultivated in a sunny place. The temperature should be 7-10℃ when it is just brought indoors, and then gradually raised to about 15℃, and pay attention to keeping the pot soil moist.
Bulb division and sowing are commonly used, with bulb division being the main method. After the freesia bulbs are planted, the original old bulbs gradually wither and die during the growth process, and several new bulbs are produced above the old bulbs, with several small bulbs under each new bulb. In winter and spring, after the freesia blooms, the above-ground plants continue to grow, and the underground bulbs swell rapidly. At this time, the amount of watering should be gradually reduced. When the stems and leaves of the upper plants begin to turn yellow, dig out the bulbs, store them in a ventilated and cool place in grades, and plant them again in autumn. New bulbs with a diameter of more than 1 cm can bloom in the same year after planting, while other small bulbs need to be cultivated for 1-2 years before they can bloom.
To change and control the flowering period of freesia, as long as measures are taken in terms of planting date, temperature regulation and daylight length, the desired goal can be achieved. If you want it to bloom on New Year's Day, you only need to treat the bulbs with low temperature (13-15℃) for about a week in July and August to break their dormancy, and keep them at 15-20℃ after planting. If you want it to bloom during the Spring Festival, you only need to force it to bloom at 18-20℃ one month before the Spring Festival, which can also fully meet the requirements.
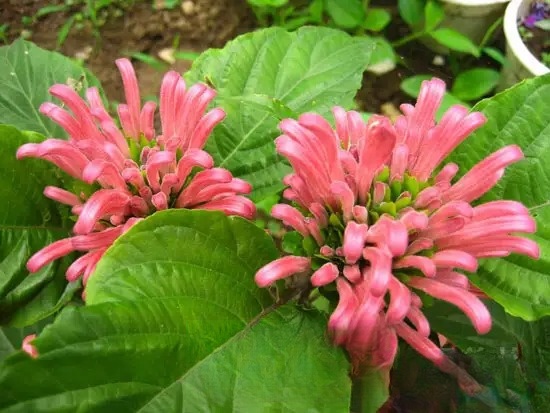
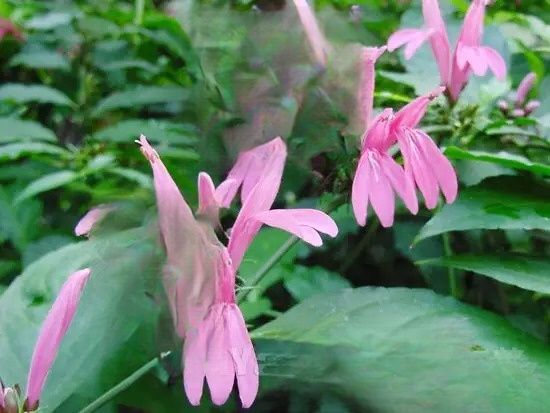
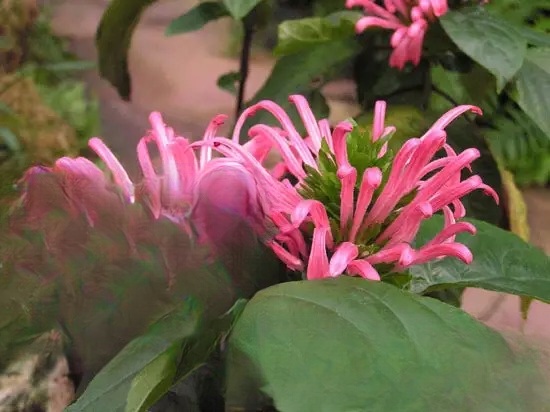
Origin: Brazil
Type: ornamental plant
Flowering period: long flowering period, from late spring to late autumn.
Sunlight: likes sunny environment, but also tolerates semi-shade.
Temperature: likes warmth, not cold-resistant, grows well at room temperature above 10℃ in winter.
Soil: likes loose, fertile, well-drained sandy loam.
Water: likes moisture. The leaves are brittle and easily broken by wind and heavy rain.
Tips for growing flowers:
The soil for potting should be well-drained and humus-rich loam. If the soil is too sticky, the drainage will be poor and the roots will easily rot.
More fertilizer is needed during the growing period, and fertilizer should be applied once a week or every other week. When the flowers are in bud, more phosphorus and potassium fertilizers should be applied to make the trunk firm and the flowers bright.
It likes moisture during the growing period, so it should be watered fully and the soil in the pot should be kept moist. During the high temperature period in summer, water the leaves frequently. During the dormant period, water less as long as the soil in the pot does not dry out.
Indoor cultivation requires sufficient light, at least 3-4 hours of direct sunlight per day. If the cultivation area is damp, the plant will grow taller, the flowers will be sparse, light-colored and small. It can grow well at normal room temperature from early spring to late autumn. It needs a period of dormancy in winter, and the temperature should be around 13℃.
After the flowers fade, the remaining flowers should be removed in time and the plants should be pruned back to avoid affecting the viewing experience.
Generally, the pot is repotted and the soil is changed every two years in April. At the same time, short pruning is required to control the height of the plant and maintain a good plant shape. If it is to grow into a shrub, it should be topped several times in the early growth stage to promote more branches.
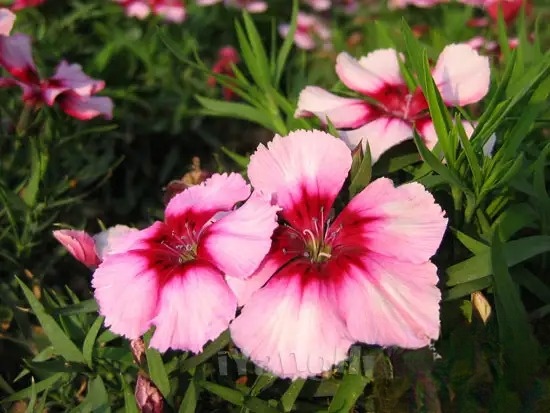
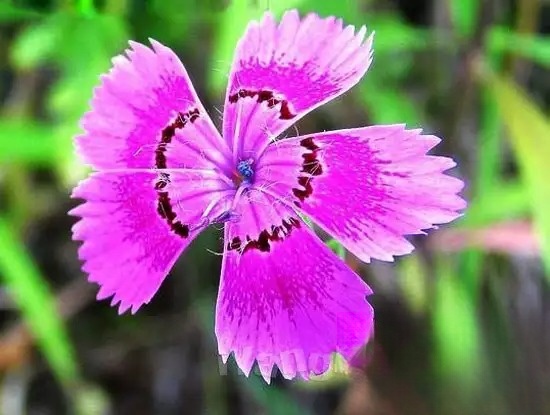
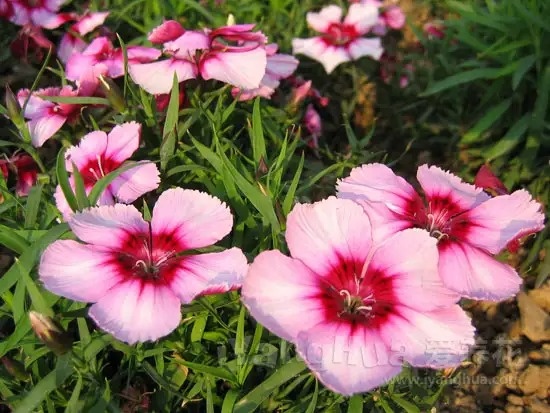
grass Origin: Northeast China, North China, the Yangtze River Basin and Southeast Asia, widely distributed
Type: ornamental plant
Flowering period: April-September.
Sunlight: Light-loving.
Temperature: Cold-resistant, likes cool climate.
Soil: Requires ventilation, good drainage, fertile soil rich in lime.
Water: Drought-resistant, avoid waterlogging and clay.
Tips for growing flowers:
The best potting soil is a mixture of 6 parts garden soil, 2 parts compost and 2 parts sand.
Fertilization
Apply thin liquid fertilizer once every 10 days or so.
It is advisable to keep the soil in the pot moist during the growth and development period. Excessive watering will cause root rot.
Dianthus likes light and should be placed in a sunny place for maintenance. In winter, place it in a sunny place indoors, keep the room temperature at 8-10℃, control watering, and it can safely overwinter.
Dianthus seedlings are susceptible to damping-off disease. The soil should be disinfected before planting, and attention should be paid to smooth drainage, ventilation and light, and a small amount of wood ash should be applied.
If you want it to bloom more, you can pinch the top to promote more branches. However, if there are too many branches, the flowers will become smaller, and the axillary buds must be removed in time to avoid nutrient consumption.
Dianthus can be propagated by sowing, cuttings and division.
(1) Seeding method: broadcast or row sow in open fields in August-September, with a 1 cm thick soil layer. The optimum temperature for germination is 20°C. It is best to use seeds harvested that year, as seeds will lose their germination ability if stored for a long time. Water thoroughly after sowing, and seedlings will emerge in 10-15 days. Transplant when the seedlings have 4-5 true leaves.
(2) Cutting method: After the flowers fade, use the clustered buds that sprout from the base of the stem, select the thick part and cut off 10 cm long as cuttings, remove the lower leaves, leaving only 1-2 leaves on the upper part, and flatten the base with a knife below the node. Leave 3-4 stem nodes on each cutting, and insert it into a flower pot filled with sandy loam or vermiculite , with a spacing of 3 cm × 3 cm between plants. After inserting, cover the pot with film. After rooting, gradually ventilate, increase light, and transplant in time.
(3) Division method: Dianthus chinensis tillering seedlings are used for propagation. When dividing, it is not necessary to dig up the whole plant, but only to dig out the young plant from one side of the root and plant it after separation.
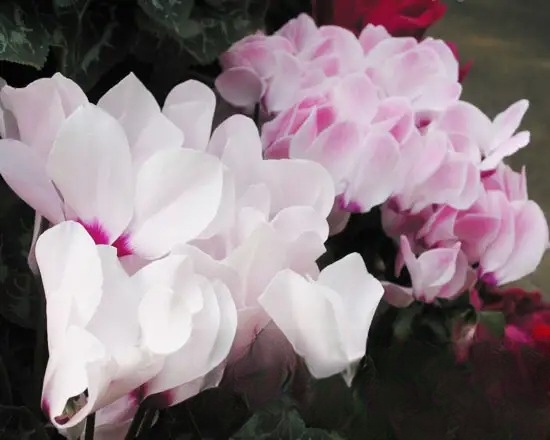
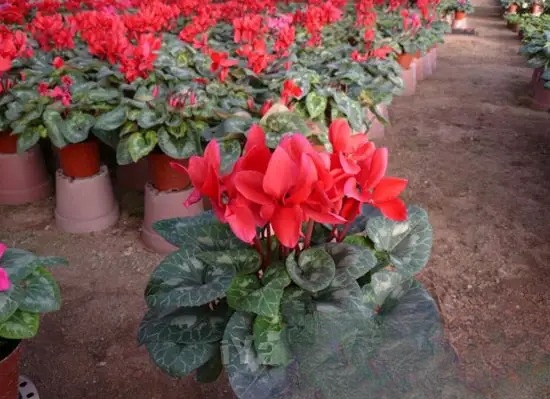
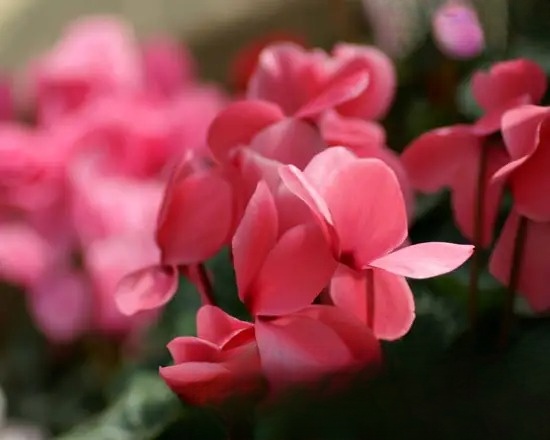
Origin: Mediterranean coast
Type: Flowering plant
Flowering period: Blooms mostly in winter and spring.
Sunlight: It is a sun-neutral plant, likes sunlight but avoids strong light.
Temperature: It likes coolness, autumn, winter and spring are the growing seasons, and it is dormant in summer.
Soil: Fertile soil with good drainage and rich humus, the soil pH is 6.0-6.5.
Water: It likes humidity, and the air humidity of 60%-70% is required for growth and development.
Tips for growing flowers:
For growing cyclamen, you can use a mixture of 2 parts peat and 1 part perlite, with a small amount of bone meal as base fertilizer. Do not repot during the dormant period. Generally, dormant bulbs begin to sprout in mid-September, and repot immediately. When repotting, you should gradually increase the size of the flowerpot depending on the size of the plant, and do not directly use a large pot to grow a small plant. In conjunction with repotting, you should remove the rotten roots and keep them indoors.
Whether putting the plant in a pot or repotting it, the soil in the pot should not cover the bulb. Generally, 2/3-1/2 of the bulb should be above the soil surface to prevent the bulb from rotting due to excessive moisture in the soil.
Apply decomposed cake fertilizer once every ten days during the growing season, apply liquid fertilizer 1-2 times before flowering, and apply bone meal or superphosphate once more when the pedicels are drawn out and about to bloom. Stop applying nitrogen fertilizer during the flowering period to avoid bud drop. Avoid applying concentrated fertilizer to avoid damaging the roots. Loosen the soil before fertilizing. Do not fertilize from the top of the plant downwards, but fertilize from the side.
Cyclamen should not be too wet. Water it once a day in the morning, slowly pouring water from the edge of the pot. Do not sprinkle water directly on the leaves and the center of the plant. Reduce the amount of watering after the flowering period, and water it once every 2-3 days. Stop watering at the end of July to let the leaves wither and enter a dormant period. Start watering the following spring, and increase the amount of watering after new leaves grow.
The most suitable room temperature is 18℃. It starts to dormant when the temperature exceeds 30℃, and the plant is prone to rot and die when the temperature is above 35℃. It can tolerate low temperatures in winter, and it is best to maintain it at around 10-12℃, but below 5℃, it grows slowly, the leaves curl, the flowers do not stretch, the flower color is dull, and there are few flowers.
It likes plenty of sunshine during the growing season, but still needs shade when the temperature is high around noon. It should be placed in the shade in summer. Shade is required during the seedling stage. After October and before the flowering period, increasing light and ventilation can make the flowers bloom longer.
Annual cyclamen is in the seedling stage in the hot summer. When the temperature reaches 30℃, it stops growing or grows very slowly. After June, the plant should be moved to a cool, ventilated and rain-proof place. Water should be sprinkled on the shade and the ground at noon to lower the ambient temperature. During this period, fertilization should be stopped and watering should be controlled.
For old plants over two years old, it is advisable to move them to a ventilated and cool place indoors to spend the summer. Starting from late May, gradually reduce watering and stop fertilizing. When the weather is hot, sprinkle water on the ground frequently to increase the humidity of the environment, but do not make the pot soil too wet, just keep it slightly wet. When the weather turns cool in September, increase the amount of watering slightly, and new buds will gradually sprout on the tubers. When the new buds are 3 cm high, pour out the old bulbs, remove the old soil, repot, strengthen fertilizer and water management, and increase light to facilitate sprouting and leafing, so that they can bloom one after another during the Spring Festival.
Pest and disease control
(1) Soft rot: It is easy to occur in the summer when the temperature is high and the humidity is high. It harms the petioles and pedicels, which become water-soaked and soft. The lesions dry up in dry weather, and rot and stink in rainy days. The pathogen overwinters in the soil.
Prevention and control methods: ① The soil in the planting pot should be thoroughly disinfected; ② In the high temperature of summer, the water content should be controlled, no nitrogen fertilizer should be applied, the plants should not be injured, air circulation should be maintained, and appropriate shade should be provided; ③ Remove diseased leaves in time, burn them, and spray them with Bordeaux solution.
(2) Anthracnose : The lesions are dark brown and circular in shape. Later, the lesions expand and develop black spherical pods, which fly around and infect the body with the help of water.
Prevention and control methods: ① Remove the affected leaves and petioles and burn them; ② Avoid wetting the leaves when watering; ③ In the early stage of the disease, spray with 500-600 times diluted 50% carbendazim .
(3) Nematode disease: When the soil temperature is 25-30℃ and the soil moisture is 40%, nematodes are prone to damage, invading the roots and forming nodules. The affected plants grow weak, the lower leaves turn yellow, and the whole plant may die.
Prevention and control methods: ① Disinfect the soil and burn the affected plants; ② Soak the nematodes in 50℃ hot water for 10 minutes to kill them.
Cyclamen is mostly propagated by sowing. In the north, it is advisable to sow around the beginning of autumn. Before sowing, soak the soil in boiling water for disinfection, and soak the seeds in warm water for 24 hours to promote early germination. Sow in shallow pots or wooden boxes, first fill with wet sand or a mixture of half leaf mold and half garden soil, level the soil, water thoroughly, and sow at a spacing of 1 cm square. Then cover with about 5 mm of soil, cover with plastic film, and place in a cool place indoors. Water by immersion pot method to keep the pot soil moist. When sowing in a wooden box, you can spray water with a fine-meshed spray bottle. Under the temperature of 18-20℃, the seedlings will emerge in about 1 month. After the seedlings emerge, remove the covering and gradually expose them to sunlight. When the seedlings grow 2-3 true leaves, they can be planted in small pots.
When growing cyclamen, the bulbs are prone to rot in summer, which is mainly caused by improper maintenance. The weather is hot in summer, especially in some areas in the south, where the temperature often exceeds 35℃, and the bulbs are prone to heat rot. Hot and humid summer with poor ventilation or rain can easily cause bulb rot. Cyclamen likes moisture but is afraid of waterlogging. If watered too much, the water in the pot soil is often saturated, the stems and roots are in a state of suffocation for a long time, the root pressure is reduced, the absorption capacity is reduced, the plant is weak, and anaerobic bacteria are active, producing toxic gases, so the bulbs rot. In addition, when applying liquid fertilizer, accidentally submerging the top of the bulb can also easily cause rot.
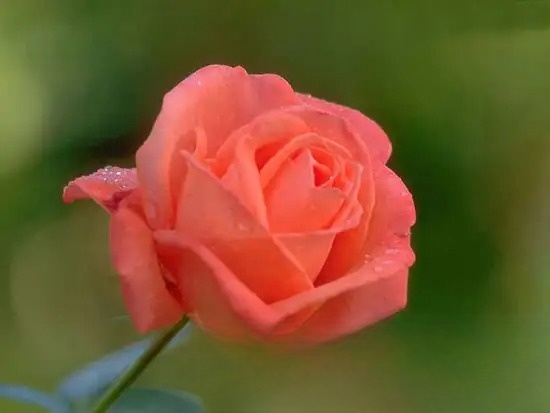
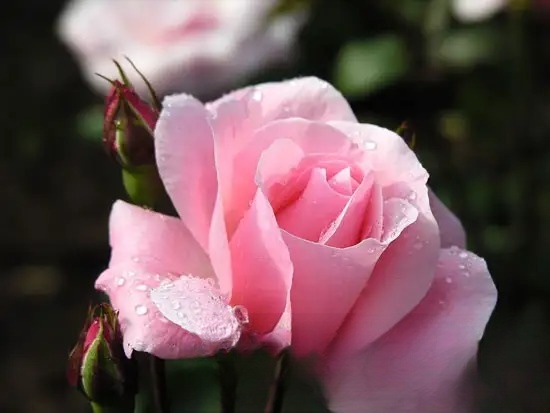
Origin: dry areas in central and eastern Asia; now mainly distributed in North China, Northwest China and Southwest China, Japan, North Korea, North Africa, Mexico, India, and widely planted in many other countries
Type: ornamental plant
Flowering period: April-April.
Sunlight: likes sunshine and tolerates semi-shade. If it is planted in insufficient light, it will grow poorly, with thin branches and leaves, few buds, small flowers, and a faint fragrance.
Temperature: The suitable temperature for growth is 15-20℃. It has strong cold resistance and will not freeze even when the temperature drops to -20℃ in winter. Therefore, roses can safely overwinter in the open field in most areas of the north.
Soil: Suitable for deep soil, loose soil, fertile, well-drained and moist sandy loam.
Water: Drought-resistant, afraid of excessive moisture. If it is planted in low-lying areas, high groundwater levels, and poor drainage, it is easy to cause root rot, leaf fall, and even death in large areas.

Tips for growing flowers:
Roses are cultivated in the open field. The planting site should be selected in a place suitable for its growth and development. Before planting, decomposed organic fertilizer should be applied to the hole as base fertilizer, and sufficient water should be poured after planting. During the growth and development period, inter-cultivation and weeding should be carried out frequently.
Roses like fertilizer very much. Generally, they should be fertilized about four times a year: once in early spring, fertilizer should be applied to promote germination; once in May, fertilizer should be applied to promote flowering; once during the flowering period; and once before winter, organic fertilizer should be applied. Then, there will be more flowers, larger flowers, and more colorful and fragrant flowers the following year.
In the early spring when the weather is dry, you should water the roses sufficiently to promote flower bud differentiation and prolong the flowering period. Roses are afraid of waterlogging. If water accumulates for a long time, the lower leaves will turn yellow and fall off, and in severe cases, they will die. Therefore, it is necessary to drain the water in time during the rainy season. It is even more important not to plant roses in low-lying areas with waterlogging to prevent waterlogging.
Common rose pests include rose sawfly, rose armyworm, rose cottonworm and red spider .
Rose stem sawfly: It is a stem-boring pest that mainly harms the stems of roses, causing branches to wither and the plant to die. When pruning the plant in winter, check the root stubble pith. If there are boreholes, drip 1-2 drops of 80% dichlorvos solution into it and seal it with mud. If tender branches are found to be infested, cut them off and destroy them.
Rose moth: The larvae damage the leaves and bite the buds and flowers. You can spray 1000-1500 times of 90% crystal trichlorfon or 1000 times of 50% cypermethrin emulsion for prevention and control.
Red spider mites: harm both sides of leaves, causing them to dry up and fall off. In the early stages of the disease, spray with 1000-1500 times diluted 20% dicofol emulsion or 800-1000 times diluted 20% dicofol wettable powder. Spray both sides of the leaves, once every 15 days, and generally 1-2 times is enough.
Pruning is an important part of rose management. Since roses bloom on branches of the current year, frequent pruning can make the plants grow vigorously, bloom in abundance and color, and have a correct tree shape, and can extend the flowering period. Rose pruning is divided into growing season pruning and dormant season pruning. Growing season pruning is to promptly cut off the remaining flower stalks and remove diseased and weak branches after the flowers fade, reduce nutrient consumption, facilitate ventilation and light transmission, and promote new branches. Dormant season pruning is to leave 4-5 branches per plant before budding in early spring, cut them short at 40-50 cm from the ground, leave 1-2 side branches on each branch, and cut them short with two buds on each side branch.
After buds appear in spring, the side buds should be removed in time to concentrate nutrients on the growth and development of the top buds.
Roses can be propagated by sowing, cuttings, division, grafting and other methods, but division and cuttings are generally used.
(1) Division: This can be done in spring or autumn. Select healthy rose plants and dig them up with their roots. According to the growth trend of the roots, divide the plants into several plants and plant them separately. Generally, root division can be carried out once every 3-4 years.
(2) Cutting method: It can be carried out in spring and winter. Both hard and soft branches of roses can be used as cuttings. For hard branch cuttings, generally in February or March before the plant sprouts, select two-year-old strong branches, cut them into 15 cm segments as cuttings, apply mud on the lower end, and insert them into the cutting bed. For soft branch cuttings, generally in July and August, select soft branches of the current year as cuttings and insert them into the cutting bed. Generally, cuttings can take root in about one month, and then be transplanted and maintained in time. Cuttings can also be inserted into the poles in December when the plants are pruned in winter.
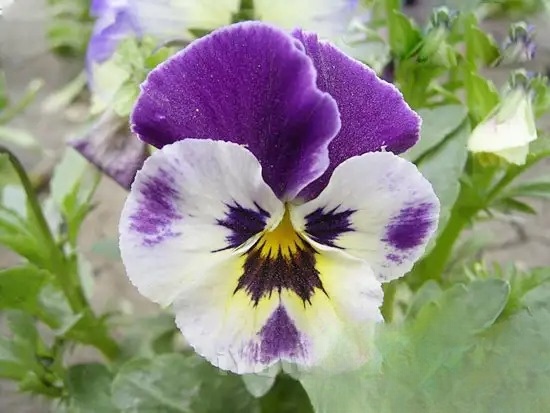
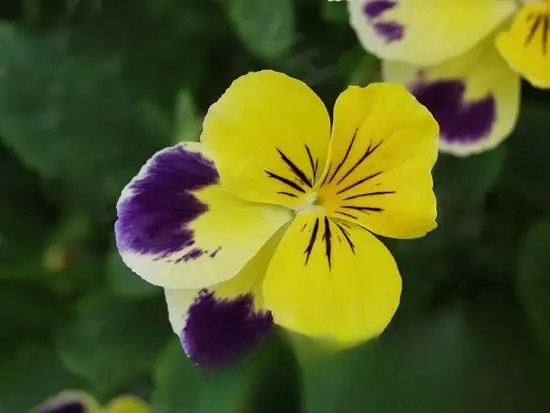
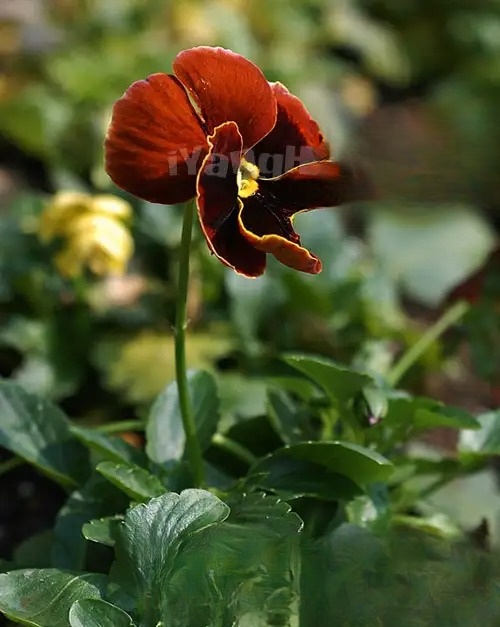
Origin: Europe
Type: ornamental plant
Flowering period: April-June.
Sunlight: slightly tolerant to semi-shade, likes cool and ventilated environment.
Temperature: relatively cold-resistant, likes cool climate, avoids heat.
Soil: It is not strict with soil requirements, can tolerate barrenness, suitable for growing in fertile and loose soil rich in organic matter, and it is difficult to grow well in moist and poorly drained soil.
Water: avoid waterlogging.
Tips for growing flowers:
When planting pansies in pots, they are usually transplanted into pots when the seedlings grow 3-4 true leaves. The soil ball must be brought along when transplanting, otherwise it will not survive easily.
Water normally for a long time, apply thin fertilizer frequently, loosen the soil and pinch the tips of the plants, and they will usually bloom in early spring.
After the seedlings are potted, they should be placed in a shaded place for 1 week to slow down the growth, and then moved to a sunny place. Not exposing them to the sun during flowering can extend the flowering period.
During the growth period of pansy, aphids sometimes occur . They can be killed by spraying 2000 times diluted omethoate emulsion or 800 times diluted dichlorvos water solvent.
Pansy is mainly propagated by sowing. The fruit is oval, bending toward the ground when young and standing straight up when old. The seeds change from bluish white to reddish brown and must be harvested when the fruit gradually straightens from drooping. Cover the seeds when drying to prevent the seeds from bouncing away when the peel is dry and cracked. The germination rate of seeds of the current year is high, while the germination rate of old seeds is low.
The most suitable temperature for seed germination is about 20℃, and it will germinate in about 10 days. The seedlings can bloom after about 15 weeks of cultivation at 10-15℃. Generally, they are sown in September and transplanted when the true leaves of the seedlings grow to 5-6 pieces. When transplanted, they must be carried with soil balls to survive easily. In the Yangtze River Basin, they can be overwintered in the open field in a sunny and windproof place in winter; in the northern regions, they can be overwintered in a cold bed or greenhouse. After the soil thaws in the following spring, they are planted and the branches that grow are propagated by cuttings.
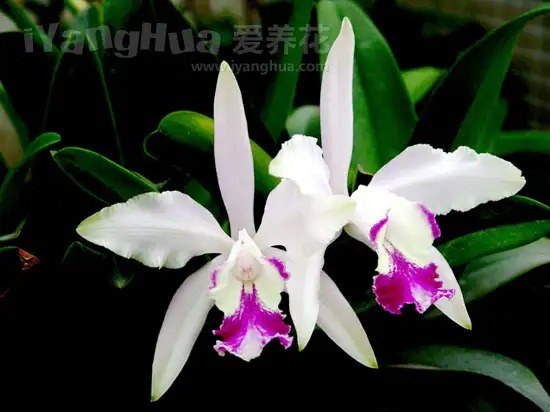
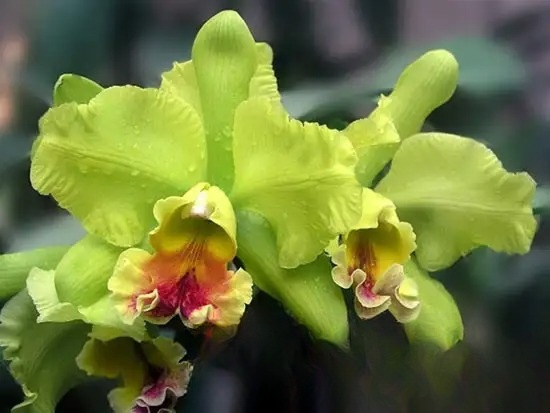
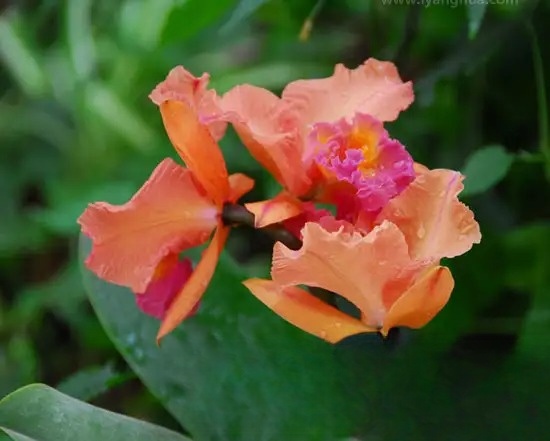
Alias: Cattleya orchid, Cattleya orchid, Achae wood
Origin: Tropical jungles of South America
Type: Flowering plant
Flowering period: Blooms in winter, spring and summer.
Sunlight: Prefers semi-shade, avoids direct sunlight.
Temperature: Prefers warmth, the optimum growth temperature is 15-26℃, the wintering temperature is 8-10℃ at night, and the daytime temperature should be 5℃ higher than the nighttime temperature.
Soil: Prefers well-drained and breathable soil.
Water: Prefers humidity, the air humidity should be kept above 80% in all seasons.
Tips for growing flowers:
It is not suitable to use ordinary culture soil and orchid mud for terrestrial orchids when cultivating Cattleya. At the same time, ordinary flower pots cannot be used. Instead, fern roots, mosses, bark blocks, porous ceramsite or charcoal particles, coconut shell blocks, etc. should be used as substrates. The above materials must be soaked in water before use. The pots should be porous plastic pots or clay pots with porous walls. This type of container is conducive to the attachment of orchid roots and maintains appropriate humidity. It also has good drainage and ventilation, which is conducive to the development of the root system. First, a thick layer of broken brick particles and coarse charcoal particles is placed at the bottom of the pot, accounting for about 1/3 of the container. A layer of fern roots (roots of Osmanthus fern) 2 parts and peat moss (moss) 1 part of mixed planting material is filled on it, and then the orchid is planted in the pot. When planting, pay attention to the new buds facing the edge of the pot, and at the same time, the roots should be stretched out. Finally, fill the planting material and cut it flat. Place the planted plants in a semi-shaded, humid and warm place, and spray a small amount of water on the leaves every day to keep the leaves and pseudobulbs from shrinking. At this time, do not water the roots or apply fertilizer. Wait until the new roots grow 2-3 cm before starting watering and fertilizing.
When fertilizing Cattleya, you should pay attention to the right amount. The concentration of fertilizer should be light, which is 1/2-1/4 of that of general flowers and plants. Generally, fertilization should be started 10 days after the new buds grow. It is advisable to "apply small amounts frequently" of light fertilizer during the seedling stage. During the peak growth season, you can apply a very thin cake fertilizer water that is fully decomposed once every 10-14 days. When fertilizing, avoid the fertilizer liquid from contaminating the leaves and tender buds. Plants that have reached the flowering age should be appropriately fertilized with more phosphorus and potassium fertilizers before the differentiation of flower buds, because phosphorus fertilizers can nourish roots and help flowers, and potassium fertilizers can increase the utilization rate of photosynthesis and promote the toughness of leaves. In addition, according to orchid experts, do not change the direction of the flower pot at will when cultivating Cattleya. If you keep changing the direction, due to the phototropism, it is easy to cause the fleshy petiole to atrophy, the leaves to twist and turn yellow, and affect flowering.
Spring, summer and autumn are the peak growth periods for Cattleya. You should pay attention to spraying water on the leaves and the ground around the flowerpot to increase the air humidity. At the same time, you should provide sufficient water supply and water when the soil is dry and wet. The amount of watering in winter depends on the room temperature. Cattleya is in a relatively dormant period in winter, which is the period of flower bud growth and development. If you heat it at this time, you need to water it every day and do not let the planting material dry out too much. At the same time, you should also pay attention to increasing the indoor humidity. If the indoor air humidity drops to about 30% at this time, it will cause the plant to dry up and die before flowering.
Temperature, light
Cattleya likes semi-shade, so it should be placed in a semi-shade environment in spring, summer and autumn. The shade should be about 60% of the sunlight. Avoid direct sunlight, otherwise it will easily cause sunburn or growth stagnation, and the leaves will turn yellow. In winter, due to the weak light, it can be exposed to more direct sunlight and placed near a sunny window.
Cattleya is the most cultivated orchid with the most varieties, the richest colors and the most popular flowers. The flowers are large, up to 20 cm in diameter, with gorgeous colors and a long flowering period, so it is known as the "King of Orchids". It is a high-end indoor ornamental flower in the world today, and is also a high-end material for cut flowers. It can be used as a high-end decorative flower for welcoming guests and celebrating weddings.
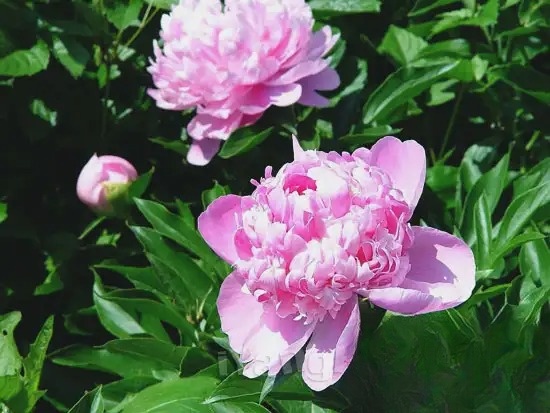
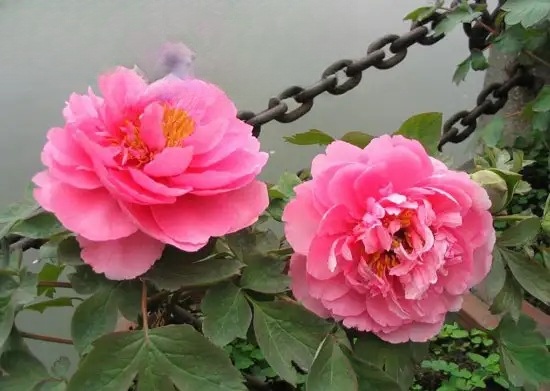
Origin: Northern China, Siberia, Korea, Japan, etc.
Type: Flowering Plant
Flowering Period: April-May, Peak Flowering Period in Mid-May.
Sunlight: Prefers strong light, but can also grow and bloom well in sparse shade.
Temperature: Strong cold resistance, can overwinter in the open field in most areas of the north, but poor heat resistance, stops growing in hot summer.
Soil: Requires deep, fertile, well-drained sandy loam, low-lying saline-alkali land is not suitable for planting.
Water: Prefers moisture, but is afraid of waterlogging.
Tips for growing flowers :
Peony likes fertilizer, shade, warmth, drought, shade and cold, so before planting, there should be sufficient rotted fertilizer, manure and bone meal as base fertilizer. It is suitable to be cultivated in fertile, deep, well-drained, loose sandy loam, and neutral or slightly alkaline soil is preferred.
Watering and fertilizing are often combined. Water once a month before and half a month after flowering, and apply quick-acting phosphorus fertilizer once after budding, which can make the flowers bloom large and colorful. After each watering and fertilizing, loosen the soil in time. Avoid waterlogging of potted peonies.
Watering and fertilizing are often combined. Water once a month before and half a month after flowering, and apply quick-acting phosphorus fertilizer once after budding, which can make the flowers bloom large and colorful. After each watering and fertilizing, loosen the soil in time. Avoid waterlogging of potted peonies.
The environment should be mild and cool on weekdays. It can see more sunshine in spring and autumn. Avoid exposure to the sun in summer and place it in a semi-shaded and semi-sunny place. The flowering period of peony is short, generally 8-10 days. If the weather is cool or it is placed in a shaded place, the flowering period can last for half a month. After the flowers fade, cut off the pedicels in time to prevent seeds from forming and consuming nutrients. In autumn and winter, you can apply a topdressing fertilizer once to facilitate flowering next year.
Common diseases of peony include brown spot disease , root rot , etc.; common insect pests include red spider mites , aphids , etc.
Brown spot disease often occurs in hot and rainy seasons. When the disease occurs, small yellowish-green spots first appear on the leaves, and then gradually form small round brown spots. It can be sprayed with 0.5% equal-volume Bordeaux solution or 800 times diluted 65% Zineb powder for prevention and control. Root rot is mainly caused by poor drainage. After the disease occurs, the roots rot and turn black, and the above-ground part does not grow well. The roots can be washed with 60-degree white wine and replanted. If pests such as red spiders and aphids are found, 2000 times diluted 40% trichlorodicol emulsion and 3000 times diluted 40% oxydemeton-methyl emulsion or 2000 times diluted 80% dichlorvos can be used for spraying and prevention.
Before the peony blooms, in addition to the main bud, there are 3-4 side buds below it. In order to make the peony flower large and beautiful, the side buds should be removed in time after they appear so that nutrients can be concentrated on the main buds to achieve the desired purpose. The following three points should be noted when thinning the buds: First, it is advisable to choose to do it in the morning on a sunny day so that the wound can heal quickly and reduce the chance of pathogens invading; second, use sharp scissors to operate carefully, and do not cut or cut off the leaves next to the flower buds when thinning, so that the plant can produce more photosynthetic products to meet the needs of flowering; third, thinning the buds is generally done twice. The first time should be done when the diameter of the main bud is about 1 cm. At this time, the main bud and the side bud closest to the main bud should be left first. When the main bud is damaged, this side bud can be used for flowering. The second time should be done when the diameter of the main bud is about 2 cm. If the main bud is not damaged at this time, in addition to leaving the main bud, all the side buds should be thinned out. For varieties that are prone to lodging during flowering, pillars should be set up in time while thinning the buds.
Peonies are usually propagated by division, but they can also be propagated by sowing. Division must be done in late August to mid-September in autumn, that is, around the time of Bailu in the lunar calendar. Division at this time can give the root system a period of time to recover and grow before winter, producing new roots and facilitating growth the following year. Be careful not to divide in spring, as flower growers have a proverb that "peonies divided at the spring equinox will not bloom until they are old." When dividing, first dig up the root cluster, shake off the soil, and when they are slightly soft and dried in the shade, divide them into one plant with 3-4 buds. In order to promote the germination of new roots, the fleshy roots can be kept 15 cm long and cut short. Plant as soon as possible after division. Generally, it is divided once every 3-5 years.
Peony seed propagation is mainly used to cultivate new varieties. Seeds should be sown immediately after they mature. The later the sowing, the lower the germination rate. They can also be stored in sand for a short period of time to keep moisture and promote the after-ripening of the embryo. After sowing, only roots will grow in the autumn of the same year, and new buds will emerge after the spring of the following year. Peony seedlings that are well developed can bloom in 4-5 years.
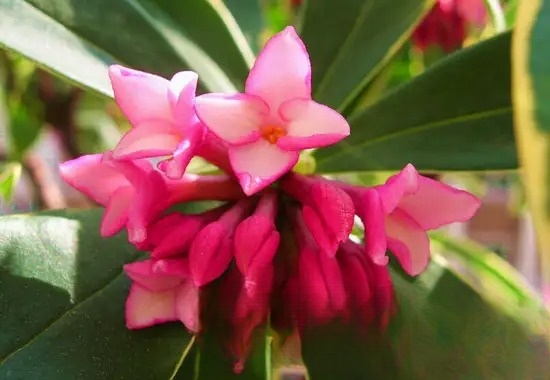
Origin: Yangtze River Basin, Japan
Type: Flowering plant
Flowering period: February-March.
Sunlight: Prefers semi-shade, avoids direct sunlight.
Temperature: Afraid of high temperature and heat, it will stop growing when the temperature exceeds 25℃; not cold-resistant, suitable for potted plants in the north, and moved indoors for wintering.
Soil: Avoid saline and alkali, suitable for growing in fertile, moist, well-drained acidic soil.
Water: Afraid of rain and waterlogging.
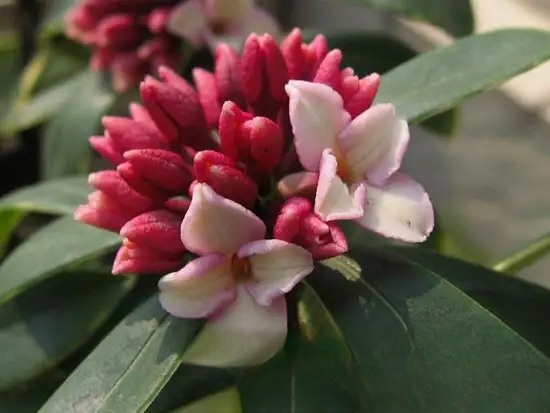

Planting Daphne koreana in the south can be done in spring and autumn. It is usually mixed with deciduous shrubs to avoid sun exposure in summer and get enough sun in winter. When planting, compost or manure can be applied to the hole as base fertilizer, but don't apply too much. The pot should be changed every 2-3 years. The potting can be done indoors in March. The potting soil should be slightly acidic, and hoof pieces should be placed at the bottom of the pot as base fertilizer.
Top dressing can be applied 1-2 times during the growth process. In winter, ditches can be dug around the plants for fertilizer application, but human feces and urine should be avoided.
Water when the soil is dry and when the soil is wet, and spray water on the leaves to cool them down in summer.
For potted Daphne odora, summer care is very important. The flowerpot should be placed in a well-ventilated, cool place, away from rain, direct sunlight, and hot wind. Daphne odora is not cold-resistant, so it must be moved indoors before winter and placed in a sunny place with the room temperature kept above 8°C.
In the hot and dry weather in summer, Daphne is vulnerable to red spider mites , aphids , and scale insects . You can spray it with 1000-1200 times diluted omethoate emulsion. The roots of Daphne are sweet and easy to hide earthworms. Too many earthworms will entangle the roots of Daphne, which will affect the absorption of water and nutrients by the plants. You can dig out the plants, remove the earthworms, and then replant them. The disease is mainly caused by mosaic disease caused by viruses. After infection, the leaves of the plants will have spots and deformities, resulting in poor flowering and stagnant growth. If this virus infection is found, the plants should be dug up with roots and destroyed.
Daphne koreana has strong sprouting ability and is resistant to pruning. In summer, you should pay attention to pruning off the overgrown branches and leaves.
Daphne koreana is generally propagated by cuttings and high pressure methods, of which cuttings are the main method, and cuttings can be done in spring, summer, and autumn. Spring cuttings are carried out in February and March. Before the plant sprouts, select one-year-old strong branches and cut them into sections of about 10 cm each, retaining 2-3 leaves on the upper end of the branches for use. Summer cuttings and autumn cuttings are carried out in June-July and August-September, respectively, and strong branches of the current year are selected as cuttings. The cutting bed is made of river sand or vermiculite , and the branches are inserted 1/3-1/2. After insertion, water it thoroughly, and then use plastic film to make an arch shed to seal it. Observe it frequently and keep the humidity of the soil in the cutting bed. It should not be too dry or too wet. Pay attention to shading for summer cuttings, and pay attention to cold and frost protection for second cuttings. Generally, it can take root in 1-2 months, and then transplant it into a pot.
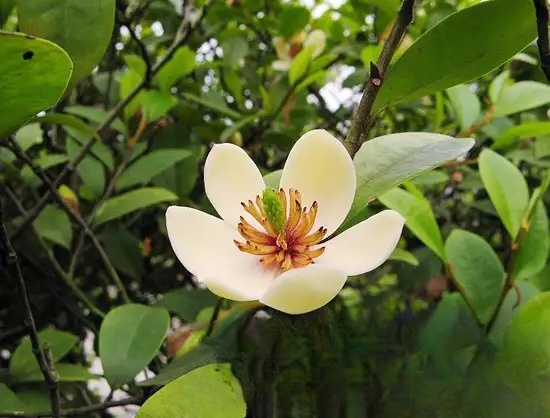
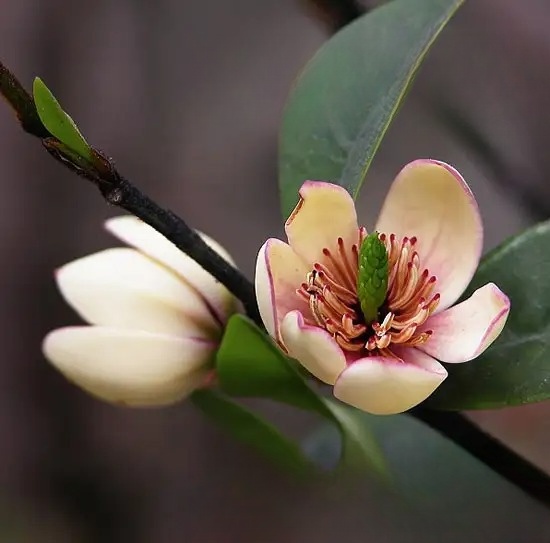
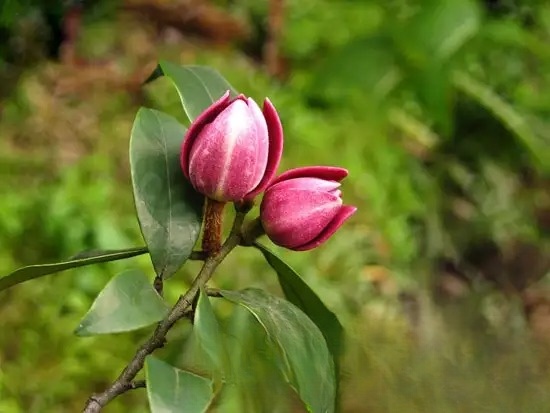
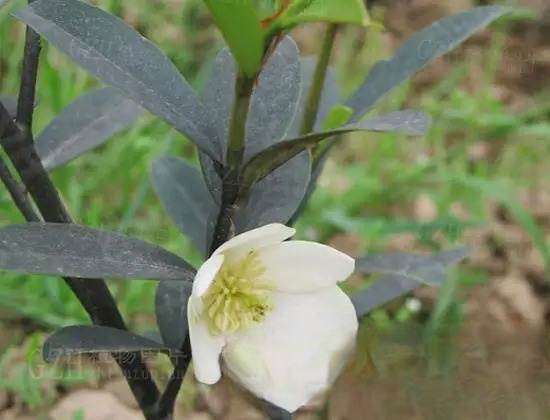
Origin: Guangdong, Fujian and southeastern Guangxi
Type: ornamental plant Flowering
period: April-June
Sunlight: likes shade, not suitable for exposure to the sun
Temperature: likes warmth, not very cold-resistant
Soil: suitable for fertile, loose, breathable, well-drained, moderately acidic and alkaline soil
Water: not cold-resistant, and afraid of waterlogging.
Tips for growing flowers:
It is best to transplant Michelia after it blooms. The original soil should be brought along. You can use a potting soil made of 4 parts leaf mold, 3 parts garden soil, 2 parts decomposed manure soil, and 1 part sand. Michelia has fleshy roots and requires good permeability in the potting soil. Therefore, before transplanting, add a 3 cm thick layer of coal ash or pebbles as a drainage layer, then add a little bone residue, fish bones or cake fertilizer as base fertilizer, and then add 2 cm thick potting soil, and finally plant the plant in the pot.
Potted Michelia is generally repotted once a year, preferably after the flowers have faded. The soil and method for repotting are the same as those for transplanting. When repotting, knock the plant out of the old pot, remove some old soil and rotten roots, and cut off some overcrowded small branches. Put the plant in the new pot, straighten it up, fill it with culture soil, gently shake the pot while filling it with soil, and finally compact it with your hands.
Michelia likes fertilizer. In addition to applying base fertilizer, apply thin liquid fertilizer once every half a month. It is best to apply fertilizer mainly composed of phosphorus and potassium fertilizer once before budding. If the acidity is not enough, you can irrigate it with ferrous sulfate. Frequent irrigating with fermented rice water will make it grow better.
Water when the soil is dry and when it is wet. Avoid waterlogging in the pot soil, which may cause root rot and leaf fall. Drought and waterlogging will cause the leaves to turn yellow and burn, affecting growth and flowering. Generally, water once every 1-2 days in spring and autumn, once in the morning and evening in summer, and once every 5-7 days in winter.
In hot and dry summer, you should spray water on the leaves and around the flowerpot 2-3 times a day to reduce temperature and increase humidity. But on rainy days, you should remove the accumulated water in the pot in time to prevent root rot.
The daytime temperature should be kept above 18-22℃ and the night temperature should be 10-13℃. In the north, they are all potted for viewing. They can overwinter in the open field in the south of the Yangtze River where they are sheltered from the wind and facing the sun. Potted plants are moved indoors to overwinter in winter. If the room temperature can be kept above 10℃, they will bloom in winter, but the fragrance is not strong.
In summer, the plant should not be exposed to the sun and needs to be shaded by 30% to prevent strong light from burning the leaves. It can be placed in an east-facing window or balcony indoors, or in the shade of a tree or shade shed outdoors. It can be exposed to more sunlight after the cool autumn. In winter, it can be placed in a sunny and ventilated place indoors.
Michelia is mostly propagated asexually, using division, cutting, layering and grafting. In northern regions, cutting is mostly used for propagation. In June and July, select strong semi-lignified branches of the current year, cut them into 6-8 cm long branches, leave 2-3 leaves, insert them into acidic sandy soil or peat soil, water them thoroughly, cover them with plastic film to keep them moist, place them in semi-shaded places, spray them with water once in the morning and evening, and they will take root after about 3 weeks. It can also be propagated by high-branch layering in early May, and they will take root in early July.
Michelia is a good natural spice that can be used to make tea and extract essence, and can also be used for medicinal purposes.
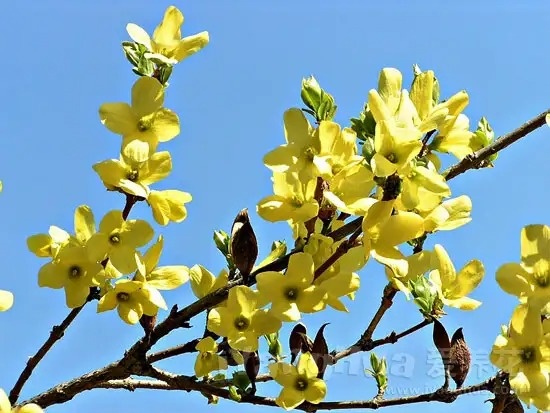
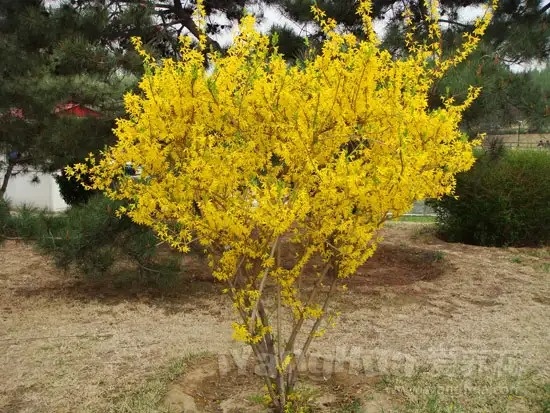
Origin: , Korea, etc.
Type: Flowering plant
Flowering period: March-May.
Sunlight: Likes sunshine, tolerates semi-shade.
Temperature: Not strict with climate, cold-resistant, likes warmth.
Soil: Tolerates barrenness, not selective soil.
Water: Tolerates drought, grows better in a humid environment.
Tips for growing flowers:
Potted Forsythia requires more fertile garden soil.
After heavy pruning after flowering, apply top dressing twice a month.
Forsythia is strong and grows vigorously. Pay attention to watering in spring, especially after the flowers have faded. Keep the soil moist and do not let it be too dry, otherwise the flower buds cannot differentiate normally and affect flowering next spring.
Usually pay attention to provide good light. If you want to see flowers on New Year's Day and Spring Festival to increase the festive atmosphere, you can move the flower pots into the greenhouse for heating about 20 days in advance, so that you can enjoy the golden yellow flowers as you wish during the festival.
The flowers of this flower are mostly born on annual branches, so it is necessary to prune the old branches and annual branches once after flowering every year to promote the sprouting of new branches. For the new shoots that grow vigorously, it is appropriate to cut them short once in the early summer of the same year.
Forsythia has strong vitality and is easy to survive. It can be propagated by cuttings, layering, division, and sowing. Generally, it is propagated by cuttings. The time for cuttings is generally around the Qingming Festival. Select one- to two-year-old tender branches and cut them into 30 cm long cuttings. The upper cut is about 1 cm away from the first node. There must be 2-3 nodes on the cuttings. Cuttings are carried out on land in early spring in the south and in summer in the north. Insert the cuttings obliquely into the soil 18-20 cm deep, leaving the top node exposed to the ground, then bury the soil, compact it, and water it. Water more during droughts to keep the soil moist. But do not accumulate water, otherwise the part of the cuttings that enter the soil will turn black and rot.
The medicinal value of Forsythia suspensa fruit is very high. It has the effects of clearing away heat and detoxifying, reducing swelling and dispersing nodules. Its seed oil can also be used to make cosmetics.
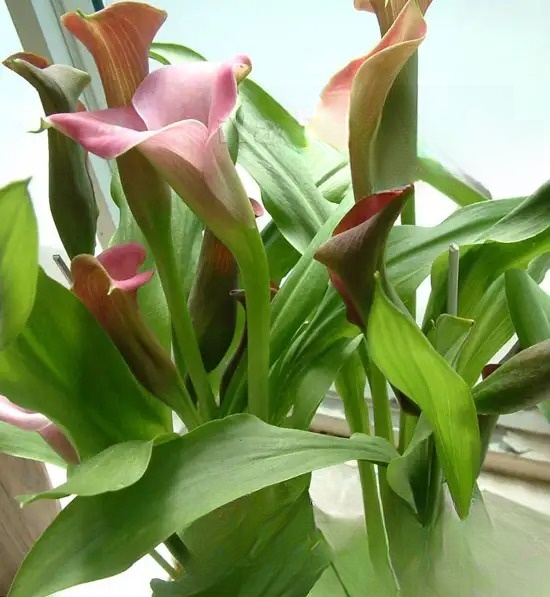
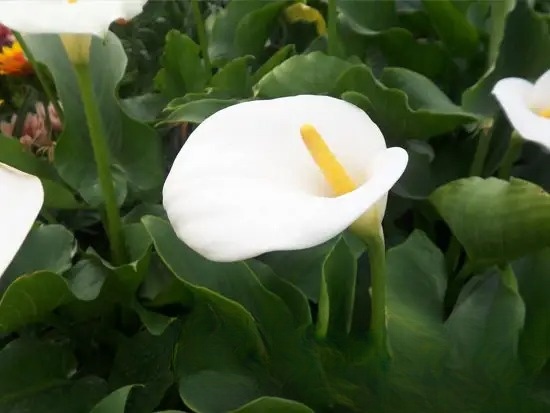
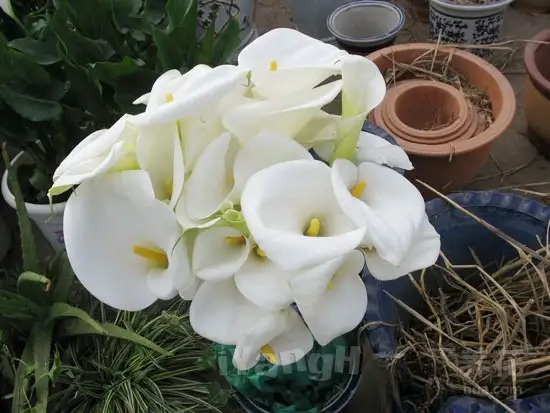
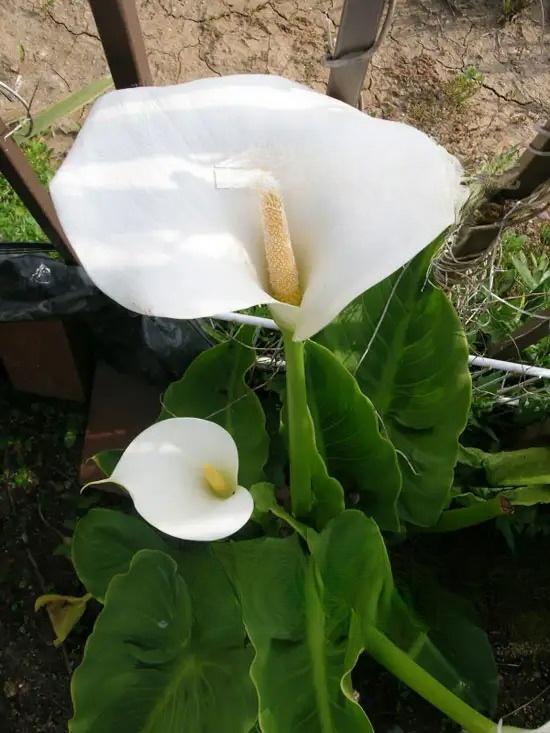
Origin: Southern Africa
Type: Foliage plant, Flowering plant
Flowering period: February-April, mostly dormant in summer due to high temperature.
Sunlight: Semi-shade is preferred, avoid strong light.
Temperature: Likes warmth, not cold-resistant, the suitable temperature for growth is about 20℃.
Soil: Likes loose and fertile soil.
Water: Likes humidity, cannot lack water from the beginning of budding, and needs sufficient water during growth and development.

Tips for growing flowers:
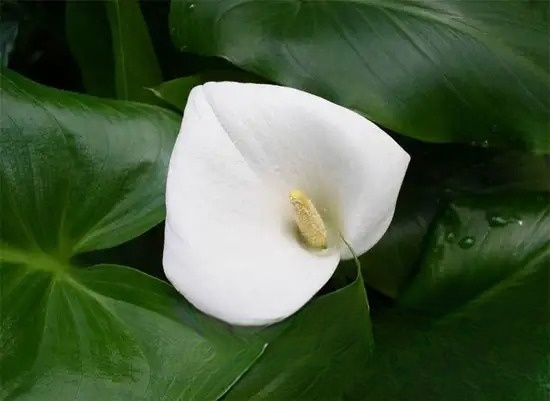
Calla lily is a potted flower for viewing leaves and flowers, and is also an important cut flower material. When potting, it is advisable to choose well-drained, fertile sandy loam, and apply well-rotted cake fertilizer or pig manure. After the first flowering in early spring (or in autumn), dig the buds that sprout around the rhizome of the mother plant and plant them separately in the pot. After planting, water it sufficiently, place it in the shade, and keep the pot soil moist.
If the fertilizer is insufficient and the nutrition is insufficient, the leaves will turn yellow, and if the fertilizer is too much, the leaves will turn yellow. Therefore, the fertilizer and water should be appropriate. In addition to the base fertilizer before planting, during the growth period, apply liquid fertilizer once every 20 days or so. The fertilizer can be decomposed bean cake fertilizer water, and during the peak growth season, a thin fertilizer liquid mixed with nitrogen, phosphorus and potassium can be added once every 10 days or so. When applying fertilizer, be sure not to pour the fertilizer water into the leaf sheath to avoid rot.
If you water the Calla Lily too little, the petiole will break due to loss of water; if you water it too much, the roots will rot. During the growth period, you should always keep the soil moist, water it frequently, and spray the ground around the pot with water in the morning and evening to keep the leaves fresh and clean.
After budding, move it to a shaded place with scattered light for maintenance. Be careful not to expose it to direct sunlight, and do not shade it completely. Calla lilies prefer semi-shaded and humid air. If you do not take measures such as cooling and humidifying and preventing strong light in summer, the leaves are most likely to turn yellow or wilt.
It enters dormancy in June and July. Water less at this time and try to create a relatively dry environment for it. When all the leaves turn yellow, take out the bulbs and store them in a ventilated and cool place, and plant them in pots in autumn. If you don't want the calla lily to go dormant, you can place it in a completely shaded and well-ventilated place in late June for maintenance. Spray water on the ground 2-3 times every day at noon and afternoon to lower the temperature. If the daytime temperature does not exceed 30℃, the calla lily can continue to bloom.
Generally, calla lilies can be moved indoors in late October. Watering should be controlled to keep the room temperature not lower than 10℃. Wash the leaves with clean water close to room temperature once a week to keep the leaves fresh and green. If the air is dry, spray water around the flowers to increase humidity. Pay attention to increasing light in winter. To promote early spring flowering, water with thin fertilizer 1-2 times in December.
Calla lilies are most susceptible to aphid damage when ventilation is poor during the growing season . When pests occur, spray 40% omethoate emulsion 1500-2000 times dilution for prevention and control, and pay attention to improving ventilation conditions.
Calla lilies are susceptible to smoke damage. If they are placed in a room where a coal stove is used for cooking or heating, they will be frequently exposed to smoke. A large amount of smoke will cover the leaves, causing them to turn yellow and affect flowering. Therefore, care should be taken to install a chimney and ensure air circulation to prevent smoke damage.
When the leaves are lush, they should be thinned out in time to facilitate the emergence of flower stalks. Calla lilies begin to bloom during the Spring Festival, and the peak flowering period is from March to April. After the flowers fade, the remaining flowers and flower stalks should be cut off in time to avoid consuming nutrients.
The main method of propagation is bulb division. During the dormant period, the bulbs around the tuber can be peeled off and planted separately. The seeds should be sown as soon as they are mature, and they will bloom after about 2-3 years.
Calla lily is easy to foresee and cultivate. It needs to bloom on New Year's Day and Spring Festival. It can be planted in August or September. Strengthen care. After germination, apply fertilizer once a week. Keep it above 15℃ and place it in a sunny place to bloom as scheduled.
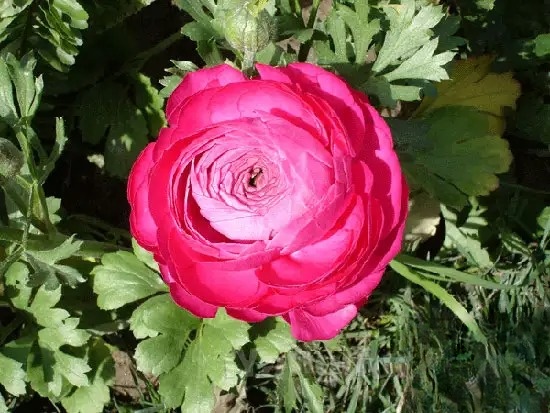
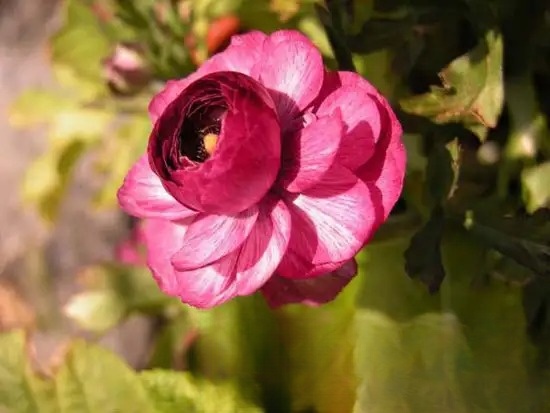
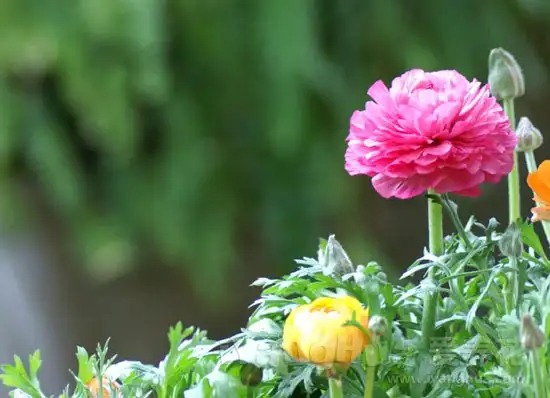
Origin: Southeast Europe and Southwest Asia
Type: ornamental plant
Flowering period: April-May
Sunlight: Prefers a sunny environment, slightly shade-tolerant.
Temperature: Prefers coolness, relatively cold-resistant, afraid of heat.
Soil: Requires sandy loam rich in humus and good drainage.
Water: Prefers moisture.
Tips for growing flowers:
Ranunculus is suitable for both ground and potted planting. Apply sufficient basal fertilizer when planting. Potted soil can be 2 parts garden soil, 1 part leaf mold and 1 part manure. The best time to plant the tubers is in early to mid-September. Planting too late will be detrimental to the growth of the plant and affect flowering in the spring of next year; planting too early will cause the tubers to rot easily due to high temperatures. Plant the seedlings in pots when they have 3 true leaves.
After the plant takes root, apply thin fertilizer once a week; apply thin cake fertilizer water 2-3 times before flowering.
In winter, it is better to place it in a sunny place or a plastic shed to overwinter safely, which is more conducive to its growth. After the spring warms up, it enters a vigorous growth stage. At this time, fertilizer and water management should be strengthened. It can bloom successively from March to May.
If leaf miners are present during the growing season, 40% oxydemeton-methyl emulsion diluted with 1000 times water can be used for prevention and control.
At the beginning of budding, select 3-5 healthy buds per plant and remove the rest. The soil in the pot should be slightly dry at this time. If you don't need to keep seeds after flowering, you should cut off the remaining flowers in time and apply liquid fertilizer 1-2 times.
(1) Bulb division: Ranunculus is mainly propagated by bulb division. In September and October, dig the roots of the Ranunculus from the soil, shake off the soil on them, and dry them in the shade for 1-2 days. Then use your hands to open the tubers along the natural position of the root neck and replant them. Disinfect the roots with formalin or other fungicides before planting.
(2) Seed propagation: The best time to sow is usually in autumn, because seeds usually do not germinate or germinate slowly under normal temperatures (above 20°C). Before sowing, artificial low-temperature germination should be carried out, that is, the seeds are soaked and placed at 7-8°C. They will germinate after about 20 days. After the seeds germinate, the soil needs to be kept moist. When 2-5 true leaves appear, the seedlings can be transplanted. As the seedlings age, they can be gradually moved into small pots for cultivation. No fertilizer is required during the seedling stage, or a small amount of organic liquid fertilizer can be applied. After one year of maintenance, they can bloom in the second year.
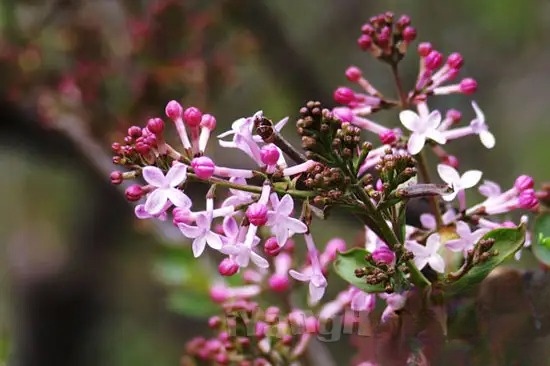
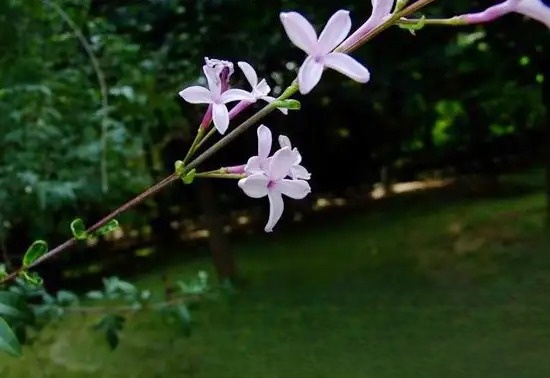
Origin: Northeast China, North China and Northwest China, also distributed in North Korea
Type: ornamental plant
Flowering period: April-May
Sunlight: positive tree species, likes sunshine, slightly shade-tolerant.
Temperature: relatively cold-resistant.
Soil: strong resistance to adversity, not demanding on soil, suitable for fertile, loose, well-drained soil, difficult to grow in low-lying and humid places.
Water: drought-resistant, likes moisture, avoids waterlogging, after waterlogging, the roots often rot and die.
Tips for flower cultivation:
Lilac is suitable for ground planting or potted planting. When transplanting, the roots should be covered with soil as much as possible, so that it is easy to survive. It is best to transplant in early spring before the buds move. Apply enough base fertilizer in the transplanting hole, cover the fertilizer with a layer of soil, and then place the seedlings and fill the soil. Water thoroughly once after planting, and then water 2-3 times to survive.
Lilac does not like heavy fertilizers, so avoid applying too much fertilizer, so as not to cause the branches to grow too long and affect flowering. Generally, it is enough to apply decomposed compost once a year or before winter every other year.
Lilac has strong adaptability and requires relatively extensive care. As long as you pay attention to weeding, waterlogging prevention in the rainy season, and watering in drought, it will grow smoothly.
Pest and disease control Cloves are rarely susceptible to pests and diseases. The main pests are aphids , bagworms and caterpillars. They can be controlled by spraying 800-1000 times diluted 40% omethoate emulsion or 1000 times diluted 25% phosmet emulsion.
Plastic pruning
Before budding in mid-March, lilacs should be pruned to remove dense branches, weak branches, diseased and insect-infested branches, and cut off vigorous branches to allow ventilation and light in the crown. If you do not want to keep seeds after the flowers fade, you can cut off the remaining flowers together with the two buds at the bottom of the flower spike to reduce nutrient consumption and promote the germination of new branches and the formation of flower buds. After the leaves fall, you can also prune once to keep the crown round and beautiful, which is conducive to growth and flowering next year.
Lilac can be propagated by many methods such as division, layering, grafting, cutting and sowing. Generally, sowing and division are used for propagation.
Sowing is done in early April. Soak the seeds in 40-50℃ hot water for 1-2 hours, take them out and mix them in a ratio of 1 part seed to 2 parts sand, place them in a sunny place, cover them with straw bags or sacks, water them frequently to keep the straw bags and sacks moist, and after about a week, the seeds will germinate and can be sown.
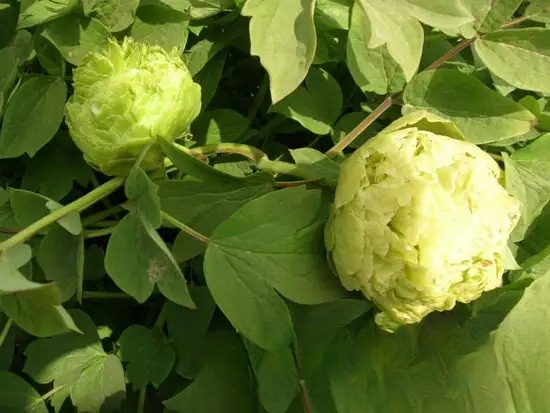
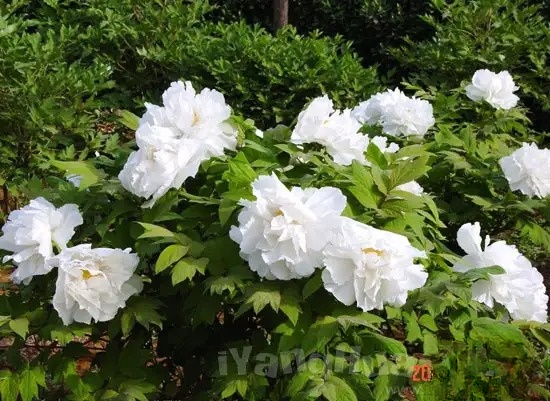
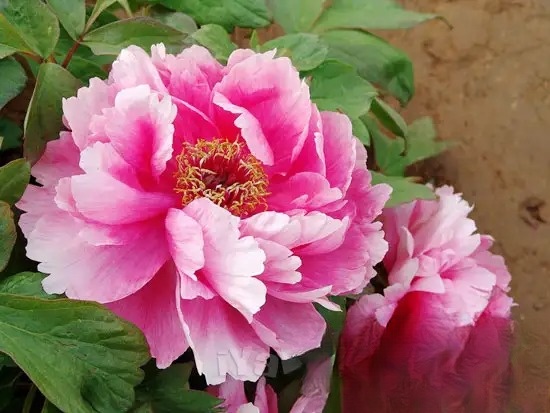
Origin:
Type: Flowering Plant
Flowering Period: April-May. Mid-to-late April in Luoyang and Shanghai, mid-to-early May in Beijing, and mid-to-late May in Lanzhou.
Sunlight: Likes sunshine.
Temperature: Cold-resistant, likes cool environment and avoids high temperature and stuffiness.
Soil: Suitable for growth in loose, fertile, well-drained sandy loam.
Water: Not resistant to moisture, has a certain drought resistance.
Tips for growing flowers:
Planting
The flower pot should be a cylindrical tile pot. The potting soil can be a mixture of 6 parts garden soil, 3 parts leaf humus, and 1 part sand, or a culture soil mixed with 2 parts of fully rotted manure soil, 4 parts garden soil, and 2 parts of coarse yarn. The planting time is preferably from late September to early October. Before planting, the peony roots need to be dried for one to two days to soften the roots for planting. Dead branches and overlong roots should be removed. The wounds should be coated with charcoal or disinfected with 1% copper sulfate solution (about five minutes) to prevent infection with bacteria. Before planting, use broken tiles to pad the drainage holes at the bottom of the pot, and then spread 3-5 cm pebbles to facilitate drainage. When transplanting, straighten the roots, then fill them in layers, and compact them by hand to make the roots close to the potting soil. Top the soil to the root neck, compact it, and leave about 3 cm on top. Water after planting, place it in a semi-shaded place to slow down the seedlings, and then transfer to normal management after slowing down the seedlings.
Peony is a fertilizer-loving plant. If you want to make the peony flowers large and colorful and avoid the phenomenon of "blooming every other year", you must pay attention to reasonable fertilization. Peonies do not need to be fertilized within half a year after they are newly planted, and they can be fertilized after half a year. Generally, fertilizers should be applied at least three times a year. The first time is "pre-flowering fertilizer", which is applied in combination with "thawing water" when the leaves and flowers stretch after the soil thaws. The second time is "post-flowering fertilizer" within half a month after the flowers wither. This fertilization has a greater effect on restoring the growth trend of the plant and promoting the differentiation of flower buds. The third fertilization is applied before winter. This fertilization plays an important role in enhancing growth in the spring of the following year. The first and second fertilizations are based on quick-acting fertilizers, and the third fertilization is mainly based on slow-acting basal fertilizers.
Whether watering is proper is a key issue for the success or failure of potted peonies. After taking them out of the house in early spring, apply fertilizer first, then water them thoroughly, loosen the soil after the water seeps in, and keep the soil moist until buds appear. If the soil in the pot is too dry, water it again until it blooms. It is advisable to keep the soil moist from time to time. In the summer, when it rains continuously, dump the accumulated water in the pot in time to prevent root rot.
Although peony is soft and durable, it is not suitable for cold places such as North China. Before and after the beginning of winter, it should be moved indoors and placed in a sunny place in the room, and the room temperature should be kept at around 0℃. It is not too early to move it out of the room the following year, and it must be moved out of the room around Qingming Festival. In places that are not too cold, you can choose a place that is not exposed to the wind and bury the flower pot in the soil, so that the surface of the pot is flush with the ground to maintain the humidity and temperature of the pot soil, and also ensure that the peony flowers can safely overwinter. After the peony flowers bloom in the spring of the second year, dig the peony flowers out of the ground with the pots and carry out normal management. When the peony flowers bloom, you can set up a shed and cover them or temporarily place them indoors to avoid direct sunlight, which can extend the flowering period.
The common disease of peony is brown spot disease , which causes yellow-green spots on the leaves at the beginning, and then gradually expands to form brown or black spots. Bordeaux liquid can be sprayed 1-2 times a month, and 3 times if the disease is serious. The leaves with more serious diseases should be cut off and burned to prevent summer delay. There is also a root rot disease that specifically harms the roots of peony flowers. The symptoms are blackening and rotting of the roots, which hinders growth. In severe cases, it can cause the death of the entire branch. To prevent this disease, it is necessary to carefully check when dividing and planting. If diseased roots are found, they must be cut off and burned, and some sulfur powder should be sprinkled in the planting hole when planting. Common insect pests are cotton scale insects , which can be sprayed with 1500 times diluted 40% omethoate emulsion. In winter or early spring, lime sulfur mixture can be applied to the lower part of the branch, which also has a good control effect.
In order to ensure that the peony plant has a beautiful shape, luxuriant flowers, and strong growth, it also needs shaping and pruning. Potted peony pruning can be divided into winter pruning and spring and summer pruning. In spring, potted peony should select branches and buds, wipe off the extra buds sprouting from the root zone, cut off the inward branches, cross branches, heavy branches, and thin out weak branches and redundant branches to ensure the plant shape is beautiful and ventilated and light-permeable. In summer, you can cut off the remaining flowers, and in late autumn, you can cut off the diseased and dead branches and overgrown branches after the leaves fall.
Peonies can be propagated by division, grafting, layering, cuttings, sowing and other methods. Division is relatively simple and easy, suitable for family use. When dividing, select 4-5 year old plants with luxuriant branches and leaves as mother plants, dig the mother plants out of the soil, remove the soil on the roots, place them in a cool place to dry for 2-3 days, wait for the roots to soften slightly, and split them into several clusters by hand or with a sharp knife according to their interconnection. Each cluster has 3-4 branches and 2-3 roots, and then plant them. The division time is mostly from late September to mid-to-late October, so that some new roots can grow before winter. If the division is too late, new roots will not sprout that year, which will affect survival.
Peony is a symbol of prosperity, wealth, luck and happiness. Many important occasions and major festivals need to be decorated with peony, which requires the flower to bloom as scheduled. If you want the peony to bloom during the Spring Festival, you can choose 4-5 years old strong and flowering varieties, such as Zhaofen, Yulouchun, Fengdan, Taohuahong, etc. After the leaves fall, dig them up and put them in pots, put them in a cool place, and keep them slightly moist. About 45 days before the festival, put them in a greenhouse, gradually increase the temperature, keep it at 20℃-25℃ during the day, and control it at 10℃-15℃ at night, and spray water on the leaves and the ground frequently; after the leaves are removed, apply thin fertilizer once every 10 days, and spray 0.2% potassium dihydrogen phosphate solution on the leaves, and then they can bloom.
Peony root can be processed into a relatively precious traditional Chinese medicine - moutan bark. Moutan bark has the effects of clearing heat and cooling blood and promoting blood circulation and removing blood stasis, and can treat a variety of diseases. Peony petals can be eaten or soaked in wine, and the peony dew wine has a mellow and fragrant taste.
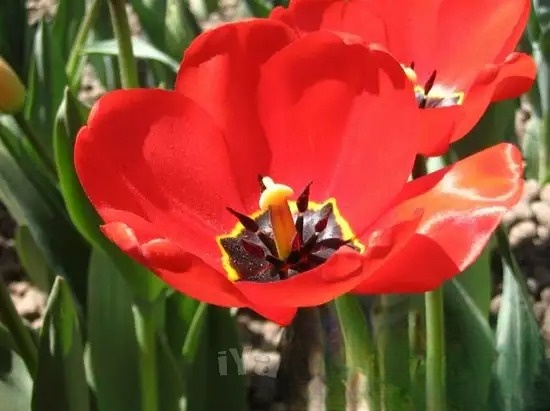
Origin: Iran and Turkey mountainous areas, as well as the Mediterranean coast
Type: ornamental plant Flowering
period: March-May
Sunlight: Prefers sunny or semi-shady environment. Sensitive to sunlight, so the petals are closed on rainy days, cloudy days and nights.
Temperature: Prefers warm winters and cool summers, and the optimum growth temperature is 9-13℃. Strong cold resistance, can withstand low temperatures of -35℃ in winter.
Soil: Prefers sandy loam rich in humus.
Water: Prefers wet winters and slightly dry summers.
Tips for growing flowers:
Planting
For potted ornamental plants, you can plant them in the autumn. Choose plump and large bulbs , and plant 4-5 bulbs in each pot. You can use ordinary culture soil for the potting soil. When planting, pay attention to not covering the soil too thickly, and make sure that the top of the bulb is flush with the surface of the potting soil. For potted plants, the bulbs that have grown out of the pot are generally not plump. A small number of them can be thrown away. A large number can be cultivated in the field for 1-2 years before replanting.
When the buds just emerge from the soil and the leaves unfold, you can apply a thin layer of decomposed cake fertilizer or compound fertilizer once. From the beginning of budding in early March to before flowering, you should apply the above fertilizer 2-3 times. This will make the seedlings grow strong and the flowers large and colorful.
In the cold winter season, straw or other materials should be covered to prevent freezing. In the spring of the following year, after the young leaves sprout, water the soil once every 15 days or so to keep it moist.
After planting, water thoroughly and place the flowerpot in a cool place. After 8-10 weeks under low temperature conditions, when the root system is fully grown and the buds begin to sprout, move the flowerpot to a warm place and gradually increase the temperature. Keep the temperature at 5-10℃ during the leaf growth period, and spray water on the leaves to keep them moist. When the flower buds emerge on the flower stems, move the flowerpot to a sunny place and raise the temperature to 15-18℃. In places with conditions, some inorganic liquid fertilizer can also be applied, so that the tulips can bloom on New Year's Day or the Spring Festival.
(1) Sclerotinia rot : This disease harms tulip seedlings and bulbs. When seedlings are infected, the small leaves will die as soon as they appear. When bulbs are infected, the outer scales will become soft and sclerotia will grow on the surface of the diseased part and nearby areas. The sclerotia are white at first and then turn brown, but the inside of the bulb remains intact.
Prevention and control methods: ① When storing bulbs, remove injured or diseased bulbs, pay attention to indoor ventilation, and control the temperature at 17-20℃; ② Disinfect the soil before planting; ③ If the plants are found to be diseased, immediately remove the diseased plants and spray the remaining plants with 500 times diluted 80% Zineb wettable powder.
(2) Broken color virus: When tulips are infected, the number of bulbs germination decreases, the quality decreases, the flowers degenerate year by year, and the flowering period is delayed. When the flowers are infected, light yellow or white stripes or irregular spots appear on the petals, and broken color flowers appear on red or purple varieties. Double-petal flowers are more susceptible to the disease than single-petal flowers. Leaves can also be infected, and when infected, the leaves will have lighter spots or stripes, and some parts of the chlorophyll will fade and become transparent.
Prevention and control methods: ① If weak, degenerated or seriously diseased plants are found, they should be removed in time; ② In the diseased area, 40% oxydemeton-methyl emulsion 1000 times diluted can be sprayed for prevention and control. To reduce the chance of aphids transmitting the virus, 2.5% dermatophyllum extract 800-900 times diluted can also be sprayed for prevention and control.
After the flowers fade, except for the mother plants that are reserved for seeds, the rest need to be cut off in time to concentrate nutrients on the development of broken bulbs. At this time, the number of watering should be gradually reduced to facilitate the expansion of new bulbs and the enrichment of texture.
The main method of propagation is bulb division. The new bulbs and daughter bulbs formed by the mother bulb flowering in the same year can be divided and planted in autumn. It is generally carried out in September-October in North China, and can be delayed in warm areas. The new bulbs should not be planted too deep, and the thickness of the soil covering should be twice the height of the bulb. The daughter bulbs can continue to be cultivated. Seed propagation requires low temperature treatment of 7-9℃, germination in 30-40 days, and flowering after about 5-6 years.
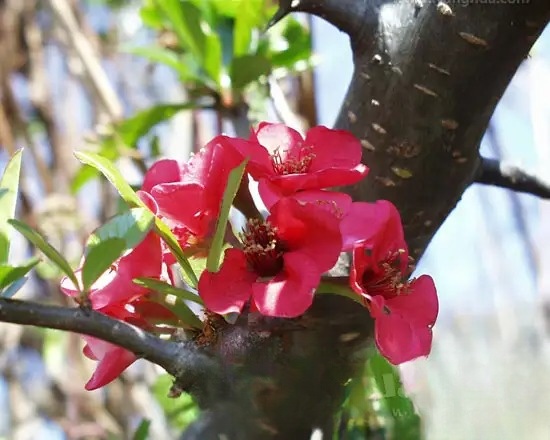
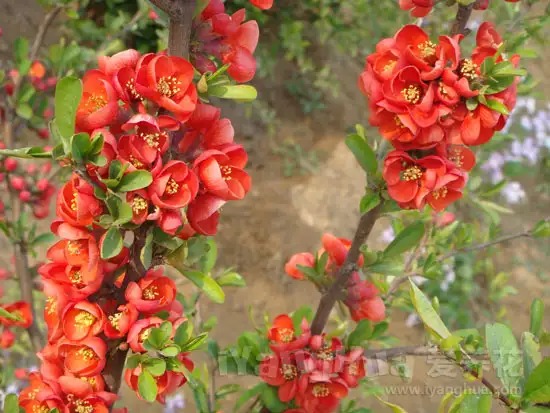
Origin: Central Yangtze River Basin Provinces
Type: Flowering Plant
Flowering Period: March-April
Sunlight: Prefers sunlight, can also tolerate semi-shade
Temperature: Cold-resistant, not demanding on the environment
Soil: Suitable for loose, fertile, deep, well-drained sandy loam
Water: Afraid of waterlogging, easy to rot.
Tips for Growing Flowers:
Malus sempervirens is a positive tree species. The planting site should be selected in a sunny place. If the light is insufficient, it is easy to cause the branches and leaves to grow too long, affecting flowering. Before planting, the long branches should be appropriately cut short to make the plants full and grow uniformly. Apply bamboo-based fertilizers such as decomposed manure, decomposed chicken and duck manure, and bean cake into the pit.
Do not water too much at ordinary times. If the soil is not too dry, you do not need to water frequently. In northern regions, water the plants with sufficient antifreeze water and apply decomposed organic fertilizer before winter every year.
In areas where the temperature drops below -20℃ in winter, the plants need to be buried to protect them during the winter.
Rust attacks the leaves, and the intermediate host juniper should be sprayed with 1% lime sulfur or 3% lime solution in March and April to prevent the spread of winter spores; from leaf expansion to late April, spray Bordeaux 200 times solution once every half a month to prevent the entry of pathogens. In addition, red spiders , aphids , caterpillars and other diseased blood can harm the leaves, and should be prevented and treated in time.
Since the pedunculate crabapple blooms and bears fruit on 2-year-old branches, do not prune the 1-year-old branches. After flowering, prune the flower branches appropriately to encourage them to sprout more side branches, which is conducive to increasing the number of flowers. In winter, you can cut off overlapping branches and diseased and insect-infested branches, and cut the long branches short to concentrate nutrients, reduce consumption, and promote more flowering. For flowering plants, it is advisable to apply liquid fertilizer 3-4 times a year. Apply more phosphorus fertilizer before flowering to make the flowers colorful.
The Malus truncatum can be propagated by division, layering, and cuttings.
(1) Division: This is done in spring and autumn. After digging out the mother plant, use a sharp knife to cut it according to the growth of the roots. Each plant should have one stem. Then plant them separately, water them sufficiently, and place them in a shaded place for maintenance. Generally, they will survive easily. After they survive, they will be managed and maintained normally.
(2) Layering: This method is carried out from late March to late September. Select long and strong branches and press them into the soil. Use U-shaped wire to fasten the branches and then cover them with 8-10 cm of soil. The soil should be compacted. It will take about one and a half months for the roots to grow. After about two months, the layered branches can be cut off from the mother plant and planted separately.
(3) Cutting method: It can be carried out in spring, summer and autumn, but it is more suitable in summer. Select two-year-old strong branches, cut them into 14-18 cm long segments as cuttings, cut off the leaves at the bottom of the cuttings, and then insert them into the cutting bed to a depth of about 1/2 of the cuttings. Water them sufficiently and place them in the shade to keep the soil of the cutting bed moist. After about one month, they can take root and be transplanted.
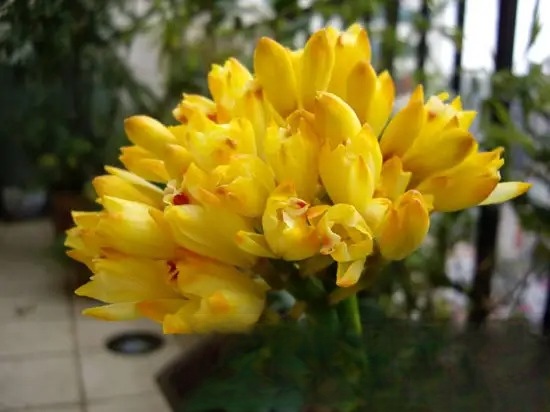
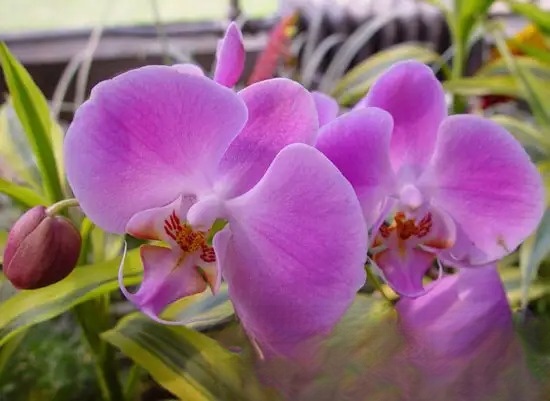
Origin: Tropical Asia
Type: Flowering Plant
Flowering Period: Peak flowering period around the Spring Festival.
Sunlight: Shade-tolerant, requires about 40% of full sunlight.
Temperature: High heat-tolerant, often grows in tropical high-temperature, humid medium and low-altitude mountain forests or coastal island forests.
Soil: Any potting medium with good drainage and ventilation can be used for planting, and it can grow well.
Water: Suitable for humid and ventilated environment, relative humidity of 70% is most suitable.
Tips for growing flowers:
When potting Phalaenopsis, first fill the bottom of the pot with a permeable substrate, then plant the Phalaenopsis seedlings in the pot with 1/3 moss and 2/3 fern roots, and slightly press it to fix the seedlings in the pot. If you use moss potting completely, you should squeeze out the water-soaked moss, loosely wrap it under the roots of the orchid seedlings, and press it lightly, but don't press the moss too tightly, because moss absorbs a lot of water, and if you press it too tightly, it will cause root rot.
The best time to repot is in late spring and early summer, just after the flowering period, when new roots begin to grow. The temperature should not be too low when repotting, otherwise it will cause root rot and death if not managed carefully.
Potted seedlings should be gradually moved to a larger pot according to their growth. Do not plant seedlings directly in a large pot. When repotting seedlings, it is not necessary to remove the original cultivation medium to avoid damaging the roots. Just wrap a layer of moss or other potting medium around the roots and plant them in a larger pot, and make the root neck consistent with the height of the pot edge. Seedlings that grow well can be repotted once every 4-6 months. After repotting, the plants need to be placed in a shaded place within two weeks. During this period, no fertilizer can be applied, only spraying or watering can be done.
Phalaenopsis has poor tolerance to fertilizer, so avoid applying raw fertilizer or concentrated fertilizer. Fertilization is mainly carried out during the growth period, and the most commonly used fertilization method is liquid fertilizer combined with watering. The principle is to apply less fertilizer and light fertilizer. Fertilization should be completely stopped during the flowering period. After the flowering period, liquid fertilizer should be applied once a week when new roots and new buds begin to grow, with a concentration of 2000-3000 times liquid. When entering the vigorous growth period, a small amount of solid farmyard manure can be applied on the surface of the pot. No fertilizer should be applied within 1 month after repotting, and watering should be controlled. Summer is the vigorous growth period of Phalaenopsis, and continuous fertilizer should be applied, with liquid fertilizer applied once a week. For areas with hot and humid nights, fertilization should be stopped for a period of time. Plant growth slows down in late autumn, and fertilization should be reduced. Excessive fertilization makes the plant grow too vigorously, affecting the formation of flower buds, resulting in failure to bloom in the future. Fertilization can be stopped by the end of October. Fertilization cannot be applied in winter without heating equipment.
Potted Phalaenopsis should be watered appropriately. Phalaenopsis roots should not be waterlogged, but rather ventilated and dry. Too much water can easily cause root rot. Usually, if the pot is still very wet 5-6 hours after watering, it will cause root rot. Moss absorbs a lot of water, so it can be watered once every few days; fern roots, bark, etc. absorb the least water, so they can be watered once a day. Water when the surface of the substrate in the pot becomes dry and the surface of the pot turns white; water more when the temperature is high and the plant evaporates a lot, and less when the temperature is low; water more during the vigorous growth period, and less during the dormant period. When the temperature is below 15°C, strictly control watering and keep the roots slightly dry. For newly potted or newly planted plants, the substrate in the pot should be kept slightly dry, and less water should be given to promote the germination of new roots.
The optimum temperature for Phalaenopsis growth is 22-28℃. It is best to keep the daytime temperature at around 27℃ and the nighttime temperature at around 18℃. In hot and humid conditions, air circulation should be increased. If the temperature exceeds 35℃ in summer, the growth and development will be inhibited. If the temperature is below 15℃, the growth will stop.
Phalaenopsis only needs diffuse light and cannot tolerate sunlight. When cultivated outdoors in summer, 80% of the sunlight needs to be blocked, and 60% of the sunlight needs to be blocked in spring and autumn. When cultivated indoors, it can thrive in a sunny room with bright diffuse light.
(1) Bacterial brown spot disease : Phalaenopsis seedlings are most susceptible to bacterial brown spot disease. Therefore, the seedlings should be protected from damage when they are taken out of the bottle. The greenhouse should be disinfected before the seedlings enter the greenhouse. After the seedlings enter the greenhouse, spraying 2000 times diluted agricultural penicillin 1-2 days can play a role in disease prevention. In addition, the indoor humidity should be maintained at a high level, water should be avoided on the leaves, and proper ventilation should be provided.
(2) Bacterial soft rot: Adult plants are susceptible to bacterial soft rot. In the early stage of the disease, dark brown spots appear at the ends of the leaves, which then spread out. Diseased plants should be completely isolated, and the diseased leaves should be immediately cut off and burned.
Reproduction generally uses the division method. Cultivated adult Phalaenopsis plants occasionally produce branches or plant buds at the base or on the flower stem. When the plant buds are slightly larger and grow 2-3 small roots, they are cut off and cultivated separately into new plants.
The reasons for the phenomenon of bud withering or not blooming in cultivated Phalaenopsis are as follows: First, the air is not circulated, especially during the flowering period, good ventilation is needed. If the air is stagnant and not circulated at this time, the top of the flower stem is easy to wither, causing the flower buds to wither and fall early; second, dry air, insufficient watering or strong light exposure can easily cause the leaves to wither, affecting the differentiation of flower buds and flowering; third, improper fertilization, such as excessive nitrogen fertilizer and lack of phosphorus and potassium fertilizers, will affect the formation of flower buds, so that no or few flowers will bloom; fourth, careless watering causes water to splash to the center of the leaf base, where water accumulation can easily cause the leaf base to rot, leading to poor plant growth, thus affecting bud formation and flowering; fifth, the temperature is too high or too low, which inhibits plant growth and also affects the differentiation of flower buds and does not bloom. In addition, the cultivation material is alkaline, which affects the root system's absorption of water and nutrients, which is also a reason for Phalaenopsis not blooming.
Origin: Yangtze River Basin
Type: ornamental plant
Flowering period: April-June
Sunlight: Not strict with light requirements, but does not like excessive exposure to the sun, prefers semi-shade.
Temperature: Temperature requirements vary, there are two types: drought-tolerant and warm-loving.
Soil: Prefers well-drained, loose soil rich in humus, avoids low-lying waterlogged clay soil, the soil pH is preferably 4.5-6.5.
Water: Prefers moisture.
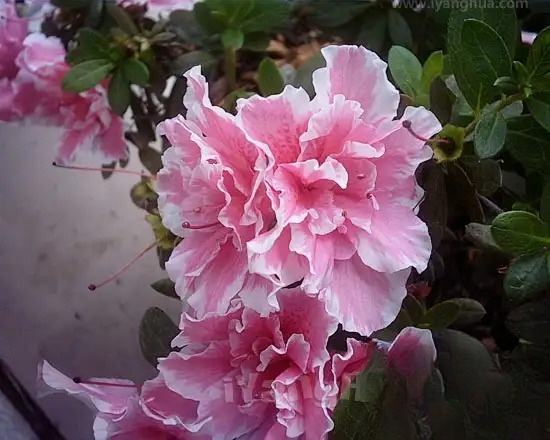
Tips for growing flowers:
The best flower pot is a clay pot with good air permeability, followed by a purple clay pot, and the worst is a glazed pot and a porcelain pot. When planting seedlings, you should pay attention to the size of the flower pot, and avoid using a large pot for small seedlings. If the pot is too large, the soil in the pot will not dry for a long time, and the ventilation will be poor. At the same time, the root system should not reach the pot wall, which will affect the development of the seedlings. Generally, you can choose a clay pot with a diameter of about 10 cm for cuttings, and then turn it into a flower pot of about 15 cm after one year.
When potting, you should pay attention to the drainage layer, cover the drainage holes with tiles, put in 1/3 of coarse soil particles, and add a little fine soil. Then put the azalea seedlings in, straighten the seedlings with one hand, and fill the pot with soil with the other hand. When filling the soil, pay attention to only fill it to 2 cm below the mouth of the pot, not too full, so as to water it later. Finally, puff the pot around and shake the pot to make the surface of the pot flat. After planting, use a watering can to water it thoroughly. Note that when watering, you must water it until water seeps out from the bottom of the pot. If the water is not watered thoroughly, only the surface layer is wet but not the inner layer, the potted flowers will dry out.
Generally, repotting is done every 3-4 years. The best time to repot is before the azalea blooms in March or in September. For plants in full bloom, it is best to do it after the flowers bloom. When repotting, be careful not to remove too much old soil or damage the root system, otherwise it will affect growth and flowering. When repotting, add some newly prepared acidic soil and water it sufficiently. Place it in a cool place for about a week before gradually exposing it to sunlight.
Fertilization should be carried out according to the needs of each growth period of azalea. For example, before flowering, phosphorus fertilizer should be applied once every 10 days for 2-3 times in a row, which can make the flowers large, colorful, thick petals and long flowering period. Fertilization should be stopped during the flowering period. Nitrogen fertilizer should be added after flowering to restore the tree body and promote the growth of branches and leaves. In the hot season of July and August, the growth stagnates and it is not suitable to fertilize. Before entering the house in autumn, it is the long bitter period of azalea, so more phosphorus fertilizer should be applied once every 7-10 days. After entering the dormant period in winter, stop fertilizing.
When fertilizing azaleas, you should pay attention to the following: apply thin fertilizers frequently and make sure the fertilizers are fully decomposed. Fertilization should be done in the evening on a sunny day when the soil in the pot is dry. This is a safe and effective time to fertilize. The next morning after fertilization, water should be poured once to dissolve the fertilizers in the soil and help the roots absorb them.
Watering azaleas should be based on weather changes and plant growth. In general, the pot soil should be kept dry and wet. In spring and autumn, water can be poured thoroughly every 2-3 days. In summer, water should be poured once every morning and evening. At the same time, spray the leaves with clean water and sprinkle water on the ground around the flower pot to increase air humidity. On rainy days, the water in the pot should be dumped in time to prevent root rot. After the beginning of autumn, the temperature gradually drops, and watering should be gradually reduced. After entering the room in winter, the amount of watering should be controlled so that the pot soil is always slightly moist, otherwise it is very easy to rot. In winter, you should also pay attention to frequently washing the branches and leaves with clean water close to room temperature to prevent dust from contaminating the leaves and affecting photosynthesis, and at the same time reduce the probability of sooty disease .
In the cultivation and management of potted azalea in the northern region, the temperature and light should be appropriate. Generally, it is taken out of the room after the Grain Rain (after the sunset) and placed on the balcony or in the courtyard. At this time, the sunlight is softer and only needs to be properly shaded around noon. After the summer, it must be moved under the shade shed or on the shady windowsill indoors to maintain good ventilation. In late autumn, it is no longer necessary to shade the light to facilitate the growth of the plant. Move it indoors before winter and place it outside with sufficient sunlight. The room temperature in winter is preferably around 10℃. If the room temperature is too high in winter, the physiological activities of the plant will be strengthened, and nutrients will be consumed, which will affect flowering and growth in the following year.
Common pests of azalea include red spider mites, armyworms, aphids , short-palped snails, etc.
Red spiders are tiny in size, but they are very harmful to azaleas. This type of pest is most likely to occur when azaleas are shaded in high-rise buildings. The prevention and control method is to catch them manually. For insecticides, you can spray 5% lime sulfur mixture , or you can use equal parts of walnut leaves, oleander leaves, and hedgerows to soak the juice, dilute it with water, and then spray it. Spraying with 1000 times dichlorvos is also a good way to kill them.
When pruning, you should cut off the dense branches, cross branches, weak branches, drooping branches, long branches and diseased branches. This is not only for the beauty of the tree shape, but also to improve the conditions of ventilation and light transmission; save nutrients, make the main branches strong, so that new shoots can sprout as soon as possible, so that when they bloom next year, they can achieve the purpose of more flowers, larger flowers and bright colors. After the azalea blooms, its residual flowers often do not fall for a long time, which will consume a lot of nutrients. In order to prevent the nutrients from being consumed in vain, the residual flowers should be picked off in time so that the nutrients can supply the needs of sprouting new branches. In addition, the shorter summer azalea has many horizontal branches. Every spring, many small branches will sprout from the branches at the root. In order to concentrate nutrients on the main branches and flowers, so that it can grow faster and bigger, these small branches should also be cut off in time. If there are too many flower buds, except for keeping one flower on each branch, the rest of the flower stalks should also be removed.
When the number of reproduction is small, it can be inserted into a shallow mud and sand basin. The basin soil is mainly fine river sand, and peat soil, garden soil, etc. are added. When cutting, choose a one-year-old strong branch with short internodes, lignified base, and 6-10 cm long as the cutting. Before cutting, it is best to poke a hole in the basin soil with chopsticks, then insert the cutting into the soil, gently compact it with your hands, and spray it with water so that the base of the cutting is closely combined with the soil. After cutting, cover the flower pot with a plastic bag and place it in a semi-shaded place. Spray water once in the morning and evening every day within 1 week, and keep the basin soil moist frequently afterwards. Under the temperature condition of 18-25℃, the general variety can take root in about 40-60 days.
Origin: Central and southern China
Type: Flowering plant
Flowering period: February-March
Sunlight: Prefers shade, avoids strong light
Temperature: Prefers a cool, ventilated and light-transmitting environment, avoids dryness. In the northern region, it can be cultivated in a low-temperature greenhouse in winter.
Soil: Avoid using alkaline soil, suitable for humus-rich, well-drained slightly acidic soil and sandy loam.
Water: Prefers moisture, relatively resistant to early.
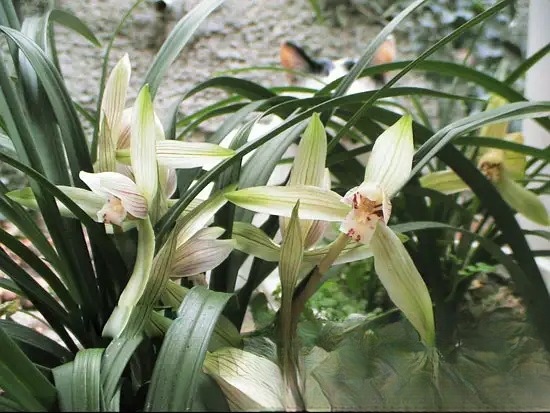
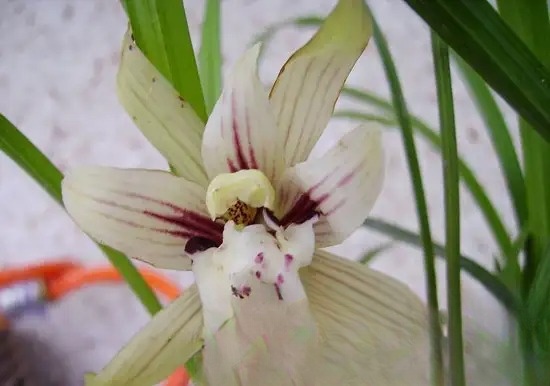
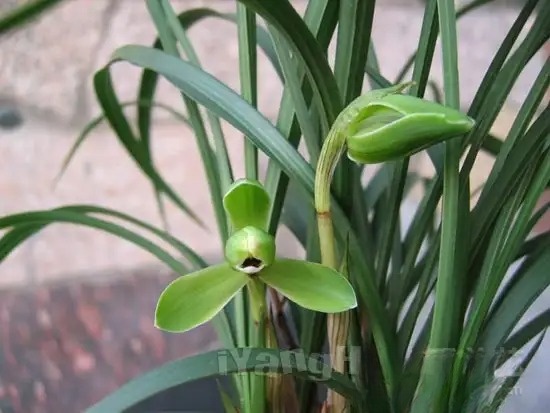
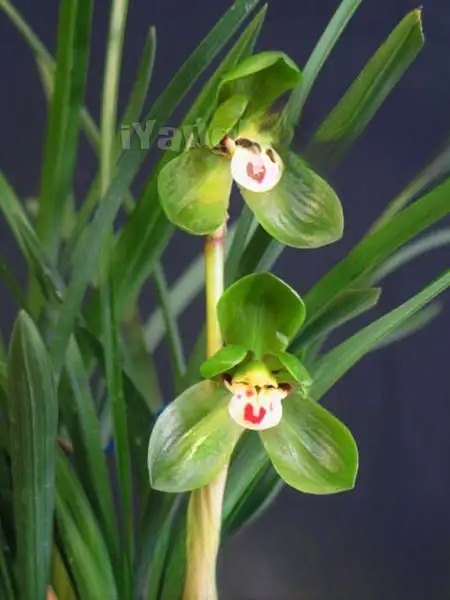
Tips for growing flowers:
Planting spring orchids should be done in late autumn. Before planting, it is advisable to use a new clay pot that has been soaked in clean water for several hours. If you use a purple clay pot or a plastic pot, pay attention to drainage. The size of the pot should be such that the roots of the flowers can stretch in the pot. Orchid mud is the most ideal culture soil, or you can mix half of leaf mold (or humus soil) and half of sandy loam. Do not use alkaline soil. First, put tiles on the drainage holes at the bottom of the pot (it is best to have 3 drainage holes), and then put gravel, ash slag, etc., which account for about 1/5 of the height of the pot. Spread a layer of coarse sand on it, and then put in the culture soil. Finally, put the orchid seedlings in the pot, straighten the roots, and let them stretch naturally. When the soil is half filled, gently lift the orchid seedlings and shake the pot at the same time to make the orchid roots and the pot soil tightly combined. Continue to fill the soil to the edge of the pot, press it tightly, and leave about 3 cm of the edge on the top for fertilization and watering.
Orchids should not be fertilized with concentrated fertilizers. New orchids should not be fertilized in the first year. Fertilizer can be applied after 1-2 years of cultivation when the new roots grow vigorously. Generally, from April to the beginning of autumn, apply a thin layer of fully decomposed cake fertilizer every 15-20 days. Stop fertilizing in the hot summer. The best time to fertilize is in the evening. When fertilizing, avoid liquid fertilizer from contaminating the leaves.
Orchids have thicker cuticles and sunken pores on their leaves, which are more drought-resistant. Therefore, they do not need much water. It is better to keep the pot soil "70% dry and 30% wet". Generally, water once every 2-3 days in spring. After flowering, the pot soil should be kept slightly dry. After April, the pot soil should be kept slightly moist. In summer, when the temperature is high, water once a day. In autumn, it is better to see dry and wet. In winter, water less. During the bud formation period of spring orchids, it is better to keep them moist, but not too wet. In the evening of drought and hot seasons, spray the ground around the flower pot to increase the air humidity.
After potting, water thoroughly and place in a shaded place. Keep indoors in early spring and winter, and outdoors under a shade shed at other times. Shade from 8 am to 6 pm in summer. The shade degree of spring orchids should be about 90% in summer, and 70%-80% in spring and autumn.
(1) White blight : It often occurs during the rainy season. Initially, white mycelium is produced on the soil surface and the base of the leaves, eventually causing the pseudobulbs to rot.
Prevention and control methods: Remove the infected soil and spray with 500 times diluted pentachloronitrobenzene powder.
(2) Black spot disease : It often occurs in hot and rainy summers. Brown spots appear on the leaves at first, then increase in size and turn into black spots. It mostly harms new buds, and in severe cases, the entire plant dies.
Prevention and control methods: Pull out diseased plants, increase ventilation, and lower the temperature; spray with 600 times diluted 5% Mancozeb powder or 800 times diluted 50% Carbendazim , once every half month for 3 consecutive times.
(3) Scale insects : commonly known as orchid lice. Scale insects often cause damage in environments with high humidity and poor ventilation. They are difficult to eradicate, but can usually be controlled with a 1000-fold solution of phosmet .
After the current storage, it is advisable to keep one flower with the best development and the best ornamental value, and remove the rest, so that the flowers can be large and beautiful. After 10-14 days of blooming, the flowers can be cut off together with the flower stalks. Do not wait until the flowers fall off naturally before cutting, so as to reduce nutrient consumption and facilitate flowering next year.
It is mostly propagated by division. General varieties are divided once every 2-3 years, and precious varieties are divided once every 1-5 years. The appropriate time for division is before the new buds appear or before winter after flowering. Early spring flowering varieties are divided in late autumn, and summer and autumn flowering varieties are divided in early spring. Before division, water less, let the pot dry, turn the pot seedlings upside down, shake off the pot soil, and cut off the rotten roots and some old leaves. For species with pseudobulbs , cut them from the widest part of the pseudobulbs. According to the size of the ramet seedlings, choose flower pots of different diameters, and choose high and deep flower pots. The hole at the bottom of the pot should be large. When potting, cover the pot hole with tiles first, add a thin layer of pebbles, about 1/5 of the depth of the pot, then put the new buds of the ramet seedlings upwards, and spread the roots flat on the bottom of the pot. While cultivating the soil, gently shake the pot, and slightly lift the seedlings, and finally add another layer of soil. For species with pseudobulbs, the planting depth is measured when the pseudobulb is flush with the soil surface. Finally, water it and place it in a cool place. After two weeks, move it to a semi-shaded place. In addition, it can also be propagated by tissue culture.