If I could renovate my home, I would definitely not customize a wardrobe! Build a wardrobe directly on the wall to save money and protect the environment
I didn't know much about decoration at the beginning, so I spent a lot of money to customize a branded floor-to-ceiling wardrobe, but in the end, it still failed! It's really frustrating!
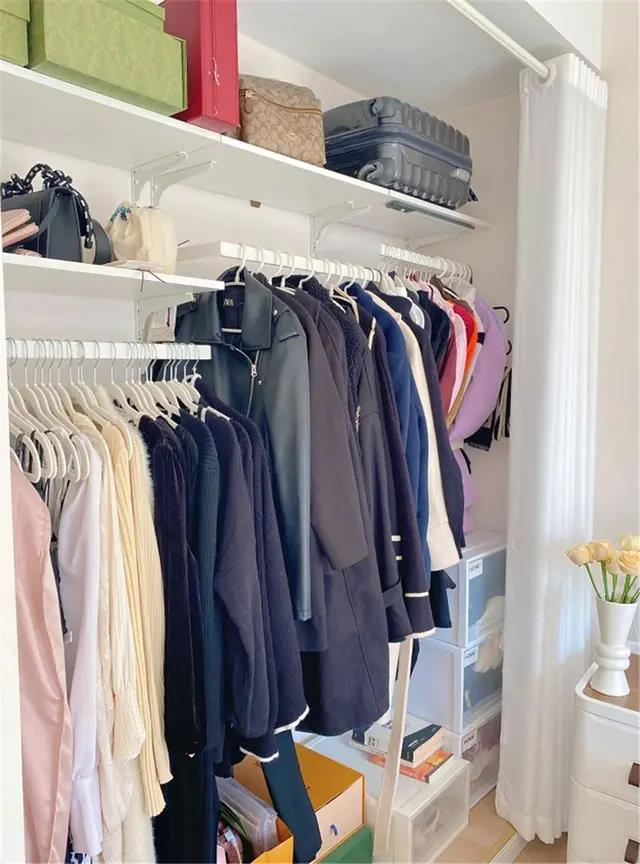
I recently went to a friend's house to warm up her room, and discovered that she didn't even want a wardrobe . She simply built a wardrobe by building a wall, but it turned out to be quite practical.
After watching it, I made up my mind: If I buy a house for renovation again, I will never customize a wardrobe! It is expensive and prone to problems. I will also build a wall to make a wardrobe, which is economical and environmentally friendly.
What is a wall wardrobe?
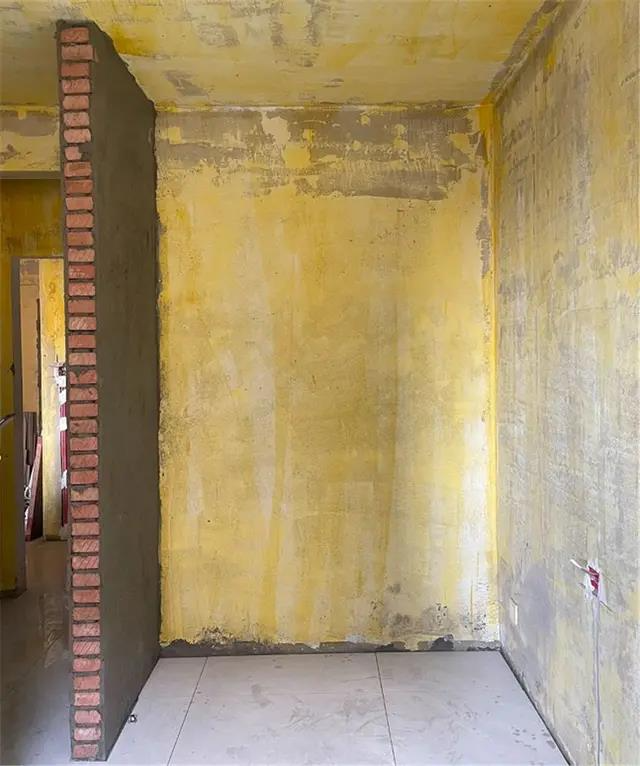
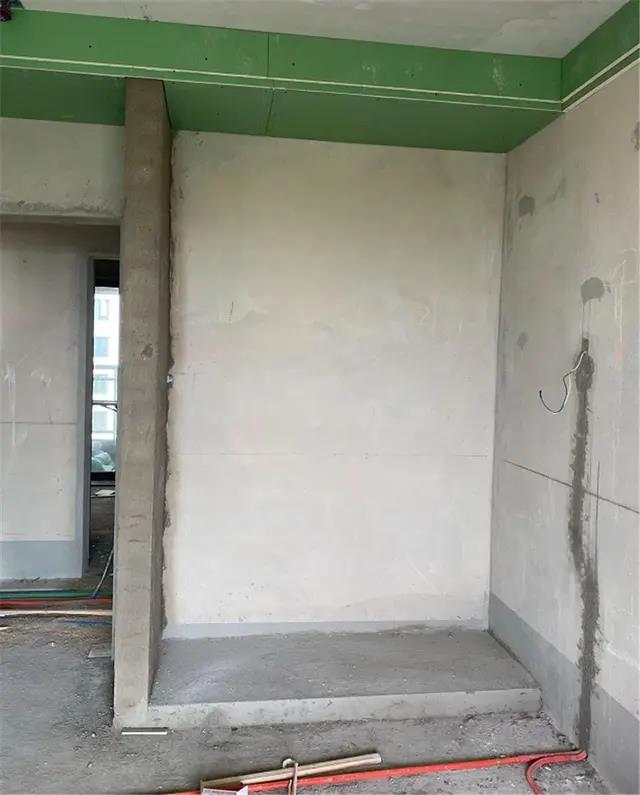
The so-called "wall-built wardrobe" is actually a simple wardrobe built by building a new wall with cement bricks in a corner of the room . It is similar to the Japanese closet.
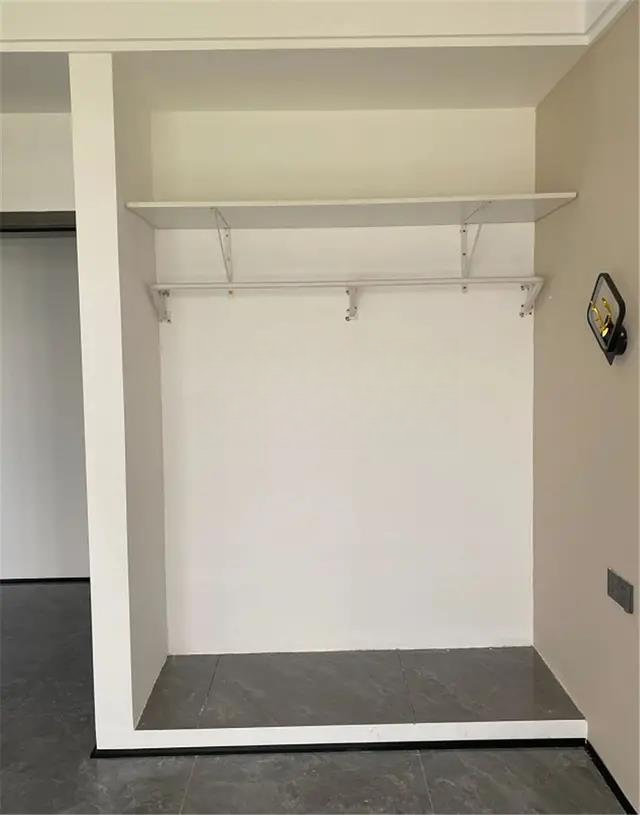
Because the cabinet is embedded in the wall, its presence is weakened and space is saved. The interior can be freely laid out and is highly flexible . The most important point is that it is more durable and environmentally friendly than custom wardrobes.
How to build a wall wardrobe
According to your own usage habits, determine the location of the wardrobe, let the bricklayer build the wall first, and then the painter will apply plaster, leveling, polishing, and latex paint. Generally speaking, it is more appropriate to choose the wall near the door to build a new wall, which is convenient for later construction.
Details to note:
- Leave 10-20 cm of space at the door opening to allow room for the door frame and switch.
- It is best to use red bricks and cement bricks to build walls. It is not recommended to use light steel keels and gypsum boards, as they have poor load-bearing capacity.
- Insert 50cm of steel bars between the new and old walls to avoid cracks at the joints
- The width of the wall depends on the size of the room, and 60 cm is generally sufficient.
- The bottom is made of 5 cm platform, and the wall is painted with 1.8 meters high waterproof, mildew-proof and moisture-proof, more durable
- If you plan to install a door later, remember to embed the track on the top in advance.
Tips:
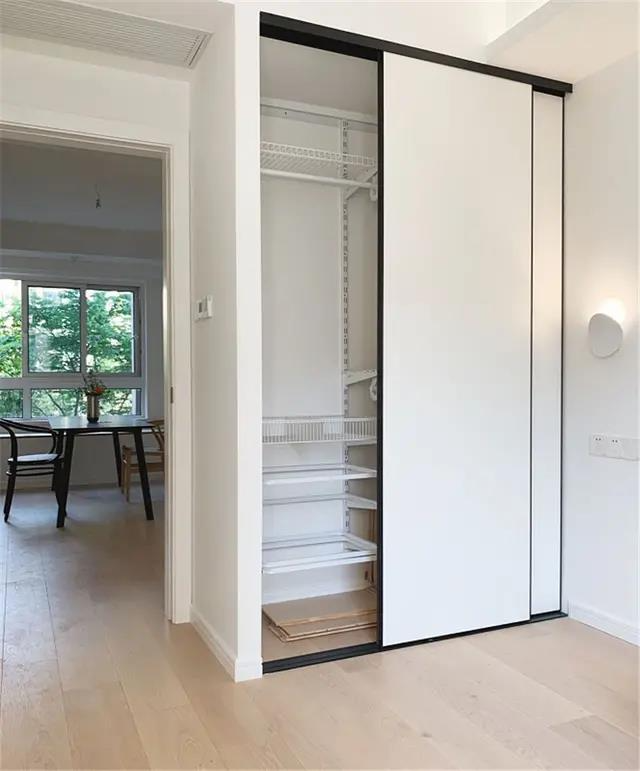
It is best to add doors to the wardrobe . Although the price will be higher, it is much better than curtains in terms of dust and moisture resistance and appearance . There are two common types of cabinet doors on the market: folding doors and sliding doors. I personally think that sliding doors are more durable and easier to clean if they get dirty.
How to arrange your wardrobe
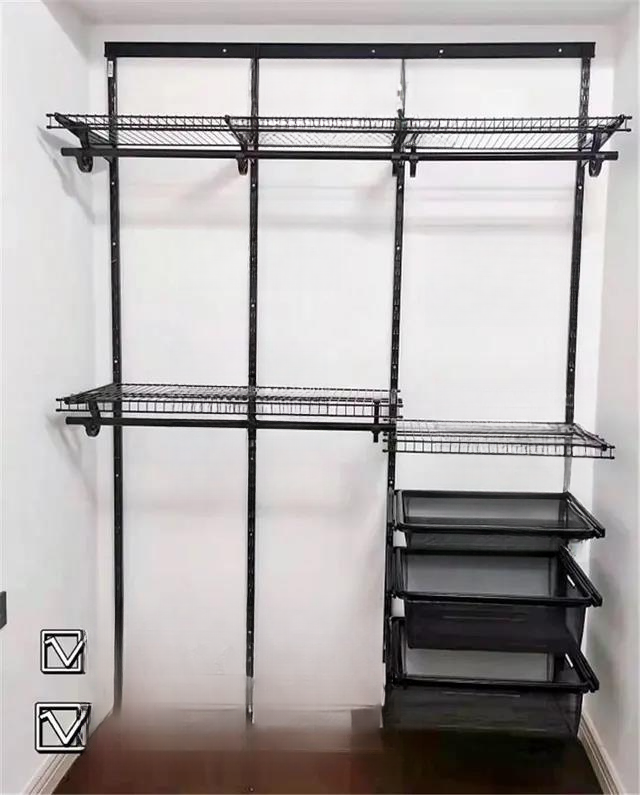
The layout of the cabinet is relatively free, as long as it is arranged according to personal usage habits and needs. Here is the simplest cabinet layout for your reference:
①The cabinet is divided into three areas: top, middle and bottom
- The top is mainly used to store infrequently used items
- Hang clothes in the middle to divide them into long clothes area and short clothes area
- The bottom is a pull-out basket for storing trousers, socks and other scattered items
- If the wardrobe space is large, you can buy storage boxes for the remaining area, or place large appliances such as suitcases, hanging irons, vacuum cleaners, etc.
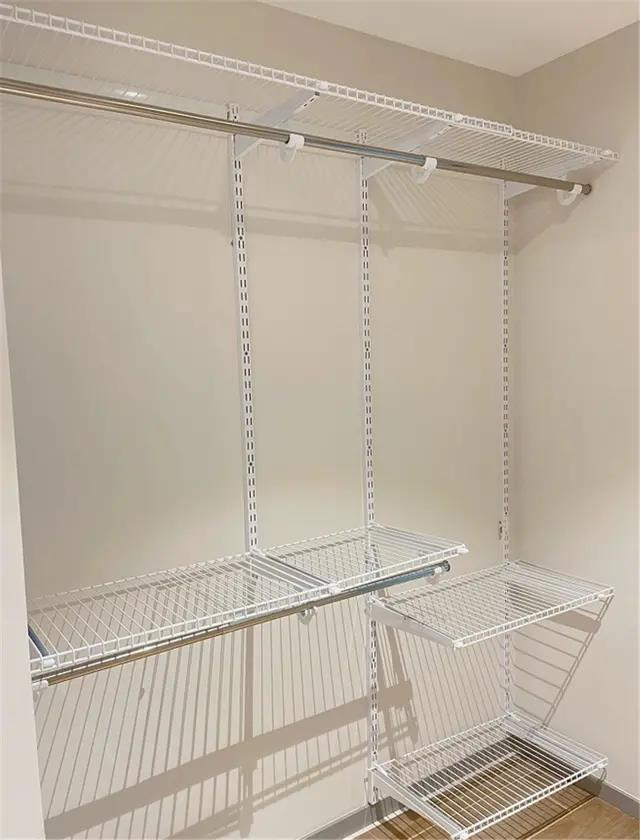
Of course, as I mentioned before, the layout of a wall-mounted wardrobe is free, and if you are not satisfied, you can adjust it yourself .

Because these metal bracket accessories are basically independent, if you want to change the layout later, you can just remove them and readjust them, which is very convenient.
(The picture comes from the Internet, if there is any infringement, it will be deleted immediately)