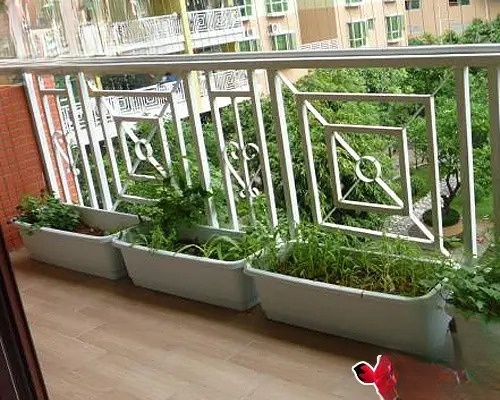
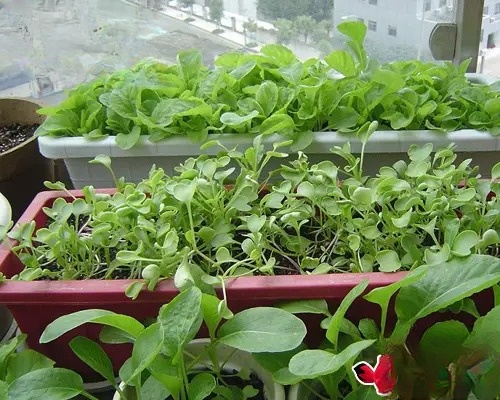
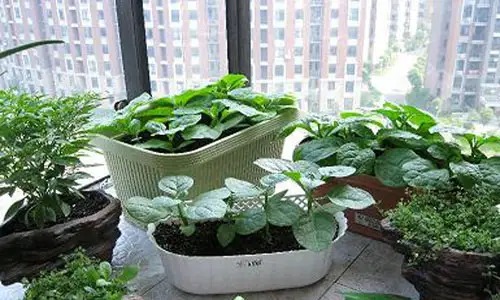
How to grow vegetables on your balcony
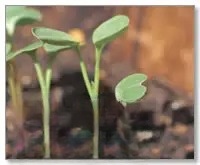
Teach you how to grow wild vegetables at home - Purslane
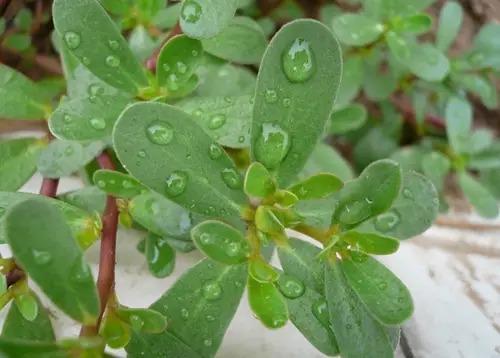
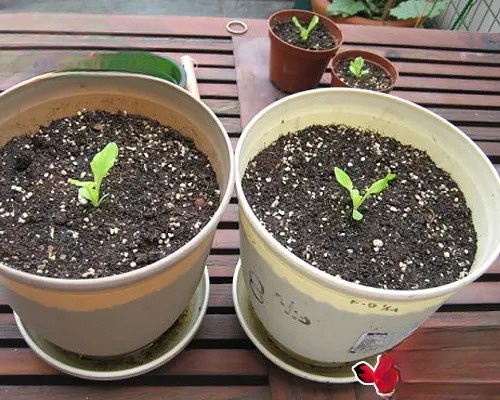
1. The suitable temperature for Purslane to grow is 20-30℃. As long as the temperature is not lower than 15℃, it can be sown at any time.
2. Pot and soil preparation. The pot used to grow purslane should not be too small. A clay pot with a diameter of 35 to 40 cm is the most suitable. Purslane grows vigorously and is not very demanding on the soil.
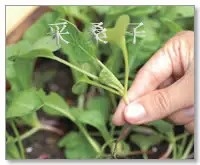
3. Sowing. Sowing should be done when the temperature is above 15℃. Before sowing, water the pot soil thoroughly. After the water seeps down, mix the seeds with fine sand and sow them, then cover them with 0.5 cm thick fine soil. After sowing, pay attention to heat preservation and moisture retention. Seedlings will emerge 2 to 3 days after sowing. Thin out the seedlings 7 days after emergence, with a spacing of about 3 to 4 cm between plants. When the seedlings are about 15 cm tall, start thinning out the seedlings for consumption, keeping the spacing between plants at 7 to 8 cm. Keep the soil moist during the growth period. Topdressing requires frequent application of thin fertilizers, once a week, and no more than 50 grains of urea per pot each time.
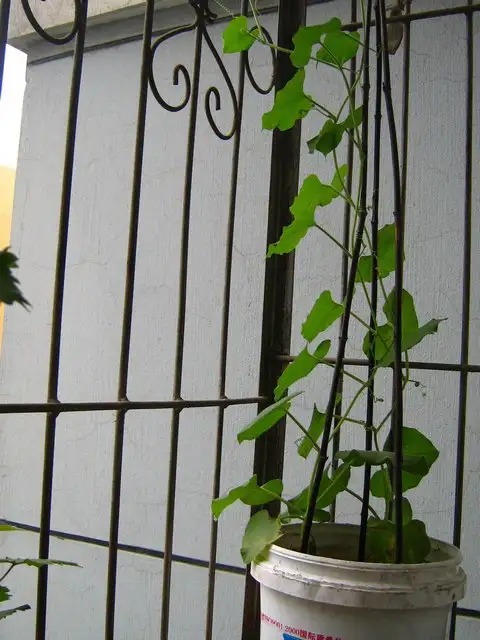
Teach you how to grow loofah at home
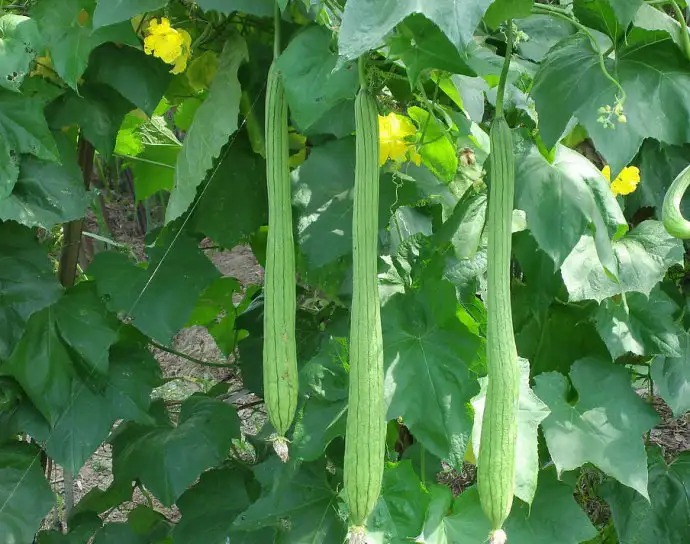
Alias: water melon, ridgeless loofah, wild melon.
Planting season: February-March (can be sown from February to August in the south).
1. Seedling cultivation
Seedlings are often raised and transplanted in spring and summer, and direct sowing is done in autumn.
① Place the seeds in 60℃ hot water and stir continuously for 10-15 minutes, then soak them in 30℃ warm water for 2-5 hours, wash them, wrap them with a wet cloth (or paper towel), and germinate them at 25-30℃ for 24-36 hours. Sow them when 2/3 of the seeds are white.
② Sow the seeds in disposable plastic cups, cover them with 1-2 cm of soil, and water them thoroughly; you can also sow them directly in the corresponding containers, with 2-3 seeds per hole. When the temperature is suitable, it will germinate in about 5-7 days. When the temperature is low, you can cover it with a film to keep it warm.
③ Water appropriately, and choose a sunny afternoon to plant when there are 4-6 true leaves. Apply enough basal fertilizer (less or no basal fertilizer can be applied for summer sowing), and plant 1 plant per pot.
- 2. Daily management
- ① Like strong light, requiring no less than 8 hours of light per day; high temperature resistance, afraid of cold, suitable growth temperature 25 ~ 30 ℃, the lowest temperature should not be lower than 12 ℃, high temperature without lack of water and fertilizer still grow vigorously; moisture resistance, need to ensure sufficient water. When the temperature is low, water should be watered before noon on sunny days, water once every other day when the weather is dry, and water once in the morning and evening when the temperature is high in summer:
② When the plant height is about 50 cm, soil and vines should be pressed once, and soil and vines should be pressed again when the height is about 70 cm, and the vines should be coiled on the soil surface and the side vines should be removed. Pruning should generally be done in the afternoon on sunny days.
③ When the female flowers begin to appear, set up a support, lead the vines to the trellis in a zigzag shape, and tie them with ropes at intervals of about 20 cm to fix them.
④ Before the first melon is formed, all the side vines should be removed. If there are too many side harvesting vines, remove some of the overly dense or weak side vines. After the side vines have 2 to 3 fruits, pinch off the top. In the middle and late stages of growth, remove the yellow and old leaves appropriately, and the principle is that the leaves do not overlap and shade each other.
⑤ During the growth period, it is best to remove the tendrils, most of the male flowers and underdeveloped fruits in time. Artificial pollination can be performed when necessary, usually at 5 to 6 pm, take the male flowers that are open on the day for pollination.
⑥ Apply decomposed organic fertilizer once every 10 days before fruiting, for a total of 2 times, and be careful to avoid partial nitrogen fertilizer; apply decomposed organic fertilizer once a week after fruiting. - 3. Harvest
- The melons can be harvested 10 to 14 days after flowering, when the flowers on the top begin to dry up, the melon skin begins to darken, and the melon feels elastic when held. If you need to keep seeds, you can wait until the melon skin turns yellow before harvesting.
Top 10 Best Herbs to Grow Indoors
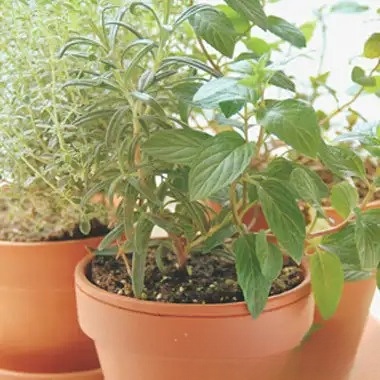
Grow herbs indoors this winter. From a dietary supplement standpoint, freshly picked herbs smell great, even when the snow is drifting outside. You don't even need special lighting; herbs do well in a bright window. Here are 10 of the best herbs for window beds and the skills you'll need. Keep them happy and healthy, then move them outdoors later.
1.
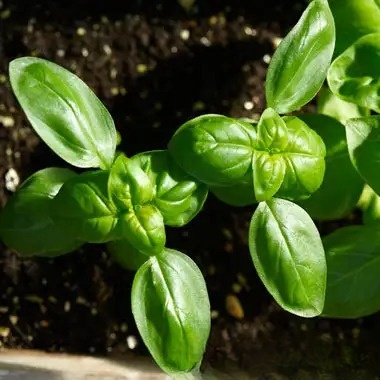
Basil:
Grow basil from seeds in pots next to a south-facing window - it's a light-loving and heat-loving plant.

2.
Bay
is a perennial plant that grows well in containers all year round. Place the pot on an east or west-facing window sill, taking care to ensure that it does not grow too densely and affect air circulation.
3.
Chervil
is sown in late summer. It grows well in low light but needs temperatures between 18°C and 21°C to thrive.
4.
Allium
At the end of the growing season of onions, pull some from the vegetable garden and plant them in pots. If any onion leaves turn yellow, remove them from the pots. In early winter, place the pots in the coldest place indoors (such as the basement), and after a few days, move them to a window with good sunlight.
5.
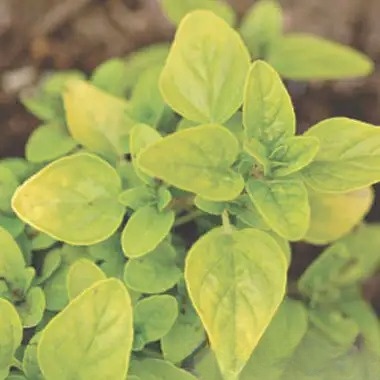
The best way to start oregano is to plant cuttings from the tips of outdoor oregano plants. Place the pot in a south-facing window.
6.
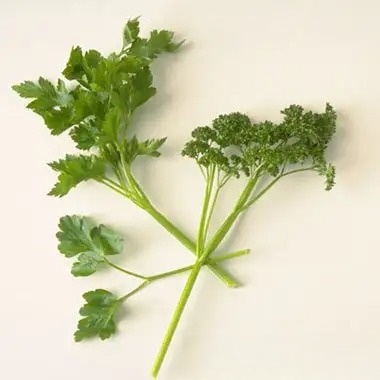
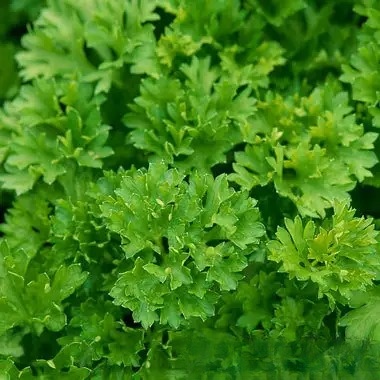
Parsley
can be grown from seeds or planted directly into pots at the end of the plant's growing season. Parsley prefers full sun but grows slowly near an east or west-facing window.
7.
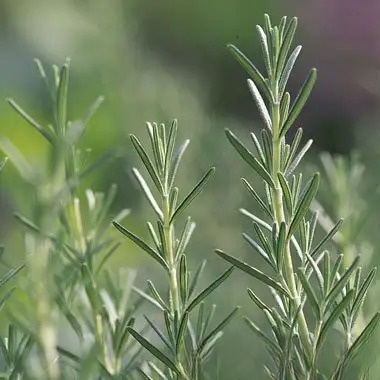
Rosemary
Start rosemary from cuttings and keep it moist in a soilless mix until it takes root. A south-facing window is best.

8.
Sage
is grown indoors by taking cuttings from outdoor sage plants. It tolerates drought and purifies indoor air, but it requires bright sunlight.
9.
Tarragon
Tarragon must go through a dormant period in late autumn or early winter, so it is suitable to grow indoors. Find some mature ones from the vegetable garden and plant them in pots. When the leaves wither, be sure to remove the dead leaves and apply organic liquid fertilizer in time.
10.
Thyme
Use young cuttings or grow thyme directly from the outdoors in potted plants indoors.
Teach you how to grow chives in a balcony pot
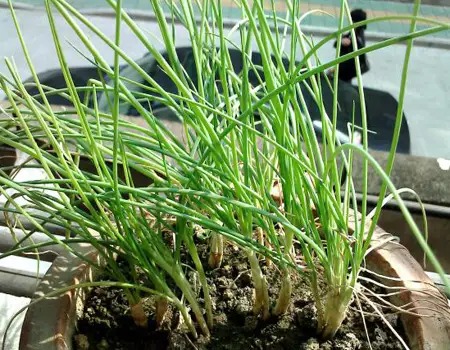
Step 1: Water thoroughly + soak seeds in warm water
The night before sowing, you need to water the soil thoroughly. On the day of sowing, soak the seeds in 55℃ warm water for 20 minutes, then dry the seeds, and then you can sow them.
Step 2: Sowing seeds
Dig a few holes in the flowerpot, sow three or four seeds in each hole, cover them with a thin layer of fine soil, press them down and water them.
Step 3: Daily watering + fertilization
Keep the soil moist from the time the shallots are sown until they have leaves. When the shallots grow to 15 cm in height, ensure that they are adequately watered to promote rapid growth. When they enter the middle growth phase, you can gradually reduce the amount of water. Fertilize once every 10 days or so, using rice water (rice water is the most environmentally friendly and economical fertilizer).
Teach you how to grow coriander in a pot at home
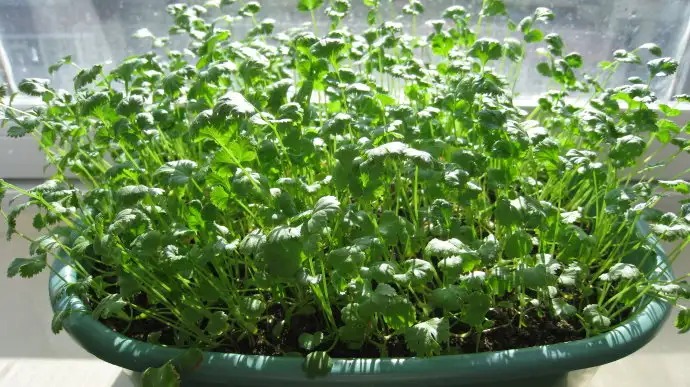
Step 1: Rub the seeds apart, because coriander seeds grow together in pairs, so rubbing them apart will help them germinate. Soak them in warm water at about 40 degrees for 6 hours.
The second step is to prepare the planting soil, water it thoroughly, scatter the seeds on the soil, and lightly cover the seeds with a thin layer of soil.
The third step is not to water too much in the early stage of the seedlings. When the seedlings grow to 10 cm, the plants grow vigorously and you should water them frequently to keep the surface of the soil moist.
The fourth step is to thin out the seedlings appropriately and remove weeds when thinning. Proper shade is required in summer.
Teach you how to grow mint in a pot at home
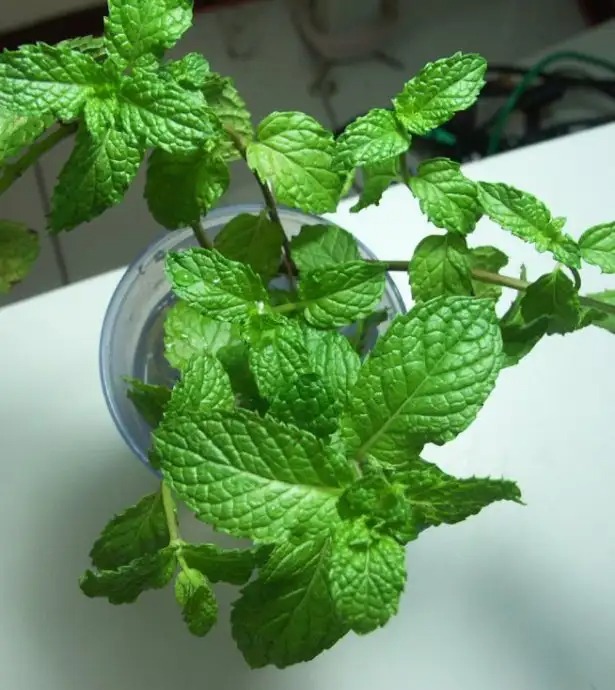


Sowing method:
1) Choose loose and breathable soil, water it thoroughly before sowing, and sprinkle the seeds evenly on the soil layer.
2) Because mint seeds are relatively small, there is no need to cover the soil, so pay attention to maintaining soil moisture. Use a small spray bottle to spray water to keep it moist.
3) The temperature for sowing is about 20 degrees, and the temperature cannot be higher than 25 degrees. If the temperature cannot be reached, use plastic wrap to increase the temperature and moisturize it. In summer, all seeds should be placed in a cool place, because it is too hot outside and it is easy to lose water. The seeds have not yet grown roots and need artificial water to maintain life.
4) If covered with plastic wrap, remove it in time after the seeds germinate, and move the flower pot to a place with scattered light in time.
5) When the seeds grow to 5-6 leaves, they can be planted. Usually one seedling is planted in each hole, first straighten it, straighten the root system, and then fill the soil and compact it. After watering once, it is done.
6) After the seedlings grow a little bigger, apply some liquid fertilizer appropriately.
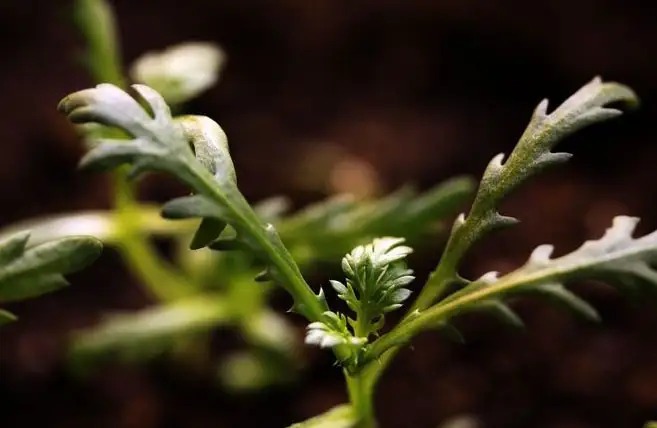
Teach you how to grow chrysanthemum in pots at home
Chrysanthemum chrysanthemum is generally cultivated in spring and autumn, and can be cultivated in spring, autumn and winter in the south.
1) Soak the seeds. Soak the seeds in warm water for 24 hours, remove and drain (soaking will germinate faster).
2) Sowing. Sprinkle the seeds evenly on the nutrient soil, apply a layer of soil after sowing, water thoroughly, keep moisture and heat, avoid sun exposure, and water every day. Seedlings will emerge in about 4-5 days.
3) Thinning. When the seedlings grow to 2-3 true leaves, thinning is required, pull out the weak seedlings, and leave the strong plants.
4) Fertilization. When the plants grow to 10-12 cm, apply some fertilizer appropriately.
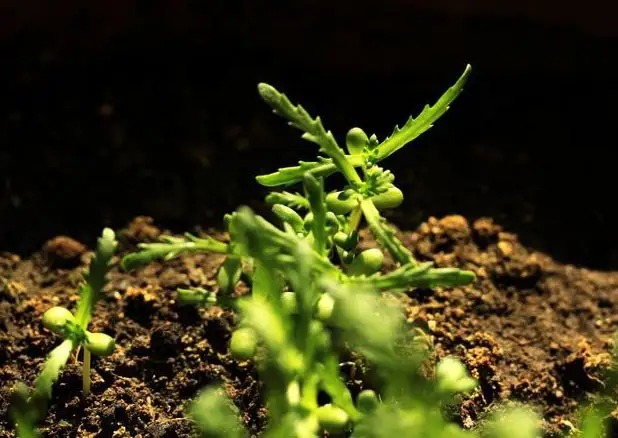
5) Harvest. Chrysanthemum chrysanthemum can generally be harvested in about 40-50 days. Water and apply fertilizer once after each harvest, and harvest again every 20-30 days.
6) Management. Chrysanthemum chrysanthemum prefers weak light, likes coolness, is not resistant to high temperature, and 15 degrees is the most suitable growth temperature. Water should not be lacking during the growth period, and the soil should be kept moist.
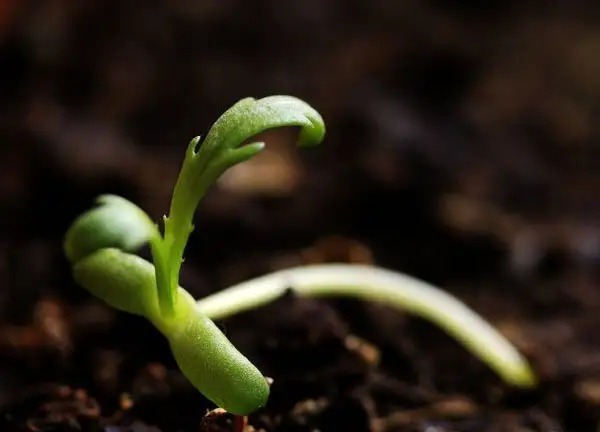
Teach you how to grow bitter melon at home
. Bitter melon planting season: February-May (sowing can be done from spring to autumn in the south)
1. Seedling cultivation
1. Because bitter melon seeds have thick shells and waxy epidermis, they absorb water slowly, so pay attention to the germination method. The specific method is: soak the seeds in 50-60℃ warm water for 10-15 minutes, stir while soaking, and continue to soak for 10-12 hours after the water temperature drops to room temperature; then place them at 25-30℃ for germination, and after about 48 hours, they can germinate. If the temperature is low, germination will be slow. It should be noted that seeds that have not yet germinated must be scrubbed with clean water once a day to remove the mucus on the surface of the seeds, prevent the seeds from mold and rot, and promote early germination of the seeds.
2. Generally, the spot sowing method is used, 2 seeds are sown in each hole, the soil is covered with about 1-2 cm, and watered thoroughly. The film can be covered to keep warm, and it will germinate in about 2-3 weeks at 30-33℃.
3. The seedlings grow slowly. After about 2 to 3 weeks, they can be planted when they have 3 to 4 true leaves. When planting, an appropriate amount of decomposed organic fertilizer should be applied to the soil.
2. Daily management
1. It requires a large amount of fertilizer and has a long growth period. Generally, decomposed organic fertilizer is applied once every 1 to 2 weeks. The proportion of phosphorus and potassium fertilizers should be increased during the fruiting period.
2. When starting to pull the vines, a support should be set up, or it can be pulled to a firm support with a rope. Be careful not to let the vines entangle with each other.
3. Bitter melon has a good branching ability. Generally, 2 to 5 side branches above 3 to 5 cm of the main vine and the plant can be retained, and the others can be cut off. If there are dead leaves or yellow leaves, they should be removed in time to facilitate ventilation.
4. Artificial pollination during the flowering period can increase the fruiting rate. It is generally carried out at 8 to 10 am. The pollen on the mature male flowers can be applied to the stigma of the female flowers.
5. It likes sufficient sunlight and a warm environment. The suitable temperature for growth is 20 to 30℃. It grows poorly below 10℃ and is easy to die in frost. It can tolerate high temperatures above 30℃ during the flowering and fruiting period.
3. Harvest:
When the tumors on the melon skin are protruding and swollen, and the color has not yet turned white and shiny, it can be harvested. If you want to save seeds, you can wait until the skin turns orange before picking it.
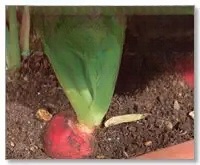
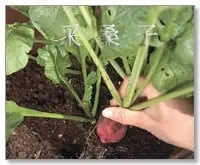
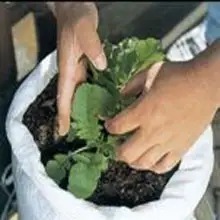
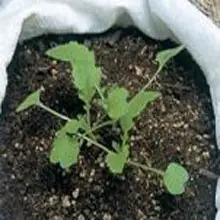
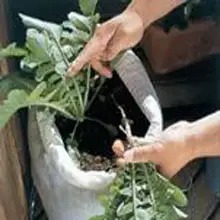
Teach you how to grow cherry radishes at home (with detailed step-by-step pictures)
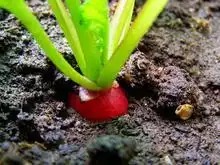
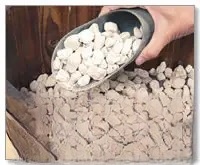
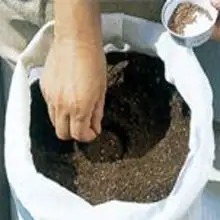
Step 1: Place potting stones on the bottom of the flower pot until the bottom of the pot is no longer visible.
Step 3: Sow the seeds one by one, with a spacing of 1 to 2 cm between each seed, and try not to let the seeds overlap when sowing. To prevent the soil from drying out, cover it with a layer of newspaper before germination to prevent water evaporation.

Teach you how to grow chives at home
First of all, let me tell you: it takes 1 to 2 weeks for chives to germinate, don't be in a hurry Prepare |
Germination method:
The growth temperature of Chinese toon is 20-23℃, the highest temperature cannot exceed 30℃, and the lowest temperature cannot be lower than 15℃.
1. Put the Chinese toon seeds into a cloth bag and rub them gently to remove the outer membrane of the seeds (or rub them directly with your hands, it is easy to remove the membrane)
2. Wash them clean and soak them in clean water for 10-15 hours in summer and 20-24 hours in winter. After soaking, wash them clean and drain the water, then you can sow them.
3. Place a towel, cotton cloth or paper towel on the seedling tray, wet it, and evenly spread the seeds in the seedling tray.

4. Place in a constant temperature of 20-23℃ away from light for germination, spray 1-2 times a day with a spray bottle, and ensure air circulation.
6. When the seedlings are 7-8 cm tall, gradually increase the light intensity.
7. When the leaves of the toon seedlings are green and flat, fully enlarged, and the true leaves have not yet grown, they can be harvested and eaten when they are 8-10 cm in height!

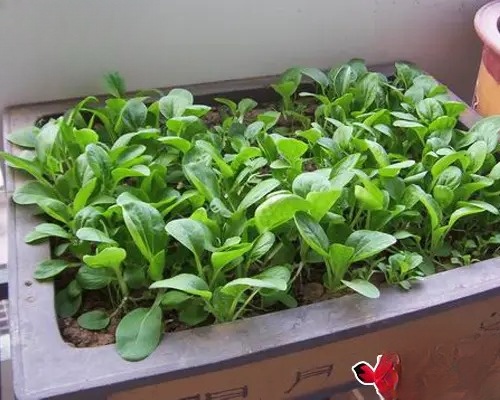
Teach you to grow Chinese cabbage at home
. Chinese cabbage (also known as general cabbage, green cabbage, and oil cabbage) is green in color, rich in nutrients, and more resistant to low and high temperatures. It can be planted in almost all seasons, but it is best cultivated in autumn and summer.
1. The first step of planting Chinese cabbage on the balcony is to prepare
materials: seeds, garden soil, leaf humus, organic fat, cultivation containers, bamboo sticks, watering cans, and small rakes
. a. Choose varieties: Generally, all varieties of cabbage can be used for potted plants. But it is best to choose four-season Chinese cabbage.
b. Soil selection: The nutrient soil should be loose, breathable, and water-retaining and fat-retaining. Generally, garden soil, leaf humus and organic fat are mixed in a certain proportion.
c. Cultivation container: You can use shallow flower pots, wooden basins, foam plastic boxes, etc. The depth of the container for planting a single plant is generally 15-20 cm. You can also build a cultivation trough with bricks on the roof, and you can also buy a special flower pot for growing vegetables.
2. The second step of planting Chinese cabbage on the balcony is sowing and
seedling raising. a. Chinese cabbage can be sown directly or transplanted. Soak the seeds in warm water at 50-55℃ for 15 minutes, and then soak them in water at room temperature for 6-8 hours.
b. When the seeds are almost soaked, put the nutrient soil into the container and level it, water it with a watering can, then evenly sprinkle the seeds on the soil surface, and then cover it with a layer of 1cm fine soil at home.
3. The third step of planting Chinese cabbage on the balcony is to put it into the pot .
a. If you need to transplant the seedlings, transplant them into the pot when the seedlings have 4 leaves.
b. Wash the flower pots before and after potting, put tiles on the bottom of the pot, and fill the nutrient soil to 3 to 4cm from the edge of the pot. Dig 5 to 7cm deep holes at intervals of about 10cm.
c. Carefully dig out the cabbage seedlings with bamboo sticks, and when planting, vertically plant the roots and stretch them in the holes, straighten the plants, and bury them.
d. Water them after planting.
4. The fourth step of planting Chinese cabbage on the balcony is daily management
a. Light conditions: Chinese cabbage likes a warm and humid environment. When cultivating, it can be placed in sunny places such as the rooftop and balcony at the bottom of the building.
b. Before transplanting and slowing down the seedlings, keep them moisturized, keep them warm, and shade them. After 4-5 days, they will gradually see the sun and can be slowed down.
c. Fertilization management: During the growing period, water and fertilize them 2-3 times, preferably with nitrogen, phosphorus and potassium compound fertilizers.
d. They can be harvested and eaten 20-40 days after sowing.
5. Step 5 of planting Chinese cabbage on the balcony. Precautions
a. It is best to water them in the morning and evening. Do not water them at noon when it is too hot. After watering, when the water seeps into the soil and is not sticky, use a small rake to loosen the soil.
b. Sowing can be done all year round in the south, but it is not suitable for growth in the high temperature in summer. It is best to sow in spring and autumn. Sowing can be done in spring, summer and autumn in the north, and it can also be done indoors in winter, but the growing period will be longer.
Teach you how to grow lettuce at home
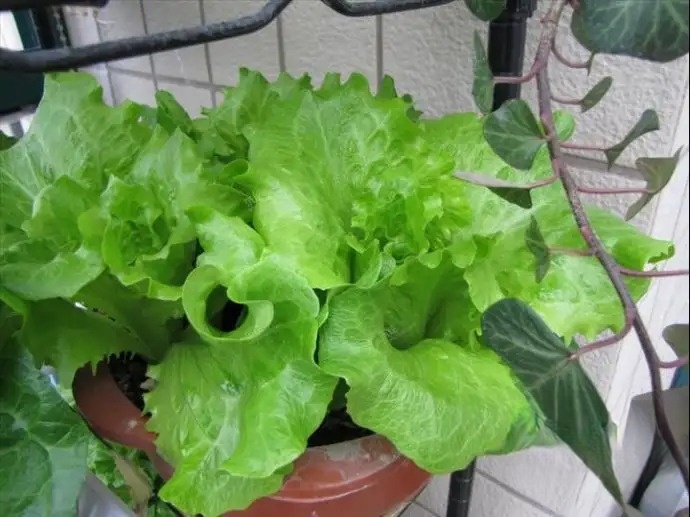
Spring and autumn are the most suitable for planting, of course, it can be planted all year round, such as in Guangdong in the south, it can be planted all year round, and indoor insulation is required in the north. The suitable temperature for growth is 15~20 degrees. Pay attention to shade and cool down when planting in summer.
1 Sowing: Usually, seedlings are raised first. Lettuce seeds are too small and too light, so they need to be accompanied by fine sand. Place them in a container and stir them evenly, then sprinkle them on the soil, cover them with 0.5~1 cm of soil, a thin layer, and germinate in about 3~5 days at 15~20 degrees. It is difficult to germinate when the temperature is higher than 25 degrees. Germination is required when planting in summer. Soak the seeds for 1 night, then wrap them with wet gauze and put them in the refrigerator (about 5 degrees). Sow them when more than half of the seeds are white.
2 Seedling stage: Keep the soil moist, not dry, and keep the soil permeable. Thin out when there are 2 to 3 true leaves, with a spacing of 5 to 8 cm.
3 Transplanting: Transplant the seedlings when they grow to 5 to 6 true leaves. Water thoroughly before transplanting, and move them to a large pot together with the soil on the roots. The spacing between loose-leaf lettuce is 15 cm, and the fruiting plant is 30 cm. Water thoroughly, put it in a cool place in summer to slow down the seedlings, and the roots will be firmly established in about a week, and normal sunlight will be applied.
4 Fertilization: Fertilize once a week after transplanting (nitrogen-based decomposed organic fertilizer is best), and apply organic fertilizer or compound fertilizer mainly composed of nitrogen, phosphorus and potassium once after 2 weeks and 4 weeks after transplanting. Stop fertilizing 2 weeks before harvest.
5 Watering: Water in the morning and evening when the temperature is high, and watering frequently in small amounts is better, but avoid waterlogging. It is suitable to control water in the early growth stage and keep it moist.
Pay attention to the following points:
There are three things to be afraid of when growing radishes:
Radishes prefer heavy base fertilizer and less topdressing. The base fertilizer is generally 65-75 kg of rapeseed cake, 50-60 kg of wood ash, and 20-25 kg of superphosphate per mu. After spreading, turn it into the soil surface, and then sprinkle 250-300 kg of human feces and urine per mu. After drying, turn the soil to make sure it is fully mixed with the soil surface before sowing.
3. Fear of drought
Insufficient water supply can cause the skin of the radish fleshy root to be thick, the flesh to be hard, the spiciness to increase, and the yield to be low and the quality to be poor. The field where radish is planted requires relatively moist soil before sowing. If early-maturing varieties encounter drought weather, they can generally be irrigated once before sowing. The irrigation should be shallow. After the topsoil is dry, sow again. After sowing, cover with straw to prevent excessive evaporation of water. Radish seedlings require less water. If the soil is not too dry, no watering is required. The fleshy roots begin to swell and grow strong until 4 to 5 days before harvest. In this case, the radish should be supplied with sufficient water to keep the soil humidity at 70% to 80%. Watering is generally done in the morning or evening. In drought, water once every 1 to 2 days.
1. You must use a deep container or large cloth bag with a depth of more than 30cm.
2. The soil particles should be uniform.
3. Fertilization should be done frequently.
Planting steps:
1. Put the soil in a cloth bag with a depth of more than 30cm, dig a hole with a diameter of 5cm, sow 4-5 seeds in the hole, cover with soil, and water it with sufficient water.
※Use soil with uniform particles. If there are stones or fertilizer clots in the soil, it will cause the white radish to be deformed or forked.
2. Thinning: When 1-2 main leaves grow, thin the seedlings into 3. After thinning, the soil needs to be concentrated at the roots to stabilize the plant.
3. Thinning and topdressing: When 3-4 main leaves grow, thin the seedlings into 2, apply fertilizer to the roots, and concentrate the soil at the roots.
4. Thinning and topdressing: When the main leaves grow into 5-6, thin them into one seedling, apply fertilizer to the roots, and concentrate the soil at the roots.
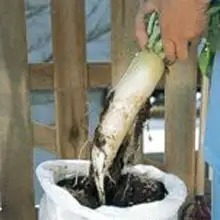
5. Harvest: When the root diameter grows to 5-7cm, it can be harvested.
※ If you harvest too late, the white radish will have many pores, so please be sure to harvest as early as possible
.
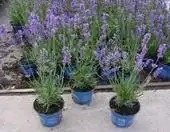

For centuries, lavender has been regarded as a symbol of love, cleanliness, purity, protection, longevity, gratitude, patience and peace. But the strange thing is that it also represents "doubt", because poisonous snakes like to hide in lavender bushes, so this flower language is to remind people to be more careful when harvesting.
Cultivation management:
The cultivation environment needs full sunlight. If the sunlight is slightly blocked, it will grow poorly. May to September every year is the most painful time for it. It is best to move it to a shaded balcony with a roof to avoid strong sunlight, northwest wind and heavy rain. In areas with severe winters, feather-leaf lavender can be placed in a greenhouse for the winter.
The soil prefers well-drained and moderately fertile soil.
Fertilization Never apply fertilizer in summer.
Watering: In summer, choose to water in the evening.
After lavender blooms, you need to remove the dead flowers and do a small pruning; if you want to prune it into a hedge or specimen tree, you can do it in spring. It can tolerate strong pruning, and you need to prune it once in early spring every year to maintain a dense plant shape, but you need to be careful not to damage the old stems, because new branches cannot grow again from severely lignified areas.
Repotting: In autumn, when the plants are growing vigorously, if they are too large, you can repot them. The diameter of the pot only needs to be 2-3 cm larger than the original one. Don't repot too large at once to avoid water accumulation.
Propagation from seeds requires 20-30 days of germination and is not easy to care for. Generally, you can buy mature lavender plants, cut off 5-10 cm top buds, and make cuttings. They will take root in about 25 days. It is suitable to do this from October to May of the following year.
How to grow lavender from cuttings:
Prepare materials: flower pots, potting soil, strong lavender pots, and a watering can filled with water
Steps for cuttings
1. Put the culture soil into the flowerpot.
2. Cut a branch of lavender 10 cm below the top.
3. Pull out the extra leaves at the bottom of the cut lavender branches by hand to make them bare.
4. Insert the bare part into the prepared flowerpot filled with culture soil and then water it thoroughly.
How to repot lavender:
When lavender grows up, in addition to pruning, it should be repotted frequently so that it can grow more luxuriantly.
Prepare materials: a large empty flower pot, potting soil, lavender pot, and a watering can filled with water.
Repotting steps
1. Spread fresh culture soil (about the amount of a small pot) on about 1/3 of the bottom of the large flower pot.
2. Loosen the soil of the lavender pot plant and place it in a large flowerpot.
3. Spread the remaining culture soil around the hole and level it.
4. Finally, water it thoroughly and you are done.
Harvest and storage:
The flowers can be harvested in due time during the flowering period, picked together with the flower stems, and hung upside down in a cool and ventilated place to dry or collected in a jar. The flowers, stems, and leaves can also be harvested together to make essential oil.
Application and efficacy:
Greeks often use lavender to treat coughs and insomnia. It has the effect of relieving stress and relaxing nerves. Europeans use it as a cell regeneration promoter for skin allergies, trauma, and sunburn. It has a strong antibacterial effect and has a soothing effect on preventing colds and coughs and calming nerves. It should be noted that lavender also has the effect of inducing menstruation in women, so it is not suitable for women in the early stages of pregnancy.
There are fewer dishes that go well with it, and sweet lavender has a better taste and works best when combined with pastries.
Drinking tea with fresh leaves or dried flowers in small amounts with other herbs can promote sleepiness and relieve stress. Do not use more than 10 plants in a cup, otherwise it will taste bitter.
Bath lavender series bath products have been women's favorite since ancient times.
It is incorporated into various beauty care products and has a astringent effect.
Essential oils can be used with an incense lamp or added to base oils for *, which has the effects of calming, anti-depression, disinfection, and improving insomnia. Experiments show that inhaling lavender oil for 3 minutes can reduce depression index, make people more relaxed, and make calculations faster and more accurate, and make your dreams calm and peaceful.
Flower art can be made into dried bouquets, pressed flower works and fresh flower bouquets, which are beautiful and charming.
The most beautiful flower in the herb garden is often lavender. Lavender is irreplaceable in mixed and herb gardens. Dwarf lavender is suitable for potted plants, rock gardens or as low hedges, while taller varieties can be planted as natural hedges. It is often used as a border in formal gardens.
Craft dried flowers can be used in lavender wands, sachets, potpourri, scented linens and winter decorations to add interest to life.
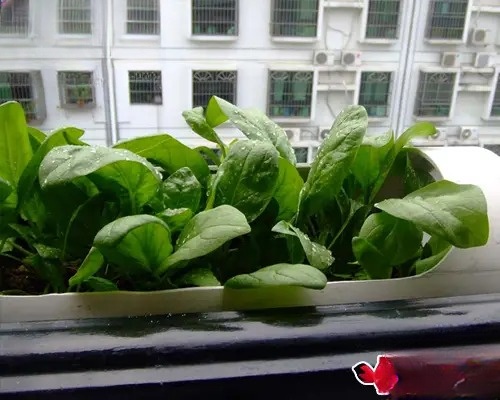
Teach you how to grow spinach in pots at home
Sowing: Direct sowing of spinach, that is, from sowing to harvesting, is done in one pot, no need to transplant. Sow seeds evenly in the pot, and you can sow them densely. Cover with a thin layer of soil, sprinkle some plant ash, water to moisten the soil surface, and the sowing is complete.
Spinach, coriander, and chrysanthemum are suitable for direct seeding. Plant them densely and eat the ones that grow first. When there is a spinach plant of about 10x10 square centimeters in the pot, you can eat it. Fertilization: In addition to applying enough base fertilizer, liquid fertilizer once a week is a necessary condition to ensure the healthy growth of vegetables.
Fertilization: In addition to applying enough base fertilizer, liquid fertilizer once a week is a necessary condition to ensure the healthy growth of vegetables. Liquid fertilizer can be simply bought rapeseed cake, added with water and decomposed (about 1 month in spring and autumn). Then pour out the liquid, dilute with water and water the pot soil. The so-called thin fertilizer is applied frequently, and more water is added (1:20~30) to avoid burning the roots.
Pests: When growing your own vegetables and using naturally decomposed organic fertilizer on the soil, small flying insects will breed; for organic cultivation, you cannot spray pesticides. You can also use some water soaked in cigarette butts and brush the places where there are insects.
Key points to note
1. It is best to plant in a place with high temperature and good sunshine.
2. To reduce the burden on branches and trunks, the first fruit needs to be picked early.
3. After the fruit is harvested, fertilize once every two weeks.
Planting steps

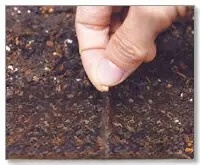
1. Put soil in the pot, dig 3-5 holes with your fingertips, put 1 seed in each hole, cover with soil and then water it with sufficient water.
※ Buying seedlings directly and planting them is the easiest method.
2. The first thinning of seedlings: The seeds will germinate after about 1-2 weeks, and after the two leaves grow together, they can be thinned into 3 seedlings. After thinning the seedlings, the soil needs to be pressed lightly to stabilize the seedlings.
※ Remove seedlings with poor leaf shape and slow development.
3. The second thinning of seedlings: After the main leaves grow out, the seedlings can be thinned, and the one with the best growth condition
needs to be retained. ※ When thinning the seedlings, pull them straight and carefully from the roots.
4. Repotting: Put soil in the pot, dig a hole about the same size as the seedling pot, and then bury the seedlings and soil shallowly in the hole.
※May is the best time for transplanting. Transplanting too early will affect the health of the seedlings.
※A temporary support is required to fix the seedlings. The thin rope on the stem should not be too tight.
5. The support can be erected about 12 weeks after sowing, leaving the main branch connecting the first flower and the buds on both sides, and picking the remaining side buds. After the roots are stable, erect a long support for support.
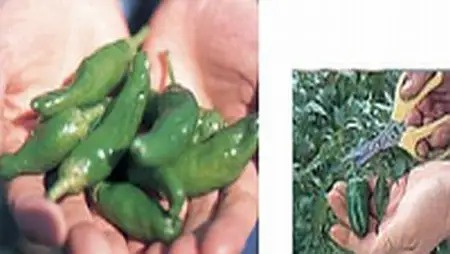
6. Topdressing: After the fruits gradually grow, you can start topdressing, once every two weeks, mix the fertilizer in the soil, or use liquid fertilizer. If you neglect to fertilize, you may grow too spicy green peppers.
7. In order to ensure that the stems have sufficient nutrients, you can harvest in advance when the first fruit grows to about 4-5cm.
8. When the fruit grows to 5-6cm, it can be harvested. Because the fruit grows fast, it is easy to make the branches tired, so please harvest as soon as possible.
※Cut it off from the fruit stem with scissors. If you harvest it too late, the skin will become hard.
Teach you how to grow wolfberry in pots at home
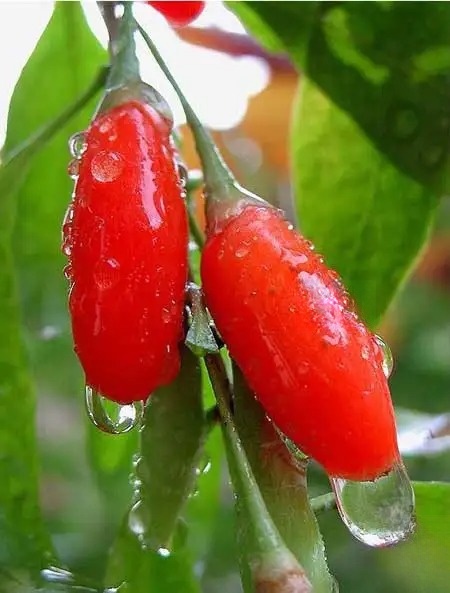
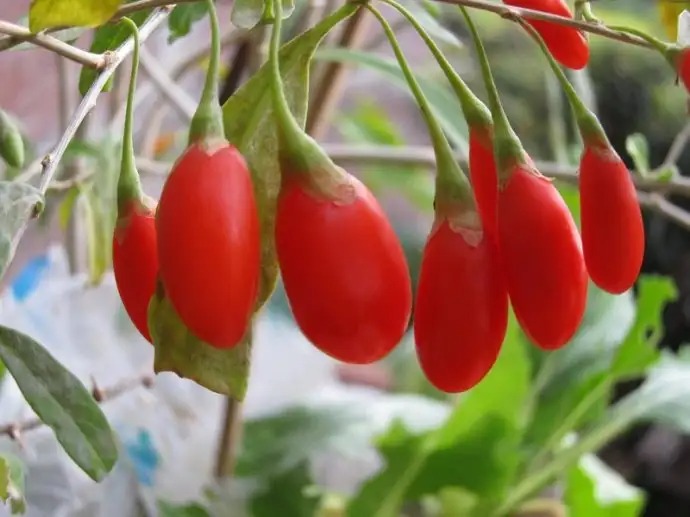
[Growth habits] Ningxia wolfberries have strong adaptability and can tolerate high temperatures of 38.5℃. They are also cold-resistant and have no frost damage at -25.6℃. They are drought-resistant and can still grow in deserts. It is a light-loving tree species. It grows strong under full light, but grows thin and weak under shade, with very few flowers and fruits. It has no strict requirements on soil, is salt-tolerant, has poor waterlogging resistance, and is not suitable for planting in low-lying waterlogged areas.
[Cultivation tips]
1. Sowing: Soak the seeds in 40℃ warm water for 24 hours before sowing to increase the germination rate. The general germination rate is about 90%. The sowing period is from late March to mid-April. Mix the seeds with some fine sand and sow them evenly in the pot. Cover the soil and water them lightly. Keep the soil moist. Seedlings will emerge in 5-7 days at a temperature of 17-21℃.
2. Thinning: When the seedlings are 3-5 cm high, thin out the weak seedlings and overcrowded seedlings.
3. Topdressing: Apply human and animal manure or nitrogen fertilizer twice during the seedling stage. When the wolfberry is planted in the flowering and fruiting period, apply phosphate ammonium compound fertilizer twice, 50-100 grams per plant, and then water it. From late October to early November every year, open a circular ditch on one side of the tree root to apply farmyard manure, cover the soil, and water it.
4. Daily management:
1) Placement: The wolfberry pile landscape should be placed in a well-ventilated and sunny place; if it is placed in
a sunny place, the light is insufficient, the branches will be thin and the flowers and fruits will be scarce, or even no flowers and fruits will be produced.
2) Dormancy management: Wolfberry is dormant twice a year, in the cold winter and hot summer respectively. All the dormant leaves fall off in winter and can be placed outdoors or in a sunny place on the balcony to safely spend the winter. When the temperature rises to around 10℃ the following year, wolfberries begin to sprout and branch out; around the summer solstice (late June), they enter dormancy or semi-dormancy again, and all the leaves on the tree gradually fall off or there are few leaves. The wolfberries can be placed under a shade net or on a north-facing balcony to spend the dormant period.
3) Pruning and leaf picking: Before the wolfberries sprout in the spring of the following year, fruit picking and heavy pruning are carried out at the same time. Before the beginning of autumn, the summer dormancy of the wolfberries will end, and pruning is carried out again, the same as spring pruning. The wolfberries should be pruned twice a year. The first is to use scissors to cut off all the wolfberry leaves in early summer (late June) (cut in the middle of the petiole, do not damage the bud eye). The wolfberries will recover about two weeks after the beginning of autumn, and green buds will soon grow from the buds. The second is to pick leaves in early autumn (late August), so that the flower buds and leaf buds will sprout at the same time.
4) Watering and fertilizing: During summer dormancy, keep the pot moist without water accumulation. In late August, water when the soil is dry and water when it is wet. Water thoroughly when the soil is dry, but remember not to dry it to the point of no return, which is conducive to flower bud differentiation. Keep the pot moist during flowering and fruiting, otherwise it is easy to cause flowers to fall and dead fruits. After the fruits are all red and yellow, reduce the amount of watering appropriately, as too much water will cause the fruits to fall. Fertilizing wolfberries starts in April, and apply decomposed organic fertilizers mainly composed of nitrogen fertilizers once a week to help wolfberries accumulate more nutrients and lay a good foundation for later flowering and fruiting. Stop fertilizing from May to July. In early September, new buds sprout, and apply decomposed organic fertilizers mainly composed of phosphorus fertilizers every 10 days to promote the reproductive growth of wolfberries. Stop fertilizing when the buds show color. Apply fermented grass juice fertilizer 2 to 3 times every 10 days when fruiting.
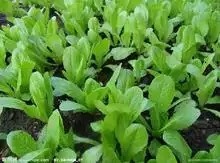
Teach you how to grow lettuce in pots at home
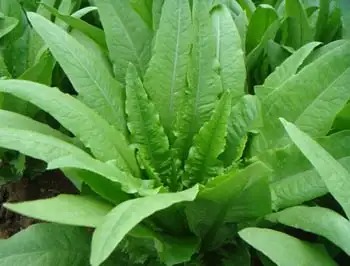
Lettuce
Other names: sesame oil lettuce, lettuce, bitter lettuce
Planting season: August-September (can be sown in all seasons, suitable for indoor planting in winter in the north)
Soil selection:
The vitality of lettuce is very strong, and
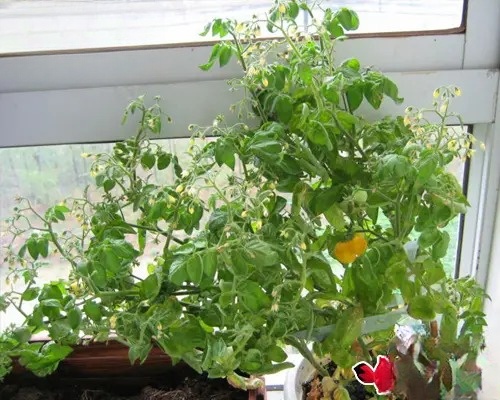
Teach you how to plant cherry tomatoes in a balcony pot.
Items to prepare:
seeds, plastic pots, large ceramic pots, pebbles, soil, fertilizer, pillars, ropes.
Cultivation points:
1. Good ventilation, sufficient sunlight, good drainage, and water immediately when the soil surface is dry;
2. If the side branches grow too vigorously and affect the growth of the main branches, they need to be budded. Smaller varieties do not need to use pillars, nor do they need to be budded. Suitable temperature for germination: 20-30 ℃ Suitable temperature for growth: 18-28 ℃
3. Planting period:
Sowing: May to August Planting: June to October Harvest: August to February
--------------------------------------------------------------------------------------
First stage: Sowing--thinning seedlings
1. Use a small plastic pot, put a small stone at the bottom of the pot to prevent the soil from leaking out, put the soil into the plastic pot, and water it thoroughly. 
2. Use your fingers to dig a small hole and sow 2 or 3 seeds. Spray water daily to keep them moisturized. 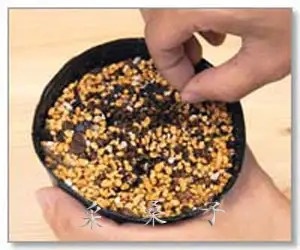
3. 3-4 days after planting, slender cotyledons will grow, and the stems and leaves will grow hair to absorb water. 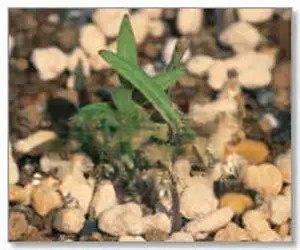
4. Start growing the unique leaves of tomatoes 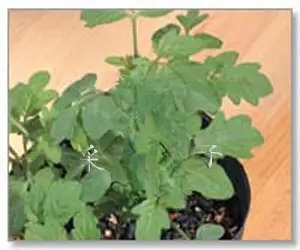
5. Thin out the seedlings before three leaves are formed, gently lift them up from the roots, and leave one seedling with a thick stem and dense leaves in each pot.
The second stage: planting --- support --- fertilization --- bud picking, core picking
planting:
about 3 weeks to 1 month after sowing, you can change the pot for planting.
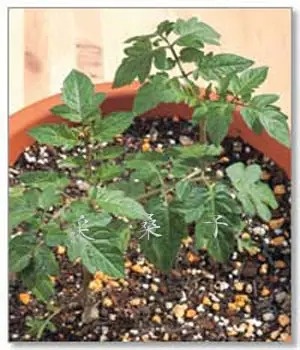
1. Choose a slightly larger beautiful ceramic pot, lay a layer of pot bottom net, put in the pot bottom stone to completely cover the pot bottom 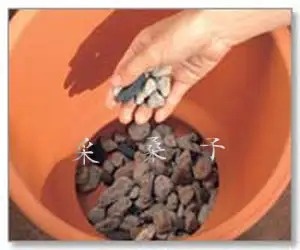
2. Add nutrient soil, remove the seedling plastic pot and place it in the middle of the large pot. Measure the height of the large pot edge, 3cm lower than the large pot edge, remove the plastic pot and put it in the large pot 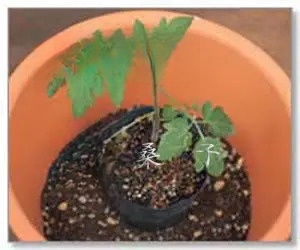
3. After planting, the soil surface must be 3cm away from the pot edge for watering
4. Insert chopsticks or bamboo sticks into the soil at the edge of the pot as a support, and tie it tightly with the 8-shaped method, leaving space for the stem to grow 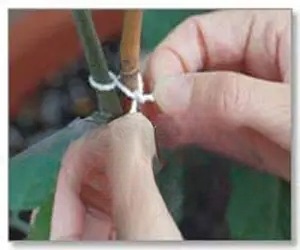
5. Apply solid fertilizer near the plant when the flowers bloom, once every 10 days. 
6. Set up permanent pillars on the four edges and fix them. Pick the buds when they sprout from the branches and leaves. Pick the core when the plant is 1-1.5 meters tall to control the plant height. 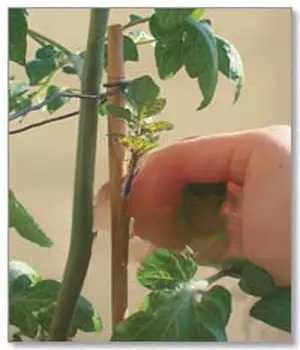
The third stage: fruit harvest 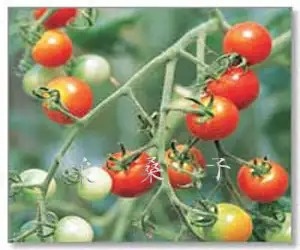
In fact, growing vegetables on the balcony is more like creating a work of art!
Teach you how to grow eggplant in pots at home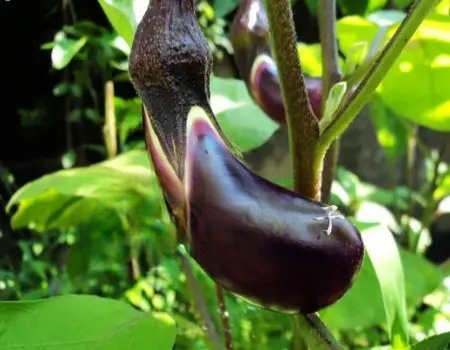
Step 1, material preparation
1) Required materials: seeds, garden soil, sand, compound fertilizer, container, garden shovel, tile, small rake
2) Container: It is advisable to use a shallow pot for sowing, and a slightly larger pot after potting. In addition, the size of the container should be selected according to the number of plants. Generally, a single plant can choose a flower pot with a diameter of 20-30cm and a height of about 25-30cm.
Step 2: Sowing and seedling raising
1) Soak the seeds in 50-55℃ warm water for 15 minutes, then soak them in clean water for 10-12 hours. After the seeds absorb water and swell, remove them and drain them before sowing.
2) Before sowing, put the prepared nutrient soil into the pot, 3-4cm away from the edge of the pot, water the nutrient soil thoroughly, wait for the soil to dry slightly, sow the seeds or soaked seeds in the container, preferably 10-12cm apart, and cover them with a layer of 1cm fine soil after sowing.
3) After sowing, the suitable daytime temperature is 25-30℃ and the nighttime temperature is 14-22℃; after the seedlings emerge, the daytime temperature is 20-26℃ and the nighttime temperature is 12-18℃.
Step 3: Potting
1) The plant can be potted when it grows 3-4 leaves.
2) Before potting the seedlings, wash the flower pots, place tiles or stones in the holes at the bottom of the pots, fill them with potting soil, 3-4cm away from the edge of the pots, and dig a 5-6cm square pit in the middle.
3) First use a gardening shovel to dig out the seedlings 5cm around the roots of the original pots, and plant them in the prepared pots. The planting depth should be slightly deeper than the original soil.
4) After burying the seedlings, water them enough.

Step 4, daily management
1) Water management: Eggplant likes a warm and humid environment. Water twice in the morning and evening during the growing season. Water 2-3 times a day during high temperature and drought. If the leaves are found to be wilting, spray water on the leaves and water them in time. After watering, loosen the soil with a small rake when the soil is not sticky.
2) Fertilization management: Eggplant likes fertilizer. In addition to applying enough base fertilizer, thin fertilizer should be applied frequently at ordinary times. It is okay to apply thin fertilizer every day.
3) When the eggplant that appears during the first branching blooms, keep the branch under the door eggplant (the door eggplant is the first eggplant to be produced) and wipe off the remaining axillary buds. After the door eggplant is harvested, remove the old leaves close to the ground.
4) Remove the top buds when the four ears of fruit are produced, and wipe off the branches on the main stem and the first and second branches at any time.
5) After the leaves grow densely, remove the large, withered and old leaves; when picking leaves, if you find long branches, overcrowded branches, dead branches, and diseased and insect-infested branches, you should cut them off.
6) When necessary, thin out the flowers and fruits, generally leaving 1 to 5 fruits per inflorescence.
Step 5, Notes
1) Do not allow water to accumulate in the flowerpot.
2) Generally, it is the right time to harvest when there is little white part of the peel at the junction of the sepals and the fruit. Harvesting should be done in the morning or evening to prevent breaking branches. The harvesting period of eggplant can be appropriately advanced.
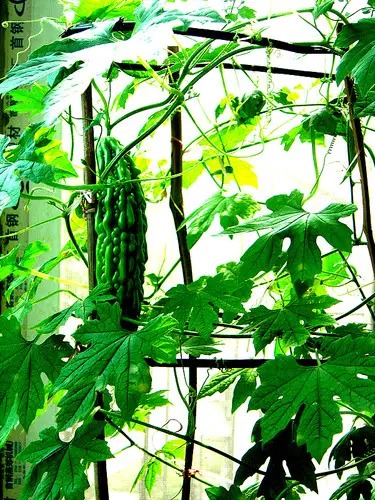
Teach you how to grow gourds at home

Ornamental gourds are highly adaptable and have low requirements for soil and temperature. The suitable temperature for growth is 20-25℃. When planting, the sowing time should be mastered according to the climate conditions of each region. Sowing can be done from the end of January to August, but it is mainly cultivated in spring and autumn. The soil used for sowing should be loose and water-retaining.
Choose seeds with full grains for sowing. Because the seed coat of ornamental gourd seeds is thick and has poor water absorption, the seeds should be soaked in 30℃ warm water before sowing. Soak small gourd seeds for 5-6 hours to allow the seeds to fully absorb water. After soaking, take the seeds out of the water, spread them out, and dry them.
When sowing, insert the seeds into the pots one by one with the tip of the seeds pointing downward, with a row spacing of 5 cm and a seed spacing of about 3-5 cm. After sowing, cover the soil with 1-1.5 cm and water 2-3 times to avoid uneven emergence. The suitable temperature for seed germination is 30-35℃. Covering with plastic film to keep warm and moisturize is conducive to seed germination. Sowing in autumn, when the temperature is high, it is necessary to cover the shade net to cool down the seedlings. Generally, 3-4 days after sowing, the seeds begin to germinate and emerge from the soil, and the plastic film is removed in time. After 7-10 days, the cotyledons are fully opened.
Keep the soil moist during the seedling period, avoid drought, and control watering appropriately when the plant reaches 2 true leaves. When the plant reaches 4 true leaves, strengthen fertilizer and water management, and it will be easy to grow in the future. Just pay attention to pests and diseases such as aphids.


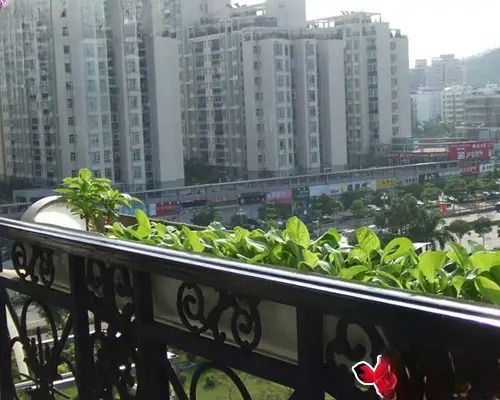
A complete guide to growing vegetables on the balcony
Balcony vegetable planting strategy 1: What vegetables to plant on the balcony?
"Growing flowers is good, but growing vegetables is even better." If you grow flowers well, you can enjoy them; if you grow vegetables well, you can not only eat the pollution-free vegetables you grow, but also the green branches, leaves and fruits, which can become a beautiful sight. But we city dwellers living in the jungle of steel and concrete don't have a large piece of land, so how can we grow vegetables? It doesn't matter, a small balcony is actually a good place to grow vegetables. The following will introduce the knowledge, methods and tips of growing vegetables on the balcony one by one. First, let's introduce what vegetables are suitable for growing on the balcony.
Choose vegetables according to their orientation
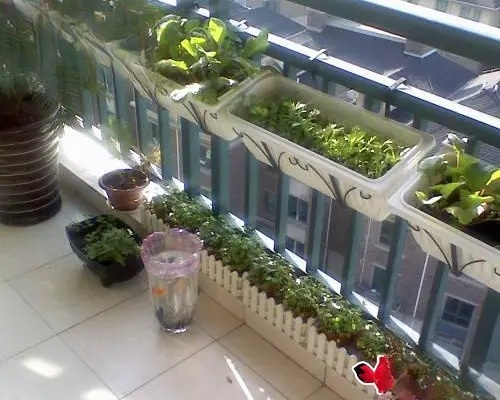
What vegetables to plant on the balcony depends on personal preferences and needs, and on the other hand, it depends on which vegetables are suitable for the environmental conditions of your own balcony. Generally speaking, if space permits, most vegetables and fruits can be planted on the balcony. The so-called environmental conditions of the balcony are mainly the balcony orientation and balcony enclosure. The orientation determines the lighting conditions of the balcony, while the balcony enclosure determines the temperature conditions of the balcony. The temperature in a fully enclosed balcony is also higher in winter, and the temperature limit is smaller. The range of vegetables that can be selected is also wider, and vegetables can be planted basically all year round. The temperature in a semi-enclosed or unenclosed balcony is lower in winter, and it is generally not easy to plant vegetables in winter. In summer, the direct sunlight causes the temperature to be too high, and attention should also be paid to shading to protect the vegetables.
What is more important is the orientation of the balcony. If the temperature permits, vegetables should generally be selected according to the orientation of the balcony.
South-facing balconies are ideal for growing vegetables because they are full-sun, sunny, and well-ventilated. Almost all vegetables grow best under full-sun conditions, so vegetables can be grown on south-facing balconies all year round, such as cucumbers, bitter melons, tomatoes, beans, day lilies, apricots, mustard greens, zucchini, green peppers, lettuce, and leeks. In addition, aquatic vegetables such as lotus roots, water chestnuts, and water chestnuts are also suitable for growing on south-facing balconies. In winter, most parts of south-facing balconies can receive direct sunlight, and simple insulation equipment can be set up to create a good environment for growing vegetables in winter.
East-facing and west-facing balconies are semi-sunny, suitable for growing light-loving and shade-tolerant vegetables, such as onions, lettuce, rapeseed, leeks, loofahs, coriander, radishes, etc. However, the temperature on west-facing balconies is higher in summer, which can cause sunburn to some vegetables, causing them to drop leaves in mild cases and die in severe cases. Therefore, it is best to plant vine-like and heat-resistant vegetables in the corners of the balcony. In summer, you should also try to protect yourself from the strong light and radiation reflected from the back floors.
The north-facing balcony has almost no sunlight all day, so the selection of vegetables is the smallest. You should choose shade-tolerant vegetables, such as lettuce, leek, asparagus, Chinese toon, dandelion, water spinach, and auricularia auricula. In summer, you should also try to prevent the strong light and radiation reflected from the back floor.
Which vegetables are best to grow on a balcony?
Fast-growing vegetables with a short growth cycle: rapeseed, green garlic, sprouts, mustard greens, bok choy, and lettuce
Vegetables with a long harvest period: tomatoes, peppers, leeks, coriander, cilantro, onions, etc.
Space-saving vegetables: carrots, radishes, lettuce, onions, ginger, cilantro
Easy-to-grow vegetables: bitter melon, carrots, ginger, onions, lettuce, bok choy
Vegetables that are not prone to insects: onions, leeks, sweet potato leaves, ginseng grass, aloe vera, caraway
What vegetables should beginners choose?
Beginners can choose vegetables that are easy to grow or fast-growing vegetables. For example, bok choy and lettuce, two fast-growing vegetables, can be grown all year round and grow quickly, and can be harvested in about five or six weeks. Bitter melon, onion, ginger, etc. are highly adaptable and have a special taste, so insects don't like to approach them, and they can grow well without pesticides or fertilizers.
Where can I buy seeds and seedlings?
You can usually find the seeds or seedlings you need at farmers' homes, gardening stores, flower markets, vegetable markets, agricultural markets, seed stores, etc.
Foreign seed companies have long noticed the market for home vegetable cultivation and have continuously developed dwarf and mini varieties of various vegetables to suit small spaces. There are still few such dwarf and mini varieties on the market. I believe that as more and more people like to grow vegetables at home, there will be more and more such vegetable varieties on the market for us to choose from.
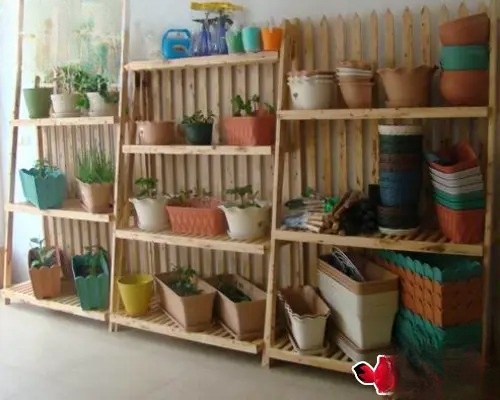
Balcony vegetable planting strategy 2: What container to use for planting vegetables?
Almost any type of container can be used to grow vegetables, as long as it is strong enough and provides enough space and drainage channels. In addition to traditional professional containers such as flower pots and flower troughs, many utensils in daily life can be used after modification, such as plastic pots, buckets, flower boxes, flower troughs, wooden boxes, aluminum boxes, galvanized iron boxes, plastic boxes, jars, food cans, and even bathtubs, tires, sacks, barbecue trays, etc. But no matter what container you choose, make sure there are drainage holes at the bottom.
Pots, buckets, boxes, jars, baskets, pots and other daily utensils can be used to grow vegetables.
Tuber vegetables such as potatoes can be grown in bags
Onions, leeks, garlic sprouts, etc. can be planted in a baking tray
Tires, sacks, etc. are also good containers for growing vegetables.
Drainage holes
No matter what container you choose to grow vegetables, you must ensure that there are drainage holes at the bottom to ensure smooth drainage. The drainage of the container is very important. Poor drainage will suffocate and rot the plant roots; too fast drainage will cause the plant to die due to lack of water. Professional containers such as flower pots and flower troughs purchased on the market have drainage holes at the bottom. For containers modified from daily utensils, you need to drill a few drainage holes yourself. Generally, you can drill a few drainage holes with a diameter of 0.5-1cm evenly around the bottom.
To prevent soil loss during watering, you can "pad the pot", that is, cover the drainage hole with broken flower pot pieces, tiles or window screens, and the requirement is to block the drainage hole. To promote drainage, you can put some coarse gravel or pebbles on the pad to keep the drainage unobstructed.
When growing creeping plants such as cucumbers and beans, you can add a "cage" to the flower pot for support.
Materials
Generally speaking, ceramic and wooden containers drain faster than plastic containers and require more watering. Don't place plastic containers near windows, as they are lightweight and can be easily blown over by the wind. Don't use high-pressure treated wooden containers, which contain chemical preservatives. Although this method protects the treated wood from termites, decay, and other harmful factors for a long time, the wood itself also contains toxic substances that can poison plants. If you make your own wooden containers, it is best to use corrosion-resistant wood, such as pine or fir.
For information about the material and selection of flower pots, please refer to "Home Gardening: How to Choose Flower Pots?"
Be careful with black
containers, as black absorbs heat and can damage plant roots. If you choose a black container, it's best to paint it with a lighter color or simply shade the container from direct sunlight.
Size
The size of the container is very important. It is better to choose a larger container rather than a smaller one for growing vegetables. A larger container not only has ample space for fertilizer, but also has a larger water storage capacity, so it will not dry up quickly in the summer. Tomatoes, peppers, beans, etc. require larger containers, and generally a container of about 15-20 liters is sufficient. When buying seeds and seedlings, it is best to consult the seller about the size of the container you need and how to water and fertilize.
Balcony vegetable planting strategy 3: soil and fertilizer
Soilless cultivation
is a technique for cultivating plants without soil, but with substrates (including rock wool, peat, vermiculite, perlite, bark, sawdust, water, etc.) and nutrient solution. Soilless cultivation not only has fast growth, high yield and good quality, but also has few diseases and pests, is hygienic and clean, and only needs to be watered with nutrient solution, which is very convenient to manage.
Soil cultivation soil
is also a good way to grow vegetables at home. Soil cultivation is relative to soilless cultivation, and it also has its advantages, such as strong buffering of pH, good fertilizer and water retention, and the activities of various beneficial bacteria are beneficial to plant growth. Organic cultivation soil is usually used for growing vegetables at home. These soils can be bought in agricultural markets, and special soils can be selected according to the type of vegetables.
Some people think that the soil bought from the market is not good for planting, while some people like to DIY and prepare their own culture soil. For the composition and preparation method of culture soil, please refer to the following articles:
What is culture soil? What types of culture soil are there?
In order to meet the needs of the growth and development of flowers, especially potted flowers, the soil is specially prepared according to the different requirements of various varieties for soil. It is rich in nutrients, has good drainage and permeability (breathable), can retain moisture and fertilizer, does not crack when dry, does not stick when wet, and does not form a crust after watering. It is called culture soil.
There are many types of culture soil, the commonly used ones are as follows:
Leaf humus
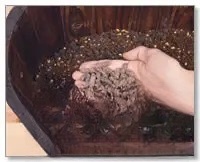
is made by piling up fallen leaves, dead grass, vegetable peels, etc., fermenting and composting them. These materials are piled into a pit, with a layer of leaves (or dead grass, vegetable peels), a layer of garden soil, and some livestock or poultry manure and urine are sprinkled on the pit and piled up several layers repeatedly, and then covered with soil to seal the top. After more than half a year, the rotten leaves and the garden soil are mixed, sieved, dried, and stored for later use. This kind of culture is rich in humus, has excellent physical properties, is conducive to fertilizer retention and drainage, and the soil is loose and slightly acidic.
Manure
is made from cow dung, horse dung, pig dung, sheep dung, poultry dung, soil and weeds that have been piled up, fermented and decomposed. After decomposition, it must be dried and sieved before use. It contains nutrients and humus.
Garden soil and field mud
Garden soil and field mud refer to the topsoil in the garden or field, that is, the cultivated soil for crops that is piled up, exposed to the sun and placed indoors for use.
Pond
mud is widely used in the south. It is made by digging out pond mud and making thin blocks, which are then dried and stored for later use. The thin blocks are broken up when needed. Its advantages are high fertilizer content, good drainage performance, and neutral or slightly alkaline.
Rice husk ash
Rice husk ash is mainly the ash from burning rice husks or rice straw, also known as wood ash. It loosens the soil and facilitates drainage. It contains potassium fertilizer and is alkaline.
Yellow sand
is generally used as culture soil with river sand, which is conducive to drainage and ventilation. It needs to be rinsed with clean water before use to remove the salt.
Sawdust
is a newly developed soil material after being piled up, fermented and decomposed, and then mixed with soil to make the culture soil loose and have good water retention properties.
Brick slag
is made by breaking up tiles or bricks, which is beneficial for drainage and ventilation, but lacks fertilizer.
Garbage
soil is called "resurrection soil", which is made of waste soil from overturned pots and then added with manure. After the soil is decomposed, it is sieved and dried for later use.
How to prepare culture soil?
Because various plants have different requirements for nutrients, acid and alkali resistance, drainage and ventilation, the proportions of preparation are also different. The basic requirements for culture soil should master the following principles:
① Have nutrients in appropriate proportions, including nitrogen, phosphorus, potassium and other trace elements.
②Requires looseness, ventilation and good drainage.
③ There are no diseases, insect pests or other harmful substances that may harm the growth of flowers and trees, such as insect pupae.
④ Remove grass roots, gravel and other debris, sieve and perform general disinfection, such as exposing to sunlight or heating and steaming.
Several methods of preparing culture soil to meet the needs of different plant potting are as follows:
The soil for sowing and seedlings is
2 parts leaf humus, 1 part garden soil, a small amount of manure, and a small amount of sand. Or use 1 part leaf humus, 1 part garden soil, 1 part rice husk ash, and a small amount of manure.
Generally, the soil for potted flowers
is 1 part leaf humus, 1 part garden soil, 0.5 part rice husk ash, and 0.5 part manure soil. Or 1 part humus, 1.5 parts garden soil, and 0.5 parts manure soil.
The soil for shade-tolerant plants
is 0.5 parts of leaf mold, 2 parts of garden soil, 1 part of manure soil, and 0.5 parts of rice husk ash.
Soil for cuttings
Because cuttings do not need nutrients before rooting, yellow sand or frog stones are often used. For example, 1 part of garden soil and 1 part of rice husk ash; or 1 part of garden soil and 1 part of leaf humus soil can also be used. For some flowers, rice husk ash alone can also be used for cuttings.
The soil for acid-loving plants
can be mountain mud, leaf mold, garden soil and a small amount of yellow sand.
The soil for succulent plants
can be 0.5 parts of yellow sand, 0.5 parts of garden soil, and 1 part of leaf humus. Or 1 part of brick slag and 1 part of garden soil.
The soil for camellia, azalea and Michelia
is 2 parts of leaf mold, 1.5 parts of yellow mud, 0.5 parts of burnt mud ash, 1 part of sand, and a small amount of bone meal.
Nowadays, most of the soil used for orchids
is black mountain mud, which is leaf mold formed by the natural accumulation of fallen leaves from mountain forests, or leaf mold with a small amount of yellow sand added.
In addition, there are several soil types to be prepared: 2 parts of
loose soil and 1 part of rice husk ash. Suitable for cuttings. 1 part of light fertile soil, 2 parts of leaf humus, and 1 part of manure soil. Suitable for plants with weak root development and small seeds. 2 parts of heavy fertile soil, 1 part of leaf humus, and 1 part of manure soil, suitable for the cultivation of general flowers. 2 parts of clay fertile soil and 1 part of manure soil, suitable for the cultivation of palm, cycad and other plants with thick roots and rhizomes.
What fertilizers should be used for
growing vegetables at home? Fertilizing vegetables without soil is the simplest, just water them with nutrient solution. The nutrient solution for soilless cultivation should contain macroelements such as nitrogen, phosphorus, potassium, calcium, magnesium, sulfur, and trace elements such as iron, manganese, boron, zinc, copper, and molybdenum. There are nutrient solution formulas for different plants, and some are universal. They can be bought in agricultural markets. You can follow the instructions on the label and mix them properly before watering.
The key to soilless cultivation is the use of nutrient solution. The principle of standard nutrient solution irrigation is to irrigate on sunny days and not on rainy days; irrigate less in the early growth period and more in the fruiting period. The nutrient solution can be recycled and reused. Generally, the nutrient solution should be completely replaced every 20 days or so.
For soil cultivation, you can choose traditional fertilizers or nutrient solution. If you use traditional fertilizers, it is best to choose organic fertilizers, including plant fertilizers and animal manure, and try not to use chemical fertilizers, because chemical fertilizers will leave acid or salt roots, and the potting soil will become acidic or alkaline, hindering the growth of plants. There are various special organic fertilizers on the agricultural market, and you can choose the appropriate organic fertilizer according to the type of vegetables.
If you like DIY, you can also make your own organic compost from
kitchen waste, which not only reduces the amount of garbage, makes full use of waste, and is economical and environmentally friendly. The method of making your own organic compost is very simple: first, put broken tiles or window screens on the bottom of the planting container as a pot, then cover it with soil about 2cm, then put the drained kitchen waste in the container (about 3cm), and then cover it with a thick layer of soil (about 6-9cm), and the compost is ready. You can sow and plant in this container.
Fertilization tips
1. If the vegetables need to be transplanted, wait until after transplanting before watering with nutrient solution.
2. If the vegetables are sown directly without transplanting, water them with tap water first to keep the soil moist. After the seeds germinate and the seedlings grow, nutrient solution can be used.
3. Although different plants have different water requirements, it is generally more appropriate to water them with nutrient solution once a day. If it is a leafy vegetable, water it with nutrient solution twice a day.
4. Water less nutrient solution in the early growth stage and more in the fruiting stage.
5. It is recommended to thoroughly rinse the planting container with tap water at least once a week to remove the unused fertilizer accumulated in the container. The specific method is to pour enough water into the container to form a self-flowing drainage at the bottom. This measure can prevent the accumulation of harmful substances in the culture medium.
6. Sometimes, you can use nutrient solution with added trace elements to irrigate vegetables. You can choose water-soluble fertilizers containing iron, zinc, boron and manganese, and follow the instructions on the label.
Note: The misuse of nutrient solution may cause the risk of excessive nitrate in vegetables.
Balcony vegetable planting strategy 4: sowing and transplanting
There are two ways to plant vegetables, one is to grow seedlings first and then transplant them, and the other is direct sowing. Beginners often prefer to buy seedlings directly at the agricultural market and transplant them at home. This is a simple and fast method, but it will narrow your planting range, because some vegetables such as beans and radishes are inconvenient to transplant and can only be sown directly, and transplanting will damage the normal development of the roots, so they cannot be transplanted. Some vegetables must be transplanted, such as cabbage, cauliflower, mustard, eggplant, etc.
Vegetable planting can be basically divided into four processes: seed pretreatment, sowing, transplanting, and harvesting. The following table shows the growth information of commonly grown vegetables at home. Due to different vegetable varieties and regions, the following table may be different from your actual operation, so it is only for reference. The important thing is to master it flexibly during the operation, find out the rules of vegetables, and you will become an excellent "vegetable farmer" after two attempts!
Information on the cultivation of common vegetables at home
| vegetable | Germination time (days) | Optimum transplanting period (weeks) | Container size | Light Amount* | Harvest time (days) |
|---|---|---|---|---|---|
kidney bean | 5-8 | - | medium | Full sun | 45-65 |
cucumber | 5-8 | 3-4 | big | Full sun | 50-70 |
eggplant | 8-12 | 6-8 | big | Full sun | 90-120 |
Lettuce | 6-8 | 3-4 | middle | Half Sun | 45-60 |
onion | 6-8 | 6-8 | Small | Half Sun | 80-100 |
Green pepper | 10-14 | 6-8 | big | Full sun | 90-120 |
radish | 4-6 | - | Small | Half Sun | 20-60 |
pumpkin | 5-7 | 3-4 | big | Full sun | 50-70 |
tomato | 7-10 | 5-6 | big | Full sun | 90-130 |
Chinese chives | 9-12 | 6-8 | middle | Half Sun | 90-120 |
coriander | 5-7 | 3-4 | Small | Half Sun | 40-50 |
Rapeseed | 4-6 | 3-4 | middle | Half Sun | 40-50 |
Note: All vegetables grow best in full sun, and "part-sun" means that the vegetable can also grow well in part-sun conditions.
Seed pretreatment
Disinfection: Seeds often carry bacteria. In order to reduce diseases in the seedling stage, ensure that the seedlings grow healthily, and allow you and your family to eat healthy vegetables, and avoid giving up your work halfway, it is best to disinfect the seeds simply before sowing. Generally, for seeds bought from the market, it is sufficient to soak them in warm water. Soak the seeds in 60°C hot water for 10 to 15 minutes, then lower the water temperature to 30°C, continue soaking for 3 to 4 hours, take them out and dry them. For seeds with unclean surfaces, long storage times or contaminated seeds, the liquid soaking method can be used. Generally, 100 times formalin solution is used. Soak the seeds in clean water for 3 to 4 hours, then soak them in the liquid for 20 minutes, take them out and rinse them with clean water.
Germination: Whether the seeds need to be germinated depends on the situation. Seeds of fruit and vegetable vegetables such as tomatoes, peppers, eggplants, and cucumbers germinate slowly and can be germinated. The seeds must be soaked before germination, but the soaking time should not be too long. According to the test, it is more appropriate to soak cucumbers for 1 to 2 hours, peppers, eggplants, and tomatoes for 3 to 4 hours (including the soaking time during seed disinfection). , Place several layers of gauze, filter paper or absorbent paper towels at the bottom of the seedling tray, soak them with clean water, control the soaked seeds to drain the water, place them in the seedling tray, and place them in an environment of 28 to 30°C for 1-5 days until the seeds germinate and turn white, then they can be sown. During the germination period, if the seeds are dry, water can be added to the seedling tray to keep the gauze and other bedding materials moist, and keep the seeds moist.
For
direct sowing, just sow the seeds directly into planting containers of appropriate size. If you need to transplant, first choose a plastic tray, glass tray or other container of appropriate size as a "seedling tray". Put culture soil with an appropriate pH value in the container (can be bought in a gardening store or agricultural market), sow the vegetable seeds into the container, and then cover with 0.5-1cm deep soil. Remember that the seeds will not germinate if they are too deep.
Suitable temperature, sufficient water and oxygen are the three elements for seed germination. Place the container in a warm and well-ventilated place, and water it appropriately (for most vegetable seeds, watering once a day is appropriate).
Before sowing, it is best to disinfect the sowing tray with 50% bleach or other disinfectant to reduce the chance of seed contamination.
When transplanted
seedlings reach a certain size, they must be promptly moved to other containers for planting. For example, tomatoes and eggplants usually have 4-5 true leaves, melons have no more than 2-3 true leaves, and cabbages and Chinese cabbages should be transplanted when they have 4-6 true leaves.
Be careful not to damage the tender roots of the seedlings when transplanting. Before digging the seedlings, water the soil or substrate thoroughly so that the roots are covered with more soil or substrate. This can not only reduce damage to the roots, but also increase water absorption and make them survive faster after transplanting. Generally, the planting depth of leafy vegetables should not bury the lowest leaves, otherwise it is easy to cause rot.
Vegetables can be grown in soil or in a soilless manner. The fertilization and watering methods for the two different culture substrates are similar. For details, see "The Complete Guide to Growing Vegetables on the Balcony Part 3: Soil and Fertilizer."
The happiest moment of harvesting is the harvest time, when you see the vegetables that you have carefully watered grow from seedlings to lush green leaves and abundant fruits. You can pick the fruits of your hard labor and enjoy green and environmentally friendly delicacies!
When harvesting, pay attention to the color, texture, and hardness of the vegetables to identify whether they are ripe and when it is the best time to pick them. Some vegetables, such as tomatoes, peppers, and fruits, should be harvested when the fruit reaches a certain hardness, otherwise they will become soft when overripe; while cucumbers, beans, etc. should be harvested when they are young and tender, and the taste is better.
It is best to harvest vegetables in the evening because the nitrate-nitrogen content in vegetables is lowest in the evening.
When harvesting bok choy, leeks, etc., you can pick the leaves to eat without pulling up the whole plant. After a period of time, young leaves will grow again.
When harvesting onions, leave two or three roots in the soil instead of pulling up the whole plant. This way, it will continue to sprout and grow.
Balcony vegetable planting strategy 5: Diagnosis and prevention of common pests and diseases
Vegetables grown in containers, like those grown in the ground, may also be attacked by various diseases and pests. You should pay attention to whether the leaves, stems and other organs of the vegetables are growing well and whether there are pests. Once a problem is found, you should first distinguish whether it is a problem with environmental conditions such as water, light, temperature or a problem with the fertility of the substrate. After eliminating these factors, you can then determine whether it is a disease or a pest.
Common problems in container vegetable growing and their prevention and control measures
Symptoms | Causes | measure |
|---|---|---|
| The plant is leggy, spindly, and fruitless | Insufficient light | Move the container to a location with plenty of sunlight. |
| Excess nitrogen | Reduce the nutrient content in the nutrient solution | |
| The plant starts to yellow from the bottom, lacks vitality, and has a dull color | Overwatering | Reduce watering frequency and check that the container is draining well |
| Insufficient fertility | Increase the nutrient content of the nutrient solution | |
| Plants wilt despite adequate watering | Poor drainage and ventilation | Increase the drainage holes in the container and increase the organic content in the growing medium |
| Burnt edges of vegetable leaves | High salt content of the matrix | Clean the container regularly with tap water |
| The plant grows slowly, has weak resistance, and is slightly purple | Low temperature | Place the container in a warmer place |
| Low Phosphate | Increase the phosphate content in the nutrient solution | |
| Leaves are twisted or notched | Pests | Spraying environmentally friendly insecticides |
| Yellow, dry, powdery or rusty spots on leaves | Diseases | Remove the diseased area and spray with environmentally friendly fungicide |
Once you determine that your vegetables have pest and disease problems, you can refer to the following article to diagnose what kind of diseases and pests they are, then go to a gardening store to buy the appropriate pesticides or fungicides, and then prescribe the right medicine.
Diagnostic methods for vegetable pests
The diagnosis method of vegetable diseases and insect pests can be identified by the morphological characteristics of pests at different stages, or by the remains of pests, such as egg shells, pupal shells, molting, residual hair of insect bodies, dead insect bodies, etc., as well as the excrement of pests, such as feces, honeydew, silk nets, foamy substances, etc.
1. Leaves are eaten, forming notches. They are mostly eaten by lepidopteran larvae and coleopteran pests with chewing mouthparts.
2. There are linear stripes or grayish white or grayish yellow spots on the leaves. This symptom is mostly caused by piercing-sucking mouthparts pests, such as leaf flies or stink bugs.
3. The seedlings are bitten or cut off. This is usually caused by crickets or leaf moths.
4. Honeydew-secreting sooty disease: This type of pest produces honeydew-like excrement that covers the surface of vegetables, causing black spots. It is often dominated by pests that suck juice and discharge liquid, such as various aphids.
5. The heart leaves shrink and become thicker. This symptom is more common on sweet peppers and hot peppers, which is related to mites.
6. The vegetables are damaged inside. This kind of pest usually enters the vegetable body, and it is difficult to see them from the outside. If you find fresh pest feces on or around the vegetable plants and fresh insect mouths on the vegetable plants, it can be judged that the pests are far from the vegetable body. Sometimes, although there are feces and insect mouths, but the feces and insect mouths have dried up, it means that the pests have moved to other places. This kind of pests are mostly moth pests and larvae.
7. The upper part of the seedlings withers and dies. This indicates that the roots of the vegetables are damaged, which is mostly caused by underground pests such as mole crickets, root mites, and root nematodes.
8. Tuberous fruits are eaten and rotted. For example, the underground tubers of potatoes, onions, garlic, etc. rot or are eaten during growth and storage. Most of these are caused by nasal insects and root mites.
In order to identify pests based on these characteristics and take corresponding prevention and control measures, we must first rule out the influence of other factors, such as excessive fertilizer or water causing the upper part of vegetable seedlings to wilt and die.
Cultivate children's interest in planting
Children cultivate flowers and plants, and flowers and plants can also teach children. Planting flowers and vegetables can help children understand that plants, like people, also need food and water to grow and stay healthy. Caring for plants not only helps to cultivate children's sense of responsibility, but also stimulates children's curiosity and imagination. Let children immerse themselves in the wonders of nature, such as seeds germinating, flowers blooming, bees collecting nectar, and insects pollinating, and lead your children to explore the mysteries of nature.
Create a small "plantation" for
your child. Create a small plot of land in the garden for your child as his or her plantation, and make it clear that this is his or her own territory and will not be occupied. This helps to cultivate children's sense of responsibility and independence. Generally, one square meter is enough for children under 10 years old. If there is no garden, you can prepare a few flower pots and other planting containers and place them on the balcony or windowsill, which can also become a favorite "plantation" for children.
Discuss with your child where to build the "plantation".
Discuss with your child where to build the "plantation". This process is a good opportunity for your child to understand that plants need sunlight, water and fertile soil to grow! Then choose a suitable location with your child.
Choose gardening tools that are suitable for children.
Choose gardening tools that are sized for children to ensure that your child is safe and convenient when gardening.
Carefully select plants that are easy to grow, easy to maintain, and interesting.
Children can easily get discouraged, so it is important to ensure that his or her first planting experience is successful and fruitful. First, select plants that are easy to grow, easy to maintain, and grow quickly. Large-seeded plants such as sunflowers, zinnias, peas, and pumpkins are the easiest to grow and grow quickly. Although radishes have small seeds, they grow quickly and are also favored by children. On top of easy seeds, you can choose some interesting plants to attract children's attention and keep them interested in planting.
Choose bright and eye-catching flowers. Children like beautiful and vivid things. Therefore, you can choose those bright and eye-catching flowers, such as impatiens, sunflowers, dahlias, marigolds, rudbeckias, chrysanthemums, periwinkles, crabapples, cockscombs, star flowers, morning glories, echinacea, sweet alyssum, phlox, etc.
Choose fruits and vegetables that children like. If they can eat what they grow, it will be very attractive to children. You can choose to grow some fruits and vegetables, such as carrots, radishes, cucumbers, potatoes, peppers, tomatoes, cauliflower, cherries, apricots, strawberries, etc.
Choose aromatic plants. Plants release scents to attract pollinating insects or to deter pests from eating their leaves. These scents may also attract your children. You can also plant aromatic plants such as lavender, mint, vanilla, basil, etc.
Endless fun
In addition to planting flowers and vegetables, there are many other fun things to do. For example, you can teach children to make insect specimens, leaf specimens, collect seeds, and even make fertilizers by themselves. These processes are good opportunities for children to understand nature, cultivate hands-on skills, and stimulate imagination.
Happy Farm Reality Version - Growing vegetables on the balcony is Lohas vegetables!
Lohas people grow Lohas vegetables: What we grow is not vegetables, but Lohas~