Home gardening fertilization and watering tips
Home flower fertilization and watering experience
There are no excessive or detailed rules and regulations for fertilizing and watering flowers at home. Just follow your feelings and do what you like. This is my personal experience and is for reference only.
About watering flowers at home
Watering is very important. I personally advocate that it is better to keep the soil dry than wet. When the soil is dry, it should be dry thoroughly. When watering, it should be water-tight, that is, there should be water flowing out from under the pot. It is often said that the soil should be wet when it is dry.
Pay special attention to some flowers. If water flows out from the bottom of the pot, it does not necessarily mean that the water is thoroughly watered. For example, the pot soil used for flowers such as cyclamen and Clivia is very loose and has very poor water retention. If the water leaks out after watering, it means that the flower pot is not watered thoroughly at all. The soaking method is often used. That is, put the flower pot in a tray and soak it in the water in the tray for a period of time after watering. The length of time can be determined according to the actual situation. About an hour is fine, and a little longer is also fine. This is to allow the roots, stems, leaves, and flowers of the flowers to fully absorb water.
I have also seen many friends who never water their plants. They fill trays with water and soak them for a long time instead of watering. I personally do not agree with this.
Friends who grow flowers know that there are holes at the bottom of the flower pot, ranging from one to more. The first function is to leak water to prevent moisture accumulation in the pot soil, and the second function is to facilitate ventilation of the flower pot. If you look closely, you will see that the bottom of the flower pot is on the ground, while the hole is suspended in the air.
In addition, watering precautions:
It is best to water the plants at noon in winter, and you can add some hot water.
It is also recommended to water the plants on sunny days, as it is not suitable for watering on rainy days.
About family flower cultivation and fertilization
I remember many friends have said: Don’t fertilize during the flowering period and don’t fertilize in winter.
But from my personal experience: in order to make the flowers bloom during the flowering period, sufficient nutrients must be guaranteed. So it is recommended to fertilize, of course, it must be thin fertilizer and applied frequently.
All year round, I would use several beverage bottles to soak water (a lazy method I learned through trial and error): bone meal, wood ash, bean cake fertilizer, potassium dicyanide phosphate (bean cake fertilizer, bone meal and potassium dihydrogen phosphate are available at the flower market, one yuan a bag, and the wood ash is wheat straw ash that I asked my colleagues to find from the countryside), and fertilizer water fermented with vegetable leaves, apple peels, rice washing water, edamame skins, and bad milk (when fermenting fertilizer in summer, the bottle cap must not be screwed too tightly, or the bottle cap should be loosened from time to time, as everyone understands the reason)
Here’s how to do it:
During the growing season, mainly use self-fermented fertilizer and bean cake fertilizer, and water at the same time. Dig a groove and bury it in the edge of the flower pot, and dilute it with water at the same time. Remember: do not use a fixed fertilizer, reasonably match and rotate watering.
During the bud stage, phosphorus fertilizer is mainly used. Use more bone meal water, and a small amount of potassium dihydrogen phosphate or wood ash water.
During the flowering period, potassium fertilizer is mainly used. Watering is done with more plant ash and a small amount of potassium dihydrogen phosphate water.
Fertilize after flowering
I will fertilize after the flowering period. Most people think that after the flowering period, the flowers will wither and have no appreciation value, so they will not fertilize them on purpose. But I think that the flowering period consumes a lot of nutrients, so in order to ensure that the flowers are lush next year, it is necessary to give enough fertilizer to store nutrients.
About Home Gardening Soil
I don't like to use purchased nutrient soil directly, I use more ordinary garden soil, occasionally mixing some fine sand. In recent years, I have learned a trick that feels good, which is honeycomb coal soil.
Go to the snack bar to pick up the burned honeycomb coal, soak it in clean water for one to two days, then dry and crush it. Large pieces are very suitable for raising immortals, and the crushed foam is very good for making flower soil. It is best to mix it with some ordinary soil.
It is said that when making honeycomb coal, you need to use this soil and that mud to synthesize it, which has comprehensive nutrients and can kill bacteria through burning. Soaking it in clean water can remove the heat. Haha, it makes sense.
Some friends are very particular about it. After crushing the nuts, they will filter them with different sieves and sort them evenly and carefully into different sizes for planting different flowers.
Regarding the disinfection of the soil, some friends will heat it in a microwave, but I am not so particular and sometimes just put it on the balcony to bask in the sun.
What is flower ceramsite
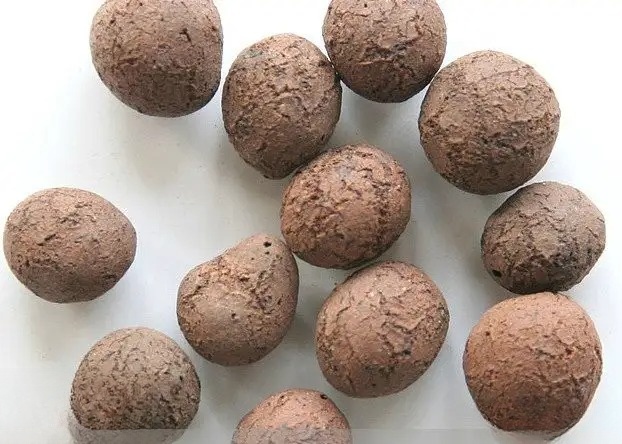
Many novice flower lovers do not know what flower clay pellets are. They only hear other flower lovers talking about clay pellets. This article simply tells flower lovers what flower clay pellets are, and experts can skip this article.
Clay granule is actually a kind of building material. There are many kinds of raw materials for its production, such as clay granule, shale granule, coal gangue granule, etc. The granule that flower lovers generally refer to can actually be any kind of granule. It’s just that because granule is always mentioned in the flower lover circle, many novice flower lovers will think it is granule used for flowers.
Next, let's talk about the use of ceramsite in flowers. In fact, the main use of ceramsite is to increase the air permeability and water permeability of the soil, or to serve as a base stone. It has no other use. The base stone is sometimes used when some flower pots are very deep, and the bottom needs to be padded with something to increase the air permeability and water permeability of the pot soil. Of course, flower lovers can also use other materials instead, such as small broken bricks, stones, etc.
In addition, expanded clay is not expensive and can sometimes be seen on construction sites. It is not a necessity for growing flowers, so flower lovers can use or purchase it flexibly.
Some things to note for beginners when growing flowers
In recent years, many new people have joined the ranks of flower lovers. Since most people do not know how to maintain their flowers and are too doting on them, their flowers not only fail to improve but also become worse until they wither and die. Not only do they suffer financial losses, but they also suffer emotional damage. In order to prevent this from happening, the following will introduce several major principles of indoor flower maintenance for novice flower lovers.
1. The pot soil cannot accumulate water
The roots of plants need water as well as air. If water accumulates in the soil for too long, the roots of the plants will suffocate and die due to lack of air to breathe. You should learn how to water plants properly.
2. Let the plant go dormant
Many indoor flowers are in a relative dormancy period in winter or after flowering. During this period, the plants require less water and fertilizer than during the vigorous growth period, and the required temperature is also lower.
It is normal for some plants to go dormant after flowering
Popular potted flowers, such as cyclamen, gloxinia, and chrysanthemum, gradually turn yellow and fall off their leaves after blooming, entering a dormant period. This is the normal growth process of the plant, not caused by your poor maintenance. Increase air humidity In the north, the air is very dry after indoor heating in winter. You should try to increase the indoor air humidity.
3. Deal with plant problems quickly
Experts and beginners will encounter some problems. If you find insect pests, they will not cause much harm as long as they are removed in time. If they are infected with viruses, it will be more difficult to treat and they should be isolated as soon as possible. Overwatering may not cause any major problems at first, but it will lead to death over time. You must learn to recognize the early symptoms of plant problems.
4. Combine multiple plants together for maintenance
Almost all plants grow better and look better when you plant them together. You should learn why and how to plant them together.
5. Learn to change pots
After one or two years of potted flower cultivation, most plants gradually become weak. In many cases, they can be revitalized simply by changing to a larger pot.
6. Choose the right type
To make plants grow luxuriantly indoors, you must choose species that are suitable for indoor growth conditions. In other words, you cannot let shade-loving plants grow well in direct sunlight and under windows.
7. Choose the right tools
Commonly used tools include: a watering can with a long spout and a fine spray nozzle; a sprayer to increase humidity, remove dust and control pests; excellent potting substrates, such as peat soil, river sand, moss, etc.; flower pots, trays or pots of different sizes; palm stakes for the growth of climbing plants and nylon or metal wire for tying plants; pesticides, fungicides, fertilizers, leaf brighteners; pruning shears, grafting knives, etc.
The above are several principles for indoor flower cultivation for beginners. I hope that all newcomers can summarize their experiences and lessons based on their own practice to avoid detours and get their flowers and plants in good condition as soon as possible.

Several issues that should be paid attention to when growing southern flowers in the north
How to grow southern flowers in the north is a question often discussed by northern flower lovers. The author believes that in order to grow southern flowers in the north, we must first understand the natural conditions of the southern flowers' origins, create a microenvironment suitable for their growth based on the ecological habits of various flowers, and then with careful and meticulous care, we will surely be able to make the flowers bloom as desired. Here are a few issues that should be paid attention to when growing southern flowers in the north for reference.
1. Choose suitable cultivation soil
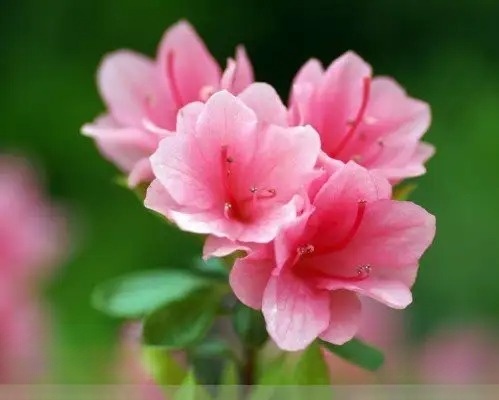
Most of the southern flowers grown in the north were transported from the south. Bare-root seedlings should be potted immediately. If they are in the original pots, they should be repotted after one year of cultivation in the north. So what kind of soil should be chosen as the cultivation soil? The author believes that the cultivation soil for southern flowers should be acidic or neutral, and have good permeability. As for what kind of flowers are suitable for what kind of soil, they should be treated differently. For example, white orchids should use plain sandy soil, azaleas should use Clivia soil, Milan, gardenia, and jasmine can be mixed with leaf mold, farmland soil, and coarse river sand in a ratio of 5:3:2 to make the cultivation soil, but it must be disinfected before use.
2. Control the temperature and light
Flowers in the south prefer a warm environment, and too high or too low a temperature is not conducive to their growth. According to the author's experience, it is best for all kinds of flowers to go out of the house after the Grain Rain Festival in spring. At this time, there is not only no late frost, but the temperature is also relatively stable, and the temperature difference between day and night is not large. In early October in autumn, all kinds of flowers can be brought indoors one after another, but they must be brought indoors before the frost falls. The general order is: white orchid, Michelia, azalea, gardenia, Milan, jasmine, osmanthus, Dai Dai, and kumquat. In winter, the room temperature must be kept between 10℃ and 18℃, and the temperature difference between day and night is generally 4℃ to 6℃. If the temperature is too low, it is easy to suffer from frost damage, and if it is too high, it will affect dormancy, consume nutrients, and is not conducive to flowering next year. Insulation work after early spring is also very important. Many flower lovers ignore insulation in early spring, causing many flowers to survive the winter but not the spring.
Of course, as the temperature rises, it is also very necessary to open windows for ventilation and hardening of seedlings, but the heat source cannot be cut off all at once, otherwise the plants will catch a cold or even be "annihilated". In the summer, the temperature in northern China is high, exceeding 30℃, and flowers such as azaleas will enter a dormant state. They should be placed in a cool and ventilated place for cultivation. If they are in a greenhouse, shade, spray humidification, ventilation and other methods should be adopted to lower the temperature. Milan, white orchid, gardenia, and jasmine are in the peak growth and flowering seasons. As long as they can keep up with the water and are not exposed to the scorching sun, they are not afraid of high temperatures and can safely spend the summer.
Light control is a key to growing southern flowers in the north. Generally speaking, southern flowers like light, but are afraid of direct sunlight. The weather in the north is dry and rainy in summer, and the ultraviolet radiation is strong, so proper shading is very important, but excessive shading is not suitable. Excessive shading is not conducive to bud formation and flowering, and even if there are flowers, they will not be fragrant. Gardenia, Milan, jasmine, white orchid, etc. should be shielded from 50% of the light, especially to avoid direct sunlight at noon. If there is no shade, the leaves of the plants will easily turn yellow and burn. From the time they are taken out of the room in spring to mid-May and after mid-September, all kinds of flowers can accept full sunlight. In winter, they should be maintained indoors and the light should be strengthened.
3. Strengthen water and fertilizer management
Most flowers in the south like a humid environment, but are generally afraid of waterlogging. Therefore, when watering them, you must first control the degree and secondly the water quality. The time and frequency of watering should be treated differently according to the season. Generally, the number of watering before mid-spring and after mid-autumn is the same (referring to outdoor cultivation). You can water once every 3 days. In summer, you need to water thoroughly once in the morning and evening every day. However, you should water less or not at all on cloudy or rainy days. If it rains, you should also pour out the accumulated water in the pot in time to prevent water rot. In winter, you should control watering and keep the pot soil slightly wet.
It is worth mentioning that watering should be controlled during the flowering period of azalea. The flowering period of white orchid, Milan and jasmine is in summer, and the water demand is relatively large. As mentioned above, water should be poured thoroughly once in the morning and evening. The water in the north is more alkaline, and long-term use can easily cause soil compaction and plant chlorosis. Families can use retained rainwater or snow water to water flowers, but large-scale maintenance is not suitable. Therefore, it is very important to improve water quality. The main measures to improve water quality are: add an appropriate amount of ferrous sulfate or edible white vinegar to the water, so that the water reacts acidically.
In addition, because the weather in the north is relatively dry, the plants should be sprayed frequently. First, it can effectively increase the humidity of the air, and second, it can wash away the dust on the leaves, which is conducive to the photosynthesis of the plants. Generally, it is sprayed once a day in spring and autumn, once every two days in winter, and once in the morning and afternoon in summer. In winter, the water temperature and time should be paid attention to. It should be sprayed at noon when the temperature is higher, and the water temperature should be close to the room temperature.
Fertilization of southern flowers in the north should follow the principle of "thin fertilizer and frequent application", and it is absolutely forbidden to apply concentrated fertilizer and raw fertilizer. It is best to use liquid fertilizer for fertilizing southern flowers. You can use sesame paste residue and water chestnut slices to soak and ferment the diluted liquid fertilizer. Apply it once every 10 days during its growth period. It can also be used alternately with potassium dihydrogen phosphate. This will not only balance the nutrition of the plants, but also make the flowers large and colorful. In addition to azaleas, flowers that bloom multiple times in summer, such as white orchids and Milan, should also adjust the number of fertilizations according to the number of flower buds, and supply them with the nutrients needed for flowering in time, but water should be found in time after fertilization. Fertilization is generally not applied in winter.
Summary of pest control in family flower cultivation
Flower lovers will have several pots of flowers and plants at home, and it is inevitable that some of them will attract some common aphids! Here are some tips for killing insects! You can kill pests without using pesticides.
⑴ Aphids: Use 5 grams of laundry detergent and 1.2 kilograms of water, stir thoroughly and spray. Spray once every 3 days, use 2-3 times in a row, the insecticide rate can reach 100%.
⑵ Snail: Pour beer into a shallow dish and place it on the ground or soil. The snails will smell the aroma of the beer and crawl into the dish and drown.
⑶ Ants: Crush the garlic cloves, dig 3-4 holes in the flowerpot and bury them in the soil. After 2-3 days, the ants, earthworms and nematodes in the soil will disappear.
⑷ Red spider mites: Light a mosquito coil containing pyrethrum, place it in an orchid pot, and seal the pot with a plastic cover. Fumigate for 1 hour to kill the eggs and adults of the red spider mites.
⑸ Scale insects: Soak 500g of mature neem fruit in 1kg of water for more than 1 month, and take the juice for later use. Use 1:1000 times solution for prevention in late spring and early summer; if small scale insects are found, use 1:500 times solution to kill them, use once every 5 days, and use it 3 times in a row to kill the small scale insects.
There are several other ways to deal with pests:
1. Tobacco. Nicotine and nicotine in cigarettes can prevent and control pests such as aphids, red spiders, stink bugs, and ants.
Production:
① Add 1 kg of water to 40 g of native tobacco leaves or stems, soak for 24 hours, filter and dilute with an equal amount of water, add 2-3 g of laundry detergent to dissolve (if using shredded tobacco, the concentration can be higher; adding laundry detergent not only facilitates adhesion, but also has an insecticidal effect).
② If there is no weighing device, you can soak several cigarette butts in about 30 times the water. After the water turns yellow-brown, add a little laundry detergent to dissolve them.
Filter the above liquid medicine before use. Spray the front and back of the leaves. When the pest is serious, soak the affected part of the flower in tobacco water for 1-3 hours, and soak the planting material at the same time, which can effectively kill the pests on the leaves and in the soil. The remaining tobacco water can be poured into the ant nest or sprinkled around the pot to kill ants. Unsoaked cigarette butts can be buried in the soil to prevent small flying insects.
Note:
① Contains nicotine, so it is not advisable to add vinegar, otherwise it will weaken the insecticidal effect.
② If detergent is added, wash with clean water the next day after spraying (or immediately after soaking).
③If it is mainly used for the prevention and control of scale insects, it is best to add laundry detergent, or use laundry detergent alone.
2. Garlic. It can prevent and control pests such as aphids, red spiders, scale insects, nematodes, and powdery mildew.
Preparation: Take a few cloves of purple garlic from the north, peel them and mash them, dilute them with 10-20 times of water, and filter out the residue after 24 hours. Spray the leaves with the prepared juice; pour the residue and remaining juice into the pot to prevent nematodes and scale insects.
Note: Garlic juice has a certain viscosity. To prevent dust accumulation, you can rinse the leaves after a few days.
3. Leek. It can prevent and control pests such as aphids and red spiders, and is more effective against aphids.
Preparation and usage: Mash 500 grams of leek, add 1.25 kilograms of water, soak for a day and night, then filter and take the supernatant and spray it three times every other day.
4. Onion. It can prevent and control pests such as aphids and red spiders, and is more effective against aphids.
Preparation and use: Soak 20 grams of onion scales in 1 kilogram of water for 24 hours before use. Spray 2-3 times within a week. In order to fully precipitate the active ingredients, chop or mash them before soaking and filter them before use.
5. Sharp pepper (dried red pepper). It can prevent and control pests such as aphids, red spiders, whiteflies, and stink bugs.
Production and use:
① Dry the chili peppers thoroughly, grind them into fine powder, add 50 grams of chili powder to 1 kilogram of water, boil for 10 minutes, cool and filter.
②Take an appropriate amount of dried chili peppers, add 20 times the amount of water and boil for 20 minutes, then filter after cooling.
③ Add 250g of dried chili seeds to 2.5kg of water and boil for 30 minutes, let cool and filter. Spray the leaves with water and then spray them with powder. A small amount of coarse powder can be sprinkled on the surface of the pot; spray the leaves and the pot soil.
6. Wood ash: It can prevent and control aphids.
Preparation and use: Soak 1 part of plant ash in 5 parts of water for 24 hours, filter and spray. Use the above method for prevention, generally once a month. It is best to use alternately.
What effect does light have on the growth and development of flowers?
Light is the energy source for flowers and plants to produce nutrients. Without light, photosynthesis cannot be carried out, and the growth and development of flowers will be seriously affected. Most plants can only bloom and flourish under sufficient light conditions. Different types of flowers have different requirements for light.
A flower proverb says: "Camellia in the shade, peony in the sun, four-season orchid in half shade and half sun". According to the different requirements of flowers for light intensity, flowers can be roughly divided into positive flowers, neutral flowers and negative flowers.
(1) Positive flowers
Most flowers and fruit-viewing plants are positive flowers, such as magnolia, rose, pomegranate, plum, crape myrtle, citrus, etc. There are also a few positive flowers among foliage flowers, such as cycads, palms, croton, etc. Most aquatic flowers, cactiand succulents are also positive flowers. All positive flowers like strong light and cannot tolerate shade. If there is insufficient sunlight, it is easy to cause the branches and leaves to grow too long, the tissues to become soft and weak, the leaves to become pale and yellow, it is difficult to bloom or bloom poorly, and they are susceptible to diseases and insect pests.
(2) Negative flowers
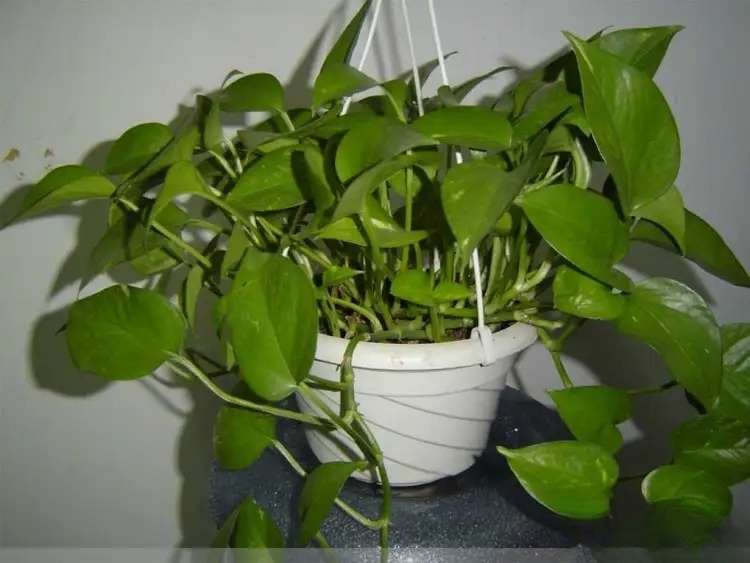
They grow well in shaded environments, such as asparagus fern, camellia, azalea, hosta, green radish, dieffenbachia, ivy, gloxinia, monstera, begonia, etc. If they are exposed to strong light for a long time, their branches and leaves will turn yellow, their growth will stagnate, and in severe cases, they may even die.
(3) Neutral flowers
They grow well in sunny conditions, but they can be shaded when the light intensity is high in summer, such as osmanthus, jasmine, white orchid, hydrangea, etc. In summary, various flowers have different requirements for light, and even the same flower has different requirements for light at different stages of growth and development. The amount of light required by seedlings can be gradually increased, while the positive chrysanthemum requires short-day conditions to form buds.
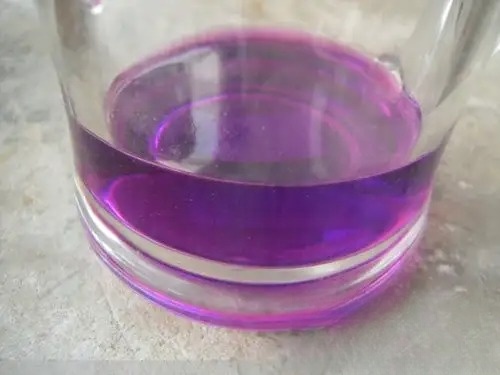
Application of Potassium Permanganate in Flower Cultivation
Potassium permanganate is a strong oxidant. It is widely used because of its small residue and low risk of causing phytotoxicity. In recent years, potassium permanganate is often used in home flower cultivation. Novice flower lovers want to use it when they see others using it, but they are troubled by their lack of understanding of potassium permanganate. So what can potassium permanganate do in home flower cultivation?
1. Imported bulbous plants such as hyacinths and daffodils often carry mold after traveling across the ocean. Many flower lovers use potassium permanganate solution to disinfect the bulbs;
2. When cutting flower seedlings, it is common to use potassium permanganate solution to disinfect cuttings, utensils, etc. This is indeed effective in preventing the cuttings from infection and rot and promoting rooting of the cuttings.
3. Disinfect the seeds before sowing. Some plants, especially cactus and various succulent seeds, some flower lovers like to disinfect them with potassium permanganate solution before sowing. However, a recent article questioned this method of sterilization. The author of the article believes that potassium permanganate will reduce the germination rate of seeds, so flower lovers need to weigh the pros and cons when using it.
4. To prevent plant diseases, soak seeds or disinfect seedlings with 0.1% potassium permanganate solution before sowing and transplanting to prevent soft rot, downy mildew and rhizome disease.
Precautions for use of potassium permanganate:
First, avoid using stagnant water (mineral water), sewage and hot water to prepare medicine; second, the medicine should be used immediately after preparation to prevent oxidation and ineffectiveness; third, avoid mixing it with strong alkaline pesticides to prevent degradation and ineffectiveness.
How to make fertilizer from egg shells
Using eggshells as fertilizer is not unfamiliar to domestic flower lovers. You can often see eggshells in other people's flower pots. So how to make eggshells into fertilizer? Does eggshell fertilizer have any effect on plants? Let's take a look.
First of all, does eggshell fertilizer have any effect on flowers and plants?
A flower lover once did an experiment in which he used the same seedlings and the same soil to test the effect of eggshells on plants. The results showed that eggshells promote plant growth.
How to make eggshells into fertilizer?
Some flower lovers put egg shells directly in the flower pot, but the result is that the flower pot either becomes smelly or maggots grow in it. This is wrong because the egg shells are easy to rot because of the unclean egg white. The correct steps are:
(1) Place the eggshells outside to dry in the sun. After one or two days, the eggshells will become dry and brittle, and can be broken into small pieces. (Some people also wash the eggshells and dry them in the sun.)
(2) Put the small pieces into a beverage bottle or bowl and crush the eggshells with chopsticks or a small stick;
(3) Remove the mud from the surface of the flower pot, bury the crushed eggshells in it, and then fill it with soil and let it absorb slowly.
ps: The main component of eggshells is calcium carbonate, which can regulate the pH value of the soil.
Methods and precautions for topdressing flowers (general)
The two sides of top dressing: Top dressing, like repotting, also requires conditions. It depends not only on the season, but also on the performance of plant growth. Both must be taken into account and used when needed to promote growth, flowering and fruiting. On the contrary, blindly applying fertilizer without considering the conditions can easily have a counterproductive effect, which can affect growth and cause fertilizer damage at the very least, and even kill the plant directly at worst.
Topdressing conditions depend on temperature:
Generally speaking, the temperature between 15 and 30 degrees is suitable for top dressing; but when the temperature continues to be below 15 degrees or continues to exceed 30 degrees, top dressing should be done with caution. If the temperature is too low or too high, the risk after top dressing will increase, which may easily lead to fertilizer damage.
Topdressing conditions depend on plant growth status:
1. Under normal circumstances, the situations suitable for topdressing are the growth period (mainly nitrogen fertilizer); the bud period, fruiting period, and the post-flowering growth period of bulbous or perennial plants (mainly phosphorus and potassium fertilizers).
2. If the plant has just been transplanted and is in the stage of recovery, do not apply top dressing too early. At this time, top dressing will do more harm than good and affect its recovery.
In short, the simple description is "don't apply fertilizer if new leaves (buds) are not seen."
Topdressing method:
1. General method: For most potted plants, when applying topdressing, dig up the topsoil at the edge of the pot, put the fertilizer directly in, and then cover with soil and water thoroughly. This method is suitable for both water-soluble and insoluble plants.
2. For water-soluble fertilizers, you can also mix it with part of the water and then spray it directly on the leaves of the plants (foliar fertilizer) or dissolve it directly in water and then water it directly.
The principle of topdressing: apply thin fertilizer frequently. Thin fertilizer: when you don’t know the appropriate dosage, try to use less concentration (try to follow the instructions on the package, and reduce it if the seedlings are too small).
Frequent application of fertilizer means frequent topdressing. Small and frequent application is most beneficial to plant growth. However, there should be a limit to how often you apply fertilizer. There should be at least a week between consecutive topdressings. You cannot use this fertilizer today and that fertilizer tomorrow. Applying fertilizer too frequently will exceed the plant's tolerance limit in the long run, which will also cause fertilizer damage. Also, do not add too much fertilizer at one time and then not give it for a long time. This is like overfeeding and then starving it for a long time, which is also not advisable.
Special cases:
1. For plants in full bloom, they are very sensitive to water, fertilizer and environmental changes during this period. Generally speaking, for most plants that bloom and bear fruit regularly, basically no topdressing is needed during the full bloom period; however, for perennial herbaceous flowers, such as dwarf cattleya, geranium, carnation, sunflower, etc., topdressing can still be given to them during the full bloom period.
2. The above-mentioned method of top dressing is suitable for potted plants, especially observing the temperature conditions. Once the temperature is not suitable (too cold or too hot), it is best not to apply top dressing. However, for ground-planted plants, the temperature requirements are not so strict and can be relaxed appropriately. You can completely depend on the growth of the plants before determining whether top dressing is appropriate.
The summary is complete.
Supplement 1: Time for topdressing (provided by chipmunk fish friends):
It is best not to apply fertilizer at noon in summer and autumn. For foliar fertilizer application, it is best to do it in the afternoon when there is no direct sunlight or in the evening. Otherwise, the fertilizer sprayed on the leaves will evaporate too quickly, the leaves will not absorb it fully, and it is easy to cause sunburn on the leaves.
The time and precautions for changing the soil and pots of flowers
When it comes to changing the soil, in addition to considering the season, you also have to consider the condition of the plant itself. Different plants have different times when it is appropriate to change the soil.
From the seasonal point of view, there are two best times to change the soil each year:
Spring: March, April, and May; Autumn: September, October, and November.
For some plants, you can also change the soil in winter, which is December, January and February.
In any case, you cannot choose to change the soil in summer, especially in midsummer. Changing the soil in midsummer will do more harm than good. The key reason is the high temperature. This problem will not exist in other seasons.
For plants, the best time to change soil is during the dormant period and the early growth period.
The periods when you should not change the soil are the seedling stage, vigorous growth stage, bud stage, flowering stage, and fruiting stage.
When changing the soil in autumn, you should also consider the habits of the plants.
For example, the camellia is in the bud stage in autumn, and the soil must not be changed at this time;
If the gardenia does not produce a large number of flower buds in the autumn and its growth is relatively slow (provided that it has been growing for a long time and does not require slow seedling growth), you can consider changing the soil.
How to care for newly bought flowers
Although most of the plants we grow at home are grown from seeds, some of them are bought and then grown at home for a period of time.
This post briefly introduces how to take care of newly purchased plants after they arrive home.
Requirements for purchasing plants: If you are not sure, try to choose the original pots and soil, try to choose local plants (growing northern flowers in the south or southern flowers in the north requires certain technical requirements, which may not be suitable for novices), and try to choose seasonal flowering species, which will facilitate the recovery of the seedlings (off-season flowering plants, because they break the growth rules, may take a long time to recover after changing to a new environment. They need to adapt to the current environment again, which is a process).
After you bring the plants home, acclimatization is a necessary step. The care during the acclimatization period is applicable to most plants.
Necessary steps:
Seedling acclimatization period: For newly bought plants, acclimatization is a must and cannot be skipped;
The maintenance method is relatively simple. Place it in a relatively fixed position with scattered light and ventilation. There is no need to use fertilizer or expose it to the sun too early. When it is time to water it, water it thoroughly: note that water it thoroughly when the topsoil is dry; this watering method is applicable at any time.
Since the plants are still in the growth stage, it is normal for a small amount of yellow leaves or fallen flowers and buds to appear. As long as the growth is successfully resumed in the future, this phenomenon will naturally disappear.
As for how long it will take, it depends on the situation of the plant itself; it varies greatly depending on the plant species. Generally speaking, smaller plants will grow faster than large ones, and herbaceous plants will grow faster than woody plants.
Optional steps:
Planting: Only suitable for plants with bare roots or soil on the roots after purchase. You need to choose a suitable flowerpot according to your personal preference or actual situation. After planting, be sure to water it thoroughly, and then place it in a place with scattered light and ventilation to allow it to slowly recover. Note: Planting should be done as soon as possible. It is not recommended to plant it after a period of time, so as not to affect survival.
Repotting: If you feel that the pot and soil of the newly purchased flowers are suitable, then this step can be completely ignored.
This should only be considered if you feel the flowerpot or soil is not suitable.
Repotting method: If it is a soft plastic flower pot, you can cut it open and then take out the plant with the whole soil. If such a flower pot has other uses in the future (raising seedlings or planting other plants), there is no need to cut it open. Keep the flower pot as it is, moisten the soil in the pot, and then carefully take out the plant. Pay attention to this process, be sure to be careful, try to minimize damage to the roots of the plant, so as to promote the recovery of the seedlings in the future.
After repotting, watering is necessary. This watering is also called rooting water, and the purpose is to allow the roots to be closely combined with the soil.
Time to repot: Do it in the afternoon or evening of the day after purchase. If it is rainy, then it can be done in time, the sooner the better; and do not wait a few days to repot it. Doing so may be more detrimental to it, because after a few days, the plant may have recovered, but repotting it at this time will require it to recover again; objectively, this will prolong its recovery period (it should recover in 3-4 days, but it may be extended to 1-2 weeks or even longer), which is not conducive to subsequent growth.
After the plant is repotted, the acclimatization period needs to be restarted (the calculation of the acclimatization period, in the case of continuous repotting, starts from the last time it was repotted). This is very important to remember. No matter how well you took care of it before, it will be in vain after repotting. This is the biggest risk of repotting. Choosing the right time to repot can effectively reduce the risk. If the timing is not right, it will bring greater risks.
Once the newly purchased plants have successfully passed the seedling acclimatization period, you can manage them according to their habits.
For those that like the sun (such as jasmine, pomegranate, wolfberry, ornamental pepper, etc.), be sure to place them in a place with sufficient light and good ventilation; for those that like the shade (red anthurium, white anthurium, arrowroot, etc.), place them in a place with scattered light and good ventilation as usual. When the temperature is suitable, you can use fertilizer according to the situation (there will be differences for foliage plants and flowering and fruiting plants).
When the growing environment conditions are stable, the placement should be kept as fixed as possible; only when there is a sudden change in the weather or a significant change in the environment (such as a sharp drop in temperature or rise in temperature) can it be moved to a more ideal location (such as moving the plant out of the house in spring or bringing it back in autumn).
Summer home potted flower management methods (tips)
The hot summer not only tests the patience of every flower grower, but also the tolerance of every flower and plant. Most flower lovers will have this feeling: when summer comes, many pots and jars will be empty at home, and countless flowers and plants will die. In fact, the management of potted flowers in summer mainly focuses on the supply of sunlight, water and fertilizer.
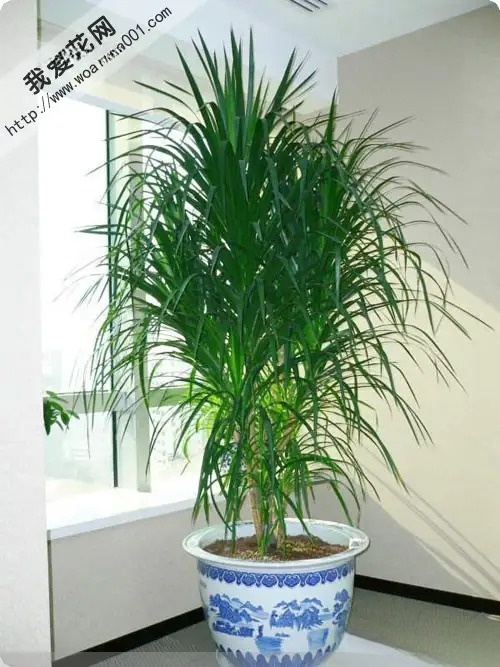
First of all, different locations should be placed according to the different habits of plants to light. Some potted flowers that like sunlight and fear cold, such as Milan, jasmine, white orchid, kumquat, cycad and five-needle pine, can be placed outdoors as long as the pot soil is constantly watered, which is beneficial to its growth. Some potted flowers that like semi-shade, such as Clivia, Christmas cactus, camellia, gardenia, begonia, etc., should be placed in semi-shade, and avoid direct sunlight at noon, otherwise the leaves will burn at best, or even die from the sun. Foliage plants such as asparagus, spider plant, and palm bamboo should also be kept away from the sun, otherwise the leaf tips will also burn and affect the appreciation.
Secondly, due to the high temperature of the sun, watering should be thorough. For sun-loving potted flowers placed on the balcony, especially small potted flowers or bonsai, some should be watered once in the morning and evening, and watered on the leaves or the ground several times to increase the ambient temperature and cool down the environment. However, for some ornamental plants placed indoors, and plants that are dormant or semi-dormant in midsummer, such as Daphne, Clivia, Begonia, and drought-resistant wintersweets and plum blossoms, the potting soil only needs to be kept generally moist, and there is no need to water too much or too frequently to avoid root rot.
Third, during the hot summer season, when applying fertilizer, avoid using too concentrated or "raw fertilizer" to avoid causing "harm"; and be careful to stop repotting and changing the soil until autumn.
In addition, potted flowers should be protected from diseases and insects in summer. The most common pests on potted flowers in summer are red spider mites, aphids, whiteflies, scale insects, etc. If they occur in large quantities, you can use tobacco water (soak 5-10 cigarette heads in 500 ml of water, add a small amount of washing powder or soap) to wash; if there are more pests, you can use 100 times diluted dichlorvos or dimethoate to spray, which is more effective.
How to prevent yellow leaves of flowers after entering the house
In autumn and winter, the temperature turns cold, and many flowers that are not resistant to cold are brought indoors from outdoors. Although it is warm indoors, many flowers will not adapt to the sudden change in environment, especially the yellowing of leaves after entering the room. How can you prevent the yellowing of flowers after they are brought indoors? The following will give you the answer.
1. Control watering: After entering the room, the water evaporation of the flowerpot and the plant surface is reduced because the space is not as open as outdoors. If you still water it as before, the roots will rot due to the wet soil in the pot, and the leaves on the ground will turn yellow.
2. Reduce fertilization: In autumn, most flowers change from vigorous growth to slow growth. After the flowers are brought into the house, they will enter a rapid growth stage due to the rising temperature. However, the amount of fertilizer absorbed by flowers is not as good as in summer, so it is necessary to reduce or stop topdressing to prevent yellow leaves of the plants.
3. Adjust the light: Some flowers that like strong light, such as roses and hibiscus, will have yellow leaves if they are placed in a shaded place after entering the house due to insufficient light. On the contrary, placing bird's nest ferns and monstera that like shade in a place with too strong light will also cause the leaves to lose their green color and turn yellow. The placement of flowers in the house should also be adjusted reasonably.
4. Environmental ventilation: A closed environment will gradually increase the content of ethylene, a gas that causes flower aging, in the air. At this time, many flowers that are sensitive to ethylene are particularly prone to yellow leaves. Therefore, maintaining good ventilation is one of the effective measures to prevent yellow leaves of indoor flowers.
5. Maintaining the right temperature: Many flowers will also have yellow leaves due to an unsuitable ambient temperature, especially when there is a large temperature difference between before and after the flowers are placed indoors. For example, if Milan and azalea are moved to a greenhouse when the outdoor minimum temperature is around 5°C, and if the ambient temperature rises to around 25°C during the day without paying attention to cooling down, the leaves of the plants will soon turn yellow. This situation must also be prevented.
How to grow foliage plants well
Foliage plants such as Monstera and Dieffenbachia are often placed in homes and offices. To care for foliage plants, we need to start with lighting, watering, ventilation, fertilization, potting, and winter cold resistance and warmth. The following will introduce how to take good care of foliage plants.
1. Maintenance of foliage plants: Pay attention to the regulation of light. They need light, but they cannot be placed in strong sunlight for too long. In a week, foliage plants should be placed outdoors for at least one to one and a half days to "sunbathe", but not at noon, but in the morning or afternoon evening, otherwise the leaves will be burned. For some foliage plants that need light, fluorescent lamps can be used to supplement, such as Monstera, Philodendron, Rubber Tree, and Dieffenbachia. If they are often lacking in light, the leaves will turn yellow or light green. If this happens, the plant should be quickly moved to a place with light to supplement and rotated 90 degrees to make the leaves evenly illuminated.
2. Watering of foliage plants: The principle of "not watering unless dry, and watering thoroughly when watering" should also be followed for foliage plants. However, in summer, in addition to watering the pot, it is also necessary to spray water on the leaves to keep the leaves moist, which is beneficial to growth. In winter, many foliage plants come from tropical and subtropical regions and like warmth. Therefore, less watering should be used to prevent the symptoms of yellowing leaves, poor growth, and even death caused by low water temperature and excessive water.
3. Ventilation: Most foliage plants are cultivated and appreciated indoors. Modern homes have good heating equipment. However, in places with poor lighting, the ventilation environment is poor. If the ventilation is not smooth, foliage plants will suffer from stuffiness and often cause excessive indoor humidity. Therefore, attention should be paid to ventilation to ensure that foliage plants grow well and are not harmed by moisture or dryness. In addition, ventilation and circulating air can reduce the occurrence of diseases and insect pests.
4. Fertilization: Foliage plants should be fertilized once a month, or once every 15 days at most. Fertilization should be light and thin, not thick. Fertilization should be stopped in winter and on hot days.
5. Cold resistance and warmth preservation: Foliage plants should generally be kept warm in winter, especially Dieffenbachia, Pothos, Cycas, Arrowroot, Pineapple, Hulk, Areca palm, Calla Lily (Waterdrop Guanyin), Tiger tail orchid, etc. They all like relatively warm temperatures, so they can be placed in a sunny place in a room with heating equipment, and the indoor temperature should be kept at least above 12°C. For miniature coconut palm, Monstera, and Spring Taro, the temperature can be slightly lower because they can withstand a certain degree of cold.
6. Pots for foliage plants: Foliage plants can be potted in plastic pots, clay pots, purple sand pots, etc., but clay pots are better because they are breathable and water-permeable, and can make plants grow luxuriantly. However, they are not satisfactory in terms of appearance and weight. Now, clay pots or plastic pots are usually covered with colorful plastic pots, which are commonly known as "covered pots" and are more beautiful and generous.
Five precautions to be taken when growing osmanthus in pots at home
Osmanthus is highly sought after by people due to its economic value, especially potted osmanthus, which is loved by all flower lovers. Here are the five most basic precautions to be taken for potted osmanthus:
1. Prevent high temperatures in winter. Osmanthus fragrans cannot fully dormant in high temperatures in winter, and will sprout and shoot prematurely. The branches are thin and weak, and are easily attacked by drought in spring. Therefore, the temperature should be kept low in winter to allow it to fully dormant so that it can thrive and bloom in the next year.
2. Prevent excessive shade and humidity Osmanthus is a long-day flower that likes strong light and tolerates partial shade. Insufficient light and excessive shade and humidity can easily cause soot disease, causing leaf fall, excessive growth, weak branches, poor differentiation of flower buds, and thus affecting flowering or even preventing flowering.
3. Preventing Weakness Osmanthus fragrans requires high fertilizer and water conditions. Insufficient nutrition will cause poor growth and affect the quality of flowering. It is required to apply nitrogen-based fertilizer once before each shoot sprouting, in December, June and September. Potted osmanthus should be repotted once every 1 to 2 years, and the potting soil should be kept fertile, rich in organic matter and slightly acidic. 30% urine should be applied every half a month or so. If the leaves turn yellow, apply 500 times liquid ferrous sulfate. Avoid excessive nitrogen fertilizer to prevent excessive growth, and add phosphorus and potassium fertilizers to improve flower quality and enhance fragrance.
4. Prevent waterlogging Osmanthus is afraid of moisture, and is most afraid of waterlogging. Therefore, potted osmanthus should be watered scientifically, watering when dry and not too much watering, to prevent waterlogging in the pot, so as to avoid root rot and leaf fall and affect flowering.
When watering flowers, you should pay attention to "seven more" and "seven less"
There are generally two situations when novice flower lovers water their flowers. One is that they are too doting on the flowers and plants and water them from time to time, causing them to die of waterlogging due to excessive moisture. The other is that they are neglected and not watered for years, causing them to die of drought. The following is a summary of the "seven mores" and "seven lesses" that novice flower lovers should pay attention to when watering flowers, which is summarized from the accumulated experience in the past. Let you know how much to water in the future when you grow flowers.
1. Water herbs more and woody plants less Herbaceous flowers have shallow roots and poor water absorption capacity. They need more water and evaporate quickly from their leaves, so they should be watered more frequently. Woody flowers have deep roots in the soil, a wide distribution area, and strong water absorption capacity, so the amount of water can be appropriately less.
2. Water the wet-loving flowers more and the xerophytic flowers less. Water the wet-loving flowers such as Monstera and Lucky Grass more; water the xerophytic flowers such as cactus, Jade Lotus, and Nandina domestica less.
3. Water more for flowers with large and soft leaves, and water less for flowers with small and waxy leaves. The larger the leaves, the softer the texture, and the easier it is for water to evaporate, so you should water them more often. For flowers with small and waxy leaves, the water on the leaf surface evaporates slowly, so you can water them less appropriately.
4. Water more for sandy soil and less for clay soil. Sandy soil is loose and has poor water retention, so it is better to water it more often. Clay soil is compact, has good water retention, but poor air permeability, so it is not advisable to water it too much or too often.
5. Water more when it is hot and less when it is cold. In the hot summer, the water on the leaves evaporates a lot and the soil in the pot dries out quickly. Water in time and water thoroughly.
6. Water more in drought and less in cloudy weather. In dry weather, the soil easily loses water, so water more frequently. Water small pots twice a day and large pots once a day.
7. Water more during the vigorous growth period and less during the dormant period. Flowers need a lot of nutrients and water during the vigorous growth period, so you should combine fertilization with more watering and watering frequently. During the dormant period of flowers, growth tends to stagnate and the water requirement is very little, so watering should be strictly controlled.
How to choose fertilizer for flower growers
Flower cultivation cannot be separated from fertilizers, and all flower growers will encounter the problem of purchasing fertilizers. Faced with various brands and types of fertilizer products on the market, how can you choose the fertilizer that best suits your beloved flowers?
1. Choose fertilizer according to the growth stage of the plant
The fertilizers used for plants at different growth stages are different. For example, high-nitrogen, low-phosphorus, and low-potassium fertilizers should be used in the seedling stage, while low-nitrogen, high-phosphorus, and medium-potassium fertilizers should be used when forcing flowers to bloom. For some flower growers, since they have not been growing flowers for a long time and do not have enough experience, they are not familiar with the details of fertilizer use, so it is also appropriate to consult veterans.
2. Purchase fertilizer according to the actual lack of plants
If plants lack certain nutrients, they will behave differently. Some people will buy fertilizers randomly and apply them, which often causes fertilizer damage. You should buy fertilizers based on the actual nutrient deficiency of the plants.
3. Buy fertilizer based on cost performance
Some people think that expensive fertilizers are good fertilizers, but this is not true. The most popular way to use fertilizers is to use 75% controlled-release fertilizers and 25% water-soluble fertilizers. This ratio is the most economical and effective. In the general public's opinion, controlled-release fertilizers are expensive and will increase costs when used, but this is not the case. Water-soluble fertilizers are wasted more during use. Controlled-release fertilizers are encapsulated fertilizers that are released according to plant needs, which can minimize fertilizer waste and have a higher efficiency. In addition, when choosing controlled-release fertilizers, you should also pay attention to some instructions provided by the supplier, such as the differences in ingredients between different brands. Some brands of fertilizers have some patented technologies that can promote the absorption of nutrients by plants. This information should provide a basis for your choice.
Because flower growers do not need as much fertilizer as flower producers and farmers, do not be greedy when buying fertilizers. Once some fertilizers are opened, the chemical components inside will evaporate if they are not used for a long time. So it is best to buy them when the time is right and use them immediately after opening.
How to repot flowers? Tips for repotting flowers
March and April are good times to repot potted flowers at home. The city's garden flower cultivation experts remind flower lovers that as potted plants grow, repotting can make the size of the pots match the seedlings and improve the nutritional conditions for the growth of flowers and trees. However, there are many things to pay attention to when repotting.
Transplanting time is now
Usually potted flowers are repotted once a year or every other year. It is best to repot when the dormancy of potted flowers ends and new buds sprout, or when flowers and trees have just been moved from indoors to the balcony and have not yet sprouted. However, the transplanting time of different flowers and trees is slightly different. In the north, potted flowers are generally repotted from mid-March to mid-April.
Change the flower pot to the appropriate size
When repotting, you should choose a flowerpot based on the root width of the flower. It is more appropriate that the diameter of the flowerpot is 3 to 6 cm larger than the root width. You can also choose a flowerpot based on the crown size of the flower or tree. It is more appropriate that the crown diameter of the flower or tree is 20 to 40 cm larger than the diameter of the flowerpot. Some people like to use large pots to grow small flowers, thinking that planting small flowers in large pots can allow them to grow freely and avoid the trouble of repotting. In fact, doing so is very detrimental to the growth of flowers. Small flowers require less fertilizer and water, and large pots with more soil often make it difficult to control the amount of water and fertilizer, which in turn affects the normal growth of flowers.
Dehumidify new pots and sterilize old pots
When replacing a new pot, soak it in clean water for a day and night before planting flowers, scrub it, and dry it before using it to remove its dryness. When replacing an old pot, expose it to the sun for sterilization. Before reusing it, scrub the inside and outside of the old pot to remove any possible insect eggs. If necessary, spray it with disinfectant. Among flower pots, clay pots are better, they are cheap and have good air permeability; purple clay pots are exquisitely made, but their air permeability is not as good as clay pots; porcelain pots have poor air permeability; plastic pots are light, but their drainage and air permeability are poor.
Repotting operation is carried out step by step
Before repotting, you need to stop watering the flowers and trees for a few days so that the soil can separate from the pot wall. Before putting the flowers and trees into the new pot, you need to cut off some of the entangled roots and old roots, and also cut off the roots that are too long and injured. If there are too many damaged roots, you also need to cut off some leaves. Flowers and trees that have just been watered should not be repotted.
Careful maintenance and frequent application of thin fertilizer
Generally, if flowers and trees are repotted at the right time for transplantation, they can survive as long as they are maintained according to the general method. After repotting potted flowers, water them thoroughly once so that the potting soil can absorb enough water. Do not water them too often, and be sure to wait until the potting soil is dry before watering. It is best to spray water on the leaves once a day. Potted flowers that have just been repotted should be placed in a cool place, not exposed to the sun, and not placed in a windy place to avoid damaging the flowers. Flowers that have just been repotted should not be fertilized because the roots of the plants cannot absorb fertilizers immediately after transplantation. Wait until they grow new leaves or sprout new roots in the new pot, and then fertilize them according to the principle of applying thin fertilizers frequently.
Correcting some incorrect understandings of fertilizer use
It is an indisputable fact that chemical fertilizers play a role in promoting agricultural production. According to FAO estimates, the contribution rate of chemical fertilizers to food production in developed countries is about 55%, and the contribution rate of chemical fertilizers to food production is also above 50%. However, from the late 1980s to the late 1990s, due to the one-sided pursuit of high input and high output in agricultural production, the social and environmental ecological problems caused by the large-scale abuse of chemical fertilizers became increasingly serious, which made people have some incorrect understandings of the application of chemical fertilizers. In fact, the emergence of these problems is not caused by chemical fertilizers themselves, but by unreasonable use of chemical fertilizers or improper management of farmland nutrients. Therefore, it is necessary to correct some incorrect understandings of people on the use of fertilizers.
1. They believe that fertilizers are man-made chemical products and that their use will cause environmental pollution and reduce the quality of agricultural products.
In fact, these problems are not caused by fertilizers themselves, but by improper application. The mineral nutrients in fertilizers are natural substances existing in nature. A large number of scientific experiments and production practices have proved that as long as fertilizers are used properly, they can not only promote crop yields, but also improve the quality of agricultural products.
2. It is believed that since the soil contains the mineral nutrients needed for plant growth, there is no need to apply chemical fertilizers.
The target output of agricultural production (agricultural products and other harvests) will inevitably take away some nutrients in the soil. The fertility of the soil in nature often cannot meet the nutrient needs of continuously planted crops. Fertilization supplements the lack of natural fertility and is also necessary to maintain and improve soil fertility.
3. It is believed that only when organic fertilizers are used in agricultural production can the food produced be safe and clean.
In fact, not all organic fertilizers are clean. If organic fertilizers are used without harmless treatment, they will also cause pollution. Moreover, the mineralization and accumulation of organic nitrogen will also increase the nitrate nitrogen content in the soil or groundwater, causing pollution.
4. It is believed that organic fertilizer can replace chemical fertilizer.
Organic fertilizer and chemical fertilizer each have their own advantages and disadvantages. Organic fertilizer contains rich humus and nutrients required by various crops, and has a special effect on improving soil structure, but the nutrient content is low, the fertilizer effect is slow, the nutrient release is difficult to control, and the input amount is not easy to accurately calculate, which makes it difficult to meet the comprehensive and sufficient nutrient needs of crops, and it is difficult to achieve high yield and high quality of crops; chemical fertilizers can often calculate the nutrient ratio and input amount more accurately according to the needs of crops, and the fertilizer effect is fast, but the nutrients are easy to lose and the utilization rate is low. Only when the two are used in a reasonable combination can the best effect be achieved.
5. It is believed that fertilizers should dissolve and disperse quickly to be more effective.
Farmers generally believe that chemical fertilizers should be fully soluble, fast-dissolving, or at least fast-dispersing, otherwise they are inferior products. Studies have shown that for fertilizers of the same composition, the smaller the particles, the faster the effect, while large-particle fertilizers have slow-release properties. It is estimated that compact, slow-dispersing compound fertilizers can increase nitrogen utilization by about 3% compared to fast-dispersing compound fertilizers. Reversing the concept of fast-dissolving and fast-dispersing, and developing slow/controlled-release fertilizers based on crop fertilizer requirements and soil fertility conditions is an important direction for new fertilizer research.
6. Overemphasis on nitrogen, phosphorus and potassium, especially the application of nitrogen fertilizer, has not attracted enough attention to the role of trace elements.
Although nitrogen, phosphorus and potassium are essential macronutrients for crops and cannot be lacking, one-sided emphasis on the role of macronutrients and partial application of nitrogen fertilizers can easily cause leggy growth of crops, induce pests and diseases, and reduce the quality of agricultural products. Moreover, some medium and trace elements in the soil of many areas are currently deficient. If they are not supplied in time, it will inevitably affect the normal growth of crops, cause some physiological diseases, and limit the improvement of crop yields and the quality of agricultural products. Therefore, fertilization must advocate scientific methods, and through soil testing and formula fertilization, a balanced supply of nutrients can be achieved, that is, a balance between macronutrients and a balance between macronutrients and medium and trace elements.
Illustration of how to repot potted flowers and rejuvenate the soil
Potted flowers continue to develop and grow, the plants become strong and tall, and the roots continue to grow toward the wall of the pot, making the original pot appear smaller and smaller. Every one to two years, the nutrients in the pot are almost exhausted, the roots of the plants show signs of aging, and the leaves gradually turn yellow and thin due to insufficient nutrient supply. At this time, you should consider repotting and changing the soil.
Repotting and changing the soil can generally be done in February and March (in the south), or in March and April (in the north). No watering is generally done a few days before repotting and changing the soil. Wait until the soil is half dry before repotting. If the soil is too wet, the stickiness between the pot wall and the soil will be too great, which is not conducive to the removal of the soil ball. If it is too dry, the plant will lack water and its growth will be affected.
Repotting and changing the soil is usually done on a cloudy day or in the evening (it is best if it is cloudy for a few consecutive days after repotting and changing the soil). You can first use an iron nail to draw a circle next to the soil on the wall of the pot to help the soil ball fall out.
The removed soil ball shows that the roots have spread all around the pot wall, and the nutrients originally stored in the pot soil have been almost exhausted by the continuous growth of the plant.
After the soil ball comes out, you can gently break up the soil ball and slowly and thoroughly remove the old soil ball; or you can rinse it thoroughly with water to expose all the roots; then carefully check the condition of the roots and cut off old and bad roots.
While cutting off old and bad roots, you can also cut off the horizontal branches, weak branches, and overlapping branches inside the plant. The purpose of pruning is: first, to reduce leaf transpiration to facilitate the recovery of the plant's root system; second, the crown of the plant needs to be trimmed after growing for many years.
If the plant is potted directly without pruning, it may naturally shed its leaves to adapt to the damaged root system (or no new branches sprouted for a long time) caused by potting. This is called the "pot-dotting period".
Before potting, the water outlet at the bottom of the pot can be stacked with two tiles in the shape of an "入" character. The advantages of doing this are: first, it keeps the water outlet unobstructed, which can prevent water accumulation and root rot to the greatest extent; second, the water outlet is also the air inlet at the bottom of the pot, which can increase air exchange in the potting soil, facilitate root breathing, and keep the plant in the best growth state.
Fill the reserved 2-3 cm space with pre-fermented organic fertilizer soil (or nutrient soil), and remove the moss and weeds on the surface of the pot before filling the soil. The soil should not be filled to the top, and at least 2-3 cm should be reserved for watering and water storage.
After repotting and changing the soil, the soil becomes fertile and full of organic matter.
After completing the above procedures, water the plant enough to allow it to take root, and the work of repotting and changing the soil is done.