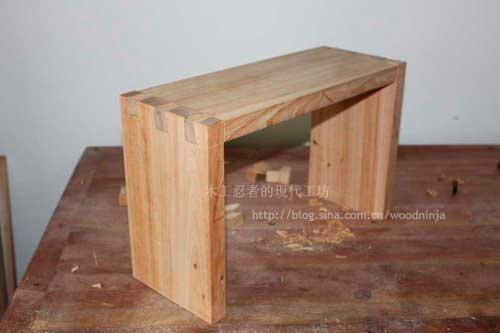
Dovetail small stool
↑ The dovetail tenon has an angle of one inch below and a height of six inches, and then the included angle is called a 1:6 dovetail tenon. Some people also like a dovetail tenon with an angle of one inch below and a height of eight inches. It depends on personal preference. However, the smaller the angle , the worse the structural strength.
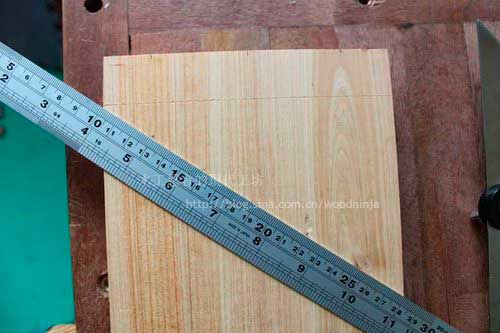
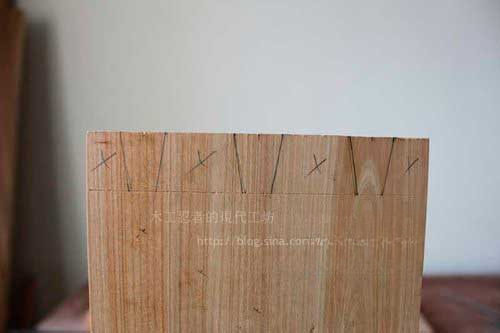
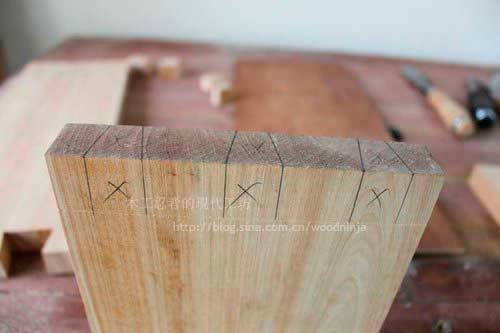
↑ First place the ruler diagonally on both ends of the board, with the left end at 10 cm and the right end at 28 cm. Mark every three centimeters and draw guide lines perpendicular to the end faces. Quickly square the width of the board into six equal parts with five endpoints.
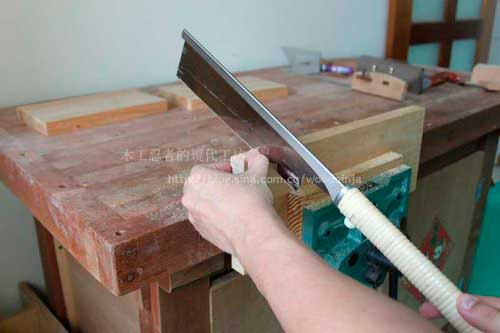
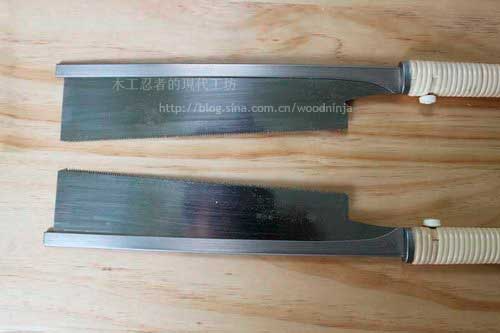
↑ Take out the back saw. The denser ones on the top are cross-section saws, which are mainly used to saw off the vascular bundles from the side of the wood, which is more like the function of a sickle to cut rice. The one at the bottom is a split saw with larger teeth. It is mainly used to saw off the vascular bundles from the upper and lower ends of the wood, a bit like sowing grass. It must be able to remove wood chips quickly, so the saw ruler is relatively large. The longitudinal opening can be used for cross-sectioning, but it is very inefficient to use a cross-section saw to saw the end face. However, making tenons does not require splitting the board material, so it is OK to use a cross-section saw to saw slowly, so choose a cross-section saw to saw the tenons.
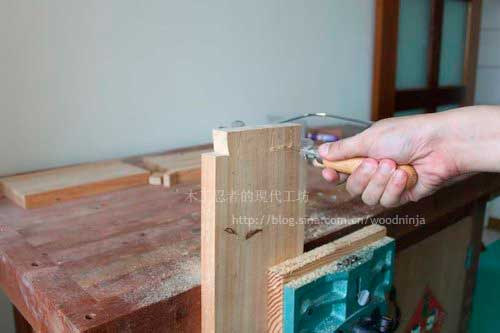
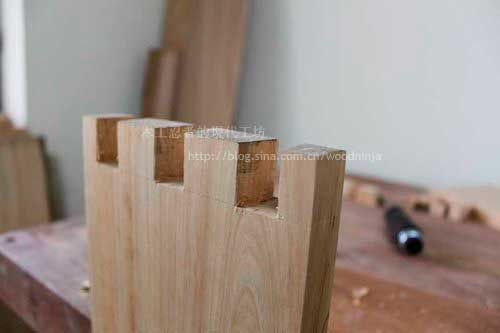
↑ Pick up the chisel to trim the tenon. If you are not sure where to put the chisel, you can clamp a wooden strip on the indicator line, then move the chisel directly upwards and trim it downwards.

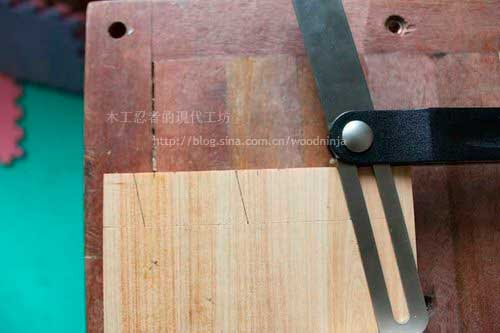
↑ Use a vertical guide to mark the mortise and tenon holes, and also mark the parts to be sawed, so as to avoid mistakes.
Home
Furniture
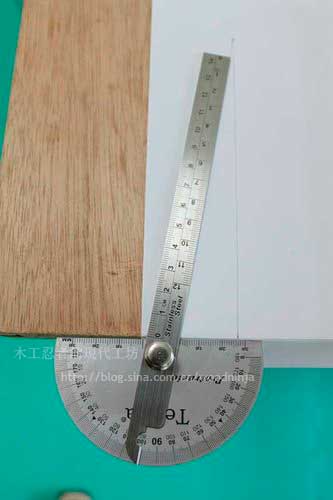
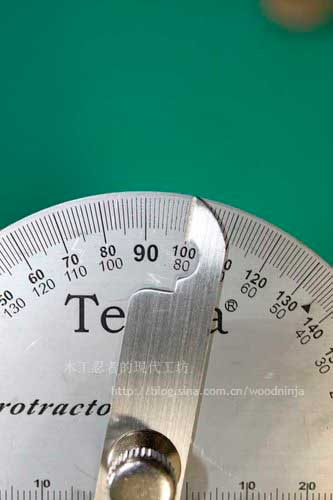
↑ Place a protractor and measure the angle of the dovetail tenon.
↑ The angle of 1:6 is about 9 degrees.
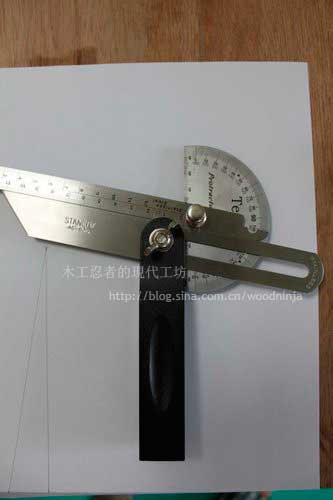
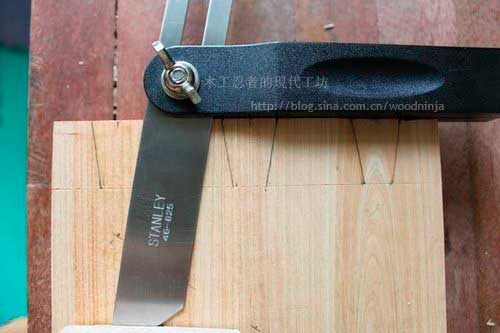
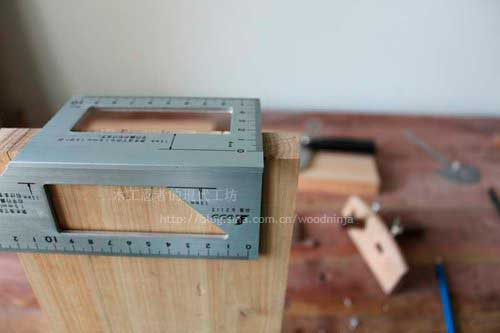
↑ Place the bevel gauge against the protractor, with the handle parallel to the protractor. The bevel part should be close to the indicator of the bevel gauge, and the angle should be guided to the bevel gauge to facilitate drawing the dovetail joint.
↑ Use a single-handled marking gauge. Place the backboard against the left side of the board and the blade on the right handle against the right side of the board. Leave it about 0.5mm away from the side of the board as a reserve for the tenon. This way , there will be room for correction when making the tenon.
↑ If the thickness of the boards is the same, then mark the range of the tenon at the tenon head and the tenon hole. Put the back plate of the marking gauge against the end of the board and draw the marking line through the blade on the handle of the marking gauge.
↑ First place the ruler diagonally on both ends of the board, with the left end at 10 cm and the right end at 28 cm. Mark every three centimeters and draw guide lines perpendicular to the end faces. Quickly square the width of the board into six equal parts with five endpoints.
↑ Move one centimeter to the left from the end point, and use the handle of the miter gauge to make sure it is against the end face of the wooden board (note to check whether the side and end faces of the wooden board are perpendicular). Use the miter gauge to draw the slope of the dovetail joint, which is the slope of 1:6 close to 9 degrees just guided out.
↑ Turn the bevel gauge upside down and move it one centimeter to the right of the endpoint of the equal part, draw the right oblique line of the dovetail tenon, and continue to draw the tenon.
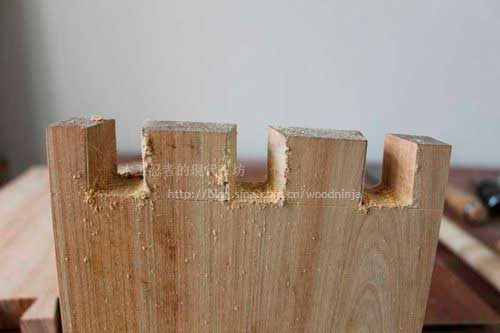
↑ This is the tenon part on the left and right sides of the chair seat, so you need to saw off the trapezoidal part. Be sure to cross it out or draw a double slash to mark it. Otherwise, if the tenon is sawed off, you will have to prepare to saw off the whole thing and start over.
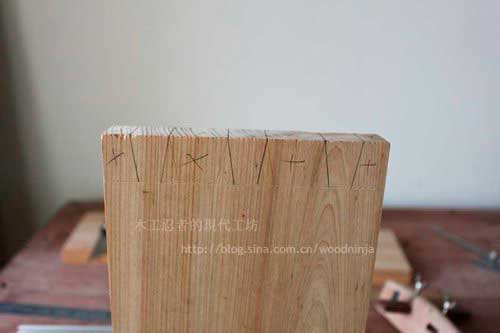
↑ Use the angle gauge to draw a vertical line on the end face. Draw the end point of the oblique line from the tenon on the end face.
↑ After painting.
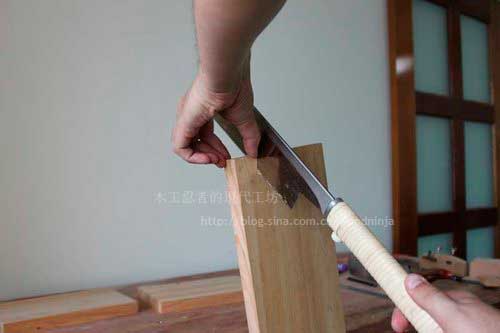
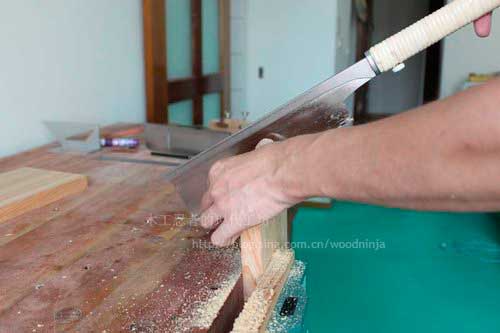
↑ Use your fingernails as a backing plate for the saw surface, cut into the wood at an angle, and use the bevel to saw out the sawing path at the front and back.
↑ Also use a miter saw for the rear.
↑ Then use a parallel saw to completely saw off the triangle area in the middle. The advantage of this sawing method is that you can see the position of the saw and the finger line on each surface, and the sawed tenon surface will be more beautiful.
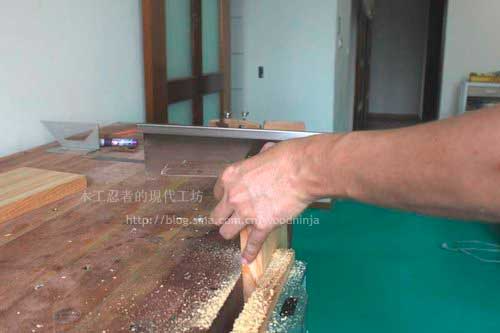
↑ Saw off the left and right sides of the board directly.
↑ Use a jigsaw to saw off the parts other than the tenon.
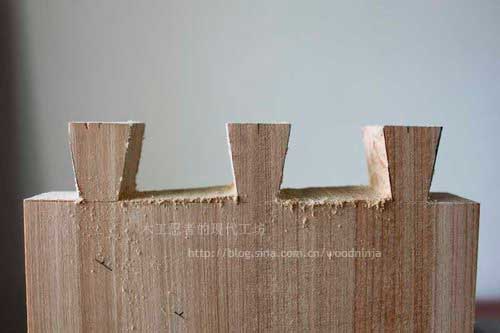
↑ After sawing, the tenon is ugly and many parts need to be repaired with a chisel.
↑ Pick up the chisel to trim the tenon. If you are not sure where to put the chisel, you can clamp a wooden strip on the indicator line, then move the chisel directly upwards and trim it downwards.
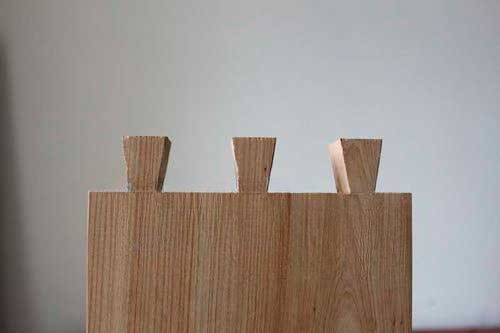
↑ The tenon trimmed with a chisel.
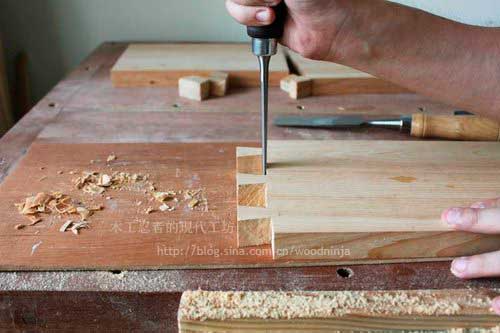
↑ Clamp the side panel of the chair with a work clamp, press the tenon onto the end surface, mark the range of the tenon, and then saw out the tenon hole of the side panel.
↑ Although the projection marks the mortise hole to be sawed, the inclination of the tenon may not be clear. Use the inclination gauge to draw it again. This can correct the tenon that may not be repaired properly.
↑ Use a vertical guide to mark the mortise and tenon holes, and also mark the parts to be sawed, so as to avoid mistakes.
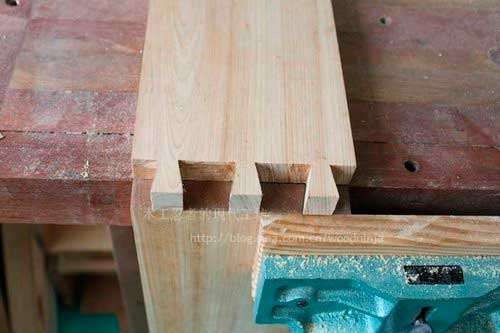
↑ The sawed mortise holes can also be trimmed with a chisel.
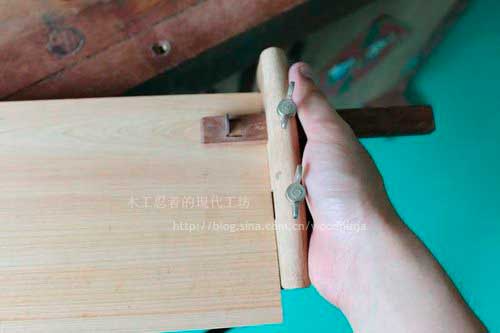
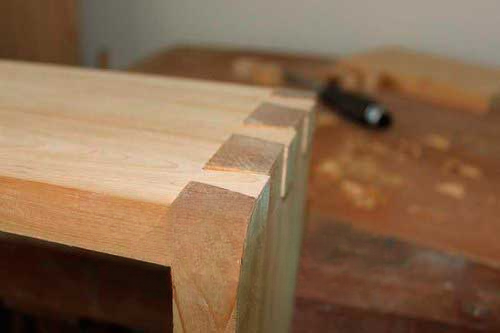
↑ After the repair, try to install it first. Don't force it hard. Forcing it hard will cause the wood to crack. You will see the interference parts and the marks of black pencil. Make careful repairs and don't overdo it . At this point you are already very close.
↑ For assembled tenons, use a planer to trim the reserved parts. Never use a chisel, as this will definitely cause injury.
↑ Assembled dovetail bench
This is the process I use to practice the dovetail tenon joint. I hope friends who are interested in learning joinery can come and play with me.