Cultivation methods of common flowers
1. How to grow Chlorophytum comosum
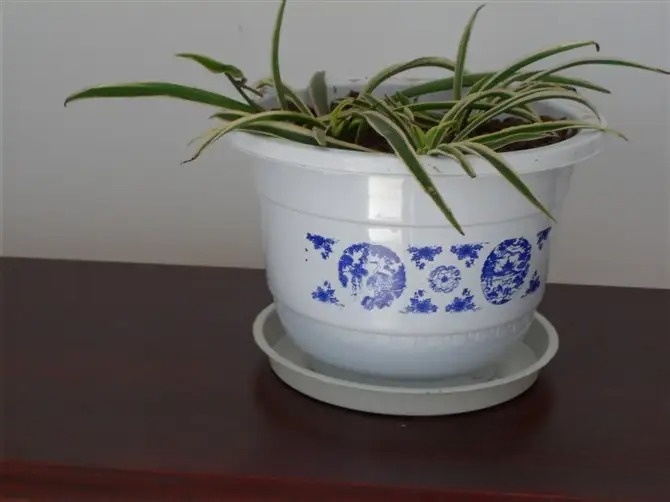
Substrate: Chlorophytum has strong adaptability to all kinds of soil and is easy to cultivate. Fertile sandy loam, humus soil, peat soil, or sand and dust with a small amount of base fertilizer can be used as bonsai soil. Reproduction: The division method is usually used for reproduction. Except for winter when the temperature is too low and division is not suitable, it can be carried out in other seasons. You can also cut the young seedlings with roots on the flower stems for bonsai. Watering: Chlorophytum likes a humid environment, and the pot soil is easy to keep moist. However, the fleshy roots of the hanging can store a lot of water, so it has a strong drought resistance and will not dry up even if it is not watered for several days. When the temperature is below 5 degrees in winter, water less and the pot soil should not be too wet, otherwise the leaves will turn yellow easily. Fertilization: Apply liquid fertilizer every two weeks during the growing season. Mosaic varieties should apply less nitrogen fertilizer, otherwise the white color or yellow pattern on the leaves will become less obvious. Stop fertilization when the ambient temperature is below 4 degrees. Lighting: Chlorophytum likes a semi-shady environment and can be cultivated in a bright room all year round. Chlorophytum grown outdoors can also grow well under strong direct sunlight in summer. However, Chlorophytum grown indoors for a long time should avoid direct strong sunlight and block 50 to 70% of the sunlight. Temperature: Chlorophytum is resistant to high temperatures. The suitable temperature is above 15 degrees, and the winter temperature is above 4 degrees. Humidity: It likes a humid environment. To keep the Chlorophytum fresh and green, you can often spray water on the leaves to clean it. Pruning: Cut off the yellow leaves at any time on weekdays. You can repot once in March every year , and cut off the old roots, rotten roots and excess fibrous roots. Cut off some of the old leaves of Chlorophytum in early and mid- May , which will promote the germination of more new leaves and small Chlorophytum. Hydroponics: Chlorophytum can be hydroponically cultivated. You can pour the bonsai Chlorophytum out of the pot, wash the soil with water, cut off the old leaves and old roots, place it in a hydroponic container, and pour clean water. Don't add too much water, just enough to reach the root and stem. In order to grow vigorously, you can drop a few drops of nutrient solution into the water (it can be cheap). The utensils can be wide-mouthed glass bottles, glasses and other containers. The water in the container can be changed every few days, or just add some water.
2. Aloe Vera Cultivation Method
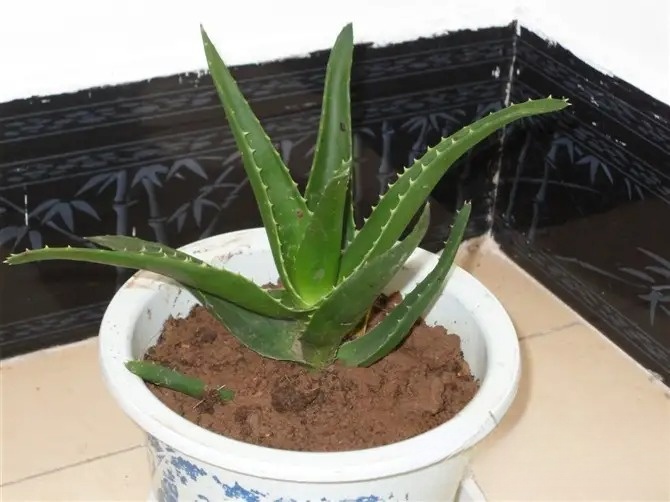
The aloe vera bonsai in the home can not only beautify the room, but also can be picked at any time to obtain the freshest aloe vera leaves for family health care. Some people say that planting a few pots of aloe vera at home is equivalent to hiring a permanent " private doctor " . Although this statement is inevitably a bit exaggerated, it is not entirely without reason. Whether aloe vera is used as medicine to treat diseases or to make the face beautiful and skin care, only fresh aloe vera can achieve the best effect.
1. The combination of pot soil
There are many recipes for the combination of aloe vera bonsai substrate. Generally, the common recipe uses humus soil, farmland soil and river sand in a ratio of 4:4:2 . Practice has proved that this kind of substrate combination is more suitable. Using sawdust to replace river sand, reduce the weight of the substrate, increase air permeability and water permeability, can achieve excellent results. It is better to use hard miscellaneous wood for sawdust, and concentrate and ferment before application.
2. Disinfection of potting soil As potting soil for indoor cultivation of aloe vera, it is best to disinfect it before use to kill the eggs and bacteria that may exist in the matrix. Commonly used methods include burning soil disinfection, steam disinfection and drug disinfection. ⑴ Burning soil disinfection: Put the prepared mixed matrix on a stove equipped with an iron plate and heat it and stir-fry it. Generally, under 80 °C , it takes 30 minutes to kill harmful microorganisms and various insect eggs in the matrix. (2) Steam disinfection: Put the prepared matrix in a container and steam it thoroughly. Generally, household coal stoves and gas stoves can be used for heating and disinfection. Steam disinfection needs to be kept above 80 °C . Steaming for 2 hours can achieve the effect of thorough disinfection. (3) Drug disinfection: 40% formalin is often used. Sprinkle 400-500 ml of the drug solution evenly on the matrix per cubic meter of culture matrix, cover it with plastic film to fill the gaps, and then open it after 1 to 2 days. Let it dry for 2 to 3 days, and then pot it after the drug solution evaporates. 3. Potting and repotting The process of planting the cultivated aloe vera in a pot is called potting. Potting time: It should be done in spring and summer. The indoor temperature is more suitable when it is 15-28 . Potting method: Selecting seedlings before potting is the key. Strong aloe vera seedlings have short and thick leaves, green color, and more than 4 self-rooted roots. When potting, first put some broken tiles at the bottom of the pot to facilitate drainage and ventilation, then fill some prepared substrate, put the aloe vera in the pot, try to stretch the root system, fill the soil to cover the roots, then gently lift the seedling up, and slightly compact it, so that the roots are in close contact with the substrate up and down, and then fill the pot soil to about 2 cm from the edge of the pot. Finally, slowly pour water into the pot, and the potting is complete. It is not advisable to water too much after potting. Generally, do not water if it is not dry, and water it thoroughly if it is dry. Frequently spraying water on the leaves of aloe vera can speed up the return of aloe vera to green and rooting. Aloe vera that has just been potted should not be exposed to direct sunlight. It can be maintained in semi-shade. Repotting: Home bonsai aloe vera generally needs to be repotted once every 1-2 years. It is also best to repot in spring. When repotting, you must master the correct technique of removing the pot. Turn the pot upside down, hold the pot soil with your left hand, and knock the edge of the pot with the palm of your right hand. After knocking several times, the pot and the old pot soil will naturally separate. Then move the aloe vera and the soil ball into a larger new pot, add new pot soil around the pot, then compact the pot soil with your hands, and then water it thoroughly. After repotting, it needs to be placed in a semi-shaded place for maintenance for a period of time, and then moved to a sunny place after the seedlings are completely slowed down. 4. Management and maintenance The management of home bonsai aloe vera mainly includes fertilization, watering and winter insulation . Fertilization: During the growth process, aloe vera needs a large number of elements such as carbon, hydrogen, oxygen, nitrogen, phosphorus, potassium, sulfur, calcium, magnesium, iron, etc. Among them, carbon, hydrogen and oxygen come from the air, while other elements are absorbed from the bonsai matrix. In addition, elements such as boron, manganese, molybdenum, zinc, copper, and chlorine are needed. Although the required amount is half large, they cannot be replaced by other elements. Scientific fertilization can supplement nutrition. Watering : In winter, it can generally be watered once every 15-20 days , and water can be sprayed on the leaves if necessary. Try to water as little as possible and keep the pot soil dry, which is conducive to the safe wintering of the plant; in spring, it is generally watered once every 5-7 days . Do not water if it is not dry, and water thoroughly if you water it, and the pot soil will be dry and wet; in summer, the temperature is high and the evaporation is large, so it needs to be watered once every 2-3 days , and you can spray water on the aloe vera leaves every morning and evening. Also pay attention to avoid exposure to the sun and reduce water loss; in autumn, the watering method of aloe vera is basically the same as in spring, and the pot soil should be kept dry and wet. The best time for watering is generally in the early morning and evening. At this time, the water temperature is closer to the pot soil temperature, which can prevent the temperature of the pot soil from changing drastically due to watering and affecting the growth of the root system. Remember: " Bonsai aloe vera, it is better to be dry than wet . " 5. Wintering management (1) Temperature requirements: Aloe vera can safely and naturally overwinter in the southern migratory areas and frost-free areas all year round such as southern Fujian, coastal Guangdong, Hainan, etc., but in other areas, wintering anti-freeze management should be strengthened. 5 ℃ is the minimum temperature safety line for aloe vera to overwinter. Mastering the safe overwintering temperature of aloe vera is one of the key technologies for the success or failure of home bonsai aloe vera. (2) Warming and insulation methods: In areas where the winter is not very cold or there are heating conditions indoors, bonsai aloe vera can generally overwinter safely if it is moved indoors. When the temperature cannot be guaranteed to be above 5 ℃ , some corresponding warming measures must be taken. For example, digging a rectangular pit ( commonly known as a ground hall ) , a simple insulated box, etc. (3) Control watering and increase light: In winter, try to water as little or no watering as possible to keep the pot soil dry. If the air is too dry, you can use the method of spraying water on the leaves. In addition, try to let the bonsai aloe vera see more sunlight.
3. Cultivation methods of Anthurium
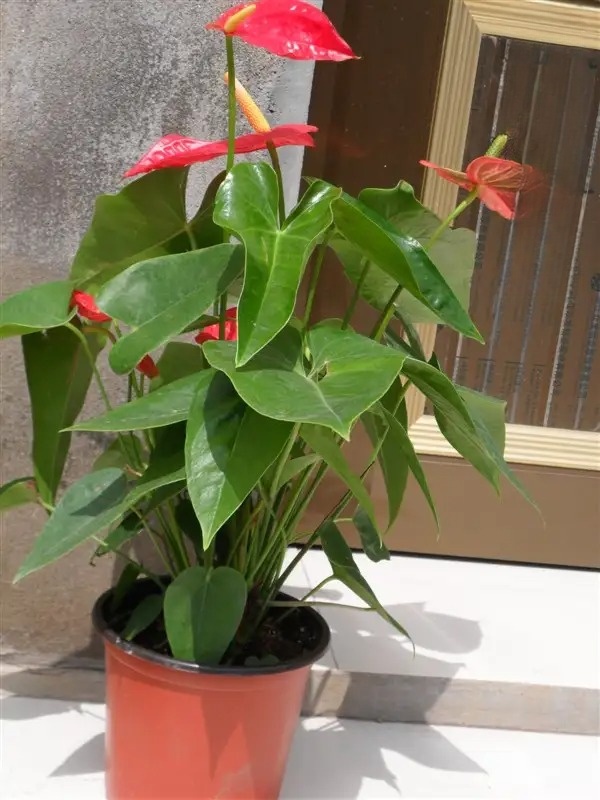
Anthurium is native to the tropical rain forests of South America. It likes warm, humid and semi-shady environments, but is not shade-tolerant. It likes sunlight but avoids direct sunlight. It is not cold-tolerant, likes fertilizer but avoids salinity.
Potted Anthurium should use a well-drained substrate. Large-scale production uses a mixed substrate of peat, perlite and sand, with a ratio of 1 cubic meter of peat: 4 to 5 kilograms of perlite: 0.15 cubic meters of sand. Its pH value is maintained between 5.5 and 6.5.
The optimum growth temperature is 20℃ to 30℃, the maximum temperature should not exceed 35℃, the minimum temperature is 14℃, and there is a possibility of frost damage at any time below 10℃. The optimum relative air humidity is 70% to 80%, and should not be lower than 50%, because maintaining a high air humidity in the cultivation environment is the key to the successful cultivation of Anthurium. Therefore, foliar spraying should be carried out more throughout the year. The optimum light intensity is 10,000 Lux, and should not be higher than 30,000 Lux.
Anthurium cannot tolerate strong light and should be cultivated in an environment with appropriate shade throughout the year, that is, a greenhouse with protective facilities should be selected for cultivation. Appropriate shade should be provided in spring, summer and autumn, especially in summer, where shading of 70% is required. Direct sunlight will cause the temperature of its leaves to be higher than the air temperature. If the leaf temperature is too high, it will cause burns and scorch, the flower buds will fade, and the leaf growth will slow down.
Anthurium can be propagated by division, sowing, tissue culture and other methods.
For division, choose a sunny day in spring, summer or autumn, gently peel the sucker buds from the pot by hand, and pot two plants (of the same size) for potting.
1. Planting
(1). Pot specifications. The pot specifications of potted Anthurium vary from seedling to large seedling at different growth stages. The seedling stage is generally completed at the seedling company. The Anthurium seedlings we purchased are all medium seedlings (about 15 cm or more). Therefore, when planting in pots, the pot selection can be a one-time 160×150 mm red straight-edged plastic pot.
(2). Cultivation medium. The substrate must have strong water and fertilizer retention capacity, good permeability, no water accumulation, no toxic substances and the ability to fix the plant. Before planting, the substrate must also be thoroughly disinfected to kill pests and diseases and maintain its normal growth.
(3) Anthurium is a shade-loving plant. When planting, a shade net with a 75% shading capacity is required to prevent excessive light. Double-plant planting is better than single-plant planting. When planting in a pot, it is very important to make the growth point of the plant's heart exposed to the horizontal plane of the substrate. At the same time, try to avoid the plant from being contaminated by the substrate. When potting, first fill the lower part of the pot with 4 to 5 cm of granular gravel and other materials as a drainage layer, then add 2 to 3 cm of culture soil, and at the same time place the plant in the center of the pot to allow the root system to fully expand. Finally, fill the culture soil to 2 to 3 cm above the pot surface, but the growth point in the center of the plant and the small leaves at the base should be exposed. After planting, it is necessary to spray fungicides in time to prevent the occurrence of blight and fusarium.
2. Water management
Anthurium is a species that is sensitive to salt. Therefore, the pH value of the substrate should be controlled between 5.2 and 6.2 as much as possible, and the most suitable pH value for the growth of Anthurium is 5.7. The EC value suitable for the growth of Anthurium is 1.2 ms/cm. Because a high EC value will cause the flowers to become smaller and the flower stems to become shorter, thus reducing the ornamental value. Spring water is suitable for planting Anthurium, but it is expensive; natural rainwater is the best water source for Anthurium cultivation.
Potted Anthurium has different water requirements at different growth and development stages. In the seedling stage, because the root system of the plant is weak and shallowly distributed in the substrate, it is not drought-resistant. After planting, it should be sprayed with water 2 to 3 times a day. The substrate should be kept moist at all times to promote early growth and more new roots, and pay attention to the dryness and humidity of the substrate on the pot surface; the plants grow fast in the medium and large seedling stages, and require more water, so the water supply must be sufficient; watering should be appropriately reduced during the flowering period, and phosphorus and potassium fertilizers should be added to promote flowering.
The key to the success of large-scale cultivation of anthurium is to maintain relatively high air humidity, especially in hot seasons. The relative humidity of the air in the greenhouse can be increased through the spray system and the mist system (note not to spray the leaves in the evening, and make sure there are no water droplets on the leaves of anthurium at night) to avoid high temperature burning the leaves, scorching leaves, deformed flower buds, and fading. During the watering process, the dry and wet cycles should be alternating. Do not water the plants when they are seriously short of water, as this will affect their normal growth and development. In hot seasons, watering is usually done every 2 to 3 days, and the spray system should be used to spray water on the leaves at noon to increase the relative humidity in the room. In cold seasons, watering should be done between 9 am and 4 pm to avoid frostbite of the roots.
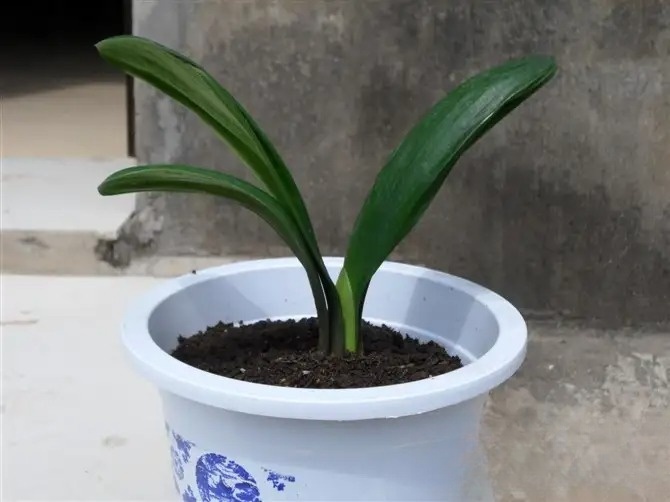
4. Cultivation methods of Clivia
Clivia is resistant to adversity and generally has no diseases and insect pests, but the following points should be paid attention to during cultivation:
1. Soil: leaf mold: pine leaves = 3 : 1 , add a little river sand to achieve ventilation and water permeability.
2. Watering: Water when the soil is dry, but in the growing season, spring and autumn, water more appropriately.
Clivia is not afraid of floods, but is afraid of watering before it is dry, but watering after it is dry must be watered thoroughly.
For large flowering orchids, the leaf bank cannot be flooded, otherwise the bank will rot.
3. Summer lighting: Avoid direct sunlight, which can cause " sunburn " on Clivia leaves , which does not occur in other seasons.
4. Summer ventilation : The only insect pest that Clivia can get is scale insect disease, which is caused by poor ventilation in summer, which is generally not the case in other seasons.
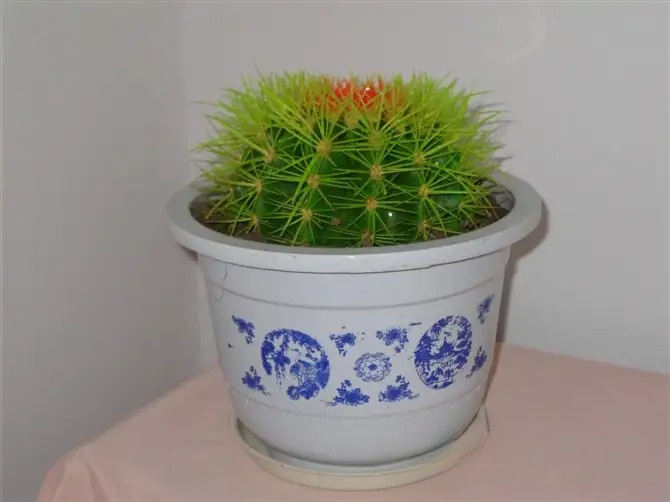
5. How to cultivate cactus
6. How to cultivate the dripping Guanyin
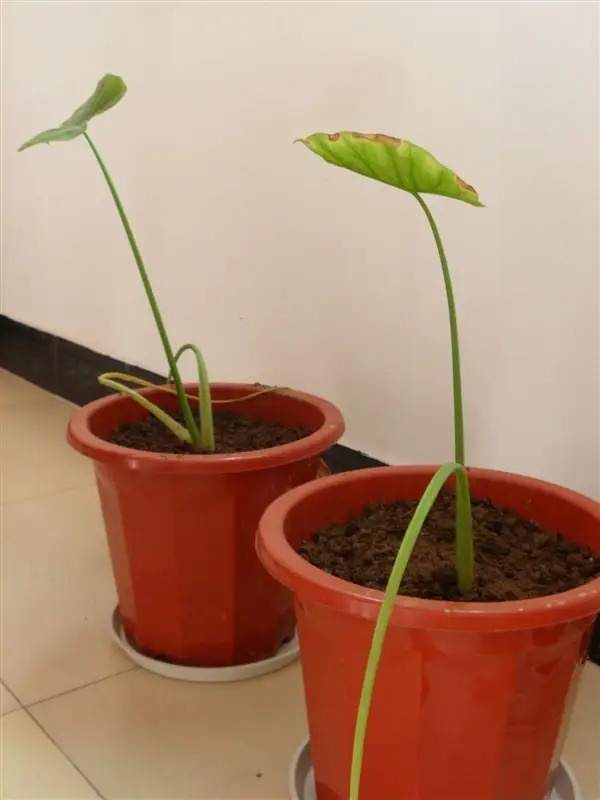
1. Temperature. The weeping angelica can only grow well in an environment not lower than 18 ℃ . If the temperature is lower than 18 ℃ , the weeping angelica will be in a dormant state and its growth will be curbed.
2. Fertilization. The weeping Guanyin likes fertilizer, so it should be fertilized every month. 3. Watering. The weeping Guanyin needs more water in summer, but not too much. It should be dry and wet at appropriate times. There should be no water accumulation in the soil, otherwise the tubers will rot. It should be dormant in winter, water less, and fertilization should be stopped. 4. Sunlight. The weeping Guanyin likes shade, so don't let it be exposed to direct sunlight. The main reason why the weeping Guanyin becomes " wilted " is that it is not fertilized enough. Pay attention to topdressing . Maintenance: The weeping Guanyin likes a warm, humid and slightly shaded environment , but it needs plenty of sunlight during the flowering period, otherwise the spathe will be green and affect the quality. It must be ensured that there are 3-5 hours of light every day, otherwise the petiole will stretch and affect the ornamental value. The weeping Guanyin is not cold-resistant, so it should be moved into a greenhouse in mid- October . In summer, it needs to be shaded and sprayed with water frequently to reduce the temperature and replenish water. The weeping angel likes moist and fertile soil, which is often called " a flood of fertilizer " , and needs to be watered frequently during the growing period.
7. Cultivation methods of asparagus fern

Asparagus fern likes moisture and is afraid of drought. It avoids excessive moisture and waterlogging. It has strict requirements for soil and water. If it is watered too much, the pot will be too wet or waterlogged for a long time, which will cause poor root growth and root rot. The aboveground part will first grow branches and leaves, then the leaf tips will turn yellow, the branches and leaves will gradually turn yellow and fall, and the newly grown buds will wither halfway. The vine plants over three years old will have a large number of falling flowers and seeds, which can cause the death of the whole plant in severe cases. If it is watered too little, the pot will be too dry, causing yellow leaves and withered tips, twigs to fall off, the body to shrivel, and buds and flowers to fall.
Asparagus fern likes semi-shade and avoids strong light. If it is placed in direct sunlight in summer, it is very easy to cause the branches and leaves to wither and turn yellow. At this time, the flower pot should be moved to a cool place, and water should be sprayed on the branches and leaves frequently to increase the air humidity. If the damage is light, most of them can be restored to their original state.
Asparagus fern likes warmth and should be placed in the sun in winter. If it is placed in a place without light for a long time in winter, poor ventilation or cold weather, it will easily cause the branches and leaves to wither and turn yellow. At this time, it can be moved to a warm place with sunshine, the room temperature can be kept between 12 ℃ and 18 ℃ , and watering can be properly controlled, and it can gradually return to normal.
Asparagus fern is afraid of smoke and dust. If it encounters toxic gases, its branches and leaves will turn yellow easily. For this reason, it should be placed in a clean environment during maintenance. Asparagus fern prefers fertile soil. If the soil is not changed and fertilized for a long time, the nutrients will be in short supply, and the branches and leaves will turn yellow. At this time, it is necessary to irrigate with decomposed thin liquid fertilizer or compound fertilizer once a week, and water and loosen the soil in time, so that it will turn from yellow to green soon. If the fertilizer is too concentrated or uncomposted, it is easy to cause " root watering " , causing the leaves to dry and fall off. At this time, it is necessary to turn the pot upside down to remove the fertilizer, flush the soil with clean water, and then replace it with new culture soil.
8. How to grow violets
Violet, also known as grass osmanthus and grass violet, is an annual, biennial or perennial herb of the genus Viola in the family Cruciferae. It is one of the famous flowers in Europe. The plant is 20-70 cm tall, and the whole plant has grayish-white star-shaped soft hairs. The stem is erect and branched. The leaves are alternate, rectangular or oblanceolate, and 3-5 cm long. The racemes are terminal or axillary, with potato chip bases on both sides hanging in a sac shape. The pedicels are thick, the flower diameter is 2 cm, and there are 4 petals with long claws, and the petals are spread in a cross shape. The flowers are purple, light red, light yellow, white, etc., and are slightly fragrant. The flowering period varies depending on the variety. There are spring violets, which bloom in April and May; summer violets, which bloom from June to August; and autumn violets, which bloom from July to September.
Violets prefer a warm winter, cool summer and well-ventilated environment. They can tolerate short-term low temperatures of -5 ℃ in winter and avoid extreme heat in summer. They need fertile, loose and moist soil, and should not be fertilized too much, otherwise it will be detrimental to flowering. They like sunlight and are long-day plants. Insufficient light and ventilation will cause them to be susceptible to diseases and insect pests. Spring violets are propagated by sowing in early September , and the optimum temperature for germination is 20 ℃. Summer violets are raised in greenhouses in early spring. Autumn violets are sown in late autumn.
Violet is a taproot plant with underdeveloped fibrous roots. Seedlings should be divided before the true leaves unfold, and roots should be injured as little as possible, and more soil should be brought in. Double-petal varieties that are not easy to bear can also be propagated by cuttings or root division.
9. How to grow white palm
White palm is a " professional " in suppressing the exhaled waste gases such as ammonia and acetone . It can also remove benzene, trichloroethylene and formaldehyde in the air. Its high evaporation rate can prevent the nasal mucosa from drying out, greatly reducing the possibility of illness. This beautiful indoor plant native to the Venezuelan rainforest is undoubtedly a miracle of medicine and living matter. The following is an illustration. Lighting conditions: Neutral plant, suitable for planting in semi-shade.
Maintenance required: Keep the soil moist and fertilize regularly, and spray the leaves with water frequently. Suitable temperature: The suitable temperature for growth is 20-28 , and the wintering temperature is 10C .
Can remove: ammonia, acetone, benzene, trichloroethylene, formaldehyde.
10. How to grow poinsettiaPoinsettia is a deciduous upright shrub of the genus Euphorbia. The leaves are alternate, ovate-elliptical to broad-lanceolate, 10 to 15 cm long, with soft hairs on the back, and the leaves on the top of the branches are narrower (also called bracts). Poinsettia is native to Central America and is potted in the north. The flowering period is from December to February of the following year . 1. Propagation method Poinsettia is usually propagated by cuttings in mud pots or water tanks, and tender branches and dormant branches can be used. Cuttings should be carried out after flowering in early spring. Use the dormant branches cut off, and cut each section into 10 cm as cuttings. After cutting, let it air dry for 2 to 3 days or apply ash to the cut end. When the latex of the cut end is fully dried, cut it into plain sandy soil, the depth is one-third of the length of the cutting, and the spacing between plants is about 5 cm. After sowing, water it thoroughly, place it in a ventilated semi-shaded place, keep the temperature at 15 to 20 ℃, and keep the pot soil dry and wet. New roots will grow in about a month, and when the new shoots grow to 10 cm, they can be planted in small flower pots. 2. Preparation of culture soil Poinsettia likes loose and well-drained soil. Generally , 3 parts of garden soil, 3 parts of humus soil, 3 parts of leaf mold , 1 part of decomposed cake fertilizer , and a small amount of slag are used for mixing. 3. Temperature Poinsettia likes warmth and is afraid of cold. In mid-to-late September every year , it is necessary to strengthen ventilation so that the plant can gradually adapt to the indoor environment. The room temperature should be maintained at 15 ℃ to 20 ℃ in winter. This is the period of bract discoloration and flower bud differentiation. If the room temperature is below 15 ℃, the flowers and leaves will be poorly developed. After mid- December , it will enter the flowering stage and gradually ventilate. 4. Light Poinsettia likes sufficient light, has strong phototropism, and is a short-day plant. It should get sufficient light all year round, and it is more important during the period of bract discoloration, flower bud differentiation, and flowering. If there is insufficient light, the branches will grow too long, be susceptible to diseases, and the flower color will be dull. If placed in a dark place for a long time, it will not bloom and will shed leaves in winter. In order to advance or delay flowering, the light can be controlled. Generally , 8 to 9 hours of light per day will be given, and it will bloom in 40 days. 5. Fertilization Poinsettia likes fertile sandy soil. In addition to adding organic fertilizer and horseshoe slices as base fertilizer when potting and repotting, apply 5 times diluted fully decomposed sesame sauce residue liquid fertilizer every 10 to 15 days during the growth and flowering season. After autumn, 0.3 % compound fertilizer can also be used once a week for 3 to 4 times in a row to promote bract discoloration and flower bud differentiation. 6. Watering Poinsettia is not drought-resistant or water-resistant, so watering should be flexibly controlled according to the weather, pot soil and plant growth. Generally, watering is to keep the pot soil moist without water accumulation, but watering should be reduced after flowering. 7. Shaping and pruning: Repot dormant old plants around the Qingming Festival, cut off old roots and weak branches to promote new shoots. Pruning is required twice during the growth process, the first time in late June and the second time in mid- August . In cultivation, large amounts of fertilizer and water should be controlled, especially in autumn before the plants are set. When the branches are 20 to 30 cm long, shaping and bending are started. The purpose is to make the plant short, the flower heads neat and evenly distributed, and improve the ornamental value.
11. Camellia cultivation method
Camellia is a traditional Chinese flower, also known as camellia, one of the world's famous flowers, and the provincial flower of Yunnan Province, and the city flowers of Jinhua City and Wenzhou City in Zhejiang Province. It is cherished by the world's horticultural community for its beautiful plant shape, dark green and shiny leaves, and colorful flowers. The suitable temperature for camellia growth is between 15 and 32 ℃ , requiring a certain temperature difference and an environmental humidity of more than 60% . Most varieties can withstand low temperatures of -8 ℃ (natural overwintering, Yunnan tea is slightly less cold-resistant), and can generally overwinter naturally in areas south of the Huaihe River. The soil for camellia cultivation should be slightly acidic and require good air permeability. In order to facilitate the development of root hairs, peat, rotten sawwood, red soil, humus soil, or a mixed substrate of the above can usually be used for cultivation. Camellia requires stronger light than azalea, and no shade is required in spring, autumn and winter, and 50% shading can be used in summer.
Camellias should be watered with neutral or slightly acidic surface water. When watering, you should water when the soil is dry and then water when it is dry. Water thoroughly, but be careful not to overdry. Generally, water should be appropriately withheld before budding at the end of spring to facilitate the transformation to reproductive growth, and water should not be cut off before flowering.
Placement: Camellia should be placed in a warm, humid, ventilated and light-permeable place. In spring, it should be exposed to sufficient sunlight. In summer, it should be shaded and avoid direct sunlight and western exposure. If it is placed on the balcony, it will be killed by the sun if you are not careful. It is not advisable to change the location frequently.
Watering: The soil of camellia bonsai should be kept moist , but not too wet , to prevent it from being dry and wet. Generally, it can be watered more in spring to facilitate germination and shoot growth ; in summer, water it in the morning and evening , and it is best to spray water on the leaves to make the leaves wet. Do not use quick water to pour directly or fill it up, and do not use hot water. Avoid watering when the temperature is high around noon ; water in autumn and water in moderation ; in winter, water it around noon , and spray water every two or three days.
Fertilization: Camellia likes fertilizer . When potting, you should pay attention to putting basal fertilizer in the potting soil , mainly phosphorus and potassium fertilizers. The fertilizers used include decomposed bone meal, hair, chicken feathers, rice husk ash, poultry manure, and superphosphate. It is not advisable to fertilize too much at ordinary times. Generally, apply 2 to 3 times of thin fertilizer water in April and May after flowering, and apply a slightly concentrated fertilizer water in November in autumn . When using fertilizer, pay attention to the proportion of phosphorus fertilizer to be slightly larger to promote the abundance and color of flowers.
Pruning: Camellia grows slowly, so excessive pruning is not recommended. Generally, you can prune away the long branches that affect the tree shape, as well as diseased and insect-infested branches and weak branches . If there are too many flower buds on each branch, you can thin out the flowers to only 1 to 2 and keep a certain distance between them. The rest should be removed as soon as possible to avoid nutrient consumption. In addition, you should also remove the flowers that are about to wither in time, which can also reduce nutrient consumption, so that the plant can grow healthily and form new flower buds.
Repotting: Camellia bonsai can be repotted once every 1 to 2 years . The new pot should be one size larger than the old one to facilitate the expansion and development of the root system. The best time to repot is in spring or April , but autumn is also an option. When changing the soil, remove some of the hardened old soil and replace it with fertile and loose new soil, and add basal fertilizer.
Pest and disease control : The main diseases of camellia are black mold and anthracnose, which can be controlled by spraying 0.5 degree Bordeaux liquid . The main insect pest is the tea moth, which can be controlled by cutting off the insect tips, usually from April to June .
12. How to grow peony
In addition to open-field cultivation, peonies can also be potted for viewing. The best planting season is September-October. Potted peonies should choose varieties such as Luoyang Red, Hu Hong, and Zhao Fen that have strong adaptability, early flowering, and good flower shapes. Plants should be selected from 3-4 year old small peonies grafted with peony rootstocks or ramet seedlings with 3-5 branches. When potting, the bottom of the pot can be covered with coarse sand or pebbles 3-5 cm thick to facilitate drainage. The potting soil should be a mixture of yellow sand and cake fertilizer, or a culture soil mixed with fully decomposed stable manure, garden soil, and coarse sand in a ratio of 1:1:1. Filling the soil should allow the roots to stretch and not curl; after covering the soil, compact it by hand so that the roots are in close contact with the soil, so that it is easy to survive. After potting, water it thoroughly once and place it in a semi-shaded place to slow down the seedlings. After transferring to normal management, it can be placed in a sunny place to ensure that it has sufficient sunlight. During the growth period, the soil should be loosened frequently, and compound fertilizer should be applied every half a month or so. Newly potted peonies should not be fertilized, especially concentrated fertilizers, otherwise the fleshy roots will mold and rot. After half a year, some thin fertilizers can be gradually applied, such as decomposed chicken manure water or bean water, and the fertilizer-water ratio should be 20%-30%. Newly potted peonies may not bloom well in the first year, but after 1-2 years of cultivation, they can bloom year after year. Peonies bloom in mid-to-late April. Liquid fertilizer can be applied 1-2 times before flowering; 1-2 times of liquid fertilizer can be applied half a month after flowering; sesame sauce residue (about 40-50 grams per pot) can be applied once in the dog days to facilitate flower bud differentiation. When peony seeds mature in August, the fruits crack and should be sown as soon as they are harvested. Before sowing, the land should be prepared and ridges should be made, watered thoroughly, and then sown. After sowing, cover with fine sand, the thickness of which is 1 to 2 times the diameter of the seeds. Keep the soil moist at all times. If necessary, cover it with a layer of corn stalks or straw to achieve the purpose of shading, ventilation and moisture retention. Roots can be taken in the same year of sowing in autumn, but the young shoots can only emerge after the spring warmth of the following year. The sown seedlings grow slowly, and the well-developed ones need 3 to 4 years to bloom. Generally, the sowing of peonies is mostly for the purpose of cultivating new varieties. Cultivation and management: Peonies cannot be transplanted frequently after planting, otherwise the roots will be damaged, affecting growth and flowering. In order to make the peony grow well, reasonable fertilization is required every year. The first application is in March when the buds emerge; the second application is in April when the buds appear; the third application is in late May after the flowers fade; the fourth application is in late August after the end of summer heat, when the plants are nurturing the flower buds of the following year; the fifth application is in November, digging trenches around the plants to apply winter fertilizer. After each fertilization, water should be poured fully and the soil should be loosened immediately to reduce water evaporation. Intertillage and weeding should be carried out frequently during the rainy season. For potted peonies, cut off the withered branches and leaves after frost to prevent the breeding of diseases and insects. There is no need to move them indoors during the winter. Place them on the balcony or under the eaves in a sunny place. The pot soil should not be too dry. Before the peony blooms, the side buds can be removed in time after they appear to concentrate nutrients and promote the top buds to be large and beautiful. After the flowers fade, if you do not plan to sow and propagate, you should cut off the pedicels at any time to avoid seeding and consuming nutrients. Prevention and control of diseases and pests: Pests that harm peonies include grubs, red spiders and aphids. To prevent grubs from biting the roots of peonies, 1000 times 50% phoxim dilution can be used for root irrigation in early spring every year. Red spiders and aphids can be sprayed with dimethoate. The main disease of peonies is brown spot disease, the symptom of which is that brown spots appear on the leaves of peonies in summer, and in autumn, the leaves gradually wither, and even the whole plant dies. The prevention and control method is to spray Bordeaux liquid once or twice a month from April to autumn.