Cultivation knowledge for various flowers (Autumn flowers, part 2)
Origin: South Africa.
Type: Foliage plant.
Flowering period: February-March or June-July.
Sunlight: Dislikes dry winds, slightly shade-tolerant.
Temperature: Prefers warmth, low cold tolerance, intolerant of frost.
Soil: Prefers loose, fertile, humus-rich, well-drained soil.
Water: Prefers moist conditions, dislikes drought.
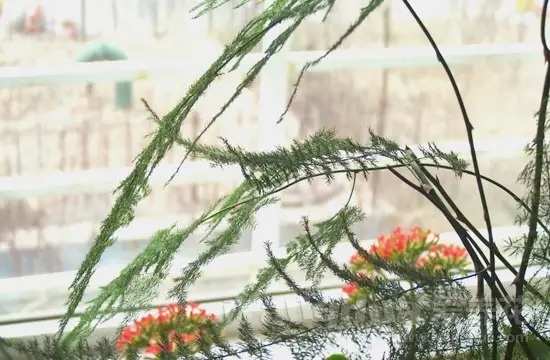
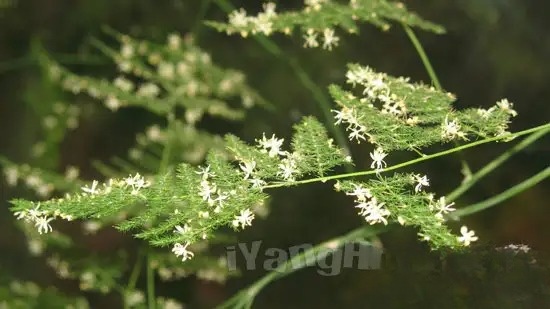
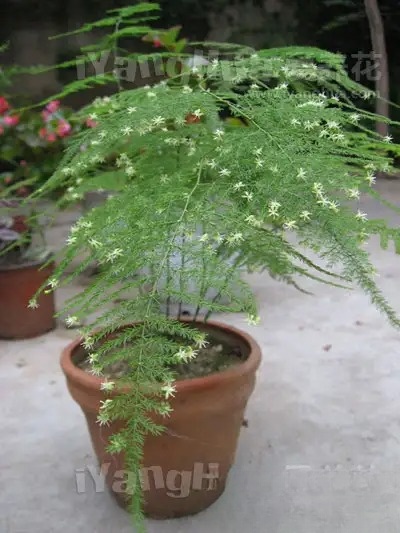
The potting soil can be loose, fertile leaf mold, or a mixture of 1 part loam, 1 part leaf mold, and 1 part manure.
Asparagus fern should be repotted every spring. When repotting, remove the old soil, keeping only the original core soil. Add fresh, fertile soil around the core soil, and place 3-4 pieces of hoof meal at the bottom of the pot as base fertilizer. The bottom of the pot should be filled with coarse sand or broken tiles to facilitate drainage; otherwise, the leaves and stems may turn yellow and the roots may rot. Also, prune away dead branches and yellow leaves, and shape the plant appropriately.
During its vigorous growth period, asparagus fern should be fertilized 1-2 times per month with diluted, well-rotted hoof meal, or once with a diluted, well-rotted liquid fertilizer rich in nitrogen and potassium. Insufficient fertilizer or excessive or concentrated fertilizer can cause the asparagus fern to yellow or die. Fertilization should be stopped after winter begins. Once the plant has reached its desired shape, fertilization should be controlled.
Asparagus ferns prefer moist conditions but are susceptible to waterlogging. Careful attention must be paid to the amount of water used, generally maintaining a soil moisture level of about 20%. This means the water should quickly seep into the soil without accumulating on the surface. Waterlogging will cause root rot, while overly dry soil will cause yellowing or leaf drop. Reduce watering in winter and regularly mist the leaves with room temperature water to increase humidity. However, never spray the foliage with cold water in winter.
The room temperature should be maintained at 12-18℃, and the overwintering temperature should be 5-10℃.
Asparagus fern prefers shade and should not be exposed to direct sunlight. In summer and autumn, it is best to place it in a well-ventilated, semi-shaded area, while in spring and winter, it can be placed in a sunny spot indoors.
The diseases include gray mold and leaf blight, which affect the leaves. Spray with a 1000-fold dilution of 50% carbendazim wettable powder.
When indoor ventilation is poor, scale insects are prone to occur. They can be controlled by spraying a 2000-fold dilution of dichlorvos emulsion. Aphids are common in summer and can be controlled by spraying a 1000-fold dilution of 40% dimethoate emulsion.
Asparagus fern has the most beautiful foliage and branching shape when it is 1-3 years old. After 3 years, the plant will exhibit vine-like characteristics, with soft, curved, drooping, and twining stems. If you do not want it to grow into a climbing plant, you can shorten the excessively long branches to encourage new shoots to sprout from the base; if you want to keep it, you can provide a trellis for it to climb. During repotting or other maintenance, you should prune old and overly dense branches to create a balanced and layered appearance, maintaining a beautiful plant shape and enhancing its ornamental value.
Asparagus fern can be propagated by seed or division. Larger plants, 4-5 years old, can be divided, usually in spring when temperatures rise, combined with repotting. Use a sharp knife to cut the plant into clumps, retaining 2-3 stems in each small clump. After division, place in a shady place, mist to maintain humidity, and cultivate for one year. They will be ready for display the following year. Because new plants obtained by division often have irregular shapes, seed propagation is more commonly used in production. First, it's essential to cultivate fruit-bearing mother plants. Generally, potted plants have insufficient nutrient area, resulting in many flowers but few seeds. Healthy 2-3 year old plants are usually transplanted to a greenhouse or planted in larger containers, with ample base fertilizer, mainly phosphorus and potassium fertilizer. Provide support, allowing the vines to climb upwards, maintaining appropriate shade and ventilation. Flowering and fruiting will occur from winter to spring, with seeds maturing the following spring. Seeds should be sown shallowly in moist sand pots to germinate, maintaining a temperature of 20℃ and keeping the soil consistently moist. Germination takes 25-30 days. After germination, apply wood ash or superphosphate as a top dressing. Transplant once when the seedlings are 5-6 cm tall, and when they are 8-10 cm tall, they can be planted individually in small pots.
How to prevent the leaves of asparagus fern from turning yellow?
Potted asparagus ferns often develop yellowing leaves and stems if not properly cared for. The causes of yellowing leaves and stems in asparagus ferns and their prevention methods are summarized below:
(1) Excessive sunlight. Asparagus fern prefers partial shade and dislikes direct sunlight, otherwise the branches and leaves will turn yellow, so it is necessary to provide shade for asparagus fern.
(2) Improper watering. Asparagus fern prefers moist conditions but is susceptible to waterlogging, so it is best to use well-draining sandy loam soil for cultivation. Watering should be done appropriately; too much water will cause root rot, while too little water will cause the leaves to wither and turn yellow. In hot and dry weather, spray the branches and leaves with clean water every day to increase the ambient humidity and compensate for the water evaporation from the branches and leaves.
(3) Insufficient nutrients. If potted asparagus ferns are not repotted for many years, the soil will become nutrient-deficient. If only water is applied without fertilizer, nutrient deficiency will also occur. Potted asparagus ferns should be watered with diluted, well-rotted liquid fertilizer once a week, and the soil should be loosened and watered regularly.
(4) Improper fertilization. Applying too concentrated or uncomposted fertilizer can damage the roots, causing the leaves to turn yellow and fall off. Rinse the potting soil with water to dilute the fertilizer concentration, or immediately replace the soil to save the plant.
(5) Poor winter management. Asparagus fern prefers warmth and is sensitive to cold. In winter, it should be placed in a sunny and warm place indoors, with the room temperature maintained above 8-12℃. Long-term shady conditions and room temperatures below 8℃ will cause the leaves to turn yellow. In addition, watering should be controlled.
Origin: China.
Type: Flowering plant.
Flowering period: October-December, but there are also different ecotypes that bloom in summer, winter, and all four seasons.
Sunlight: Prefers sunlight; a typical short-day plant. Artificial control of light duration can advance or delay flowering.
Temperature: Prefers cool climates. Its optimal growth temperature is 18-25℃; it dislikes high temperatures. It has some cold tolerance, especially small chrysanthemum varieties. Some varieties can overwinter outdoors in North China and under cover in Northeast China.
Soil: Suitable for deep, fertile, loose, well-drained sandy loam.
Water: Dislikes waterlogging and continuous cropping.
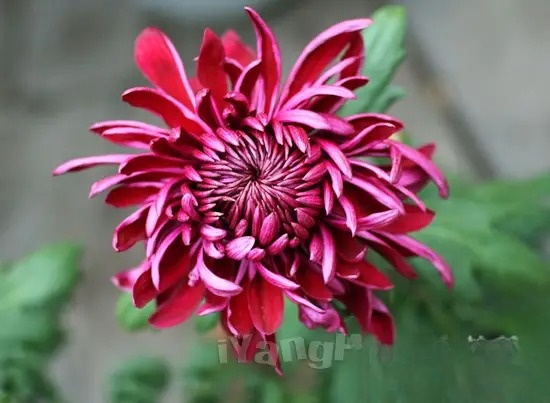
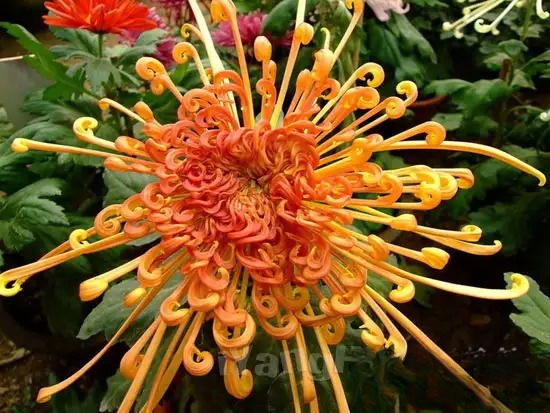
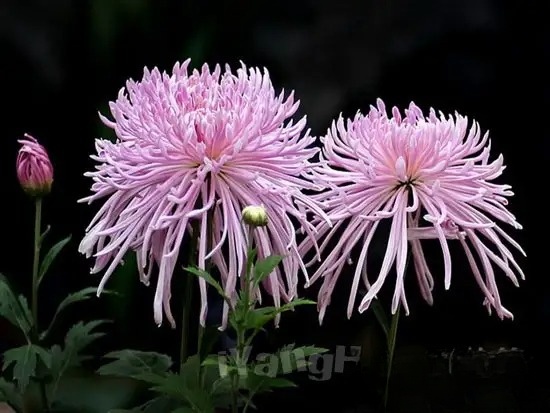
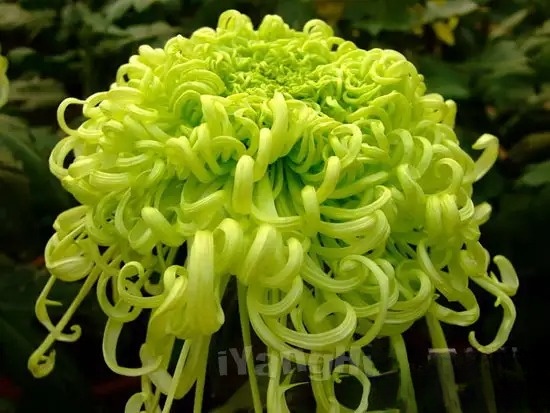
Key tips for growing flowers:
Once the cuttings have taken root, transplant them into pots promptly. Use loose, fertile sandy loam soil. As the plant grows, most varieties require repotting 2-3 times before final planting. For final planting, use a potting mix of 6 parts leaf mold, 3 parts sandy loam, and 1 part compost residue. When transplanting seedlings, it's best to plant them in moist soil, place them in a shady spot to allow them to recover, water thoroughly, and gradually move them to a sunny location.
In addition to sufficient base fertilizer, chrysanthemums should not be fertilized excessively or too early, otherwise it will cause root damage and leaf drop. However, from the beginning of autumn until the buds appear, fertilizer and water should be sufficient, generally applying a diluted solution of bone meal and fermented soybean residue once a week. When the buds are about to open, apply a solution of superphosphate or 0.1% potassium dihydrogen phosphate once more to make the flowers more vibrant. After each fertilization, water and loosen the soil promptly to improve aeration.
Stop watering before fertilizing; it's best to fertilize only after the potting soil has dried slightly. After fertilizing, promptly spray water with a spray bottle to rinse off any fertilizer residue on the leaves, preventing them from turning yellow and affecting the plant's appearance.
Proper watering is a key factor in the success or failure of chrysanthemum cultivation. Watering should be timely and in the appropriate amount. The frequency and amount of watering should be determined based on the different water requirements of chrysanthemums from cutting to flowering.
Under normal circumstances, chrysanthemum seedlings are smaller in spring, so watering should be less frequent to promote root development. In summer, the plants are larger and evaporate water quickly, so watering should be more plentiful, and water should be sprayed on the branches, leaves, and ground to increase humidity. In autumn, the large temperature difference between day and night in northern regions coincides with the peak growth period for chrysanthemums, so watering should be increased appropriately. In winter, when seedlings are overwintering, watering should be strictly controlled. Overwatering should be avoided throughout the year to prevent waterlogging, which can lead to root rot, yellowing of the plant, and even death. Furthermore, avoid direct watering to prevent soil from splashing onto the leaves.
The key to successfully cultivating chrysanthemums is ensuring they survive the winter. Due to differences in climate between northern and southern my country, the management methods for overwintering chrysanthemums also differ. In some southern regions, after the chrysanthemums grown outdoors have finished blooming and the stems and leaves have gradually withered, they can be cut off 15 cm above the ground, watered once for overwintering, and then covered with fallen leaves and dry soil, leaving 3-5 cm of stems and leaves exposed to allow for ventilation. This will allow them to safely overwinter. In northern regions and parts of southern China, chrysanthemums need to be moved indoors for overwintering. There are two main methods for overwintering potted chrysanthemums:
(1) Preservation of Perennial Roots: After flowering, cut off the old rootstock, then water thoroughly once and place it in a cool, sunny room with a room temperature of 0-3℃. At this time, watering should be strictly controlled; do not water unless the soil is very dry. Water sparingly, keeping the soil slightly moist. This will allow it to enter a state of full dormancy, which is beneficial for healthy growth the following year. In winter, the location should not be too shady, and the room temperature should not be too high; otherwise, insufficient light, high temperature, and excessive watering will easily lead to the growth of yellow and weak root shoots, which will consume a lot of nutrients and affect normal growth and flowering in the second year. Therefore, the environment should be kept neither too dry nor too wet, neither too hot nor too cold throughout the winter, and care should be taken to prevent it from drying out. In March of the following year, as the weather gradually warms up, gradually increase the amount of watering and move it outdoors to a sunny place to promote the sprouting of new shoots from the old roots for division propagation or cuttings.
(2) Bud Preservation Method: Select first-generation new buds from the rhizomes for cuttings in late autumn or early winter. When selecting buds, choose those with plump, budding tips. Use a sharp knife to dig them out about 2 cm into the soil along with the soil, and insert them into a cylindrical pot filled with half potting soil and half fine sand. After planting, place them in a cool room with light, maintaining a room temperature of around 3℃, and water sparingly to keep the soil slightly moist. There are four things to avoid when preserving buds: high temperature, excessive humidity, excessive shade, and drying out. In mid-March of the following year, move them outdoors and place them in a sheltered, sunny location for 7-10 days to harden them off before dividing them into pots or planting them in the ground.
The main diseases affecting chrysanthemums are rust, black spot, and gray mold. Rust affects the leaves and stems, with leaves being most severely affected; it can be treated with a 500-fold dilution of 65% zineb wettable powder. Black spot mainly affects the leaves and can be controlled by spraying with an equal amount of Bordeaux mixture. Gray mold affects the flowers, leaves, and stems; in the early stages of the disease, it can be treated by spraying with a 500-fold dilution of 65% zineb wettable powder.
Aphids are a pest that can be controlled by spraying with a 1500-fold dilution of 40% dimethoate emulsion.
Timely pinching can encourage lateral branching and reduce plant height. The timing and frequency of pinching for potted chrysanthemums vary depending on the artistic style. In northern regions, most households leave 4-7 flowers on a potted chrysanthemum. After transplanting, pinch the seedling back to 4-5 leaves. When the lateral branches have grown 4-5 leaves, pinch each branch back to 2-3 leaves for a second time. However, large upright chrysanthemums may require 6-9 pinchings.
During the vigorous seedling stage of chrysanthemums, many axillary buds sprout. These should be pinched off promptly with your fingers, otherwise they will consume a lot of nutrients and grow many small branches with small flowers, making the plant look messy. During the bud formation period, side buds sometimes appear on the small branches below the terminal bud. Except for those that need to be retained, the side buds should also be removed with tweezers as soon as possible to promote the enlargement of the terminal bud.
Chrysanthemums are commonly propagated through cuttings, division, and grafting. For home cultivation, division and cuttings are the most common methods.
(1) Division method: After the chrysanthemums have finished blooming in autumn and winter, cut off the old stems. Soon, many basal buds will grow next to the old roots. Around Qingming Festival the following year, dig up the mother plant and divide it into several small roots according to the condition of the roots. Each small root should have one bud. Plant them in the open ground or in pots. Chrysanthemums propagated by division are tall and produce more flowers, but the flowers are not as large as those propagated by cuttings.
(2) Cuttings: Generally, in May or June, take 10 cm long cuttings with 2-4 nodes from new shoots sprouting from the previous year's old plant. Remove the lower part, cut off half of the leaves in the upper half, and then cut the lower part of the cutting flat. Insert the cuttings into the substrate (the cutting substrate is usually a mixture of equal parts garden soil and rice husk ash) to a depth of 1/3 of the total length of the cutting. Spacing each cutting 10 cm apart, water thoroughly, and provide shade. Roots will develop 15-20 days after cutting at a temperature of 18-21℃. Leaf cuttings can also be used, but only leaves with the bark of the mother plant's branch attached to the base of the petiole, i.e., leaves with leaf axil growth points, will be used to ensure new buds grow after cutting.
Early Flowering: Chrysanthemums are short-day plants, generally requiring no more than 10 hours of sunlight per day to flower. To induce early flowering, it's essential to control the amount of sunlight. Once the chrysanthemum plants have reached a certain stage of growth, when the temperature is between 25-30℃, limiting daily sunlight to 8-10 hours will allow the plants to bud and bloom within 2 to 2.5 months. Shading the chrysanthemums in the early morning and late evening is ideal.
Delayed flowering: Starting in early September, provide 3 hours of additional artificial light to the chrysanthemum plants around midnight each day until late October. This will allow the chrysanthemums to bloom around New Year's Day. If you wish to delay flowering even further, continue providing artificial light at night, which may even allow the chrysanthemums to bloom as late as the Spring Festival. Note that as winter approaches, the plants must be moved indoors to prevent them from freezing.
Some varieties of chrysanthemums can be eaten, used in drinks, and for medicinal purposes. In some areas of southern my country, people stir-fry tender chrysanthemum shoots; use Hangzhou chrysanthemums in medicine or drinks; and also use chrysanthemums to make chrysanthemum wine, chrysanthemum meat, chrysanthemum sauce, and other flavorful foods.
Osmanthus fragrans
Origin: Southwest and Central South China.
Type: Fragrant.
Flowering period: September-October.
Sunlight: Prefers full sun, but also tolerates some shade.
Temperature: Prefers warmth and is not cold-hardy.
Soil: Prefers acidic soil. For potted plants, a mixture of 5 parts mountain soil, 3 parts humus, and 2 parts sand can be used, or a mixture of equal parts leaf mold and sandy loam can be used. If the soil is too acidic, growth will be slow, and leaves will turn yellow and wither. In alkaline soil, leaves will wither and may even die after 2-3 months.
Water: Dislikes waterlogging.
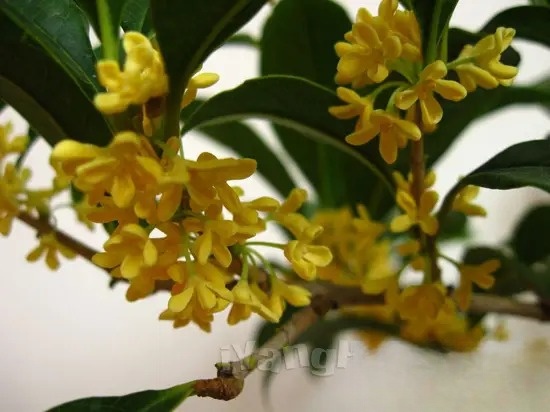
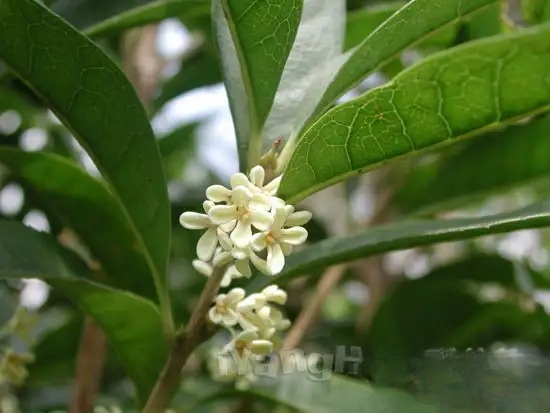
Potted osmanthus should be repotted in the autumn of the second year, preferably in an earthenware jar or a larger earthenware pot. When repotting, avoid damaging the roots when lifting the plant. Remove some of the old soil, replace it with fresh potting soil, and add a small amount of base fertilizer. When planting, ensure the roots are spread out in the pot, not huddled together. After planting, shake the pot to ensure close contact between the potting soil and the roots, then water thoroughly once. Place the pot indoors around the time of the first frost. During the initial stages of potting and repotting, avoid overwatering to prevent root rot. The indoor temperature should be maintained between 5-10℃. Temperatures that are too high are detrimental to dormancy, causing the growth of leaf buds and weak branches, affecting normal growth and development the following spring; temperatures that are too low make the plant susceptible to frost damage.
After sprouting in spring, apply fully decomposed cake fertilizer solution every 10 days or so to encourage branching. After July, switch to liquid fertilizer mainly composed of phosphorus to promote flower bud differentiation, resulting in vigorous plant growth, abundant flowering, and a fragrant aroma. Insufficient fertilization, especially phosphorus, will result in fewer branches, fewer flowers, and a less fragrant plant.
Watering osmanthus should follow the "two less, one more" principle: water less before new shoots appear, water less on rainy days, and water more during dry summer and autumn weather. Regularly maintain the soil moisture content at around 50%. On rainy days, ensure proper drainage to prevent waterlogging and root rot.
Osmanthus trees are susceptible to diseases and pests such as anthracnose, brown spot, gray mold, leaf spot, algal spot, scale insects, leaf miners, tussock moths, cicadas, and osmanthus leafhoppers, requiring timely spraying for prevention and control. In addition, special attention should be paid to the control of black spiny whiteflies.
The adult black spiny whitefly is 1-1.3 mm long, orange-yellow in color and covered with a thin layer of white powder. Both adults and larvae congregate on the undersides of leaves to suck sap, causing yellow spots on the affected areas. Their excrement easily induces sooty mold, causing branches and leaves to turn black, and leaves to wither and fall off.
Control methods: When black spiny whiteflies are found, spray with 2.5% deltamethrin or 20% methomyl at a dilution of 2000-2500 times, or spray with neutral laundry detergent at a dilution of 800-4000 times. Spray once every 5-6 days, for a total of 3-4 times.
Osmanthus trees have well-developed root systems and strong sprouting ability; mature osmanthus trees produce new shoots twice a year. Therefore, to ensure abundant flowering and foliage, proper pruning is necessary to maintain a balance between reproductive and vegetative growth. Generally, overgrown branches, weak branches, and diseased or insect-infested branches should be removed to improve ventilation and light penetration, concentrate nutrients, and encourage the formation of more and fuller flower buds, resulting in profuse flowering.
Potted plants are generally pruned into a single-trunk style. Starting from seedlings, select one main trunk. When the trunk reaches the desired height, pinch off the top to encourage the growth of 3-5 lateral branches, forming a crown. Thereafter, prune once a year before bud break in winter or spring, removing diseased, dead, overly dense, and weak branches. For plants with strong upper growth and weak lower growth, or those with poor shape, appropriately shorten the branches to encourage the growth of adventitious buds and new shoots from the lower part. However, pruning should not be excessive, otherwise it will easily lead to the growth of overly long branches, affecting the number of flowers.
Osmanthus can be propagated by sowing, cuttings, grafting, and layering. Seedlings take a long time to flower, so this method is rarely used in home gardening. Cuttings are taken in spring before bud break, using current-year branches as cuttings. These are inserted into plain sand or peat moss, covered with plastic film, and placed in a shady location; roots will develop in about two months. Grafting can be done using rootstocks such as privet, privet, or ash. Before spring bud break, the cutting is made 5 cm above ground level, and the graft is performed using the cleft grafting method. In northern regions, potted osmanthus can be propagated by approach grafting in summer. In early spring, privet is potted and then approached with a branch of similar thickness from the osmanthus tree. After successful grafting, the scion is separated from the mother tree, and the branches above the graft union on the rootstock are removed. Air layering is done in spring before bud break, using 2-3 year old branches. A girdling is made, and the branches are wrapped with moss or other moisture-retaining material for propagation.
Osmanthus trees typically bloom in September. To extend their blooming period until National Day (October 1st), move them indoors in early August, maintaining a temperature above 17℃. Water sparingly at this time, keeping the soil only slightly moist. Stop fertilizing to slow bud growth. In mid-September, move them outdoors for outdoor cultivation. The cooler outdoor climate at this time promotes rapid bud growth, ensuring they are in full bloom just before National Day.
What could be the reason it doesn't bloom?
Osmanthus prefers strong sunlight and warmth, but dislikes waterlogging and coal smoke. Potted osmanthus will not bloom if its physiological requirements are not met due to improper care. There are generally five reasons why osmanthus may not bloom:
(1) Improper winter care. After being brought indoors in winter, the osmanthus should be placed in a low-temperature environment to allow it to go dormant, so that it can grow vigorously and produce abundant flowers and leaves the following year. If the room temperature is too high, the osmanthus will not get enough dormancy, will sprout and grow leaves prematurely, and the branches will be thin and weak, consuming a lot of nutrients. After being brought outdoors in spring, it will easily wither and die when it encounters drought and wind. Overwatering in winter or insufficient light in the location can easily cause the plant to lose a lot of leaves, affecting flowering the following year.
(2) The location is too shady. Osmanthus is a long-day plant and prefers strong light. If the plant does not receive enough light during its growth and development, it will cause excessive growth of branches and leaves, which will affect the formation of flower buds and is also a reason why it cannot bloom.
(3) Smoke pollution. Osmanthus is not tolerant of smoke and dust. If it is allowed to live in a place with air pollution, it will grow poorly, its leaves will become smaller and fall off easily, and it will bloom less or not bloom at all.
(4) Insufficient nutrients. If potted osmanthus has not been repotted or had its soil changed for a long time, it will suffer from insufficient nutrients, and its roots will become tangled and unable to extend, which is also a factor affecting flowering. Therefore, potted osmanthus should be repotted every 1-2 years and a small amount of bone meal should be applied as base fertilizer.
(5) Overwatering. Osmanthus fragrans dislikes waterlogging. During the growing season, water only when the soil is dry to the touch. Overwatering or waterlogging in the pot on rainy days can easily lead to root rot and leaf drop.
Besides its ornamental value, osmanthus flowers also have significant economic value. Fresh osmanthus flowers are an important raw material for making osmanthus sugar, osmanthus cake, osmanthus tea, and osmanthus wine. The essence extracted from osmanthus flowers is a high-grade and precious fragrance used in the food and daily chemical industries. Osmanthus wood has a glossy sheen and beautiful grain resembling rhinoceros horn, hence its name "osmanthus wood," making it an excellent material for carving. Cinnamon bark can be used to extract dyes and tannins. Osmanthus leaves can be used as a seasoning to enhance the aroma of food.
Origin: China;
Type: Ornamental fruit plant;
Flowering period: May-June; Fruiting period: August-September;
Sunlight: Prefers full sun, but tolerates some shade;
Temperature: Cold-hardy;
Soil: Grows best in deep, well-drained, fertile soil;
Water: Tolerant of both wet and dry conditions.
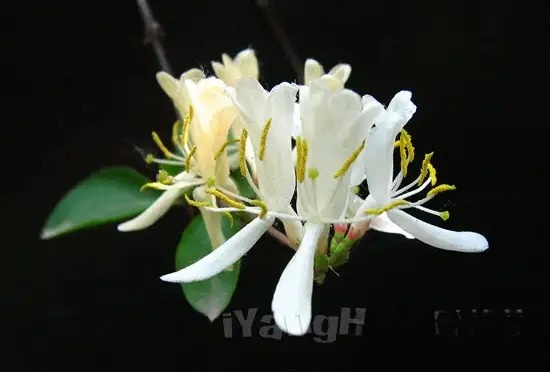
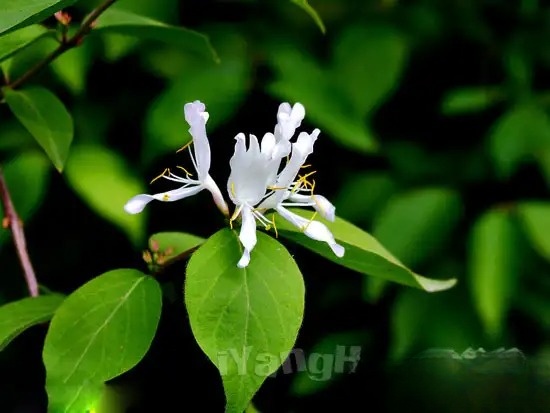
Key tips for growing flowers:
Honeysuckle, when grown in pots, needs to be transplanted, with the best time being March in spring. Use 1-2 year old seedlings. When digging up the seedlings, keep the original soil around them and avoid damaging the fine roots. The potting soil should be fertile, loose, and well-drained humus or garden soil.
Repot every two years, replacing half of the old soil and trimming some of the excess old roots. This will help promote flowering and fruiting.
Apply diluted, well-rotted cake fertilizer once before flowering in early summer, and apply phosphorus fertilizer again after flowering to promote fruiting. In winter, apply well-rotted poultry manure and bone meal as base fertilizer.
After transplanting, water thoroughly once. Keep the potting soil moist during normal care, especially before flowering and fruiting; it should not be allowed to dry out.
Origin: Argentina and southern Brazil.
Type: Cactus
. Flowering period: Summer.
Sunlight: Prefers bright light, but dislikes prolonged direct sunlight in summer. Also dislikes shade and should not be kept indoors for extended periods.
Temperature: Prefers warmth and is not cold-hardy.
Soil: Requires moderately fertile, well-drained, and aerated sandy loam containing lime.
Water: Prefers moist conditions.
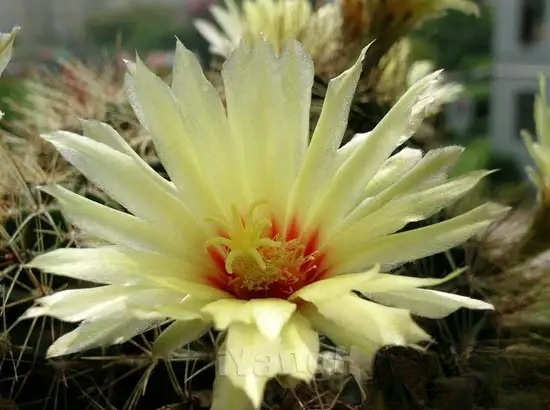
Key tips for growing flowers:
For potted plants, use a potting mix of 3 parts leaf mold, 3 parts garden soil, and 3 parts coarse sand, plus 1 part wood ash and old wall plaster chips. Potting and repotting are best done in early spring. The pot should be large enough to accommodate the plant with a little space between it and the soil; it shouldn't be too large, otherwise it will affect the appearance. When potting, place a 3 cm layer of broken tiles or gravel at the bottom of the pot to facilitate drainage. The planting depth should be such that the root collar of the plant is level with the soil surface. The lower the temperature, the drier the soil should be. As the temperature rises, the plant gradually emerges from dormancy, and the amount of watering should be gradually increased. However, in the hot summer, watering should be controlled appropriately, and the potted plant should be placed in a shady place. After the hot summer, when the weather cools down, normal watering can be resumed.
Apply diluted liquid fertilizer or compound flower fertilizer about once every half month during the growing season. Stop fertilizing in winter and during the height of summer.
Newly planted cacti should not be watered directly; simply mist them 2-3 times a day. After two weeks, you can water them sparingly. Once new roots have grown after one month, you can gradually increase the amount of water. It's important to note that watering cacti differs from other potted plants. During their winter dormancy, watering should be reduced to keep the soil from becoming excessively dry.
In summer, in addition to providing shade, good ventilation is also important. Insufficient light during cultivation will prevent flowering, while excessive shade or too much fertilizer and water will also cause problems. In northern regions, potted plants can be placed outdoors in a sunny location after the weather warms up in spring. Before winter, move them indoors to a sunny spot and keep the room temperature above 5℃ for safe overwintering.
Cacti are susceptible to scale insect infestation. The larvae often hide inside the cactus or its ridges. They can be killed by spraying with a 1500-2000 times diluted solution of dimethoate emulsion. Alternatively, they can be removed with a small bamboo stick.
Cacti are very easy to propagate, mainly through cuttings and grafting. Cuttings can be taken from April to September. Cut off the bulblets from the mother plant, let them dry for 2-3 days, and then insert them into sandy soil. No watering is needed; just mist them lightly. Many bulblets will already have roots on the mother plant, so they can be transplanted after one week.
Grafting is best done in May or June, as the grafted portion heals quickly and has a high survival rate. A triangular prism is generally chosen as the rootstock for grafting. Use a knife to flatten the top of the rootstock with one cut, then flatten the bottom of the bulb with another cut. Align the center of the bulb with the pith of the rootstock, ensuring they are tightly attached. Secure it with string and place it in a well-ventilated, shaded indoor location for maintenance.
Origin: Mediterranean coast.
Type: Ornamental fruit plant.
Flowering period: April-June; fruiting period: August-September.
Sunlight: Prefers full sun.
Temperature: Prefers warm temperatures.
Soil: Prefers fertile and well-watered soil; adaptable to various conditions, thrives in deep soil, and can grow in slightly alkaline soil.
Water: Prefers moist conditions.
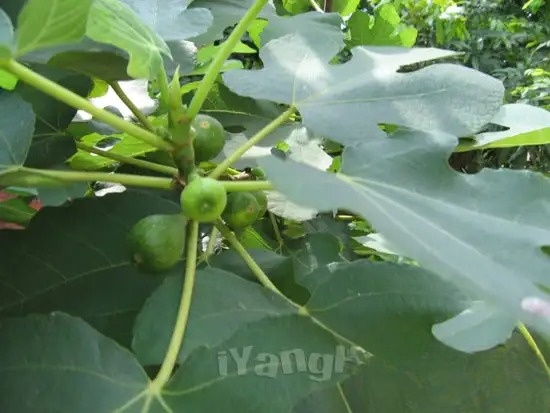
Key tips for growing flowers:
Figs can be grown outdoors in southern North China and south of East China, and are easy to manage.
For potted plants, use a mixture of 4 parts leaf mold, 4 parts garden soil, and 2 parts fertile soil, with a small amount of horse manure as base fertilizer. Replace the soil every 2-3 years and apply liquid fertilizer regularly.
Apply well-rotted organic fertilizer once a year in autumn after the leaves have fallen.
Water 2-3 times in spring, apply liquid fertilizer twice during the peak growing season, and apply liquid fertilizer mainly composed of phosphorus and potassium once more during the fruit enlargement period.
Newly potted plants require less water, so water them thoroughly twice when potting or repotting, then water them once a day thereafter. During dry seasons and summer, spray water on the branches and leaves 2-3 times a day. Gradually reduce watering as the fruit ripens.
In northern regions, it can be moved outdoors to a sunny location in late April or early May. During the hot summer months, it should be appropriately shaded around midday. Before winter, it should be moved indoors to overwinter in a cool environment, and watering should be stopped, with the temperature maintained at around 0℃.
Common diseases and pests affecting fig trees include anthracnose, crown gall, and pests such as longhorn beetles and scale insects. You can refer to the pesticide solutions used on other plants suffering from the same diseases and pests for prevention and control.
For potted fig trees, the plant should not be too tall, ideally around 30 cm. This requires careful pruning. Pruning should be done in March. When the seedlings reach 40-50 cm, top them at 30 cm. When the axillary buds below reach 3 cm, leave only 3-5 buds at the top as the main branches, and remove the rest. Pinching back the tips in July of the same year prevents excessive branch growth. The following spring, shorten the main branches again at 12-15 cm. When new buds sprout 3 cm, leave 2-3 buds on each main branch, removing the rest. Pinching back the tips again in July. After these two prunings, the tree will have a shorter, sturdier, and more bushy shape, making it much more attractive.
Figs are mostly propagated by cuttings, usually in summer. Select healthy one-year-old branches and cut them into 15-20 cm long sections as cuttings. They will root in about a month after cutting, and then be transplanted for cultivation.
Origin: Arid desert regions of South Africa.
Type: Succulent.
Flowering period: It will flower after 3-4 years of healthy growth, with the flowering period in October.
Sunlight: Prefers a sunny environment, but avoid direct sunlight in summer.
Temperature: Tolerates high temperatures, but not cold-hardy.
Soil: Requires well-drained sandy loam.
Water: Prefers dry conditions, but the soil should be kept moist in spring and summer.
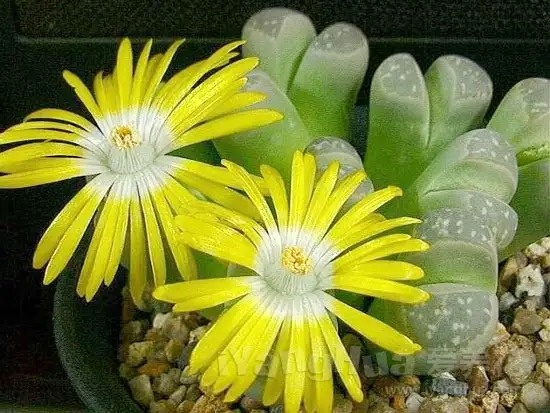
Key tips for growing flowers:
Lithops are not very demanding in terms of environmental conditions and are relatively easy to cultivate and manage. The potting mix can be prepared by mixing 4 parts leaf mold, 3 parts calcareous material (shell powder, eggshell powder, old wall plaster, etc.), and 3 parts river sand. Planting should not be too deep, otherwise it is prone to rotting. It is best to place a layer of small pebbles or colored stones on the surface of the potting mix, which is both aesthetically pleasing and has a cooling effect.
Spring and autumn are its peak growing seasons. Water it every 3-5 days to promote growth and flowering. Lithops begin growing in March and April, then stop growing during the hot summer months, entering a summer dormancy period. After the autumn cools, it resumes growth and flowering, then enters dormancy again for winter. When the plant begins to grow in spring, the old plant gradually shrinks and cracks under the growth of new shoots, producing two small new Lithops. At this time, reduce watering, keeping the soil slightly dry. Avoid spraying water directly onto the plant to prevent infection and rot. In summer, move it indoors to a semi-shaded location, avoiding direct sunlight. Ensure proper ventilation and cooling, and reduce watering to help it survive the summer. In autumn, gradually increase watering and apply a small amount of compound fertilizer to promote bud formation and flowering. After flowering, gradually reduce watering again, and strictly control watering in winter, keeping the soil dry.
Lithops prefer sunlight and should be placed on a balcony or windowsill during the growing season. During winter, potted plants should be placed on a south-facing windowsill, and the room temperature should be kept above 13℃.
Lithops can be propagated by sowing and division.
(1) Sowing method: After harvesting the seeds in late autumn, sow them immediately if there is a high-temperature greenhouse. The room temperature should not be lower than 18℃, otherwise the seeds should be properly stored and sown again in mid-May of the following year, but the germination rate will be reduced. Small deep pots are mostly used for sowing. First, fill the bottom with pebbles or small pieces of slag as a drainage layer, then add sandy potting soil on top, and then soak the potting soil with water and carefully sow the seeds. Since the seeds are very small, the soil covering should be thin. Use the bottom watering method to water, and do not water directly, otherwise the seeds will be easily washed away. Seedlings will emerge about 3 weeks after sowing. After emergence, maintain good ventilation and thin the seedlings in time to keep the seedling spacing at 1.5-2 cm. When transplanting, use small bamboo sticks to lift the seedlings into pots. Do not water immediately after transplanting. Keep the seedlings under the shade for 5-6 days, and then water them again with the bottom watering method.
(2) Division method: Every spring, new fleshy leaves grow from the central crevice of Lithops. The old leaves swell, crack, and wrinkle, while the new leaves grow very quickly. In summer, they wrinkle and crack again, and 2-3 small new plants can grow from the crevice. These can be divided and replanted. You can get many new plants in one year using this method, which is much simpler than sowing.
Origin: India and southern China.
Type: Foliage plant.
Flowering period: April to June.
Sunlight: Prefers partial shade and dislikes direct sunlight. Direct sunlight will cause the leaves to turn yellow and the plant to grow poorly, affecting its ornamental value.
Temperature: Prefers warm temperatures and dislikes hot and humid conditions.
Soil: Suitable for loose, fertile soil.
Water: Prefers moist conditions.
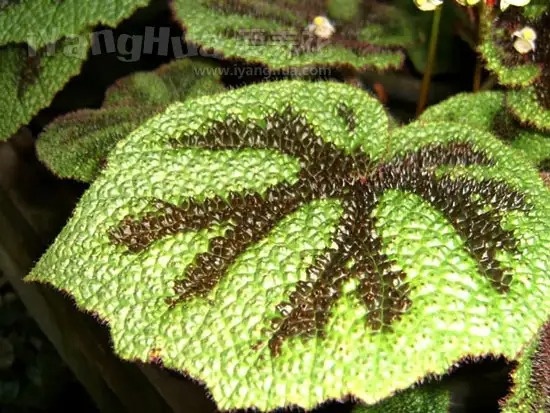
Key tips for growing flowers:
Iron Cross Begonias should be repotted annually, ideally in spring, between April and May. The potting mix should be primarily composed of leaf mold.
Apply a light fertilizer once or twice a month during the peak growing season, but be careful to avoid splashing fertilizer water on the leaves, otherwise the leaves will easily rot.
Because Begonia ferruginea has large leaves and high transpiration rate, it needs ample watering during its growing season to replenish water lost through evaporation. However, the soil should not be waterlogged, as this can easily cause leaf and stem rot and death. Since Begonia ferruginea prefers a humid environment and dislikes hot, stuffy conditions, it's best to keep the air around the plant humid in summer. This can be achieved by placing the pot on pebbles in a bowl of water to increase humidity, which is beneficial for its growth.
Iron Cross Begonias prefer partial shade and dislike direct sunlight. Therefore, when potted, they can be placed in a bright indoor location during spring and autumn. In summer, they should be moved to a north-facing windowsill, ensuring good ventilation and cooling. In winter, they should be placed on a south-facing windowsill to receive more sunlight and promote vigorous growth. The optimal growing temperature is 18-25℃, and the room temperature should not fall below 10℃ in winter.
Iron Cross Begonias are commonly propagated through division and leaf cuttings. Division is usually done in conjunction with repotting in spring. Leaf cuttings are best taken in May or June each year.
grassland; Origin: South America, Southeast Asia, Australia, and New Zealand
; Type: Ornamental fruit plant;
Flowering period: May-June, fruit ripening period: August-November;
Sunlight: Suitable for sunny environments, tolerates partial shade, dislikes strong direct sunlight;
Temperature: Prefers warm temperatures, not cold-hardy;
Soil: Prefers loose, fertile, and well-drained sandy loam;
Water: Prefers moist conditions.
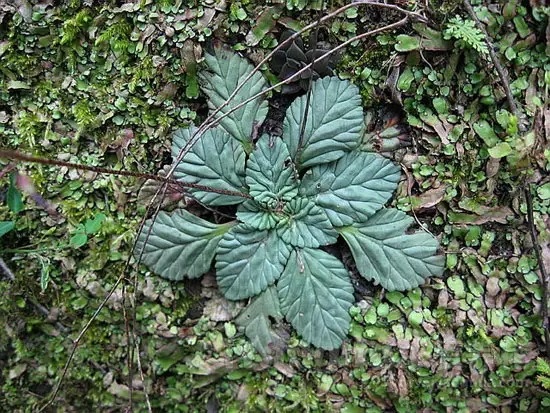
Potting soil is usually a mixture of equal parts leaf mold, fertile soil, and river sand.
Fertilize once every half month, and apply phosphorus and potassium fertilizer 1-2 times before flowering, or use Huiyou 15-15-30 potted plant fertilizer, which will help the fruit to be large and bright.
In addition to watering frequently to keep the soil moist during the growing season, it is also necessary to spray water frequently to increase air humidity. Especially from flowering to fruit ripening, it is necessary to spray water 1-2 times a day. However, water should not accumulate in the pot, otherwise the stems and leaves will easily rot.
The optimal growth temperature is 10-16℃, and the minimum winter temperature should not be lower than 5℃.
During the growing season, the plant needs to receive plenty of sunlight. If there is insufficient sunlight, the stems and leaves will grow excessively, covering the fruit and affecting the ornamental effect.
Artificial pollination is required when the fruit is in bloom to improve the fruit set rate. Pruning can be done to remove branches and leaves that cover the fruit and to remove overly dense, drooping, creeping branches along the pot.
Mossy corals are commonly propagated by division, cuttings, or seeds.
Division is usually done in spring in conjunction with repotting. After separating the densely growing mother plant, each plant should be planted separately with a clump width of at least 5 cm. Generally, division is done once every year.
For propagation by cuttings, use tender shoots with a length of 3-4 cm at the tip as cuttings, insert them into a bed of moist sand, maintain high air humidity and semi-shade conditions, and they will root in 20-25 days.
Origin: Yangtze River Basin, China.
Type: Foliage plant.
Flowering period: Leaves are green in spring and summer, turning red in autumn; flowering period is April-May.
Sunlight: Prefers sunlight, but tolerates some shade; avoid direct sunlight.
Temperature: Prefers warm temperatures.
Soil: Not particular about soil type, but thrives best in slightly acidic soil rich in humus.
Water: Tolerant of drought, but susceptible to waterlogging.

Key tips for growing flowers:
Japanese maple is quite resilient. For outdoor cultivation, choose a high, dry, sunny location with loose, fertile, and deep soil. Avoid planting in low-lying, waterlogged, or heavy clay soils, as this will hinder growth. Before planting, deeply till the soil and apply well-rotted organic fertilizer. When planting, keep a soil ball intact to protect the root system and improve the survival rate. Water thoroughly after planting.
For potted Japanese maple, you can use a potting mix of leaf mold, garden soil and a small amount of river sand, with a small amount of well-rotted cake fertilizer added as base fertilizer.
For open-field cultivation, apply organic fertilizer three times a year, avoid excessive nitrogen fertilizer, and pay attention to applying more phosphorus and potassium fertilizer, otherwise the leaf color will not be bright.
For potted Japanese maple, apply diluted cake fertilizer once a month starting from spring when it sprouts. From September onwards, switch to potassium fertilizer. If you apply 0.5%-1% potassium sulfate solution or wood ash leachate, the leaves will be brightly colored.
When cultivating in open fields, pay attention to watering during dry periods and frequently loosen the soil and remove weeds to increase soil aeration and promote root development.
When growing potted Japanese maple, water it thoroughly during the growing season, but not too much; just enough to keep the soil moist.
In spring and autumn, it can be cultivated on a balcony or in the courtyard. In summer, move it to a semi-shaded place, paying attention to providing appropriate shade to prevent direct sunlight from causing the leaf edges to scorch. If you want to keep it indoors for display, place it in a bright location with good air circulation. After a period of time, you can move it outdoors to a sunny spot. In northern regions, before winter, move it to a cool room to overwinter. Place it in a room with a temperature of 0-5℃ and keep the potting soil dry to ensure safe overwintering.
Pruning should be carried out every winter after the leaves have fallen, in conjunction with shaping.
Origin: South Africa.
Type: Foliage and flowering plant.
Flowering period: Summer and autumn.
Sunlight: Prefers full sun, tolerates partial shade.
Temperature: Prefers warmth, dislikes heat.
Soil: Suitable for sandy loam.
Water: Dislikes waterlogging, highly drought-tolerant.

Key tips for growing flowers:
While sandy loam can be used as a substrate for potted plants, it is best to use a potting mix of 4 parts leaf mold (or peat moss), 4 parts coarse sand, and 2 parts garden soil. Generally, repotting should be done every 1-2 years in early spring.
During the peak growing season, apply diluted cake fertilizer or compound fertilizer every half month or so. Stop fertilizing when the plant enters dormancy in winter.
The money tree is quite drought-tolerant, so watering should be done when the soil is dry to the touch. In summer, water once a day, and in spring and autumn, water once every 3-4 days. The soil should not be too wet or too dry. Overwatering easily leads to root rot; underwatering hinders leaf and stem growth and causes the leaves to become dull. In winter, when the room temperature is low, watering should be reduced to once every two weeks.
The money tree is highly adaptable and grows well in both full sun and partial shade. In spring, summer, and autumn, it can be placed indoors in a location with bright, indirect light; in winter, it needs to be placed in a bright, well-lit location indoors. The optimal growth temperature is 15-25℃, and it can safely overwinter as long as the room temperature does not fall below 10℃. During summer cultivation, ensure good ventilation and place it in a cool, well-ventilated area.
The Money Tree is commonly propagated through division and cuttings. Division can be done in spring or autumn by taking bulbils from the leaf axils and planting them directly in pots. After planting, place in a shady location and keep moist; roots and new shoots will develop in about 20-25 days. Division can be combined with repotting in spring. Spring is the best time for cuttings. Take a pair of mature leaves, slightly attached to a short stem, and insert them into the substrate. Maintain a room temperature of around 20℃; roots will develop in about one month.
Origin: Solomon Islands, Malay Peninsula, Indonesia
; Type: Foliage plant;
Flowering period: ---;
Sunlight: Prefers partial shade, avoid direct sunlight in summer;
Temperature: Prefers warmth;
Soil: Suitable for loose, fertile, well-drained soil;
Water: Prefers moist conditions, not drought-tolerant.
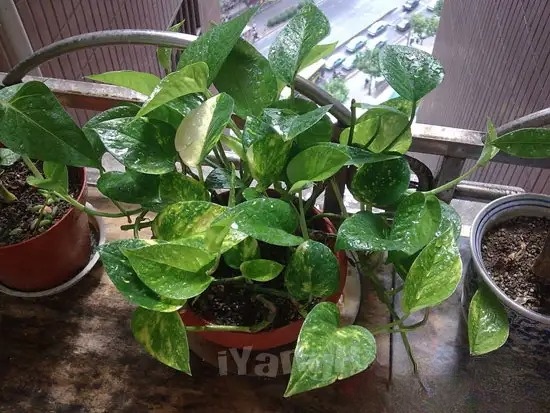
Key tips for growing flowers:
The potting soil should be loose, fertile, and rich in organic matter. It is best to use a mixture of 1/3 each of fertile leaf mold or peat moss, garden soil, and coarse sand.
It is best to mix slow-release fertilizers such as oil cake and bone meal into the potting soil as base fertilizer before planting. During the growing season, apply diluted liquid fertilizer once every 10-15 days. Do not apply too much nitrogen fertilizer; instead, apply phosphorus and potassium fertilizers appropriately.
Water moderately, keeping the soil moist but not waterlogged. Avoid letting it dry out completely, otherwise the leaves will easily turn yellow and the plant will lose its shape. However, do not overwater, as waterlogging will cause root rot and leaf withering. Reduce watering even more during the cold winter months.
The roots of pothos prefer a moderately humid environment. The leaves require an air humidity of over 60%. In summer, in addition to watering thoroughly, it is also necessary to frequently mist the leaves, both the top and bottom.
Pothos prefers a warm environment. It grows most vigorously in temperatures above 20℃. In winter, the room temperature should not be lower than 10℃, otherwise yellowing and leaf drop will easily occur.
Pothos dislikes direct sunlight and thrives in environments with strong diffused light. However, it's important to ensure it receives adequate sunlight to maintain leaf thickness. Prolonged exposure to excessive shade will cause stem elongation, weak and thin internodes, a sparse plant shape, thinner and paler leaves, smaller and duller variegation. In spring, summer, and autumn, place the plant near a well-ventilated east or north-facing window; in winter, move it to a south-facing window. In summer, protect it from direct sunlight to prevent leaf scorching.
Pothos is mainly susceptible to root rot and leaf spot diseases caused by nematodes. Root rot can be controlled by applying 3% carbofuran granules. For leaf spot disease, in the early stages, diseased spots or leaves should be pruned promptly, and the plant can be sprayed with a 500-fold dilution of 70% mancozeb wettable powder.
After long-term cultivation, the lower old leaves of pothos will gradually fall off, affecting its appearance. In spring, the plant can be pruned from the base, leaving only one section near the soil surface to encourage renewal and the growth of new branches. Alternatively, the lower leafless branches can be coiled and buried in the potting soil, which also works well. Pothos is relatively resistant to pests and diseases, but poor ventilation can easily lead to scale insect infestations.
There are many ways to propagate pothos, but the following three are commonly used.
(1) Cuttings: In spring and autumn, take cuttings about 15 cm long. Remove the leaves from the bottom 1-2 nodes and insert them into pots filled with potting soil, 3-5 cuttings per pot. After inserting, place in a semi-shaded place and keep the potting soil and air moist. Under the temperature of 25℃, they will take root and sprout in about 3 weeks and grow into new plants. Alternatively, the runners can be covered with moist sand. After the aerial roots enter the soil, they can grow. After new leaves grow, they can be cut into sections and replanted.
(2) Leaf cutting: When the temperature remains above 20℃, select healthy leaves from the upper part of the pothos branches. Use a sharp, clean, thin blade to cut them off from the base of the petiole. Wash them with clean water and place them in a cool, shady place for several hours. After the cut surface has dried slightly, insert the base of the petiole into clean water, with an insertion depth of about 1.5 cm. If the insertion depth is too shallow, the leaves will wilt if the water evaporates and is not replenished in time; if the insertion depth is too deep, the petiole will easily rot. After insertion, place the plant in a shaded area and change the water every 3-5 days. Roots will develop in about one month. This method does not damage the shape of the mother plant and is relatively simple to operate, making it a good propagation method.
Origin: Brazil.
Type: Flowering plant.
Flowering period: July-October.
Sunlight: Prefers full sun, but can tolerate partial shade; intolerant of frost.
Temperature: Prefers warm, cool climates; not cold-hardy.
Soil: Prefers loose, fertile sandy loam.
Water: Intolerant of waterlogging; drought-tolerant.
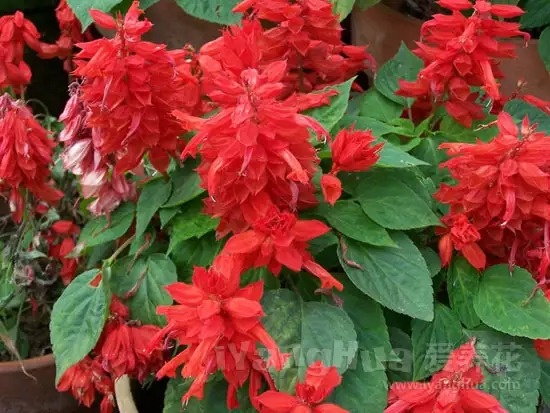
Growing tips:
Transplant the seedlings when they have grown to 2-3 true leaves.
Base fertilizer should be applied to both the planting site and the potting soil.
To prevent excessive growth, water sparingly, loosen the soil frequently, and apply top dressing fertilizer.
The optimal growth temperature is 15-30℃. Growth stops below 12℃, leaves turn yellow and fall off, and flowers gradually fall off.
In summer, potted plants need to be properly shaded from the midday sun. When the flowers turn from red to white and are about to wither, the seeds should be collected in time.
When cultivating Salvia splendens in a greenhouse, high temperature, high humidity, or insufficient light can easily lead to rot. Therefore, it is essential to regulate temperature and humidity and ensure good air circulation. In addition, Salvia splendens is susceptible to pests such as spider mites and aphids, which can be controlled by spraying with a 1500-fold dilution of dimethoate emulsion.
Pinch off the growing tip immediately after transplanting, and pinch off the growing tip at least twice during the growing season to make the plant short and sturdy, with many flowering branches and dense flower spikes.
Salvia splendens can be propagated by either sowing or cuttings, but sowing is more common. In North China, the sowing season is not limited, while in other regions, spring is the best time. Salvia splendens blooms relatively late; those sown in spring will flower in September or October. To advance the flowering period or to harvest seeds, sow the seeds in a greenhouse or hotbed in early March. Apply a small amount of base fertilizer to the seedbed, level the surface, and water thoroughly. After the water has soaked in, sow the seeds and cover them with a thin layer of soil. The seeds will germinate 8-10 days after sowing. Flowering occurs after about 100 days of growth, with a flowering period of about two months. Cuttings are mostly taken from tender shoots, with March-May or September-October being the most suitable times, combined with pinching off the terminal buds.
To ensure that Salvia splendens blooms year-round, suitable environmental conditions for its growth and development are necessary, along with timely pinching. For Salvia splendens planted in flower beds or pots, pinch back the plant when it reaches approximately 15 cm in height to encourage lateral branching. When each lateral branch has 6-8 leaves, pinch back the plant a second time, leaving 4 leaves. Afterward, when each lateral branch has 2-3 pairs of leaves, pinch back the plant again, leaving 2 pairs of leaves, to further encourage lateral branching, resulting in a shorter, sturdier plant with denser foliage and more flower clusters. For plants that need to bloom around May Day, sow seeds in a seedbed in late August of the previous year and pot them in mid-to-late November. Maintain a temperature of around 20℃ and ensure ample sunlight for blooming. To encourage blooming around National Day (October 1st), sow seeds in spring and pinch back multiple times, completing the pinching process before September 5th. The plant will then reach peak bloom around National Day.
Taking advantage of the characteristic that after all the inflorescences of Salvia splendens are removed, it will bloom again in about 25 days, and by strengthening water and fertilizer management, providing sufficient light and a suitable temperature for its growth and development, it can bloom in all four seasons.
Origin: Warm regions of southern China.
Type: Ornamental fruit plant.
Flowering period: June-August; fruiting period: November-December.
Sunlight: Prefers full sun; intolerant of shade.
Temperature: Prefers warmth; intolerant of cold.
Soil: Suitable for loose, acidic or neutral soil.
Water: Prefers moist conditions.
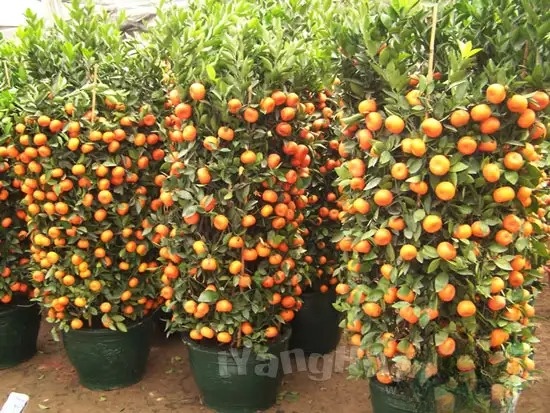
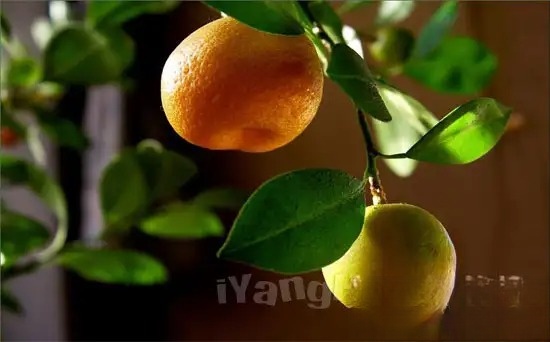
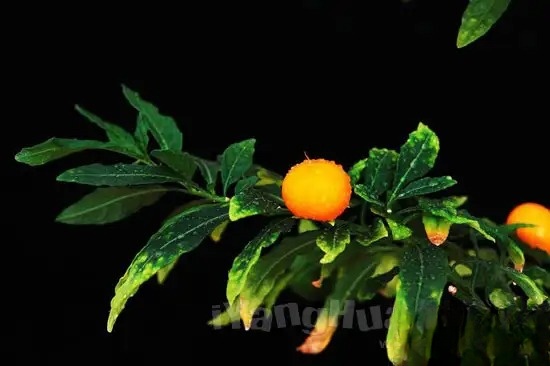
Kumquats thrive in fertile, loose, acidic sandy loam. When potting, a potting mix of 4 parts leaf mold, 5 parts sand, and 1 part cake fertilizer is recommended.
After the first pruning, apply well-rotted organic fertilizer (such as human excrement, green manure, soybean cake, fish fertilizer, etc.), and then apply it again every 10 days. At this time, the temperature is suitable and the fertilizer and water are sufficient, which is conducive to the growth of spring shoots. After the new shoots have emerged uniformly and the tips are pinched off, apply quick-acting phosphate fertilizer (potassium dihydrogen phosphate, superphosphate) to promote flower bud formation. The key to whether flower buds can form is to ensure that the nutrients stored in the kumquat are not consumed in excessive branch and leaf growth, but are concentrated on the reproductive development of flower bud differentiation.
"Water withholding" can promote flower bud differentiation. As the saying goes, "dry flowers, wet fruit," which means that watering should be reduced appropriately during the flower bud differentiation period. This is what "water withholding" means.
In flower cultivation, the method of withholding water is commonly used to inhibit plant growth and promote flower bud differentiation. Specifically, about 10 days before the end of summer (the 14th solar term), the amount of watering for kumquats should be gradually reduced to control excessive growth of summer shoots and promote flower bud formation. About 5 days before the end of summer, watering should be stopped. After 3-4 days of exposure to strong sunlight, the upper tender leaves of the kumquat will wilt slightly and droop, and the potting soil will dry and turn grayish-white. However, to prevent the slightly wilted leaves from dehydrating excessively, a small amount of water should be sprayed on the leaves every morning and evening, and a little water can be poured into the pot at noon. When the main buds and reserve buds of the kumquat swell and turn from green to white, it indicates that flower bud differentiation has been completed. At this time, watering should be resumed in time, and a light fertilizer should be applied. Soon, they will bloom one after another.
Kumquat branches and leaves are often damaged by scale insects, spider mites, and swallowtail larvae. Scale insects are the most common pest, occurring in April and May. They can be sprayed with a 1000-fold dilution of acephate; alternatively, a small brush can be used to remove the pests.
After spring arrives and temperatures rise, kumquats grow rapidly and pruning is necessary. To maintain a rounded crown, select 3-5 main branches and leave them staggered on the trunk, cutting off any excess branches at the base. Then, depending on the strength of the remaining main branches, shorten them accordingly: strong branches can be pruned to 4-5 buds, while weaker branches can be pruned to 2-3 buds. This helps regulate branch growth, encouraging each main branch to produce vigorous spring shoots, laying the foundation for flowering. After two months of growth, the new shoots will have mostly emerged. To control excessive growth, a second pruning is required, but the amount of pruning can be reduced, focusing primarily on tip trimming. Afterward, every new shoot should be pinched back when it has 8-10 leaves to induce abundant summer shoots, promoting more flowers and fruit. The final pinching time should be determined based on whether all the summer shoots have formed buds.
Kumquats are commonly propagated by grafting. The rootstock is often *Citrus aurantium* (propagated by seed), while in Guangdong, *Citrus medica* (propagated by air layering) is used. Grafting methods include cleft grafting, bud grafting, and approach grafting. Cleft grafting is best done from early March to early April, 1-3 weeks before bud break. Longevity kumquats sprout spring shoots early, so grafting should be done earlier. Scions should be selected from the middle section of one-year-old branches, retaining either two or one bud. Bud grafting is best done from mid-September to early October. Approach grafting is done from April to July; the rootstock should be potted one year in advance, and the scion should be a healthy two-year-old branch.
Under normal circumstances, the fruit gradually turns yellow after the start of winter. To ensure optimal viewing during the Spring Festival, if the fruit matures too early, shading and applying additional nitrogen fertilizer (0.4% urea) can delay the ripening period. If the fruit matures too late and doesn't turn yellow before the Spring Festival, applying 1.5×10 ethephon to the fruit or spraying with 2×10-5×10 gibberellin 25 days before the expected ripening date can yield significant results.
Origin: India.
Type: Flowering plant.
Flowering period: July-September.
Sunlight: Prefers full sun but dislikes intense sunlight; somewhat shade-tolerant.
Temperature: Prefers warm temperatures; not very cold-hardy.
Soil: Not particular about soil type; tolerates saline-alkali soils; thrives in fertile, humus-rich, and well-drained soil.
Water: Prefers moist conditions.
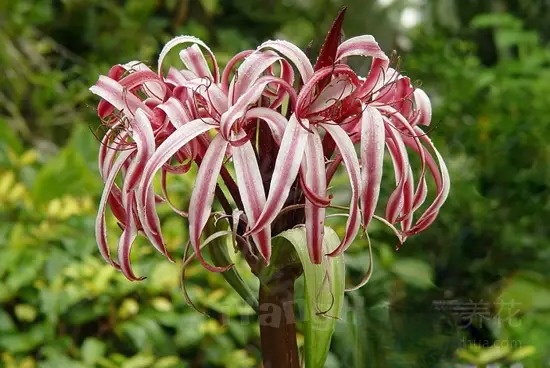
Key tips for growing flowers:
Crinum asiaticum is suitable for both ground planting and pot planting. When potting, you can use 3 parts pond mud, 1 part rice husk ash, and a small amount of soybean cake as base fertilizer.
This flower needs fertilizer. Apply manure 2-3 times a month, and apply phosphorus fertilizer 2 times before and after flowering to promote more blooms and prolong the flowering period.
During the growing season, it needs ample water; the soil should be kept moist but not waterlogged. Reduce watering in autumn and apply phosphorus and potassium fertilizer twice to enhance its cold resistance.
During the summer when the sunlight is strong, it should be shaded or placed in a semi-shaded area to avoid direct sunlight at noon, otherwise the leaves will turn yellow. Spraying water to cool it down will be more beneficial to its growth.
Potted Crinum asiaticum should be moved indoors by the end of October, and can safely overwinter if the room temperature is kept above 5℃. The following spring, repotting can be decided based on its growth. In the Nanjing area, plants grown outdoors will have their above-ground parts wither in winter, but new shoots will sprout again in the spring.
After flowering, the flower stalks should be cut off if the plant is not intended for seed production, and old, yellow leaves should also be removed at the same time.