Clear oil process
Clear oil process - brief overview
 Clear oil process
Clear varnish without a base coat is applied directly to the wood surface after the painter has finished treating it. This method can basically reflect the wood grain and original color, resulting in a strong sense of realism. However, this process cannot solve the problems of color difference and defects in the wood itself, such as knots.
The "clear oil process" for applying the base color involves the painters on the construction team making a paint sample before starting the work, allowing the customer to choose a color according to their preference; or, if the customer has a particular fondness for the color of a certain type of wood, they can request the painters to make a paint sample for them. The painters then apply a base color (oil color or water color) to the wood surface. After the base color is applied and dried, the painters apply the paint to the wood surface according to the pre-agreed number of coats until the entire process is completed.
Clear oil process - Construction preparation
1. Material preparation:
 Preparation for Clear Oil Processing
Coatings: varnishes, clear varnishes; linseed oils, phenolic varnishes, lead oils, blended paints, shellac, etc.
Fillers: gypsum, floor yellow, red clay, soot, white powder, etc.
Thinners: gasoline, kerosene, alkyd thinners, turpentine, alcohol, etc.
Drying agents: "liquid cobalt dryer," etc.
2. Preparation of main equipment:
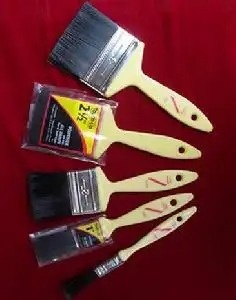
Oil brushes, knives, horn boards, oil paintbrushes, picks, brushes, sandpaper, rags, wiping cloths, putty boards, steel scrapers, rubber scrapers, small oil drums, half-sized large buckets, water buckets, oil ladles, cotton fibers, hemp fibers, bamboo skewers, small coloring dishes, copper wire, high stools, scaffold boards, safety belts, wire cutters, small hammers, and small brooms, etc.
3. Working conditions:
The construction temperature should be kept constant, without sudden large changes, and good ventilation is required. Wet work should be completed and have reached a certain strength, and the environment should be relatively dry. Generally, the ambient temperature during painting work should not be lower than +10℃, and the relative humidity should not be higher than 60%. The moisture content of the wooden substrate surface should generally not exceed 12%.
When working outdoors or indoors at heights above 3.6m, scaffolding should be erected beforehand, ensuring it does not obstruct operations. A sample room should be prepared before large-scale construction begins, and only after confirmation by the design and construction units can work teams commence large-scale construction. A thorough handover and inspection should be conducted before operations begin, and any outstanding issues should be properly addressed.
Clear oil process - base treatment
 Clear oil process for base treatment
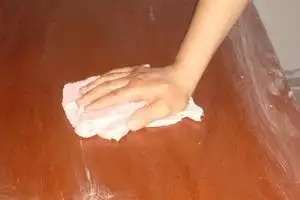
Sanding the base layer is a crucial step in the clear varnish process. First, remove dust, oil, and other impurities from the wood surface. Nail holes and heads should be driven 1mm into the wood as required, with nail heads flattened before being driven in (except for pneumatic nails). When sanding, wrap the sandpaper around a short piece of wood as a pad and sand along the corner. The larger surfaces should be sanded smooth and polished. Clean the surface with a damp cloth or cotton wool. Applying the varnish powder is another important step in the clear varnish application. The varnish powder is made by mixing white powder, gasoline, and varnish in a ratio of 12:28:21 (by weight) with colorant, aiming for a thin paste consistency.
During application, apply the paint powder to the surface of the wood using cotton wool. Rub the paint powder into the wood by hand, ensuring that all exposed areas are covered. Otherwise, the surface will look uneven after applying the varnish. Once the paint powder has slightly dried, wipe it clean with a linen cloth or wood shavings. Use a scraper to clean the corners and edges, ensuring no lumps of paint remain.
After the paint powder dries, lightly sand it with #1 sandpaper along the wood grain, first sanding the corners and then the flat surfaces, until the surface is smooth, but do not sand away all the paint powder from the edges. If the raw wood is exposed, add more paint powder, sand again after it dries, and wipe clean with a damp cloth or cotton. To apply putty, mix plaster powder and varnish in a 20:27 ratio (by volume) with an appropriate amount of water. The amount of pigment added should be slightly lighter than the other parts. Use a putty knife or scraper to apply the putty into nail holes, joints, etc. When applying, spread horizontally and then vertically to smooth and clean the surface. After it dries completely, lightly sand it along the wood grain and wipe clean with a damp cloth or cotton.
Clear oil process - Construction specifications
 Clear oil process construction specifications
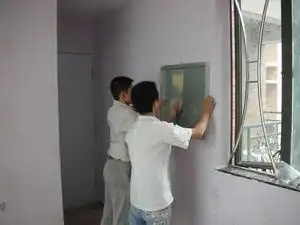
When applying clear varnish, hold the brush lightly and naturally for easy and flexible movement. Generally, hold the brush handle with three fingers, applying light pressure to ensure it doesn't slip or fall off during movement. Apply the varnish using multiple small coats, following the principle of frequent, even brushing, and working from top to bottom, from difficult to easy areas, from left to right, and from inside to outside. Use a horizontal brushing technique followed by vertical strokes. When applying the first coat of clear varnish, add a small amount of thinner to dilute the varnish and promote faster drying. Apply the varnish along the wood grain, vertically and evenly, then continue brushing straight along the grain.
The paint film should be applied evenly without any missed spots, dripping, or sagging. After the clear varnish has completely dried and hardened, it should be sanded. Sanding should remove all gloss from the paint film to increase adhesion to subsequent coats. After sanding, wipe clean with a damp cloth or cotton wool.
After the first coat of clear varnish, the surface should be cleaned and repaired. Uneven areas can be repaired with oil-based putty of the same color as the varnish. If knots or black spots on the wood surface are inconsistent with the main varnish, a suitable color paint should be prepared to cover and correct them, ensuring a consistent color. When applying the second coat of clear varnish, do not add any thinner. Apply the paint evenly and thickly, using both horizontal and vertical strokes. If there are any runs, immediately smooth them out with the brush while the paint is still wet. After the second coat is completely dry, sand and clean it as you would the first coat before applying the third coat. Polishing and waxing the surface is a further finishing touch and a key difference between high-end and standard painting. For polishing, first use wet sandpaper dipped in soapy water, starting with 320-grit sandpaper and gradually increasing to 600-grit. Apply even pressure and ensure the entire varnish film is sanded. Then, apply polishing compound (abrasive) to a soft cloth and rub it repeatedly on the paint film surface. Do not use too much polishing compound on the cloth, and rub quickly. Once the surface is very smooth and flat, apply a thin layer of polishing wax to the paint film surface using a cotton ball.
Oil purification process - Environmental requirements
Applying varnish to wood surfaces requires a high level of environmental control; failure to meet these standards will negatively impact the quality of the project. The painting site must be clean and dust-free. Thorough cleaning is essential before painting, and good ventilation is crucial during the process. The floor should be frequently dampened with water, and the work should not be done concurrently with other dust-generating trades. Therefore, applying varnish should be done in the final stage of any home renovation project.
Painting should be carried out in slightly dry conditions, with the temperature above 5 degrees Celsius to ensure proper drying of the paint film, shorten the construction period, and improve the quality of the paint film. The application site for clear varnish should have good lighting conditions to ensure accurate color mixing, prevent missed areas, and allow for timely detection of changes in the paint film for appropriate corrective action. Therefore, additional lighting should be provided for the work area in darker environments.
Oil purification process - Operating procedures
1. Process Flow: Base treatment → Applying colored putty → Applying full coat of putty → Applying paint color → Applying the first coat of clear varnish (applying clear varnish → repairing putty → color matching → sanding) → Installing glass → Applying the second coat of clear varnish → Applying the third coat of clear varnish. 3.2 Base Treatment: First, clean the dust, oil stains, spots, glue residue, etc., from the surface of the wooden doors, windows, and wood using a scraper or broken glass. Be careful not to create burrs or damage the plastered wall. Then, use sandpaper of grit 1 or higher to sand along the wood grain, first sanding the corners, then the four flat surfaces, until smooth. If there are small pieces of peeling wood on the base of the wooden doors and windows, they can be torn off with a knife. Secure the peeling areas with small nails. If the peeling is large or has burn marks, it should be repaired by a carpenter.
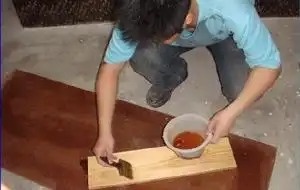 Clear oil process operation
2. Coloring Powder: Mix 2:4 of whiting powder, 1:6 of turpentine, and 2 of boiled tung oil (by weight) to make a coloring powder (the color should match the sample). Store the powder in a small oil container. Apply the powder repeatedly to the wood surface using cotton wool, wiping it through the pores. Then wipe it clean with linen or wood shavings. Use a bamboo stick to remove any excess powder from the edges and corners. Be careful not to get the powder on walls or hardware. After the powder dries, lightly sand along the grain with #1 sandpaper, first sanding the edges and corners, then the four flat surfaces, until smooth. Be careful to protect the edges and corners, and avoid sanding away the powder from the pores. After sanding, wipe away any powder and dust with a damp cloth.
3. Applying full coat of putty: The weight ratio of the putty is 20 parts plaster powder, 7 parts boiled tung oil, and 50 parts water (by weight), with pigment added to create an oil-colored putty (1-2 shades lighter than the sample). It's important that the putty's oil content is neither too high nor too low. If it's too oily, it won't easily penetrate the wood; if it's too low, it will easily seep into the wood, resulting in an uneven color. Use a putty knife or horn-shaped scraper to scrape the putty into nail holes, cracks, and pores. Apply the putty horizontally and vertically. For larger joints or knots, use the putty knife or horn-shaped scraper to squeeze the putty into the joint, then smooth it out. The putty must be scraped smooth, leaving no unsmooth areas. After the putty is completely dry, lightly sand it with #1 sandpaper along the wood grain, first sanding the edges and corners, then the four flat surfaces, being careful to protect the edges. Sand back and forth until smooth. After sanding, wipe away any sanding powder with a damp cloth.
4. Applying paint : First, mix lead paint (or blended paint), gasoline, varnish, and clear oil together and sift (using the same color as the sample). Then pour it into a small oil container and stir frequently before use to prevent sedimentation and inconsistent color. When applying paint, work from the outside in, from left to right, and from top to bottom, following the wood grain. Avoid staining the walls when painting door and window frames. Apply paint lightly at joints to achieve a uniform color. Because paint dries quickly, apply it quickly and smoothly, ensuring straight lines and avoiding brush strokes. When painting wooden windows, paint the upper part of the frame first, then the translucent area; after painting the translucent area, hook the sash and then paint the window sash. For double windows, paint the left sash first, then the right; for triple windows, paint the middle sash last; for screen windows, paint the outside first, then the inside. When painting wooden doors, first paint the translucent surface, then the door frame and the back of the door leaf. After painting, use wooden wedges to secure the door leaf, and finally paint the front of the door leaf. After painting, check for any missed spots, and wipe off any paint stains on the small hardware promptly. The paint should ensure a uniform wood color without obscuring the wood grain, so each surface must be painted in one stroke, without leaving any joints. Avoid getting paint on the edges where two painted surfaces meet; if paint gets on them, wipe it off immediately to achieve a consistent color.
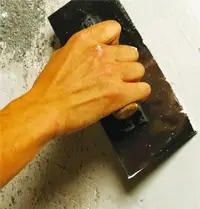 Repair putty
5. Apply the first coat of clear varnish: The application method is the same as for the oil-based varnish, but the first coat should be slightly diluted with thinner to facilitate faster drying. Because clear varnish is quite viscous, it's best to use an old brush with worn edges. When applying, be careful not to let it drip or sag, and ensure even application. After the clear varnish is completely dry, thoroughly sand it with #1 sandpaper or old sandpaper to remove most of the gloss from the first coat. Then wipe away any dust with a damp cloth.
Repairing putty: Generally, it is required not to apply putty after applying paint color. In special cases, colored gypsum putty with slightly higher oil content can be used to repair imperfections. When operating, a horn scraper must be used to scrape and apply the putty. Do not damage the paint film. The putty should be scraped clean and smooth without putty marks (putty marks must be treated with paint chips).
Color correction: For black spots, knots, putty marks, and areas where the wood color is inconsistent on the surface, use shellac, alcohol to mix the color (matching the sample color), or use a mixture of light to dark varnish and thinner to correct the color. Dark wood should be lightened, and light wood should be darkened, combining the light and dark wood to form a single color and drawing the wood grain.
Sandpaper: Use fine sandpaper to gently sand back and forth, then wipe off the powder with a damp cloth.
Apply the second coat of clear varnish : Use the original can of clear varnish without thinner. The application process is the same as before, but the brushing motions should be quick and swift, applying multiple coats and smoothing to ensure the varnish is applied evenly and thickly, without drips or runs, resulting in a glossy and uniform finish. After application, carefully inspect the varnish again and correct any defects promptly. The surrounding environment should be kept clean and passageway temporarily prohibited during this application. Finally, secure wooden doors and windows firmly with hooks or wooden wedges.
6. Apply the third coat of clear varnish . After the second coat of clear varnish has dried completely, first polish it, then wipe it with a damp cloth, and finally apply the third coat of clear varnish; the application method is the same as before.
Clear oil process - quality standards
1. Main Controlled Projects:
The type, model, and performance of the coatings selected for solvent-based coating projects should meet the design requirements.
 Clear oil process
The color, gloss, and pattern of solvent-based coatings should meet the design requirements.
Solvent-based coatings should be applied evenly and adhere firmly, without any missed areas, bleed-through, peeling, or rust.
The substrate preparation for solvent-based coatings should meet the requirements of Article 10.1.5 of the "Code for Acceptance of Construction Quality of Building Decoration and Renovation Engineering":
the moisture content of the wood substrate should not exceed 12%.
The substrate putty should be smooth, firm, and secure, free from powdering, peeling, and cracks.
2. General items:
The coating quality and inspection methods for colored paints shall comply with the provisions of the quality acceptance specifications: Color: Uniform and consistent. Gloss and smoothness: Uniform and consistent gloss and smoothness. Brush marks: No brush marks. Wrapping marks: Not allowed. Straightness deviation of decorative lines and color separation lines: 1mm.
The coating quality and inspection methods of varnish shall comply with the provisions of Table 10.3.7 of the "Code for Acceptance of Construction Quality of Building Decoration and Renovation Project".
Color: Uniform and consistent. Wood grain: Grain holes smoothed out, clear and even grain. Gloss and smoothness: Uniform and consistent gloss, smooth. Brush marks: No brush marks. Wrapping grain: Not allowed. The coating should blend seamlessly with other finishing materials and equipment, and the interface should be clear.
Oil removal process - problems and solutions
(1) Sagging: The main causes are too low paint viscosity, excessive brush application, nozzle diameter being too large, or improper selection of thinner. During application, the paint viscosity should be appropriate, and the thickness of each coat should be controlled. The brush should be applied frequently, in small amounts, and smoothly, especially in grooves and fine details, ensuring proper smoothing. Ventilation at the work site is also important. For repairs, wait for the paint film to dry completely, then sand it smooth with fine sandpaper before applying another coat of topcoat.
 Fall
Fall(2) Brush marks: The main causes are excessive paint viscosity, failure to brush in the direction of the wood grain, use of a brush that is too small, has too stiff bristles, or has uneven bristles. During construction, a matching thinner and a high-quality brush should be selected, and the paint viscosity should be adjusted appropriately. When repairing, lightly sand the paint surface with wet sandpaper to make the paint surface smooth before applying another coat of topcoat.
(3) Wrinkles: These are mainly caused by the surface of the paint film drying and shrinking due to high temperature or sun exposure during or after painting, while the inner layer remains wet. It may also be due to the paint film being too thick. During construction, avoid operating under high temperature and sun exposure conditions. Depending on the temperature change, appropriate thinner can be added. Each coat of paint should be thin. After wrinkles appear, wait for the paint film to dry completely, then sand it and repaint.
(4) Pinholes: The main causes are high paint viscosity, low construction site temperature, air bubbles in the paint, and impurities in the paint. Appropriate varnishes should be purchased according to climatic conditions, and construction should be avoided in low temperatures and windy weather. The viscosity of the varnish should not be too high; after adding thinner and stirring, it should be left to stand for a period of time before use.
(5) Loss of gloss: The main reasons are excessive air humidity during construction, exposure to smoke before the paint is dry, and incomplete treatment of oil stains on the substrate. During construction, avoid rainy, cold, and humid environments. Smoke and dust are strictly prohibited on site. Oil stains must be thoroughly removed during substrate treatment. If loss of gloss occurs, far-infrared irradiation can be used or a thin layer of paint with added moisture-proof agent can be applied.
(6) Rough paint film: The main reasons are poor paint quality, dusty environment, and unclean tools. In addition to following the specifications, a better quality varnish should be selected. When repairing, the paint film can be sanded smooth with sandpaper, and then a top coat of varnish can be applied.
Oil purification process - estimated construction period
Wood surface varnishing is a time-consuming and technically demanding renovation project. The construction period varies depending on the area to be painted, the complexity of the finish, the type and quality of the varnish, and the required grade of varnish. Taking a three-bedroom, two-living-room home renovation as an example, including the painting of doors, windows, radiator covers, wainscoting, and furniture, a standard varnish coat takes approximately 12 days, while a high-grade wood varnish coat takes approximately 14 days, including processing time. If nitrocellulose lacquer or alkyd varnish is used, the quick-drying nature allows for shorter recoating intervals, thus shortening the construction period.