Chrysanthemum breeding technology | Flower cultivation | Flowers | 597 Seedling Network
1. Cutting propagation
Cutting propagation is divided into four types: bud cutting, tender branch cutting, leaf bud cutting and bud cutting.
1. Bud cutting
is to dig the foot buds at the base of the plant for cuttings after the chrysanthemum blooms in November and December, or after the early spring warms up. The foot buds that occur in the underground stems of chrysanthemums are deep or shallow, and occur early or late. For those whose foot buds occur deep and early, the farther they are from the plant in the soil, the stronger the buds are; for those whose buds occur late and shallow, the closer they are to the plant in the soil, the weaker the buds are. Therefore, it is advisable to select foot buds that are far away from the plant and strong for cuttings. If the mother plant is potted, select strong buds that penetrate to the edge of the pot. And it is better to select those with plump buds and uniform leaf nodes. Those with buds that shrink inward, too dense or too sparse internodes, and too thin and weak buds are not suitable for use. After selecting, use a sharp knife to cut foot buds 5 to 7 cm long from the soil, and let them dry for 1 to 2 hours after cutting to make the cut surface slightly dry to prevent the cuttings from rotting easily after insertion. After drying, insert the foot buds into the insertion bed in the greenhouse or shed, and the insertion depth is 1/3 of the bud length. Water thoroughly after insertion, and water again the next day. After that, water appropriately, and it should not be too wet. Keep the room temperature at 7-8℃ in winter (not lower than 0℃, not higher than 10℃). When the outdoor temperature rises above 12℃ in the next spring, move it to the outdoors for management. This method is often used in North China. The foot bud cutting method is also often used when introducing species.
For cutting soil, generally 10%-20% leaf humus is mixed with fine sand, or ordinary culture soil and sand are mixed and applied.
2.
Cuttings of tender branches are cut from the mother chrysanthemum plant that was reserved for seeds last year. When new branches appear in spring, the tender tips are cut for cuttings. This method is the most widely used in production because it can produce a large number of seedlings.
Cutting time: Cuttings can be made throughout the growth period of chrysanthemums, but due to differences in climate and cultivation purposes, the time of cuttings may be early or late.
Preparation of cutting beds: There are several types of cutting beds due to the amount of cutting seedlings and equipment conditions. If a small amount of seedlings is required, cutting boxes can be used for cuttings. The cutting box can be a wooden box with holes, or a commercially available plastic box, 35 cm long, 23 cm wide, and 10 cm high. Drill holes at the bottom for drainage, and lay a layer of coal slag at the bottom of the box to facilitate drainage. Add a substrate on top, 6 to 7 cm thick. The substrate can be coarse sand or vermiculite, and perlite is better. If you use a wooden cutting box, you can make a 45 cm wide, 90 cm long, and 18 cm deep wooden box with holes. Handles are nailed at both ends for easy transportation. Fill in the substrate and you can cut.
If you need to raise a large number of cuttings, the following three forms of cutting beds are generally used.
One is an open-air cutting bed, which is a loam garden with ventilation and light, slightly higher terrain, and no chrysanthemums. Turn the soil several times about a month before cutting to fully expose the soil. Before cutting, add 1/3 of the rice husk ash to the garden soil. If the soil is sticky, add appropriate sand. After fully mixing, make a high ridge with a height of 25-30 cm, a width of 100 cm, and a ridge furrow width of 60 cm. Spray 800 times of 50% thiophanate and 800-1000 times of 90% trichlorfon on the ridge to sterilize and kill insects. After a few days, level the ridge surface, build a south-sloping shed with a height of 100 cm in the north and 80 cm in the south, and use reed curtains to shade it, and then you can prepare for cuttings. The pH value of the bed soil is optimally pH6.2-6.7.
The second is the cutting pool. First, use bricks to make a cutting pool with a height of 45 cm, a width of 100 cm, and a moderate length. The bottom of the pool is covered with pebbles or coarse coal slag with a thickness of 10-15 cm, and a substrate of 20-25 cm (vermiculite or coarse sand or a mixture of half and half of the two) is laid on top. Level and compact it, and then build a sunshade.
The third is the full-light cutting bed. Automatic spray equipment is added to the above-mentioned cutting bed or cutting pool, so that no sunshade can be set up and cuttings can be carried out under full light. Cuttings and cutting technology : Cuttings should be cut from the branches of the mother plant that grow in sufficient sunlight, are strong, have short internodes, are disease-free, and are strong. The night before cutting cuttings and the morning of the same day, water the mother plant first so that the cuttings have sufficient water and are easy to root and survive. The length of the cuttings is 4 to 10 cm, which varies according to the variety and season. Cuttings should be cut from the bottom of the base leaf near the node, and the cut cuttings should be cut off from the lower 2 to 3 large leaves, and 1/2 of the upper large leaves should also be cut off to reduce evaporation. Then use bamboo sticks to make holes according to the plant spacing of 2.5 cm and the row spacing of 2.5 to 5 cm. Insert 2 to 3 cm deep, press tightly after insertion, and water thoroughly. Then cover with reed curtains to shade the sun, and lift the curtains in the evening to allow the seedlings to absorb dew, which is conducive to rooting. If the cuttings are not inserted immediately, they can also be stored in a cold storage at 0-3℃. If the cuttings are varieties that are not easy to root, after arranging the cuttings, dip the base of the cuttings in a 2.5 microliter/liter solution of indolebutyric acid (IBA) before inserting them to promote rooting. The room temperature after inserting should be kept at 15-18℃, and the temperature of the substrate should be 18-21℃. 500-600 cuttings can be inserted per square meter of substrate, and the specific number depends on the size of the lower leaves of each variety of cuttings. Seedling management: During the cutting seedling period, the main contradiction between the seedlings and the environment is that the lower part of the seedlings has a very weak absorption capacity before rooting, while the upper part still needs water and nutrition, which is easy to cause wilting. The way to overcome this is to use appropriate shading and water supply to reduce temperature, reduce evaporation, and regulate the seedlings' need for water. Sunshade management: For seedlings grafted in April, the temperature was still low at that time, so only one layer of reed curtains was needed after grafting. When grafting in May and June, it is advisable to cover the grafting with double layers of reed curtains, and spray water once in the morning and evening every day. The reed curtains are covered at sunrise and uncovered at sunset, that is, full sunshade. In the second week, water only once in the morning, cover the curtains at 9 am and uncover the curtains at 17 pm. In the third week, water once every 2 to 3 days, cover the curtains at 10 am and uncover the curtains after 16 pm. Generally, roots will be formed in about 2 weeks. If managed properly, roots will begin to form 10 days after grafting. Varieties that are more difficult to root will gradually take root and survive in the fourth week, so after 4 weeks, the reed curtains can be left uncovered all day and exposed to sunlight. At this time, most seedlings have sprouted, and the sprouted seedlings can be pinched to prevent leggy growth. To promote strong seedlings, dilute fertilizer and water can be applied 21 times every 3 to 4 days, and weeds can be removed. Generally, transplantation can be carried out after 4 to 5 weeks. Seedlings in full-light cutting beds take root early, so they should be transplanted early appropriately. This is because there is no nutrient in the substrate, the root system is entangled and aged, and late planting is not conducive to growth. If there are many varieties when cutting, when picking cuttings, each variety must be hung with a label with the name of the variety and tied up with thread for cutting. When cutting, each variety must first be inserted with a label with the name of the variety and the date of cutting, and then inserted into the cutting bed. Each variety is cut in turn. After the cutting is completed, all the cutting beds and the number of varieties should be drawn into the map, so that when the variety nameplate is accidentally lost in the future, it can be checked according to the record map. This work is very important. The speed of cutting rooting is closely related to different varieties, temperature and substrate types. Varieties that are easy to root can take root more than 10 days after insertion under suitable conditions. Varieties that are difficult to root will take root 30 to 40 days under the same conditions. When the temperature is between 12 and 27°C, the higher the temperature, the faster the rooting; below 10°C, the rooting is slow; the best rooting is when the substrate temperature is between 21 and 27°C. However, in summer with high temperatures above 30°C, if the substrate is not disinfected, it is very easy to get sick, and the cuttings are prone to blackening and rotting. For full-light cuttings, because the humidity conditions are suitable, there is no need for shading, there is plenty of sunlight, and photosynthesis is vigorous, the roots take root faster. Young plants grow and develop best when the night temperature is 18°C and the air is humid. The cutting substrate is one of the important factors for the success of cuttings. The substrate should have good drainage, ventilation, water retention, and be sterile. The substrate affects the regulation of groundwater, air, temperature and other factors, thereby affecting the rooting speed of the cuttings. 3. Leaf bud cuttings
Refers to cutting a stem with one leaf and axillary buds from the chrysanthemum branches for cuttings, and using the axillary buds to root and develop into seedlings. This method has high technical requirements and is only used for the reproduction of rare varieties. It is rarely used in general production. This method is also often used to preserve the varieties of treasures that are difficult to root.
4. Cuttings with buds
When the chrysanthemum blooms in autumn, if there are no foot buds at the base of the plant, you can choose a side branch with buds 6 to 9 cm long under the flower, pick it and cut it for wintering. Transplant it again after the spring warmth of the following year, and pinch it when it grows to 30 to 40 cm high to stimulate the occurrence of foot buds, and then cut it for cuttings and propagation. This not only preserves the variety, but also maintains the excellent characteristics of the variety, and can make the flowers more beautiful and larger, without degeneration and deterioration.
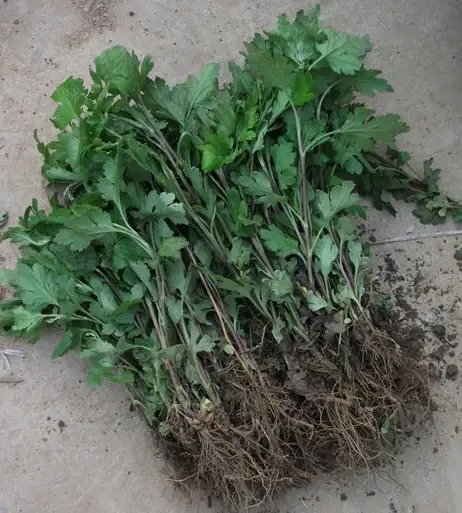
2. Division propagation
Dig up the mother plant of the chrysanthemum, separate the branches with roots according to their natural shape, and plant them separately. After planting, water thoroughly, and then water appropriately. After two weeks, you can apply fertilizer and carry out normal maintenance. This method is easy to operate and reliable to survive. In the past, this method was often used for reproduction. The so-called "three-quarters and four-quarters" means that the plants are divided in March of the lunar calendar, and after they survive, they can be pinched and maintained in April. This method is mostly used in the cultivation of large upright chrysanthemums and hanging rock chrysanthemums, but not in cut flower cultivation. For parents of hybrid breeding, this method is also often used in order to make them bloom early for hybridization and receive seeds early. However, this method has the problem of early division, the lower leaves are prone to withering early, and the flowers also deteriorate, and it is not as good as the cutting method in terms of mass reproduction of seedlings, so it is less used at present.
3. Grafting propagation
Grafting propagation is to graft the branches of chrysanthemum onto the rootstock of Artemisia plants. The purpose is to utilize the developed root system of Artemisia plants to absorb sufficient nutrients, so that the chrysanthemum plants grow strong and bloom beautifully and large. At the same time, because the roots of Artemisia plants are highly resistant to adversity, they are easy to manage. Using Artemisia plants as rootstocks for cultivating ten kinds of chrysanthemums, hanging rock chrysanthemums, large standing chrysanthemums and other artistic chrysanthemums can expand the ornamental value of chrysanthemums. However, when using Artemisia roots as rootstocks to graft chrysanthemums, it is generally not used as a mother parent for seed preservation. If you want to bloom beautifully and large, and to keep seeds as a mother parent after flowering, you must shovel off the Artemisia stems under the soil when the flowers are half open. This is because the base of the chrysanthemum is also full of roots at this time, and the chrysanthemum stems can still produce foot buds for seeds after shoveling off the Artemisia stems.
4. Layering propagation
Bend the branches of chrysanthemum and bury them in the middle, exposing the branches. Use a knife to cut the skin below the buried stems to stimulate rooting. After rooting, cut it from the top of the buried soil and plant it to form a new plant. In order to maintain the characteristics of the bud mutation, this method is often used.
5. Tissue culture
The leaves, stem tips, stem segments, petals and buds of chrysanthemum can be successfully regenerated plants through tissue culture.