Care and hydroponic methods for 39 types of flowers
39 Hydroponic Methods for Flowers
Hydroponic product production process: Selecting superior mother plants – removing from pots and rinsing roots – root or base cutting – disinfection and rooting treatment – planting in planting cups (or planting with expanded clay pebbles) – rooting in a rooting bed – mutagenesis in a hydroponic bed – hardening off and sale (management during this period is computer-aided).
The cultivation of hydroponic flowers is a very complex process, involving a series of steps such as washing roots, pruning roots, disinfecting, planting, promoting root growth, and inducing root growth. The time required can range from ten or twenty days to half a year.
I've been searching online for information about hydroponics, and now I'm uploading all the information I've collected over the past year, along with hydroponic methods for 39 different flowers, to the Xinya Flower Shop WeChat public platform to share with everyone~~~ I hope you like it~~~~
I. Dry Umbrella
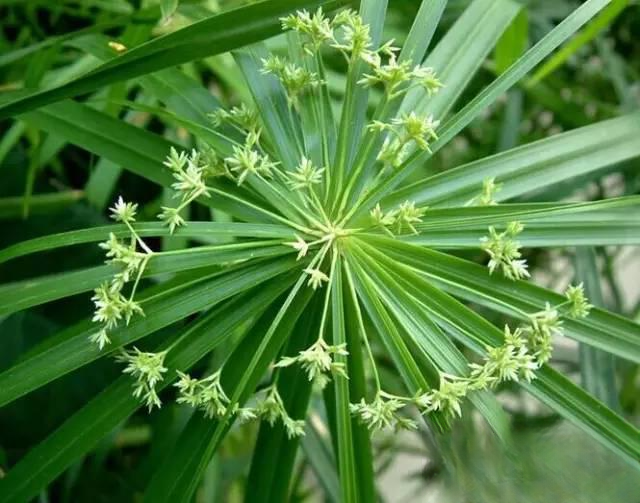 1. Use root washing or division methods to convert established plants to hydroponics. Old roots adapt well to the hydroponic environment and generally will not rot. New roots will grow in the water in about 7 days. Suitable for low-concentration nutrient cultivation.
2. The crown of the dry umbrella tree is relatively large and dense, so the number of branches should not be too many when hydroponically planted. Too many branches will affect ventilation and light penetration, and will also appear messy and disorderly. Sparser branches will look more natural, with 7 to 9 branches being sufficient.
3. To prevent lodging, deep containers should be used for planting.
4. The leaves of the umbrella shrub have well-developed and numerous stomata, resulting in vigorous transpiration. Therefore, it is necessary to replenish the solution naturally consumed in a timely manner. It is a relatively easy plant to cultivate hydroponically.
II. Peace Lily
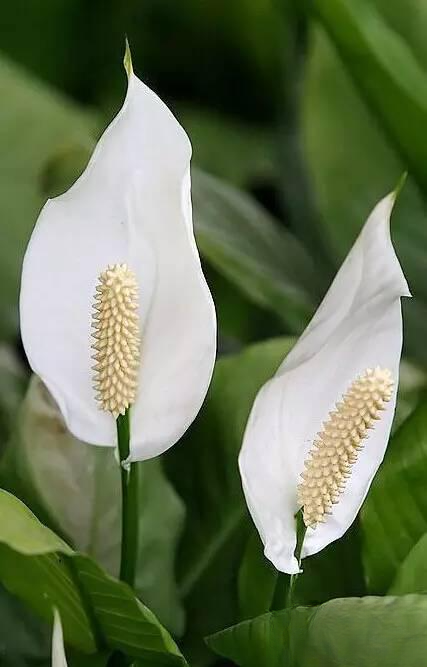 1. Plants grown hydroponically using division or root washing methods adapt quickly to hydroponic conditions and generally do not develop root rot. New roots sprout in 7-10 days, allowing for the appreciation of flowers, leaves, and roots in a short time! 2. Peace lilies have well-developed, pure white root systems. Cultivating them in containers with high clarity enhances their ornamental effect.
3. Peace lilies prefer shade, and hydroponically grown plants can also bloom in a semi-shaded indoor location.
4. When switching from soil to hydroponics in summer, some older leaves may turn yellow. These should be removed promptly, and the water should be changed daily. After a week, the frequency of water changes should be reduced.
III. Coleus
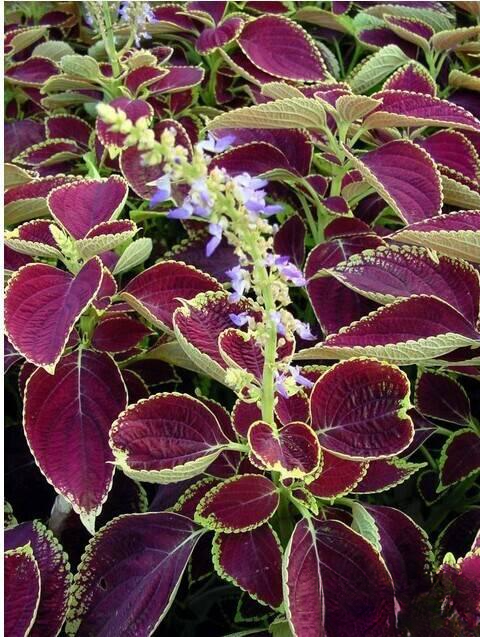
1. For hydroponic cultivation of coleus, take a stem section with 5-8 leaves from the plant, insert it into water (15-28 degrees Celsius), and roots will generally sprout in 10-15 days. Then, plant it in a delicate vase. Coleus has vibrant leaves and makes a nice decorative plant. However, be careful not to add too much fertilizer during hydroponics, as this may cause the leaves to turn green!
2. To maintain the vibrant color of the leaves, place it in a bright location. Insufficient light will cause the leaves to become dull and lose their luster.
3. Use pinching to control the height, promote branching, prevent the plant from producing inflorescences, and maintain a full plant structure.
IV. Lucky Bamboo
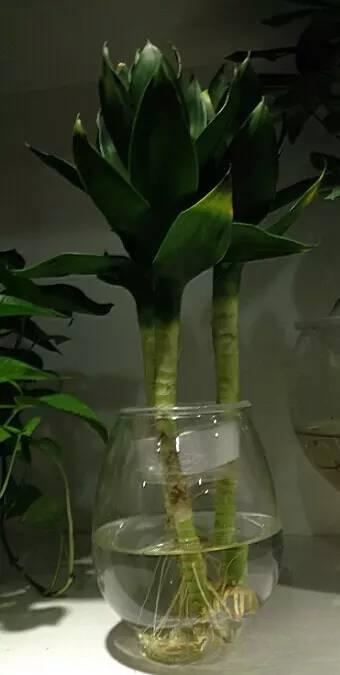
1. As one of the most suitable flowers for hydroponics, it is widely planted in households. It roots very easily when propagated by water cuttings and requires relatively little care. It thrives year-round at temperatures between 18 and 28 degrees Celsius. 2. When grown hydroponically using the root-washing method, the original soil-grown roots are orange-red, but the roots that emerge in water are milky white, creating a beautiful contrast of red and white. Lucky bamboo is elegant and serene, evergreen, and symbolizes peace, wealth, and good fortune, making it a popular plant.
V. Taro
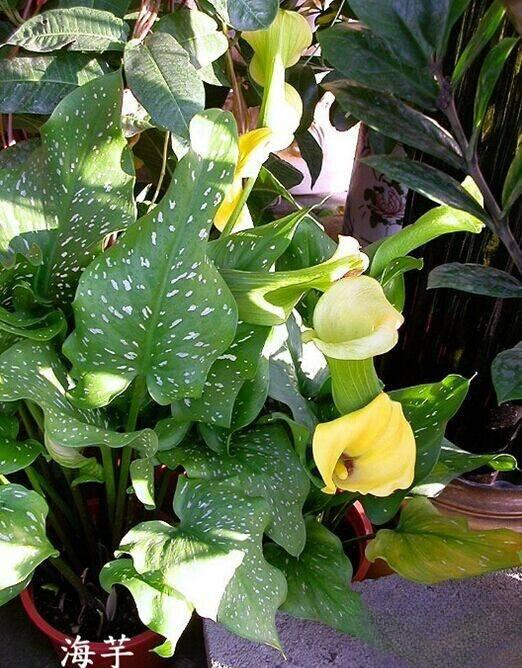
1. Propagating from seedlings that sprout from the plant is the easiest way to ensure survival. In the early stages of hydroponics, pay attention to changing the water and washing the roots daily. Alocasia is one of the fastest-rooting hydroponic flowers. New aquatic roots can grow in about 7 to 10 days.
2. The sap in the stems and leaves of the taro is poisonous. Contact with the skin can cause itching and redness. Rinse with clean water immediately and do not ingest.
3. With its unique shape and beautiful leaves, the Alocasia macrorrhiza is an excellent decoration for computer desks!
6. Green Ivy
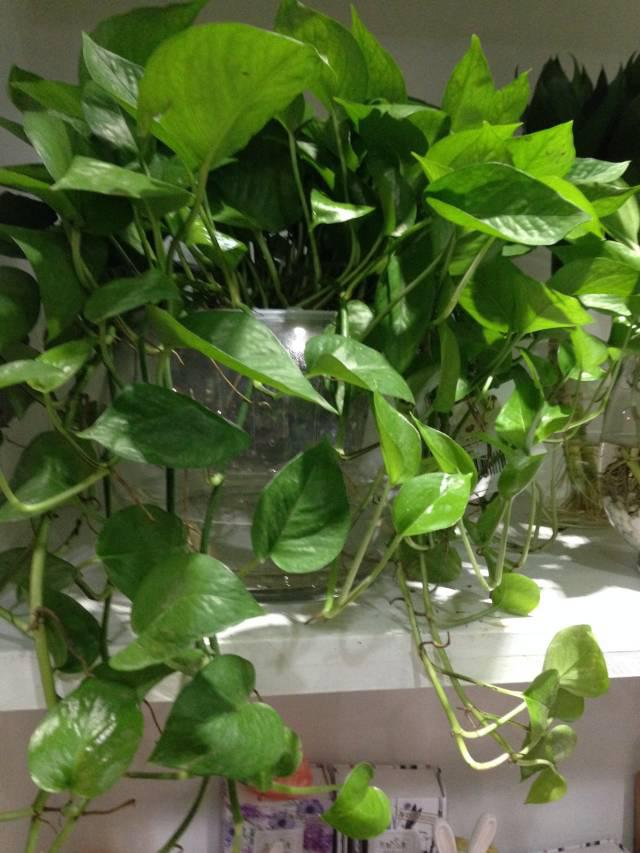
1. Pothos is very suitable for hydroponic cultivation. It is easy to obtain ideal plants by water propagation or root washing. Under hydroponic conditions, new roots can sprout in about 15 to 20 days.
2. Place the aerial roots in the water as well. The aerial roots can also act as nourishing roots, absorbing water and nutrients.
3. During the growing season, spraying diluted hydroponic fertilizer on the leaves will make the leaves more vibrant.
4. The vines of the pothos are light and graceful, with variegated leaves. Small plants can also be planted in wall-mounted containers, allowing them to hang down at an angle, resembling a green curtain, which is fresh and elegant.
7. Snake Plant (Sansevieria trifasciata)
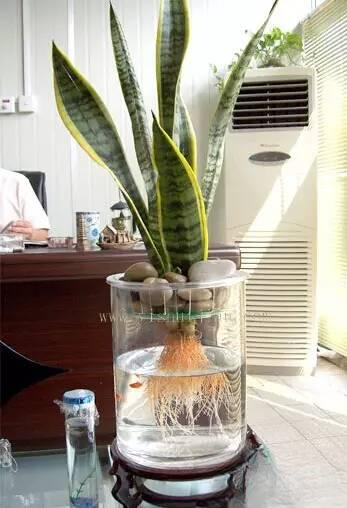
1. For hydroponic cultivation of snake plants at home, it is best to choose the golden-edged variety with yellow leaf margins, as its ornamental value lies in hydroponics. New roots will sprout in approximately 10-15 days at a water temperature of 20 degrees Celsius.
2. Snake plant has a sparse root system and should not be pruned. Snake plant has beautiful leaves, with arrow-shaped leaves that stand upright and have a noble temperament. It is highly adaptable and can be used for green decoration in living rooms, studies, and dimly lit areas.
8. Miniature Coconut
1. Select small to medium-sized plants grown in soil and convert them to hydroponics using the root-washing method. 2. Dwarf coconut palms have delicate and underdeveloped root systems. New root growth is slow in hydroponics, but older roots are sturdy and less prone to rotting. Generally, root pruning is not required.
9. Bamboo Palm
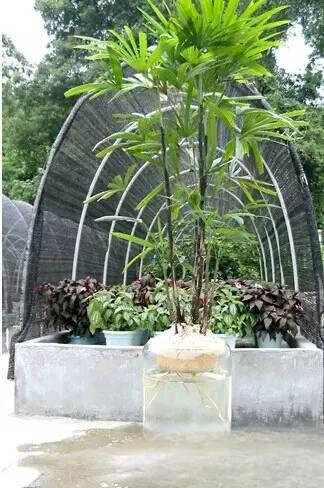
1. For home hydroponics, choose small to medium-sized plants and plant them using the root washing method.
2. It is better to plant sparsely than densely. Planting 2-3 branches in each dish will show its beautiful and quiet temperament.
3. The roots of the bamboo palm are dense and elastic, and adapt to the hydroponic environment quickly. However, new roots do not easily sprout during the hydroponic process, and some roots may not grow even after several months of hydroponics, but this does not hinder its growth.
10. Spider Plant
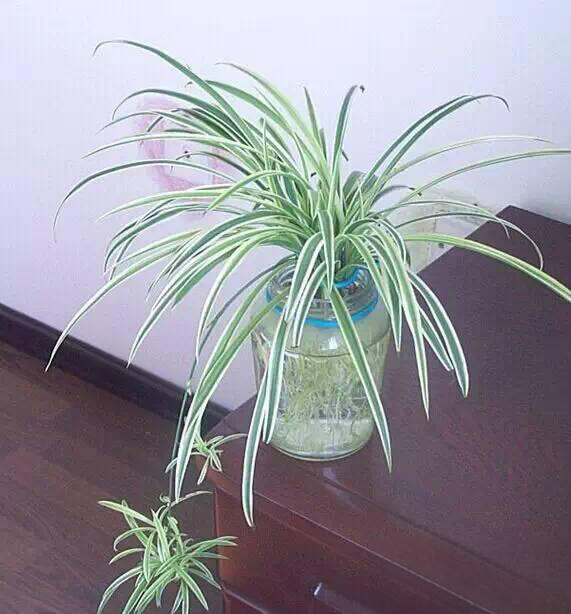
1. For hydroponic spider plants, it's best to plant them using the aerial roots that grow from the runners (stolons), as these roots are very suitable for hydroponics and easy to manage. Roots will sprout in about 5 days of water cultivation.
2. When hydroponically cultivating spider plants using the root washing or division method, the original thick, fleshy roots will rot. It is necessary to change the water every day, clean the root system, and remove the rotten roots. New roots will grow from the rhizome in about 25 to 30 days. The old roots will gradually adapt to the hydroponic environment and stop rotting. At this time, nutrient solution can be used for cultivation.
3. When growing spider plants hydroponically, it is advisable to choose green-leaved varieties, as silver-thread spider plants are more difficult to grow.
11. Green Emperor
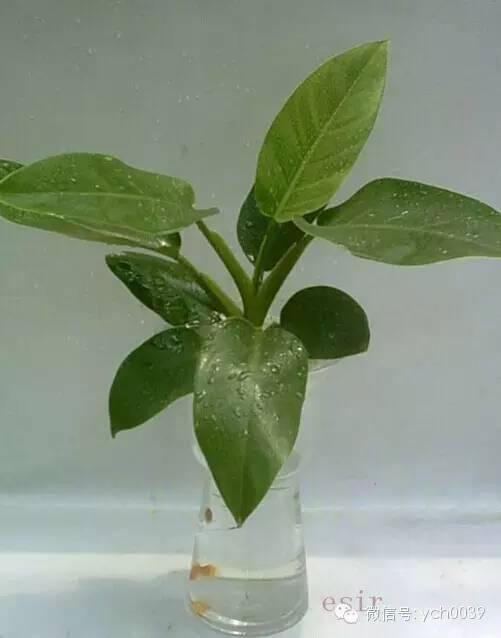
1. When propagating by water propagation, it is advisable to cut off the upper part of the stem and insert the aerial roots into the water. New roots will sprout in about 10 to 15 days.
2. For home hydroponic cultivation of Green Emperor, it is advisable to use small plants and frequently spray water on the plant surface to keep the leaves fresh.
3. The Green Emperor plant has a thick stem; taking advantage of this characteristic, it is best grown upright for better visual appeal. Provide it with appropriate diffused light.
Twelve, Haruha
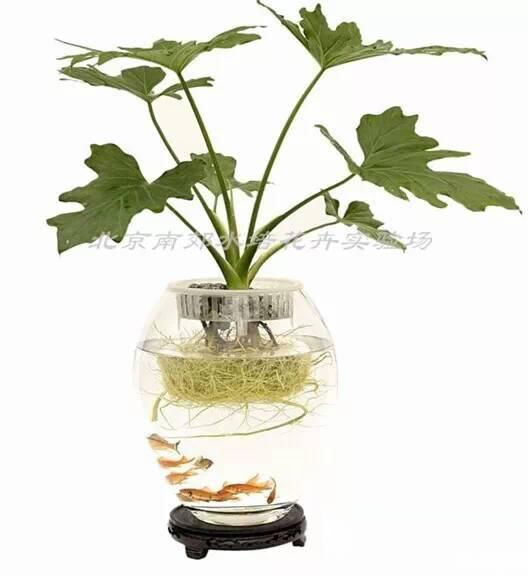 1. For hydroponic Philodendron bipinnatifidum, select small seedlings and use the root washing method.
2. Frequently spray water on the leaves and wipe away dust with a damp cloth to keep the leaves fresh.
3. The unique leaf shape of the Philodendron bipinnatifidum makes it an excellent choice for home decoration.
1. Cut a suitable length of upper branch, wash away the sap, and plant it using the water propagation method. It will take about 20 days to root in an environment with a water temperature of 25 degrees Celsius.
2. Using the root-washing method to convert established soil-grown plants to hydroponics generally prevents root rot. However, a low-concentration nutrient solution should be used for planting.
3. Cultivating Aglaonema in water has a long history in my country. In Guangdong, it's quite common to grow it in glass bottles filled with water. Water cultivation is convenient, clean, and hygienic, and it adds a unique charm.
14. Monstera deliciosa
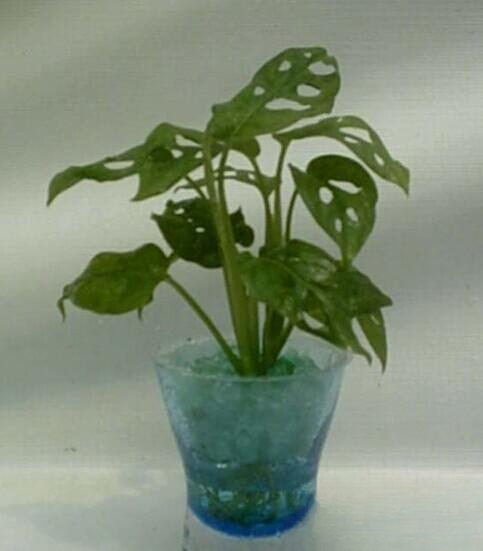
1. Monstera deliciosa is very adaptable to hydroponics. Soil-grown plants can be converted to hydroponics by washing the roots all year round.
2. Planting by water propagation. The aerial roots on the branches should be preserved and inserted into the water. The aerial roots can become nutrient roots and provide support for the plant.
3. Monstera deliciosa has large leaves and a thick stem, so when hydroponically growing it, a sturdy and stable container should be used to prevent it from falling over.
4. Regularly spray water onto the leaves with a fine-nozzle sprayer to increase ambient humidity, which is beneficial to plant growth.
15. Synthetic sweet potato
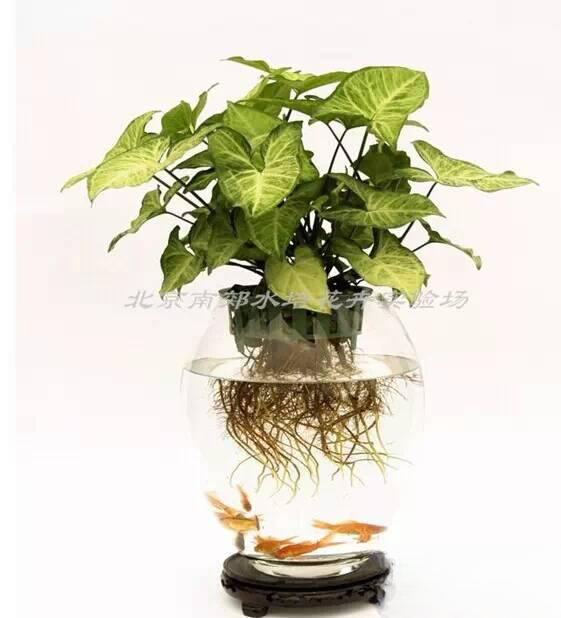 1. The root washing method can be used to plant mature plants without seasonal restrictions. Water propagation can be carried out all year round as long as the plant has aerial roots.
2. It requires minimal management and grows rapidly, so it is advisable to frequently replace the plant. Cut off the top branches of overgrown plants and replant them. New roots will grow in about 10 days. Axillary buds on the old stems will also sprout quickly.
3. For hydroponic Syngonium podophyllum, it is advisable to choose small plants with brightly colored leaves, such as the white butterfly Syngonium podophyllum, pink butterfly Syngonium podophyllum, and silver leaf Syngonium podophyllum, and cultivate them in an upright manner. Because of their brightly colored leaves and butterfly-like shape, they are quite ornamental.
picture:
16. Pineapple
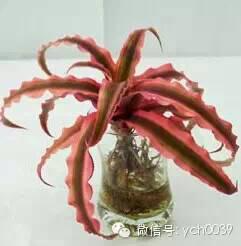
After flowering, root sprouts can be propagated hydroponically. When separating root sprouts, they should not be too small; they can be broken off by hand, the base smoothed, and several leaves near the base removed. Place them in a container, ensuring they touch the water surface. Under shade and at 20℃, roots will develop in 2-3 weeks. Alternatively, potted plants can be washed and then hydroponically propagated, but rooting is slower, taking about a month and producing fewer roots. The nutrient solution should have a pH between 4 and 5. The small, brightly colored bromeliad (Pineapple 'Plum') is an excellent choice for desktop decoration.
17. Coral Begonia
Cuttings can be inserted into water and will root in about 3 weeks. In the initial stages of hydroponics, the nutrient solution can be diluted appropriately (500 times); after new roots have developed, use a 200-fold diluted solution, adjusting the liquid level to half the height of the roots. The coral begonia has a graceful form, clusters of small flowers, and exceptionally vibrant leaves, making it a beautiful hydroponic ornamental plant with both attractive flowers and foliage.
18. Geranium
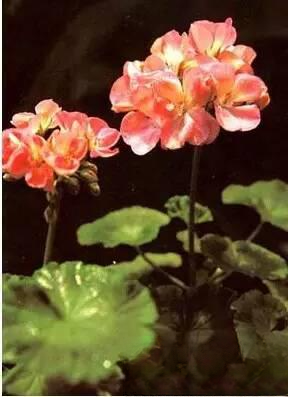
Take a branch, let the cut end dry, place it in a container so that it touches the water surface, and keep it above 20°C. It will take about a month to develop roots. Alternatively, you can grow it in a pot by washing the roots and then hydroponically propagating it.
19. Hydroponic Tulips

When hydroponically growing tulips, it's crucial to select varieties based on the desired flowering period to ensure vibrant color and beauty. Secondly, temperature control is essential. The management process from bulb germination to flowering can be divided into three stages: germination, vegetative growth, and flowering.
1. Germination Period Management: Fill the pot containing the bulbs with water (ordinary household water is fine), ensuring the roots are submerged. Place the pot in a bright indoor location (ideally on a windowsill), maintaining a room temperature of 13°C. Avoid large temperature fluctuations. Roots and buds will emerge in 4-7 days, marking the start of the vegetative growth period. Change the water every three days, and weekly after budding. The relationship between the number of days after planting and the number of germinations is as follows:
Days after bulb cultivation: 1 2 3 4 5 6 7
Germination count: 0 0 0 15 28 39 48
2. Management during the vegetative growth period: During this period, as the growth volume and speed of roots, stems, and leaves increase, a large amount of water is required. Maintain a constant water level in the pot, ensuring the roots are always submerged. Control the growth temperature between 15℃ and 18℃; excessively high temperatures will cause excessive vegetative growth, resulting in thin, elongated stems that negatively impact appearance. Because plants exhibit phototropism, frequently rotate the pot to ensure the stems grow upright. After 2-3 weeks of growth, once 3-4 leaves have emerged, oval-shaped flower buds will appear at the stem tip, marking the start of the flowering period.
3. Flowering period management: After the buds appear, the temperature can be controlled at 15℃-18℃. The buds will gradually open in 5-7 days, and the flowers will show bright colors. After the flowers open, the flower pot can be moved to a cool place indoors, which can prolong the flowering period. Generally, the flowers can stay open for 2-3 weeks.
Leaving the ball of the gen
The fragrance of the Hoya carnosa flower, its beautiful color, and its long blooming period make it an excellent material for flower arranging.
Hoya carnosa has traditionally been cultivated in soil. However, after experiments with exposed-root hydroponics, it exhibits the following characteristics: ① labor-saving; ② hygienic; ③ fewer pests and diseases; ④ easy management; ⑤ long flowering period; ⑥ ornamental value including roots, leaves, and flowers.
The method of exposed-root hydroponics is:
(-) Seedling treatment: Dig up the soil-planted hoya, wash it with clean water, cut off the dead leaves and diseased and pest-damaged leaves, and soak it in diluted flower nutrient solution for half a day.
(ii) Potting: Take a glass bottle or vase (without a bottom hole), put a few nice river stones in the bottom of the bottle, transfer the prepared hoya seedlings into the vase and river stones, spread out the roots, add clean water and flower nutrient solution, and place it indoors or in a shady place.
(III) Management: 1. Spray the leaves with clean water once a day. After one or two days, spray the leaves with flower nutrient solution once every three to four days. 2. Change the water once every fifteen days and add nutrient solution after changing the water. 3. One month after potting, inject the head of the hoya with flower nutrient solution, half a milliliter each time, and then once a month thereafter to promote growth, flowering and prolong the flowering period.
(iv) It will bloom about two to three months after potting. After the flowers wither, prune the branches, change the water, and inject nutrient solution to make it bloom again.
Hydroponic cultivation method for winter jasmine
I. Water Propagation Time: Water propagation can be done year-round. In winter, the container for water propagation can be placed indoors in a sunny spot. In summer, it is important to provide shade to prevent exposure to direct sunlight. The water temperature should be maintained between 15℃ and 20℃ during water propagation to promote rapid rooting and a high survival rate.
2. Cuttings for water propagation: Select healthy branches with plump buds from the current year. The cuttings should be 8 to 12 cm long and have 2 to 4 nodes. Cut the cutting about 2 mm below the lowest node and tie them together in groups of 10. If there are too many leaves on the upper part of the cutting, remove them appropriately to promote rooting.
3. Water container: The container is a basin with a large opening or a shallow wide-mouthed bottle, etc., and must be washed clean before use.
IV. Water Propagation Method: Fill a container with clean rainwater, river water, or tap water to a depth of 8 to 10 centimeters. Then, arrange the tied cuttings and place them in the water to a depth of 4 to 6 centimeters. Place the container outdoors in a well-ventilated, semi-shaded location. The water must be kept fresh and clean, and should be changed every 3 to 5 days. Generally, callus tissue will appear about 20 days after planting, and fibrous roots will grow in 35 to 40 days.
5. Timely planting: When the fibrous roots grow to 3 to 5 cm, they must be planted in time. Be careful during the operation to avoid damaging the root system. Generally, after planting, provide shade for about 10 days before normal management can be carried out.
20. Clivia
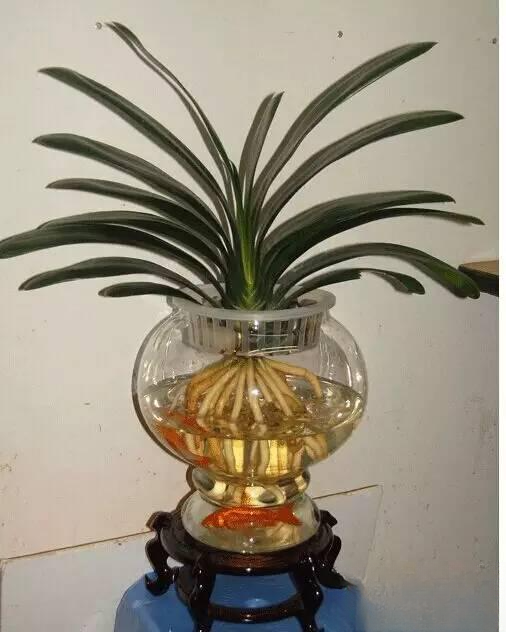
Clivia can also be grown hydroponically, and the method is as follows:
Container selection
To hydroponically cultivate clivia, the first step is to choose a suitable container. Generally, a transparent glass container is best; if you're growing a single seedling, a glass jar will suffice. For larger-scale hydroponics, you can weave a metal mesh with a 1-centimeter aperture using fine wire, and then create a glass hydroponic box slightly smaller than the mesh; alternatively, a fishbowl can be used. Cover the hydroponic box with the mesh, and insert the clivia seedlings through the mesh into the nutrient solution, ensuring the roots are submerged no more than the pseudobulb.
Nutrient solution preparation
Nutrient solutions come in two types: inorganic and organic. Inorganic nutrient solution can be prepared as follows: 1.5g calcium, 0.01g ferrous sulfate, 1g urea, 1g potassium dihydrogen phosphate, and 0.5g magnesium sulfate. Dissolve these five inorganic salts in 1000g of water before use. Organic nutrient solution is prepared as follows: 100g roasted sesame seed powder, 100g bone meal (made from unsalted fresh bones), 150g soybean meal, and 50g roasted sesame powder. Dissolve these in 1000g of water. Compared to inorganic nutrient solutions, organic fertilizer is richer in components but has a lower nutrient content, while inorganic fertilizer has a relatively simpler composition but a stronger and faster effect. To maximize their advantages, they can be used in combination. If used alone, inorganic fertilizer should be applied once a week, and organic fertilizer once every five days.
Water
When hydroponically cultivating clivia, tap water cannot be used directly; it must be "aged" water. "Aging" water means placing tap water in a container and letting it sit in the sun for 3-5 days to allow harmful chlorine compounds like bleach to precipitate. Aged water will show the sediment changing from streaks to clumps, and the water should ideally be green. After aging, the water should completely submerge the roots, but not the pseudobulbs. Too shallow a water level will prevent the clivia from receiving sufficient water, while too deep a level (submerging the pseudobulbs) will cause root rot. During cultivation, carefully observe the water quality. If the roots turn yellow or black, it indicates a lack of oxygen and nutrients in the water, and the water must be changed immediately.
Air, sunlight, temperature
Proper aeration of the roots is crucial to the success of hydroponic orchid cultivation. After a period of cultivation, a layer of algae will grow on the roots. If the algae is too thick, it will severely impair root respiration and corrode the nutrient solution. At this time, gently brush away the algae layer with a soft, clean brush (it doesn't need to be completely removed, as a small amount of algae on the roots has little impact). In addition, it's necessary to regularly check if the oxygen level in the water is sufficient. A method for checking is to place two or three small fish in the hydroponic container. If the fish swim freely in the water, it indicates sufficient oxygen. If the fish constantly float to the surface with their mouths and gills exposed to breathe, it indicates a lack of oxygen. If oxygen deficiency is detected, it must be replenished. There are two methods: changing the water or using a small air pump to supply oxygen to the water. Regarding sunlight, Clivia is a semi-shade plant, so pay attention to light, especially in summer. Avoid direct, strong sunlight and allow it to receive diffused light. In addition, based on the phototropic characteristics of Clivia leaves, it is important to ensure that the leaves receive light evenly; otherwise, the leaves will be of uneven length and grow in a staggered direction. Generally, the angle of light should be adjusted every two to three days. Regarding temperature, the ideal ambient temperature for mature Clivia is 11℃-25℃, while seedlings can tolerate slightly higher temperatures, 20℃-35℃. When growing Clivia in water, it is crucial to manage the day-night temperature difference. In winter, maintain a daytime temperature of around 20℃ and a nighttime temperature no lower than 15℃.
21. Rose
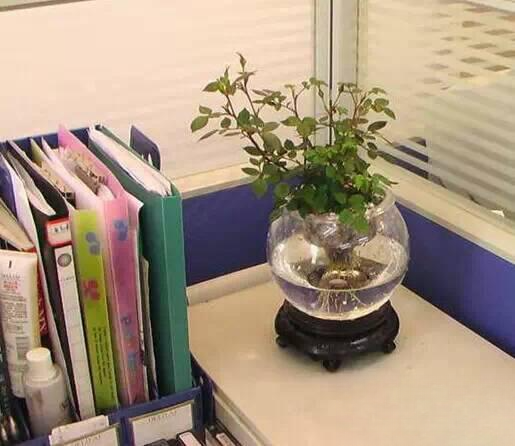
After the roses have faded, prune the spent blooms and allow the stems to grow for several days. Once the first axillary bud on the stem has grown stronger and accumulated nutrients, cut a three-node cutting. Remove the petioles from the bottom leaves and use a sharp blade to make a slanted cut on the underside of the bottom bud. Immediately insert the cutting into a prepared bottle filled with clean water, submerging it about one-third of the way down. To reduce water evaporation from the leaves, you can trim some of them. New roots will easily grow from the cut in the dark, so a brown bottle is recommended. If a brown bottle is unavailable, you can wrap it in a layer of black plastic film. Place the bottle on a south-facing windowsill, but avoid direct sunlight.
When the temperature is high, change the water once a week. Roots will develop in about 20 days at temperatures between 15-25℃. Once the young roots are 1-2 cm long, they can be transplanted into a pot. Because the young roots grow in water, water them once a day initially to help them adapt to the environment, gradually reducing the watering time. After providing shade for a week, they can be exposed to sunlight in the morning and evening, and they will survive.
The advantages of water propagation are: it is simple, has a high survival rate, is not limited by time, and can be propagated after flowering.
22. Azalea
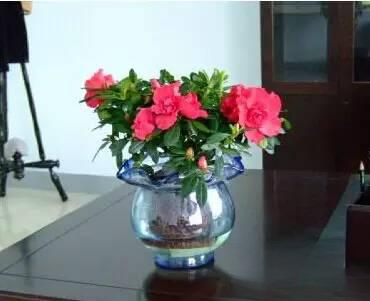
Soilless cultivation is characterized by replacing soil with artificially manufactured substrates. The Hunan Provincial Forestry Research Institute has achieved highly satisfactory results using solid substrates for soilless cultivation of azaleas. The variety used is the Summer Azalea. Soilless cultivation results in compact canopy structures, abundant flowering, large flower diameters, and fewer pests and diseases. This method not only improves flower quality but also significantly reduces strenuous physical labor, making it a cultivation method worthy of widespread promotion.
1. Preparation of the substrate
Azaleas have very delicate root systems, requiring a loose substrate to facilitate aeration and drainage. A suitable substrate is a mixture of 1 part vermiculite, 1 part perlite, 1 part river sand, and 1 part cinder. After mixing, sterilize the substrate with a 0.1% carbendazim solution, then evenly mix it in and cover with plastic film for one day. Rinse several times with clean water, let it dry, then mix in a 0.4% agricultural compound fertilizer solution. Cover with plastic film again for one month before potting.
2. Preparation of nutrient solution
Azaleas have relatively strict requirements for fertilizers. During the growing season, apply fertilizer frequently but in small amounts. Experiments have shown that using agricultural compound fertilizer as the main component, supplemented with trace elements, maintaining the pH value at around 5, and spraying low-concentration foliar fertilizer can achieve good results.
Preparation of macro-elements: Add 2 grams of agricultural compound fertilizer and 0.5 grams of magnesium sulfate to 1 liter of water to make a standard solution.
Preparation of micronutrient solutions: Add 20g disodium EDTA, 15g ferrous sulfate, 4g manganese sulfate, 6g boric acid, 0.2g zinc sulfate, 0.1g copper sulfate, and 0.2g ammonium molybdate to 1 liter of water to form a stock solution. When using, add 1ml of the micronutrient stock solution to 1 liter of standard solution to obtain the total micronutrients. Preparation of foliar fertilizer: Add 1g urea, 1g potassium dihydrogen phosphate, 0.02g boric acid, and 0.1g vitamin B1 to 1 liter of water.
3. Water and fertilizer management
Because the substrate has good drainage and aeration, but poor water retention, it generally requires more watering than soil-grown substrate, just enough to keep it moist. At this stage, when buds are forming and leaf buds are sprouting, the demand for fertilizer is high; apply a full-strength nutrient solution about every 10 days. From March until the flower buds open, spray foliar fertilizer about every 15 days. After flowering, the water demand is high; in addition to daily watering, spray the leaves in the evening. At this time, the fertilizer demand is also high; switch to applying nutrient solution once a week and spraying foliar fertilizer once a week to promote strong new branches and facilitate flower bud differentiation. After the hottest period of summer, keep the substrate moist and spray the leaves; reduce fertilization to applying nutrient solution about every 20 days. After autumn cools down, gradually increase the amount of fertilizer, applying a full-strength nutrient solution about every half month and spraying foliar fertilizer 1-2 times to promote healthy bud growth. After winter, azalea physiological activity is weak, so fertilization is not advisable; water only as needed depending on the dryness of the substrate. During cultivation, there were basically no pests or diseases.
23. Hyacinth hydroponics
Hyacinths are plants belonging to the lily family and are also bulbous flowers. Hyacinth inflorescences are full, come in a variety of colors, and have pure white roots.
Key points of hydroponics:
(1) Choose a container with a mouth that can hold the bulb. It is best to choose a gourd-shaped container that is smaller at the top and larger at the bottom, and it is better to choose a transparent glass container. Some household utensils such as stemmed wine glasses and wine bottles can be used, as can wide-mouthed containers.
(2) The water temperature should not be too high, preferably below 15℃.
(3) Place the bulb on the neck of the bottle. After roots develop, lower the water level until the roots just touch the water surface. This allows the roots to fully absorb oxygen and promotes root growth. Once the roots have developed, cover the culture container with a black cloth to allow the bulb to develop further.
(4) In winter, the container should be moved to a sunny place to encourage the plant to have large and strong flowers.
(5) You can also plant several hyacinths in the fish tank, use sand as the substrate, and supplement with shade-loving ferns to create a charming little scene.
24. Gerbera
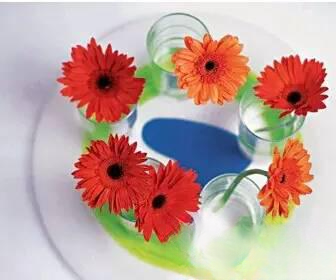
A perennial herbaceous plant of the Asteraceae family, with large flowers in a variety of colors, it blooms year-round. It prefers warm, sunny, and well-ventilated environments, is semi-hardy, and thrives in fertile, well-drained soil. Gerberas are excellent cut flowers, have a long hydroponic lifespan, are highly ornamental, and are also effective at absorbing formaldehyde.
These hydroponic plants generally require no special care. Any container with sufficient volume for root expansion can be used, but open-mouthed glass containers are particularly beneficial for maintaining water quality and promoting root growth. When planting, avoid submerging the leaves in water to prevent rotting. Place them in suitable light conditions, and they will root quickly. Add water when the water level is low to prevent the roots from drying out. If the water becomes cloudy, remove the plant, clean the container, and refill with fresh water. Generally, change the water every three days and apply a nutrient solution once a day; the nutrient solution's concentration and amount depend on the size of the plant.
25. Asparagus fern
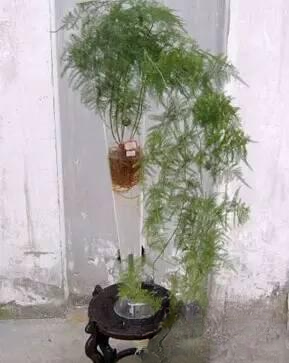
Other names: Cloud bamboo, Flat grass
Family and genus: Liliaceae, Asparagus
Morphological characteristics: Asparagus fern has an elegant plant shape, with slender and beautiful leaf-like branches that resemble clouds. It is similar to bamboo but not bamboo. Its posture is graceful and unrestrained. Its aquatic roots are fleshy and white. When paired with a transparent container, it is both dignified and beautiful, and also appears noble and elegant. It is a fine variety for hydroponics.
Growth habits: Prefers warm, humid and semi-humid environments, with an optimal temperature of 15-25 degrees Celsius and a minimum operating temperature of no less than 5 degrees Celsius. It likes diffused light and dislikes strong direct sunlight and dry air.
Key points of hydroponics:
1) Material selection: Select soil-grown plants with good shape and vigorous growth. After washing away the soil and removing rotten roots, plant them in a hydroponic container and add water to one-third to one-half of the root system.
2) Maintenance: Initially, change the water every 2-3 days, removing any rotten roots promptly. After two weeks, the root system will have adapted to the environment and developed aquatic roots. Thereafter, change the water every 5-6 days. When the plant shows strong growth, switch to nutrient solution cultivation. The nutrient solution should be shallow rather than deep. In summer, replenish it about every 10 days. When the nutrient solution accumulates sediment, replace it. Generally, replace it every 1-2 months. Avoid direct sunlight in summer; place the plant in a warm, well-lit location.
Keep the room temperature above 5 degrees Celsius, and spray water on the leaves frequently when the air is dry to maintain high air humidity and keep the branches and leaves clean.
26' Hedera Hellx
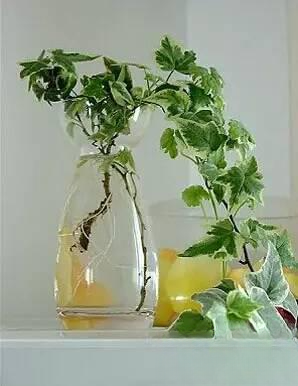
Other names: English ivy
Family and genus: Araliaceae, Hedera.
Because of its vines and dense foliage, it is the ideal material for vertical greening of indoor and outdoor walls, and also an excellent ground cover plant. It is suitable for climbing on buildings, walls, steep slopes, rock walls, and the ground under the shade of trees, and the demand for potted plants is gradually increasing.
(I) Morphological characteristics and varieties
An evergreen climbing vine with slender, flexible branches and aerial roots. The tips of the vines grow spirally, allowing them to climb on other objects. Leaves are alternate, leathery, dark green, and have long petioles; leaves on vegetative branches are triangular-ovate, entire or shallowly 3-lobed, while leaves on flowering branches are ovate to rhomboid. The inflorescence is a raceme with small, pale yellow, spherical flowers. The drupe is spherical and black.
Commonly cultivated species in the same genus include Chinese ivy (H. nepalensis var. sinensis), Japanese ivy (CV. conglomerata), variegated ivy (CV. discolor), golden-heart ivy (CV. goldheart), and silver-edged ivy (CV. siluer quetn).
(II) Ecological Habits
Ivy is a typical shade-loving vine, but it can also grow in full sunlight. It thrives in warm, humid climates but is not cold-hardy. It is not particular about soil type, but prefers moist, loose, fertile soil and is intolerant of saline-alkali conditions.
(III) Reproduction methods
Ivy nodes can naturally root in humid air and will naturally burrow into the soil once they touch the ground. Therefore, it is mostly propagated by cuttings. Use nutrient branches as cuttings. After planting, it is necessary to provide shade in time, ensure high air humidity, and avoid making the soil too wet. Roots will develop in about 20 days.
(iv) Cultivation techniques
Ivy is easy to cultivate and manage, but it needs to be planted in moist, well-ventilated areas. Transplanting can be done in early autumn or late spring, and pruning is necessary after planting to encourage branching. In southern regions, it is often planted in shady areas of gardens, allowing it to creep naturally on the ground or artificial hills. In northern regions, it is often grown in pots. Potted plants can be tied to various supports for training and shaping. In summer, it should be kept under shade and watered sparingly to prevent stem rot. If stem rot occurs, diseased plants should be separated from healthy plants, and fungicides such as carbendazim and thiophanate-methyl should be sprayed alternately. In winter, it should be placed in a greenhouse to overwinter, maintaining humidity in the room, avoiding excessive dryness, but also ensuring the potting soil is not too wet. Ivy can be propagated hydroponically using whole plants or cuttings, and it is best to do so in spring and autumn. After the roots have grown in the cutting bed, they can be transferred to a planting basket for rooting and mutation induction. Once cultivated, ivy is very easy to care for and is clean and hygienic, making it a good ornamental plant for the home. Cultivated ivy can be grown using general nutrient solutions on the market or nutrient solutions for foliage plants. The concentration of the nutrient solution is generally 1/4 of the original formula.
(iv) Other effects
Ivy is not only a great landscaping plant, but the whole plant can also be used medicinally. It has the effects of dispelling wind, promoting diuresis, invigorating blood circulation, and reducing swelling. It is mainly used to treat rheumatic joint pain, back pain, and injuries from falls and blows. Crushing it to extract the juice or boiling it in water to wash the affected area can treat boils, carbuncles, measles, and eczema.
27. Qilin
Euphorbia lactea is typically propagated by cuttings. From April to early September, take healthy cuttings. A white sap will ooze from the cut surface; this can be stopped by dipping the cutting in wood ash or charcoal powder. Let the cuttings dry in a cool, shady place for 3-4 days until the cut surface has shrunk before planting. Euphorbia lactea is not closely related to aquatic plants; therefore, hydroponics requires strict adherence to pollution-free cultivation principles and regular changes of the nutrient solution to increase dissolved oxygen. Winter temperatures should not be too low, otherwise, leaf drop will occur. The nutrient solution concentration should not be too high, nor should the plant be excessively shaded, otherwise, it will revert to its original form, growing a columnar, fleshy stem, affecting its ornamental value; in severe cases, it can lead to root rot and death. The white sap of Euphorbiaceae plants is poisonous. It should especially not get into the eyes, and care should be taken to keep it out of reach of children.
28. Brazilian Wood
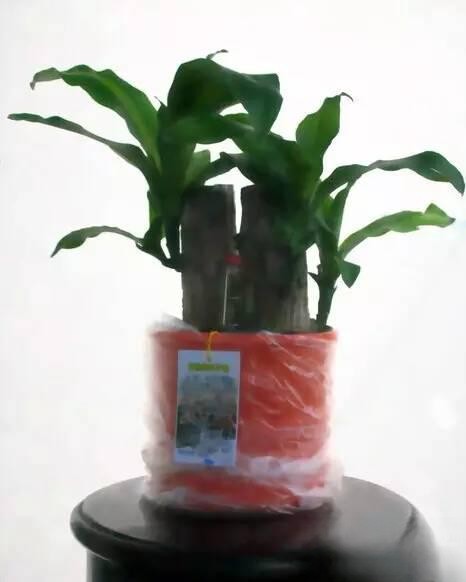
Dracaena fragrans is highly adaptable to light. In northern regions, it can be displayed indoors in dim light for over a month, and in bright light, it can be displayed for extended periods. It prefers warm, humid, and well-ventilated environments. While it likes light, it can tolerate shade, but it dislikes direct sunlight and dryness. It thrives in loose, well-drained sandy soil. The optimal growing temperature is 20℃ to 28℃. In winter, temperatures below 13℃ require protection from frost damage, causing leaves to wither. The overwintering temperature is 5℃. Dracaena fragrans is primarily propagated by cuttings. The best time for propagation in northern regions is from April to June. Large, columnar Dracaena fragrans has perennial stems that contain nutrients and water, and the dormant buds on the stems have a strong regenerative ability. For decorative purposes, it can be cut into sections of varying lengths for planting. However, the ends of the stem sections should be sealed with paraffin wax to prevent water loss or disease infection, which is especially important in the dry seasons of northern regions. Alternatively, select mature, robust stems (not lignified), cut off the leafy stem tip, halve the upper leaves, remove the lower leaves to expose the stem nodes, each section about 10 to 20 cm long. Insert the cuttings 3 to 4 cm deep into coarse sand, fine sawdust, or humus soil. Place the cutting bed in a semi-shaded environment with high humidity, 50% to 60% sunlight, and a temperature of 25℃ to 30℃. Roots and shoots will develop in about 20 to 30 days, after which they can be potted. Stem cuttings root more slowly, sometimes requiring 2 to 3 months for new shoots and roots to appear. Water propagation and air layering are also possible, but these must be done at temperatures above 25℃. For water propagation, immerse 1/3 of the stem cutting in water, changing the water every 3 to 5 days and adding a small amount of carbendazim solution for preservation and disinfection, which promotes faster rooting and shoot growth.
29. Agave
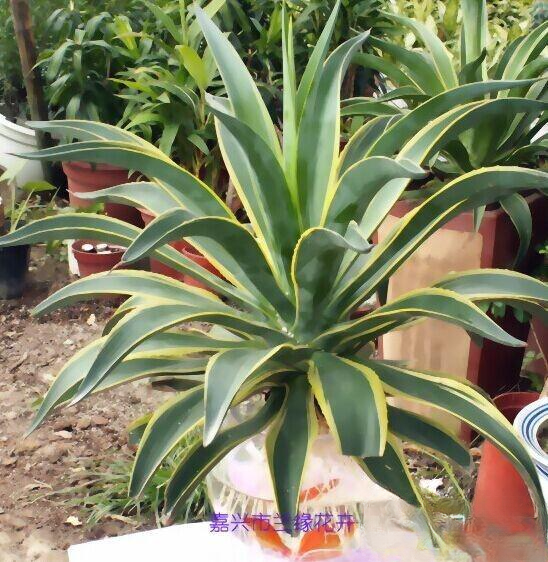
Common varieties of agave include: golden-edged agave, golden-centered agave, silver-edged agave, green-edged agave, and narrow-leaved agave.
It is robust, prefers sunlight, and does not tolerate shade. It is somewhat cold-hardy and can be cultivated outdoors at temperatures above 5°C. Mature agave plants suffer only mild frost damage to their leaves at -5°C, and the above-ground parts will rot at -13°C, but the underground stems will survive and sprout new leaves the following year, growing normally. It is drought-tolerant. It prefers well-drained, fertile, and moist sandy loam. In its native habitat, it typically flowers only after several decades, after which the mother plant dies. It does not flower in the Nanjing area. Cross-pollination is required for fruit production.
Agave can be hydroponically grown year-round in a heated environment. When hydroponically growing agave, all roots need to be removed, disinfected with disinfectant, and then soaked in rooting solution for a certain period of time. During hydroponics, be careful of cabbage caterpillars eating the leaves and heart, which will cause it to lose its commercial and ornamental value. If insects are found, they can be captured manually or killed with insecticide.
For hydroponically grown agave plants, they should be placed in a sunny location regularly. Avoid keeping them in dark places for extended periods, as this can cause the leaves to turn white and thin, diminishing their ornamental value. In winter, pay attention to insulation. During the day, place them near a sunny window. At night, if there is no heating in the room, place the glass bottle in a plastic or cardboard box. If the leaves turn yellow or droop listlessly, it may be due to frost damage, requiring additional insulation. Then, place it away from doors and windows, avoiding north-facing locations. When changing the water in winter, use lukewarm water between 12 and 18 degrees Celsius. Agave plants are resilient and can safely overwinter with proper care.
30. Money Tree
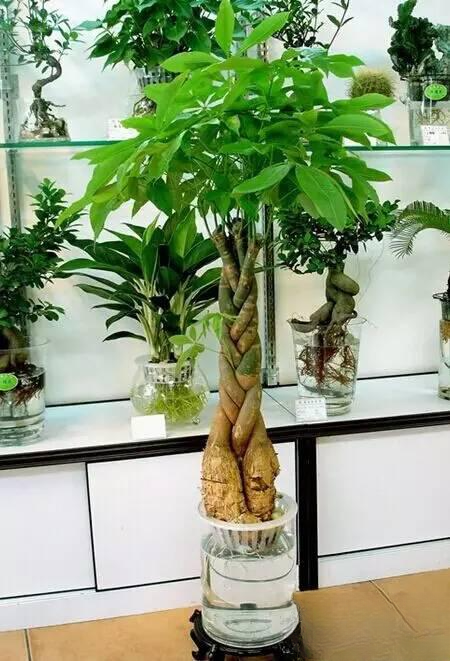
With its graceful shape, majestic crown, and emerald green leaves, the money tree is both elegant and charming when placed in the living room.
The money tree (Pachira aquatica) is a perennial evergreen shrub native to the Malay Peninsula and the South Pacific islands. In recent years, through cultivation and selection, it has become widely available in urban and rural households across my country. When cultivating it at home, considering its preference for warm, humid conditions and its intolerance to frost and dryness, the following four points should be emphasized:
First, pay attention to sunlight. Money trees thrive in warm, humid environments with plenty of sunlight and cannot tolerate prolonged shade. Therefore, during maintenance, they should be placed in a sunny spot indoors. When placing them, the leaves must face the sunlight. Otherwise, the leaves will become distorted due to phototropism. Additionally, mist the leaves with water every 3 to 5 days; this promotes photosynthesis and makes the foliage more attractive.
31. Periwinkle
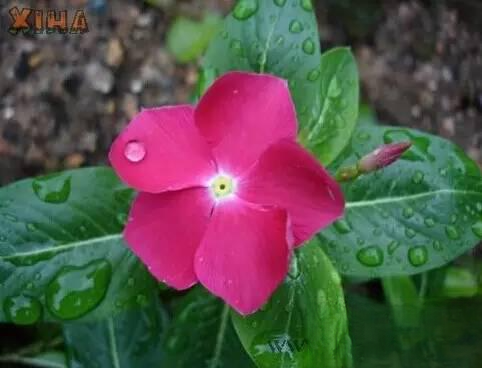
Hydroponic cultivation method for periwinkle
It belongs to the genus Vinca in the family Apocynaceae, and is also known as the five-petaled plum.
Biological characteristics: Periwinkle originates from East Africa. It prefers warm, slightly dry, and sunny environments. The optimal growth temperature is 18-24℃ from March to July, and 13-18℃ from September to March of the following year. The winter temperature should not be lower than 10℃.
Periwinkles dislike excessive moisture and waterlogging; the potting soil should not be overwatered, as this will hinder their growth and development. Especially for plants overwintering indoors, watering should be strictly controlled, keeping the soil on the dry side to prevent them from freezing. For outdoor cultivation, ensure timely drainage during summer downpours to prevent waterlogging and the death of the entire plant.
Periwinkle is a light-loving plant and requires ample sunlight during its growing season to produce lush, glossy leaves and vibrant flowers. If it grows in shady areas for extended periods, its leaves will turn yellow and fall off.
It thrives in fertile, well-drained loam, tolerates poor soil, but should be avoided in alkaline conditions. Compacted, poorly aerated clay soils will result in poor plant growth, yellowing leaves, and failure to flower.
Propagation methods: Commonly propagated by sowing, cuttings and sowing.
Cultivation and Management: Transplant seedlings with 3 pairs of true leaves into 10cm pots, 3 seedlings per pot. Pinch back the tips once when the seedlings are 7-8cm tall, and then pinch back twice more to encourage branching and more flowers. Fertilize every half month during the growing season, or use a 15-15-30 "Huiyou" potted plant fertilizer. Potted plants or those planted in flower beds will bloom from late May to early November, a period of more than 5 months. Remove spent flowers regularly during the flowering period to prevent mold growth and maintain the plant's ornamental value. The seed collection period is from August to October; harvest as soon as the seeds ripen to prevent seed loss.
Pest and disease control: Common pests include leaf rot, rust, and root-knot nematodes. Leaf rot can be treated with a 500-fold dilution of 65% zineb wettable powder. Rust can be treated with a 2000-fold dilution of 50% carbendazim wettable powder. Root-knot nematodes can be controlled with a 50-fold dilution of 80% dibromochloropropane emulsifiable concentrate.
32. Lucky Grass
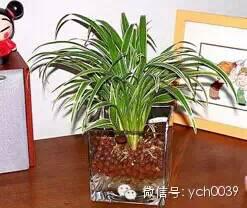
Hydroponic cultivation method of auspicious grass
Lucky Grass, also known as Guanyin Grass, is a perennial green herbaceous plant belonging to the genus Lucky Grass in the family Liliaceae. Its leaves grow in clusters, are broadly linear, with a concave midrib and a tapering tip, and are 15 to 40 cm long. The stems are creeping and rooted at the nodes. It flowers from September to October, with pale purple, erect, terminal spike-like inflorescences about 6 cm long. The fruit is bright red and spherical. Native to southwestern my country, it prefers warm, humid environments, is relatively cold-hardy and shade-tolerant, and has low soil requirements, exhibiting strong adaptability. Due to its beautiful shape and vibrant green leaves, Lucky Grass can be cultivated hydroponically in various goldfish tanks or other glass containers, taking advantage of its cold-hardiness and shade-tolerance. Placing it on a bar counter or coffee table creates a beautiful and elegant work of art, with water, stones, and roots visible in the water. The cultivation method is described below.
I. Material Selection. Select plants with dark green leaves, vigorous growth, and no pests or diseases. Carefully dig them out of the soil with a shovel and clean their roots thoroughly. During the digging process, be careful to dig as deep as possible, keeping as much soil as possible attached. This serves two purposes: first, to avoid damaging the roots, which is beneficial for hydroponic growth; second, because water is transparent, intact roots display a unique beauty when submerged.
II. Pressing with Stones. Select pebbles or cobblestones used for paving garden paths, wash them clean, and first lay a layer at the bottom of the glass container. Place the lucky grass upright on the stones, then use stones to stabilize its roots and prevent it from falling over. Pour clean water into the glass container until the entire root system is submerged. The transparency of the water dictates that the pressing with stones should also have certain aesthetic appeal; the artist can use their creativity to design and highlight their individuality. III. Management. Since the roots of the lucky grass are soaked in water for a long time, the water is prone to developing an odor. Therefore, the water should be changed frequently, preferably once a week. For fertilization, add a few drops of nutrient solution or potassium dihydrogen phosphate solution periodically. The lucky grass is relatively shade-tolerant; 1 to 2 hours of fluorescent light each night is sufficient to meet its photosynthetic needs.
33. Cyclamen
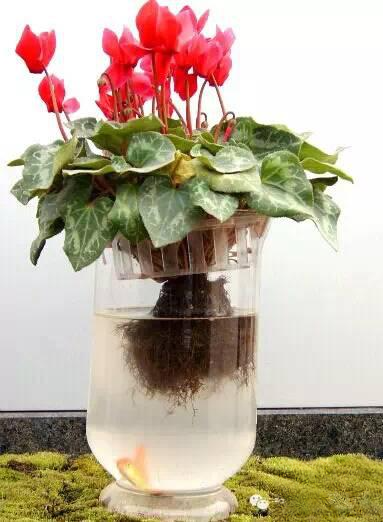
Cyclamen hydroponic method
Choose cyclamen plants that are 1 to 3 years old, free from pests and diseases, and growing vigorously with buds about to bloom. Soilless cultivation substrates such as perlite, vermiculite, and sawdust are best, as they will not damage the roots or cause stunted growth after environmental changes and will adapt quickly. Hydroponic containers are simple and economical, making use of recycled materials. Any container that can hold water, such as a fish tank, teacup, beverage box, wine bottle, or vase, will work; transparent containers are best, allowing for full viewing of the roots, stems, leaves, flowers, and fruits. Regardless of the container used, its size, height, and color should be in harmony with the cyclamen plant to showcase its delicate, translucent, and elegant beauty.
Cyclamen flowering period is generally from October to June of the following year, so the hydroponic cultivation period is generally from September to April of the following year. Remove the selected cyclamen plant from its pot and wash the roots with 20℃ warm water to remove any adhering substrate, being careful not to damage the roots. Then place it directly into a prepared container, ensuring the water depth is level with the roots and does not exceed 1/3 of the bulb's height to prevent rot. Finally, place it in a suitable indoor location, adding water and nutrient solution regularly. After two to three months of hydroponic cultivation and flowering, remove the plant and replant it in a suitable growing medium for the summer.
For hydroponic cultivation of cyclamen, the best water is spring water or magnetized water. This water should be clean, clear, and free of sediment, containing essential trace elements for the plant. No water changes are needed during the entire hydroponic cultivation period. Tap water contains chlorine, which is detrimental to plant growth and easily becomes cloudy and settles. It should be changed every few days and should be avoided if possible. The water temperature should be close to the room temperature, generally between 10°C and 20°C.
Light and Indoor Temperature: Cyclamen prefers a sunny environment. The water-grown container should be placed on a sunny table or windowsill indoors, not directly on a radiator. The ideal indoor temperature is 15℃ to 20℃, with a maximum of 25℃ and a minimum of 10℃. Nutrient Solution: During the flowering period, water-grown cyclamen needs regular nutrient supplementation. Generally, add 50 ml of a 1:100 diluted nutrient solution for flowering plants per plant every 10 days. Use spring water to prepare the nutrient solution. If yellowing leaves, small leaves, or small flowers are observed, and root rot has been ruled out, more nutrient solution can be added as needed.
34. Silver-edged Grass
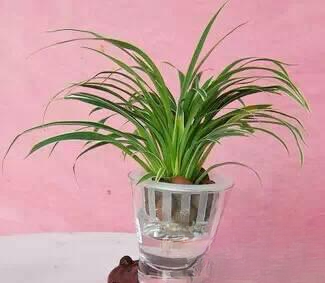
Hydroponic Silver-edged Grass
Chinese name: Libangcao
Other names: Silver-edged grass
Family and genus: Poaceae
Latin name: Arrhenatherum elatius
Characteristics: Perennial herb
Plant height: 50-100 cm
Flowering period: Summer (June-August)
Cold resistance : Cold resistant (above -5℃)
Tolerance for negative: positive
Morphological characteristics: The underground stem is white and beaded; the above-ground stems are clustered and smooth. Leaves are clustered, linear-lanceolate, 750px long and about 25px wide, with yellowish-white margins. The panicle has a long peduncle, about 1250px long, and is branched; the spikelets have two flowers, the upper flower is bisexual or female, and the lower flower is male; flowering period is June-July. Native to Europe.
Habits: Extremely robust, cold-resistant and drought-resistant, and undemanding of soil. The above-ground parts often wither and go dormant in the height of summer, and sprout again in early September.
Propagation and Cultivation: Propagation is typically done by division every 2-3 years, either in spring (March-April) or in September after dormancy when new leaves begin to emerge. Dig up the old plant and separate the plants, ensuring each separation includes 2-3 new buds and the beaded rhizome. Prune the old plant annually, preventing leaves from becoming too long. Once the rhizome is exposed, mound soil around it to encourage vigorous and attractive growth. Over-fertilization or nutrient deficiency during cultivation will cause the white spots on the leaves to disappear, turning them entirely green and affecting their ornamental value.
35. Hydroponic methods for Anthurium and Flamingo Flower
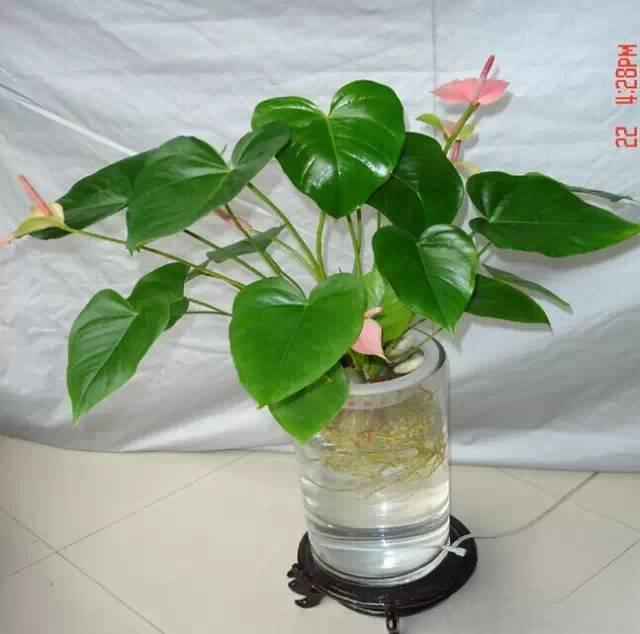
Anthuriums are plants of the Araceae family and are quite hydrophilic. However, they are somewhat difficult to cultivate hydroponically.
When cultivating Anthuriums hydroponically, half of the root system should be exposed to the air to allow it to breathe (as shown in the diagram). Otherwise, root rot is highly likely. Hydroponic plant roots grow exposed to light, and the plant cells photosynthesize, including the roots. A green color is normal. As long as it's not exposed to direct sunlight, healthy root growth is usually ensured. Not all hydroponic plant roots will eventually turn green; a healthy green color is not always a good indicator. For example, some may turn brown.
Some of the secondary roots of the pink flamingo flower (Pink Champion) are brown, which is abnormal. Roots of this color should feel soft to the touch. This is root rot and should be cleaned up promptly. Increase the frequency of water changes to control its spread.
The common belief that something can survive by being placed in water is a misconception. Due to its strong affinity for water, it can survive for several months even when placed in water.
Anthuriums have very strong root respiration, and directly submerging them in water can easily hinder this process. The best method is to use a substrate, and the best substrate is expanded clay pebbles. Because anthuriums have fleshy roots and leaves emerge from the base, the common method of using a combination of orchids, stones, and loose materials doesn't easily encourage the emergence of new leaves. Expanded clay pebbles, on the other hand, are lightweight and provide ample space, making it easier for new leaves to emerge. The anthuriums I'm currently growing hydroponically in my office are cultivated using expanded clay pebbles, and after two years, each plant produces 3-4 flowers.
To hydroponically grow anthuriums using expanded clay pebbles, first clean the roots, trim any old or damaged roots, and remove any flowers. Then place the plant in a container, fill it with expanded clay pebbles, and then dilute rooting powder according to the instructions, spraying the pebbles with water. Be careful not to let too much water accumulate at the bottom; if there is excess water, drain it. After a long wait, you will be pleasantly surprised to find that thick, white, fleshy roots of the anthurium are growing in all directions, close to the edge of the container. Congratulations! Your hydroponically grown anthurium is now complete. The next step is to regularly add nutrient solution to support its growth.
Additional information:
1. Anthuriums grown in hydroponics with expanded clay pebbles should not be exposed to direct sunlight. Place them in a shady spot.
2. Do not add nutrient solution when you first start hydroponics. It is best to add rooting powder instead. If you can't buy rooting powder, leave me a message and I will teach you how to make your own. Using B12 is not very effective.
3. The container for growing anthuriums should be relatively large, preferably V-shaped with a wider top and narrower bottom, and also have a certain height.
4. How long can anthuriums live in hydroponics? Anthuriums grown in hydroponics using clay pebbles can live for a very long time. I've been growing mine for two years and it still produces leaves and flowers every year. I estimate it can live even longer.
5. If you want to hydroponically grow Anthuriums, it is recommended to induce growth using expanded clay pebbles first, and then transfer to pure hydroponics. Directly placing them in water is not recommended.
36. Hydroponic cultivation method for Schefflera heptaphylla (Umbrella Tree) ~~~~~
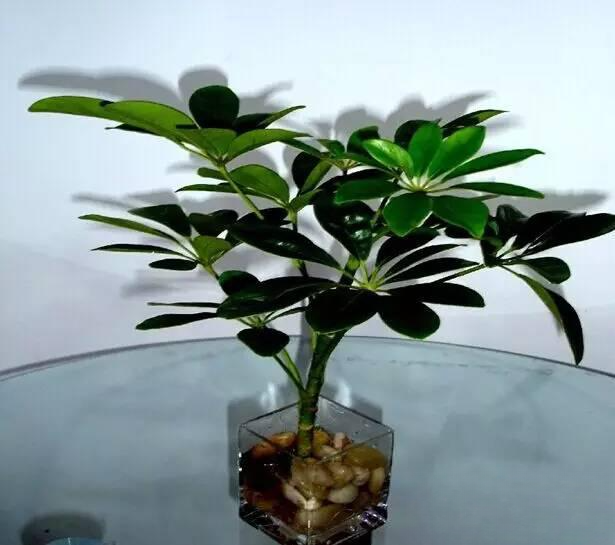
The Schefflera arboricola has glossy, emerald-green leaves and a beautiful shape, making it highly ornamental. Its strong shade tolerance makes it an ideal indoor foliage plant. Schefflera arboricola is usually grown in potting soil, but experiments have shown that it can also be successfully cultivated indoors in hydroponics in glass bottles. There are two methods for hydroponics:
1. Water propagation : Select cuttings.
Take semi-lignified basal segments with 2-3 or more nodes, about 10 cm long, from mature plants. Remove the lower leaves, leaving only 1-2 palmate compound leaves at the top. Immerse the lower 2/3 of the segment in a glass container filled with clean water and place it in a bright indoor location, maintaining a temperature above 15℃. Usually, after about 10 days, white callus tissue will begin to form at the lenticels and the base of the cut on the submerged segment. Soon, adventitious roots will differentiate from these areas. After about 45 days, the water-propagated segment will have developed roots longer than 6 cm and will have grown white root hairs. At this point, normal care can be carried out.
2. Switching from soil cultivation to hydroponics
Carefully remove the soil-grown Schefflera and clean the soil from its roots. Place it in a transparent glass bottle containing clean water (tap water needs to be stored for 2-3 days). Change the water in the bottle every 2-3 days. Keep the temperature above 15℃ and provide adequate light. This will allow you to grow a plant with green leaves on the outside and white roots inside, making it elegant, clean, hygienic, and very attractive.
Key points for hydroponic Schefflera care:
1. Nutrient solution: Change the water every 7 days. When changing the water, add hydroponic plant nutrient solution. The water level should not be too high and should not submerge the plant trunk.
2. Light: Prefers full sunlight for bright leaf color. It also tolerates shade, resulting in dark green leaves. It is highly adaptable to light conditions, but should be protected from direct sunlight in summer.
3. Temperature: The optimal growth temperature is 15-25℃, but it can also grow at temperatures above 30℃. The overwintering temperature should not be lower than 5°C, otherwise the leaves will fall off.
4. Maintenance: It grows relatively quickly, so pay attention to shaping and pruning.
37. Hydroponic cultivation of Dragon Blood Tree
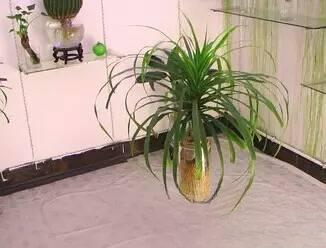
Dragon blood tree plants can be obtained through hydroponics using the methods described above, or they can be obtained directly from soil cultivation, as detailed below:
For hydroponics based on root growth, sterilize and treat the plants a week before cultivation, and select plants of good quality for cultivation. If using hydroponics for cuttings (removing the roots from soil-grown materials for rapid propagation and root development), it's best to place the planting basket in the water first. Once the roots have grown to 5-6 cm and haven't yet returned to land, transfer them to a mutation induction tank. Initially, the nutrient solution concentration should be low. As the plants adapt to the aquatic environment, the concentration can be increased according to the plants' needs, while simultaneously reducing aeration, eventually stopping aeration altogether. Once the roots are long enough to be bottled, they can be transferred to the container.
Clay pellet planting: Before potting, promote root growth in the same way as hydroponics. When potting, do not plant the plant too low, as this will not be good for its future growth. Once the plant's roots have grown out of the inner pot, it can be sold.
During production, apply fungicide and foliar fertilizer once a week. For home care, in addition to referring to the product instructions, you should also consider its growth habits. Stop fertilizing during the dormant season and place it in a sunny location. Water less when planting with clay pebbles in winter and early spring. If placed in a dark place for too long, the leaves will turn yellow and lose their vitality. Moreover, the tips of the basal leaves are prone to blackening, as if scalded by boiling water. Do not let it dry out during the growing season.
38. Tricolor Dracaena sanderiana (also known as...)
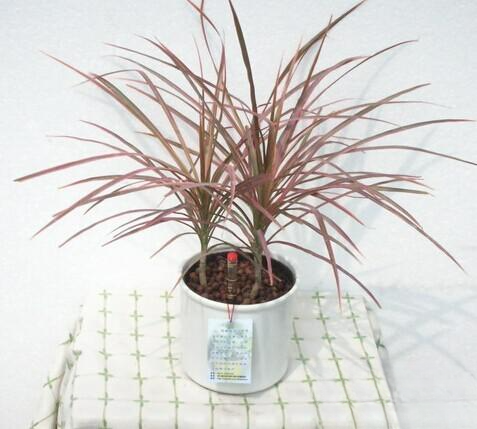
Tricolor Dracaena sanderiana, also known as: Tricolor Dragon Blood Tree, Rainbow Dragon Blood Tree, and Variegated Coral Tree.
Family and genus: Agavaceae, Dracaena
Morphological characteristics: An evergreen small tree. The stem is slender, upright, and can reach a height of 3 meters. Leaves are 15-60 cm long and 1-2 cm wide, sword-shaped. The green leaves have creamy white, yellowish-white, and red stripes. It is a unique variety within the Agave genus.
Distribution and habits: Native to Madagascar.
It prefers a warm, humid environment with bright, diffused light. It is relatively shade-tolerant but dislikes direct sunlight. The suitable growing temperature is 18-28 degrees Celsius. The overwintering temperature needs to be above 10 degrees Celsius.
Propagation method: Cuttings
Key points of hydroponics:
1) Water propagation via water cuttings results in easy rooting of aquatic roots that are pure white and aesthetically pleasing. Water changes are crucial for success, especially when the roots are first planted. Changing the water every other day increases nutrient content until roots develop and the plant adapts to hydroponic cultivation. After this, water can be changed or added weekly or monthly depending on the season.
2) When the water temperature is above 35 degrees Celsius in summer, the roots are prone to rot. At this time, the use of nutrient solution should be stopped, and only clean water should be used for cultivation. The frequency of water changes should be increased to keep the water clear.
3) Place the plant in a bright indoor location. Generally, change the water once a month during autumn and winter. If using a transparent container, wipe away any residue from the container with a soft cloth when changing the water to make it transparent, thus better showcasing the beauty of the plant's root system. After changing the water, add a few drops of commercially available nutrient solution or some potassium dihydrogen phosphate diluted 1000 times to provide the plant with the necessary nutrients. Applying foliar fertilizer or 1000 times diluted potassium dihydrogen phosphate as a foliar fertilizer during the growing season can promote stronger and healthier growth.
It can remove: toluene, xylene, benzene, trichloroethylene, and formaldehyde.
39. Yushu
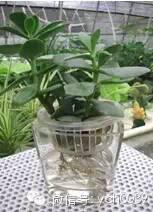
[Other names] Crassulaceae, Jade Plant, Emerald Tree, Kalanchoe pinnata.
[scientific name] Crassula arborescens
[Family and Genus] Crassulaceae, Crassula.
[Morphology] An evergreen succulent plant, 45-75 cm tall, with a semi-woody stem. Leaves are opposite, simple, thick and fleshy, broadly elliptical, with entire margins, 3-5 cm long and 1-3 cm wide, dark green and glossy. When exposed to light, the leaf margins turn red. Horticultural varieties include variegated and multicolored varieties.
[Habits] Native to South Africa. Prefers warmth, is drought-tolerant, likes full sun but also tolerates partial shade, and grows best in bright, diffused light. Prefers fertile, loose, well-drained, and aerated sandy loam soil.
Jade Tree Hydroponic Cultivation
Cuttings can be taken from the mother plant of Jade Plant in spring, summer, or autumn. Sterilize, disinfect, and kill insects a week before taking the cuttings. After planting, maintain a certain level of moisture in the substrate; initially, spray water and provide shade. Once callus tissue has grown, reduce or stop watering to prevent leaf drop and rot. Once roots have grown to 2-3 cm, the plant can be transferred to a hydroponic seedbed for root development.
[Uses] For indoor decoration, suitable for decorating halls. Note: A related foliage plant, Jade Plant (Crassula portulacea), has obovate leaves and is cultivated in the same way as the Jade Plant.
The above tips for flower care are shared with you all. I hope that flower lovers can learn from them together.