All the production drawings and steps of Luban stool
Hello everyone! I'm a newbie, I don't have many points, and I don't have many places to go, so I have to post it here.
I happened to see a friend in the forum playing "nonsense", and someone in the reply wanted the blueprint of Luban stool. Hehe~~~, this is a piece of cake. I spent 1 or 2 hours using SW to draw a Luban stool, and took screenshots of the production. I hope it will be helpful to everyone.
If you have shavings, please give me some. I will be very grateful~~~
I just registered a few days ago, and I don’t understand a lot of the terms, so please bear with me~~~
Okay, let’s get started!
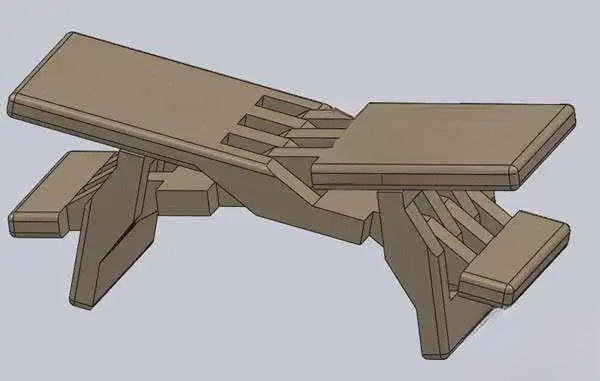
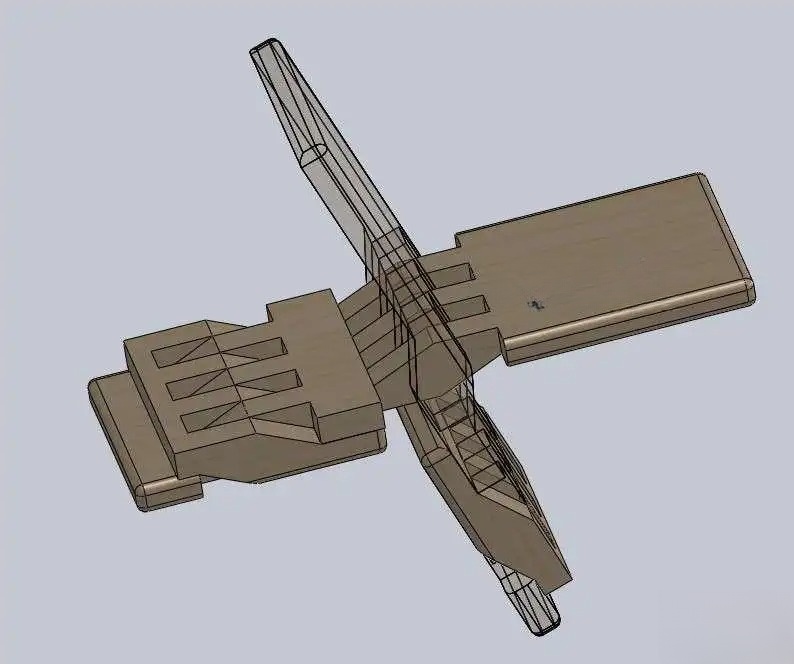
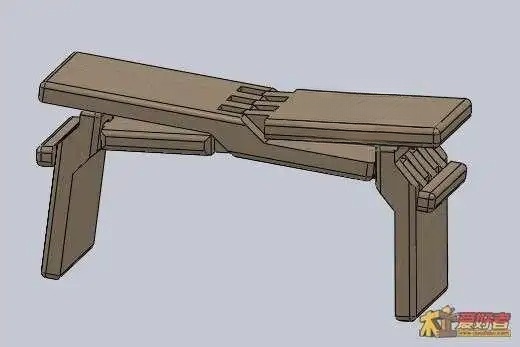
Here are some full-view pictures, and some modifications were made to the back. After all, the sharp edges and corners are easy to hurt children. I don’t know if the angle of the Luban stool is comfortable, so I made the sitting area flatter. You can choose what you need.
Production steps:
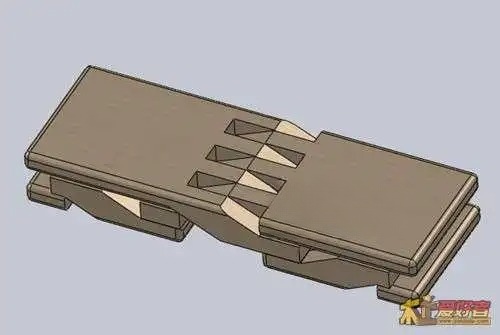
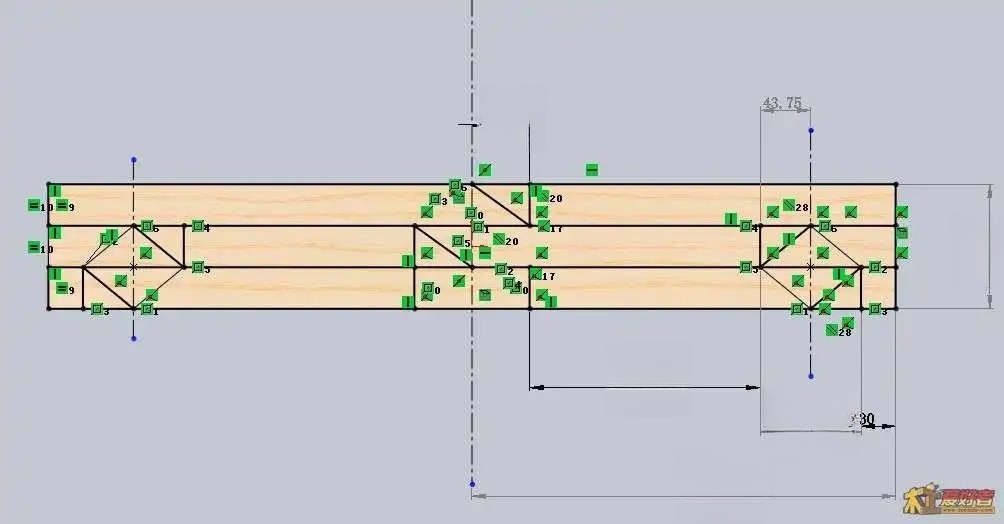
1. Material size: 735x245x108
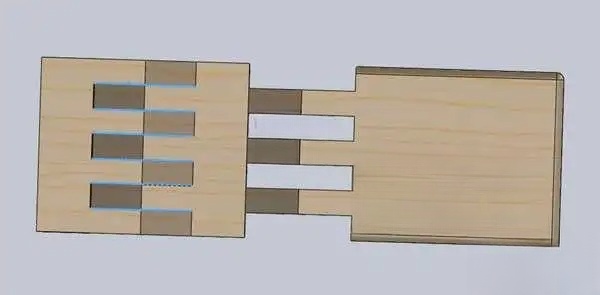
2. The steps can be summarized as follows: saw through - (wire saw - chisel) - (wire saw - chisel) - (wire saw - chisel) - trimming. After completing the first set of (wire saw - chisel), the left and right panels can be rotated. The rest is to repeat the above method, but the position of the saw and chisel is different.
Note: Only the red and blue lines in the picture can be sawed through by a jigsaw, the black lines cannot be sawed through
Well, I hope everyone has a happy DIY~~~~
Thanks to Caodi Feilong for his suggestions. It is much better after the modification. The two sizes 50 and 87.5 in the size diagram have been changed to be small enough to reduce the processing amount. The height of the stool can also be increased a lot. The angle of the stool surface is also much smoother and not as large as before. Thank you~~
But I personally feel that after the change, it feels less stable than before, a bit like a high stool. The size of 30 is difficult for beginners, so you should leave more space.
I found that there was an error in the picture in step 1, so I made a new one.
Making Luban stool drawings
Reduced the angle of the stool
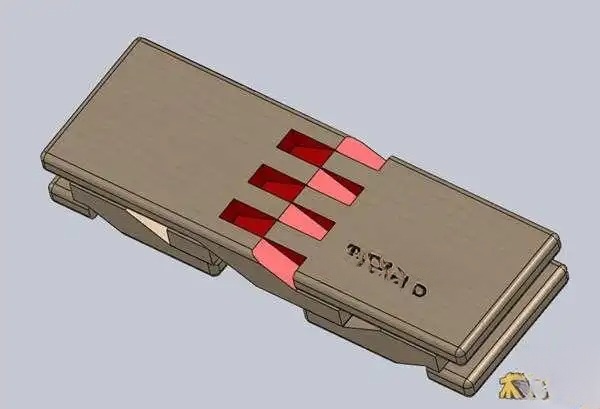
Front, red part chiseled bevel
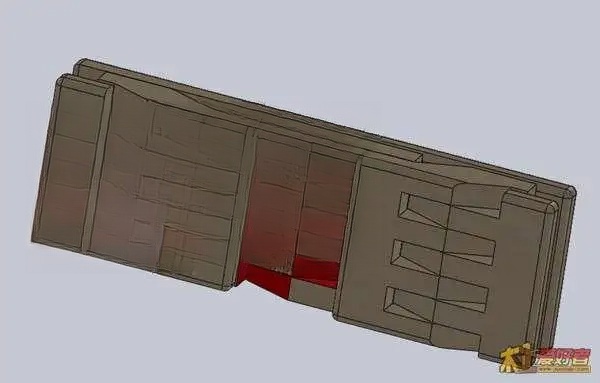
Back, red part chiseled bevel
The left and right panels can be rotated
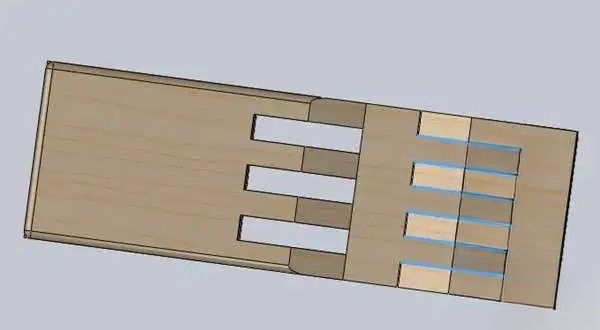
Draw the line, repeat the blue line on the left, saw and chisel
The blue line on the right, repeat the wire saw and chisel
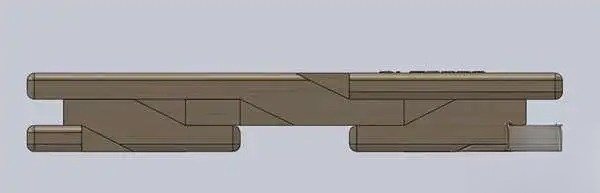
Removing some of the two middle boards on the left and right can make the stool flatter.
The size 30 requires skilled techniques, so you should leave a little more space according to your own situation.
New Look
The red part needs to be sawed through