A ridiculously detailed pizza recipe—you'll definitely want to make a better pizza after reading this | Foodie Research Group | Guokr.com Tech is interesting

Pizza is one of the most popular foods in the world, or perhaps even one of them can be removed. Nowadays, almost every household has an oven, and I believe many people have also tried to bake pizza at home to better suit their taste. No matter what your current level is, as long as you want to make it taste a little better than what is available, then you must read this pizza recipe (tutorial) that is so detailed that it is heartbreaking. The content covers everything from choosing the best flour and cheese, to the optimal dough fermentation time, to how to properly match the fillings, and how to overcome the low temperature of the home oven. To bake a perfect pizza, none of these details can be missed, and I believe these contents will always have what you need. Even if you have never made it before, you can refer to this recipe that not only explains the method but also the principle, and easily make pizza that surpasses ordinary pizza shops.
1. How to make better dough:
80% of pizza's success depends on the base, so the importance of dough is self-evident. Without good dough, there's no such thing as a good pizza. Essential dough ingredients include flour, water, and yeast. Shortening, salt, and sugar are also often used to provide a variety of flavors and textures.
Flour and water options:
When it comes to flour, one thing is certain: gluten development. Gluten is a strong, sticky, and elastic protein formed when wheat flour and water combine. Gluten helps flour create a variety of foods, such as chewy noodles, fluffy pancakes, crispy crackers, sturdy artisan breads, and, of course, pizza. However, not every baked good requires the same amount of gluten.
Yeast-raised dough relies heavily on gluten for its structure. For pizza, we want a lot of gluten to form. So, whether it's choosing flour or kneading the dough, we take measures to promote gluten production. For example, we choose bread flour because it contains a lot of high-quality gluten. The more gluten-forming proteins the flour contains, the elastic the dough will be, and the firmer the base will be after baking. Kneading the dough helps starch connect to the protein, which then promotes the formation of a gluten network structure, making the dough firmer and more elastic. In addition to these, we can also add high-purity active wheat gluten. Experiments have found that only 0.5% of active wheat gluten is needed to achieve the right chewiness without much kneading.
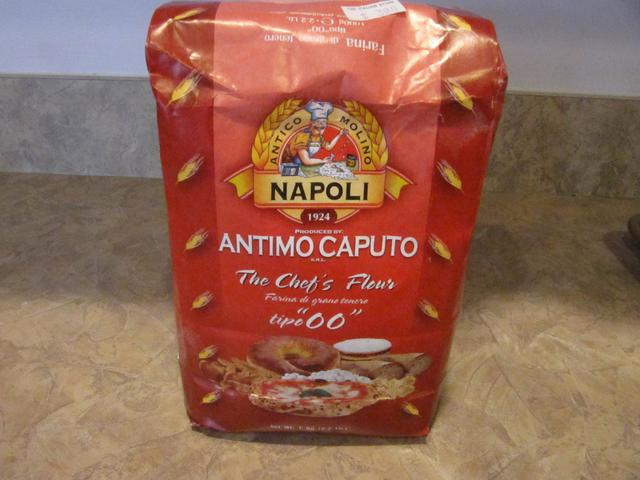
There are many options for flour that can be used to make pizza dough. If we can only choose one, the best choice must be Antimo Caputo Tipo 00 flour from Italy. This is the highest standard of pizza flour. Most pizzerias in Naples use this flour to make a particularly elastic dough. "00" has nothing to do with protein content, but the precision of flour grinding. 00 means it is the most precise flour in Italy. Because this type of flour is not easy to buy in China at present, we can replace it with other flours, such as all-purpose flour. But if there is a chance, you must use this flour. There is no real substitute for this flour. The protein content of this flour is 12.5%, and its ability to absorb water is relatively low.
The choice of water does not require much attention, as it does not have much impact on the final quality.
Yeast and fermentation:
The essence of fermentation is actually to allow yeast to absorb the carbohydrates in the flour and convert them into ethanol and carbon dioxide, which will give the pizza crust a light, bubbly structure and a very distinctive, slightly sour taste.
So how does fermentation work? Let's go through the four stages of making pizza:
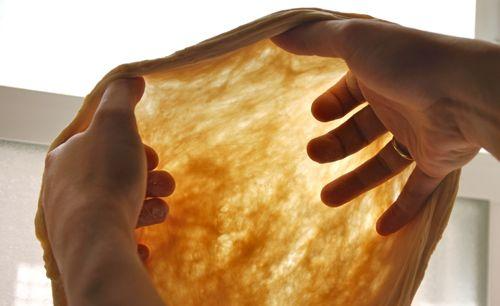
1. Mixing/Kneading: First, combine the water, flour, and yeast. During this stage, the two main proteins in flour (gliadin and glutenin) begin to connect with each other, forming a flexible network. This network of proteins is gluten, which provides the structure of bread and pizza. During the kneading process, the gluten adjusts to form a wide, highly elastic structure.
2. Resting/First Expansion: During this stage, fermentation begins. The yeast begins to absorb carbohydrates, producing carbon dioxide, which causes the air in the dough to expand. Simultaneously, the gluten continues to strengthen. This is because the enzyme reaction and the expansion of the air bubbles shorten the proteins, making it easier for the gluten to bond.
3. Second expansion: After the first expansion, the dough is rolled into balls or blocks, and then continues to ferment. It can eventually expand to twice its original size or even more.
4. Baking: Once placed in a hot oven, the bubbles inside expand, causing the dough to rise and expand, while the heat solidifies the gluten. The sugars and proteins on the outside of the dough undergo a Maillard reaction, causing the color to change and creating a rich aroma.
The higher the temperature, the faster the fermentation process and the faster the production of carbon dioxide (which peaks at around 32°C). The entire process can take just a few hours, but experienced pizza makers know this isn't optimal. While yeast ferments faster at high temperatures, it also produces unpleasant flavors, even a sour, milky taste. Therefore, many people choose to slow fermentation in the refrigerator. Fermentation in the refrigerator produces more pleasant flavors, fewer sour components, and slower carbon dioxide production.
So what's the optimal fermentation time in the refrigerator? Most people recommend starting a day in advance. However, J. Kenji López-Alt of The Food Lab has verified that the optimal fermentation time in the refrigerator, at around 3°C, is 3 to 5 days. This allows for optimal fermentation without any unpleasant flavor. Any longer and the flavor will deteriorate, while any shorter fermentation will result in an incomplete fermentation.
Neapolitan Pizza Dough Recipe:
Yield: 800g (makes four 30-35cm /12-14 inch pizzas)
Storage: Refrigerate for 5 days, freeze for 3 months
Difficulty: Medium
Specially Needed: Blender, Antico Caputo 00 flour, Vital Wheat Gluten
ingredients:
00 flour: 500g or 3 3/4 cups
Water: 310g or 310ml
Honey: 10g or 2 tsp
Vital wheat gluten: 2.5g or 1 1/2 tsp
Active dry yeast: 2.5g 3/4 tsp
step:
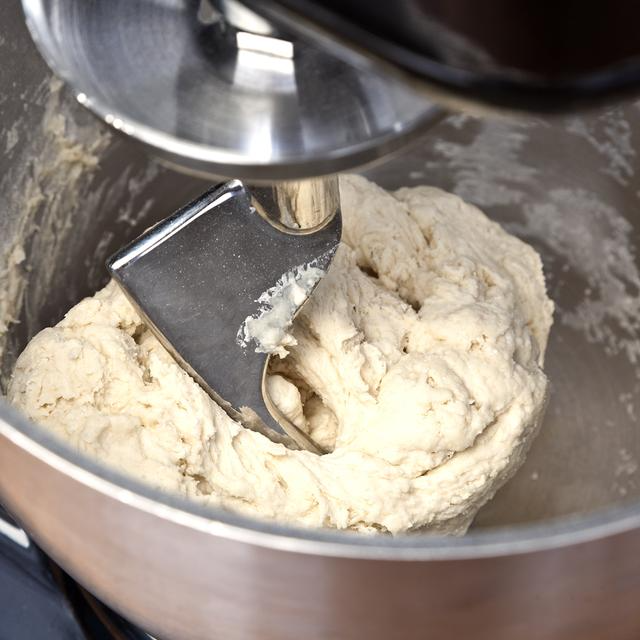
1. Use a stand mixer to mix until completely mixed.
1. Mix at medium speed for 5 minutes
3. Let the dough rest in the bowl at room temperature for 10 minutes, then mix at medium speed for another 5 minutes.
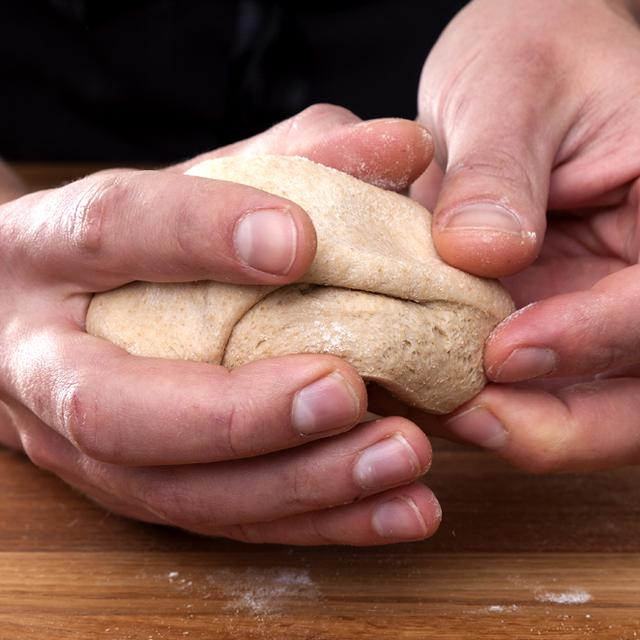
4. Transfer the dough to a floured chopping board and cut into 200g pieces. Then stretch and knead into smooth and even balls.
5. Place in the refrigerator to continue fermenting. If you are in a hurry to use it, keep it at room temperature for fermentation.
If you don't have Antico Caputo 00 flour, you can use all-purpose flour, but you may need to add 10% more water. You can even use other flours, such as quinoa or buckwheat, but you'll need to adjust the amount of gluten depending on which flour you use instead of 00. Adding gluten creates a chewier base. I recommend Bob's Red Mill, which is available on Taobao.
Alternatively, if you don't have a blender or food processor, you can mix the ingredients by hand. Use a wooden spoon to combine the ingredients, then knead them on a cutting board or marble surface (if possible) for about 7 to 8 minutes. The dough will stick to your hands, but don't add extra flour yet. Let the dough rest for 10 minutes, then continue kneading for another 7 or 8 minutes. It should feel elastic and smooth at this point. If it still feels sticky, sprinkle a spoonful of flour on it and mix thoroughly. In step 3, the finished dough should be able to pull away from the edge of the bowl. If the dough sticks to the side of the bowl, sprinkle a spoonful of flour on it and continue mixing until the sides of the bowl are clean.
It's best to refrigerate overnight, or even for three to five days. If you're going to use it later, let the dough rise at room temperature for at least an hour. If you're going to use it later, you can freeze the dough separately for up to three months. Besides pizza, the dough can also be used to make other pastries.
2. Prepare cheese, tomato sauce and fillings:
A pizza base is like a canvas, a canvas where you can unleash your imagination and creativity. In theory, you can add anything you want to a pizza base. This article introduces the most common topping combinations. From there, you can let your imagination run wild and create your favorite pizza.
cheese:
Pizza lovers love the smooth, stringy cheese layer on a freshly baked pizza. Cheese is a staple of pizza. There are many different types of cheese, but which one is the best? Those who frequently make pizza are familiar with the famous Mozzarella cheese. But is using only Mozzarella cheese a guaranteed success?
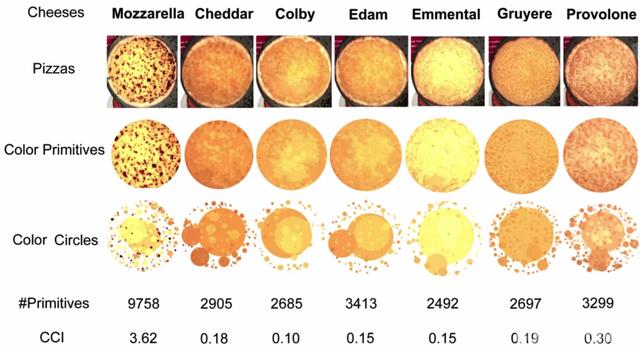
In 2014, an international research team from the University of Auckland in New Zealand (considering the name, it seems to consist of two people) published a paper in the Journals of Food Science on the effects of different cheeses on pizza. The team selected seven cheeses, including Mozzarella and Cheddar, and conducted extensive experiments. They studied various parameters, including the Maillard reaction, solubility, foaming properties, and elasticity. Cheddar, Colby, and Edam cheeses have low elasticity, making it difficult for bubbles to form. Gruyère and Provolone cheeses, however, release a large amount of oil, preventing moisture from evaporating.
Everyone may have their own choice of cheese. But no matter what kind of pizza you like, this experiment will help you choose the best cheese. The experiment proves that there is a reason why Mozzarella is so popular. Mozzarella has good elasticity, and more importantly, it has unique stretchability. Although if only one kind of cheese is used, it must be Mozzarella. But other different cheeses can be used in combination with Mozzarella. For example, Gruyere and Provolone cheeses can be added to reduce the appearance of burning because there will be more oily ingredients. If you want the color of the pizza to be more uniform, you can add low-elasticity cheese, such as Colby. Many people also recommend using Mozzarella and Cheddar cheese together, and the ratio can start with 2:1.
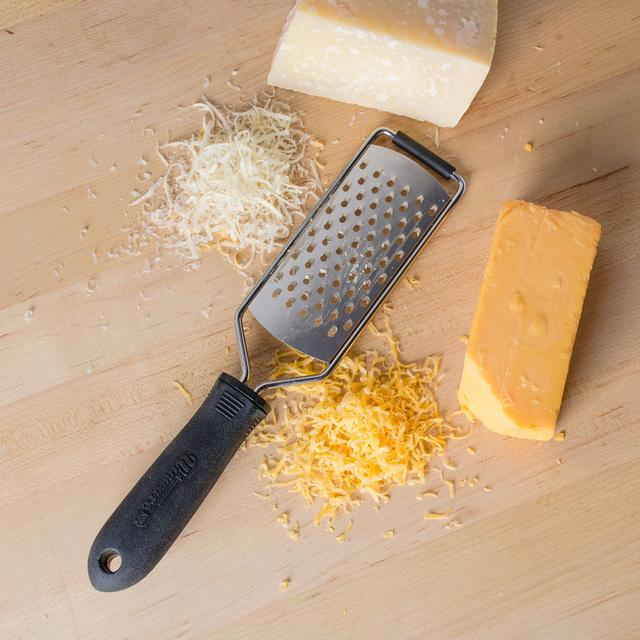
When choosing cheese, you can buy it already cut into shreds. If it is not already cut into shreds, it is recommended to use a scraper to scrape it into thin shreds yourself. Otherwise, if the shreds are not thin enough, it will be difficult to bake a stringy pizza.
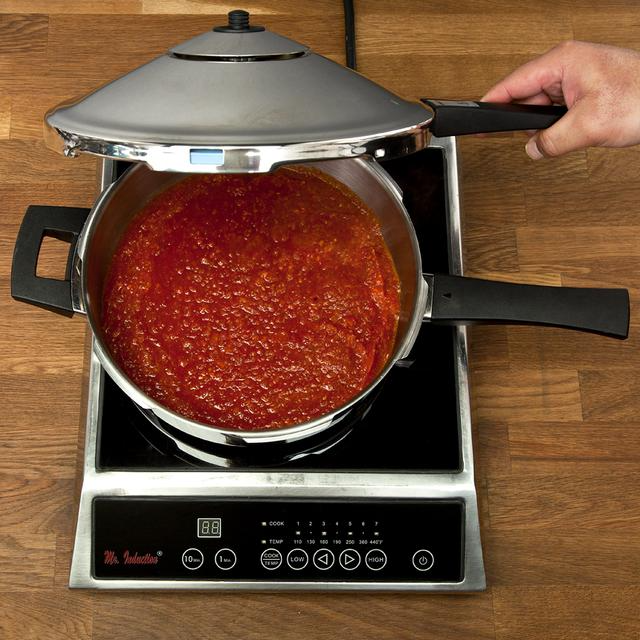
Tomato sauce:
Traditional pizzas are usually topped with a layer of tomato sauce. However, it's up to you whether to add it or not. For example, white pizzas don't use sauce, but instead use a little olive oil and top with your favorite vegetables, meat, or cheese. If you choose to use sauce, you can simply use pasta sauce for simplicity, but homemade sauce is always fresher. Here's a classic tomato sauce recipe:
Yield: 1 kg /4 cups
Time: 1 hour total, 15 minutes preparation and 45 minutes waiting
Storage: Store in refrigerator for 5 days or freeze for 6 months
Difficulty: Easy
Requires: Pressure cooker
ingredients:
50g minced garlic
Olive oil: 100g
Canned crushed tomatoes: 794g
Salt: Taste to determine the amount
Extra virgin olive oil: Taste to determine the amount
step:
1. Fry garlic in olive oil until golden brown, about 5 minutes
2. Put the fried garlic and canned tomatoes into the pressure cooker
3. Keep the pressure cooker at 1 bar/15 psi for 45 minutes. Start timing when the pressure reaches 15 psi.
4. Remove the pressure from the pressure cooker
5. Season the tomato sauce with extra virgin olive oil and salt
Tips and Ingredient Substitutions:
Crush the garlic in a food processor for better results;
Fresh tomatoes will also work. Canned tomatoes are better for this recipe because the flavor is altered during canning and pressure cooking won't change it.
It is recommended to shake the pressure cooker from time to time, especially when increasing the pressure, to prevent burning and sticking.
Other fillings:
Besides cheese and tomato sauce, any ingredient you can think of can be used as a filling. Here are a few basic principles:
First of all, don’t pile too much stuffing, balance it yourself, and the thickness of the stuffing should not exceed 2cm.
All meats placed on pizza must be cooked in advance if they are not already cooked, including but not limited to beef, chicken, pork, and Italian sausage.
For vegetables that take longer to cook, if you don't need a crispy texture, blanch them in hot water first. For example, for vegetables like broccoli, cauliflower, asparagus, and eggplant, the standard pizza baking time is 15 minutes, while professional pizza shops usually only take a few minutes. For these vegetables, the cooking time is insufficient. Other vegetables, such as onions, mushrooms, spinach, and peppers, contain a lot of water. If they are not cooked and drained in advance, they will add too much moisture to the pizza. Before using, make sure all pre-cooked or canned vegetables and fruits are drained and patted dry.
All the fillings to be added to the pizza base need to be prepared in advance, so that after the pizza base is prepared, you can add them directly and put them in the oven to bake.
Foodler, an online restaurant reservation company in the United States, once conducted a survey of thousands of restaurants. The top 10 most popular fillings are as follows:
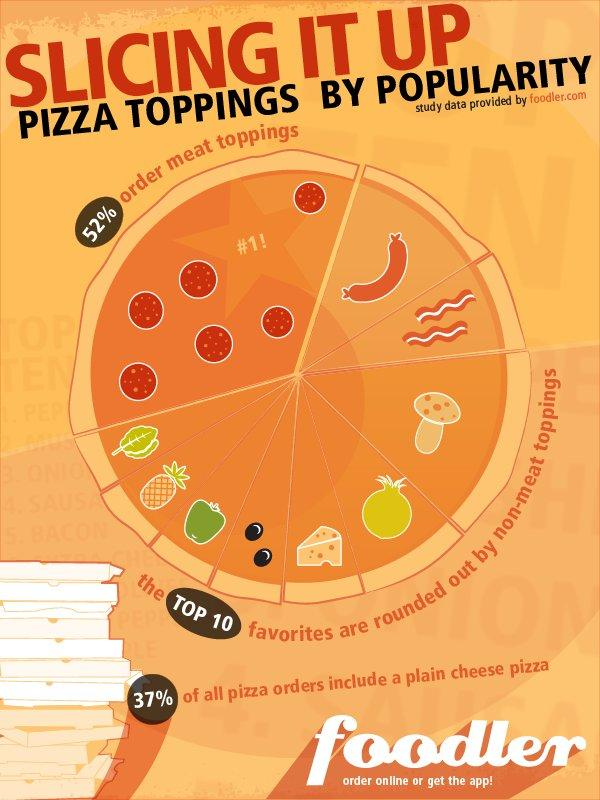
Pepperoni
Mushrooms
Onions
Sausage
Bacon
Extra cheese
Black olives
Green peppers
Pineapple
Spinach
When the toppings are ready and added to the pizza base, the order in which you arrange them is crucial. The same ingredients can make a perfect pizza in one way, but may ruin it in another.
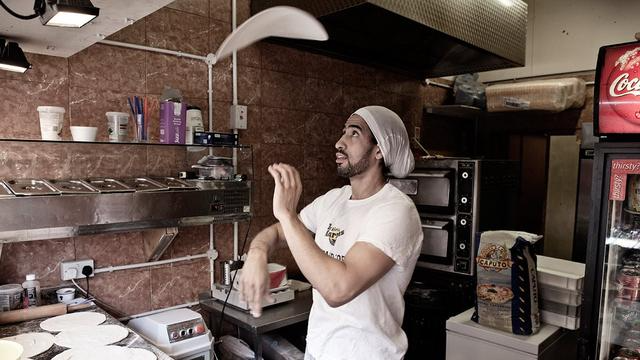
3. Roll out the dough into pizza:

First of all, it must be said that this is actually the most difficult step in making pizza. It takes a lot of practice to "roll out" the perfect pizza. Pizza masters at the World Pizza Championship usually show off their various techniques at this step.
But don't worry, the good news is that even if the pizza you "roll out" turns out to be ugly, the pizza you bake will still be delicious. If you're really desperate, you can actually use a rolling pin, but it won't be as fluffy and delicious as making it by hand.
I have tried many methods, and the steps of the method that works best are as follows:
1. Sprinkle some flour or cornstarch on the chopping board first. In the following steps, if the dough feels a little sticky, you need to sprinkle more.
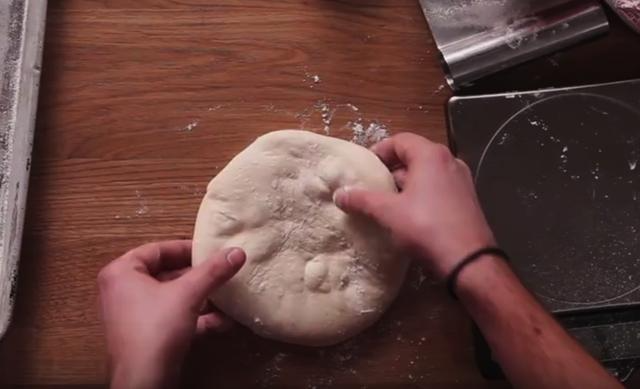
2. Take a dough and use your palm to gently and evenly flatten the dough ball (the diameter should be about twice as large as before)
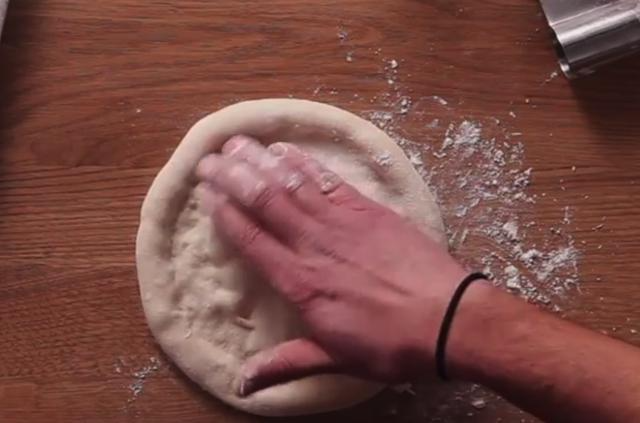
3. Use your fingers to gently press the cookie base in circles to make the cookie base have a round edge that is thicker than the inside.
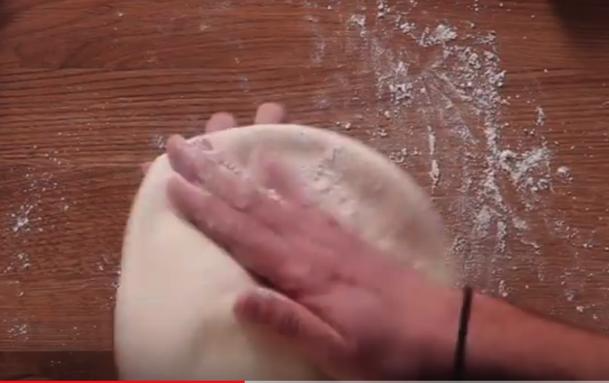
4. After that, we can use the weight of the dough to stretch the biscuit base to the size we want. Pick up the biscuit base with your hands and swing it between your hands while keeping it rotating.
5. If you want to speed up, you can place the biscuit base on the fist of one hand and then rotate the biscuit base with the other hand.

If you have practiced Northeast Yangge, you can do this
This is also possible.
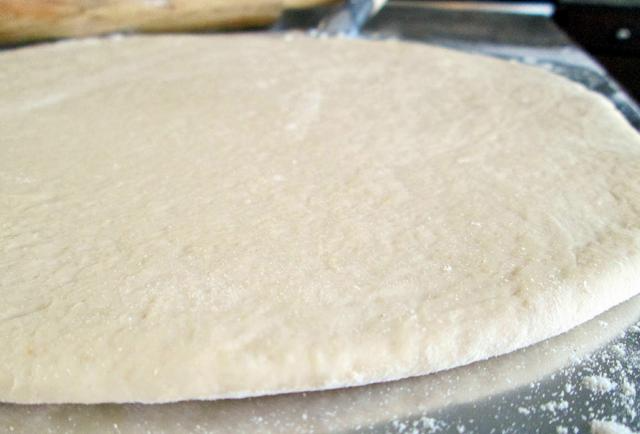
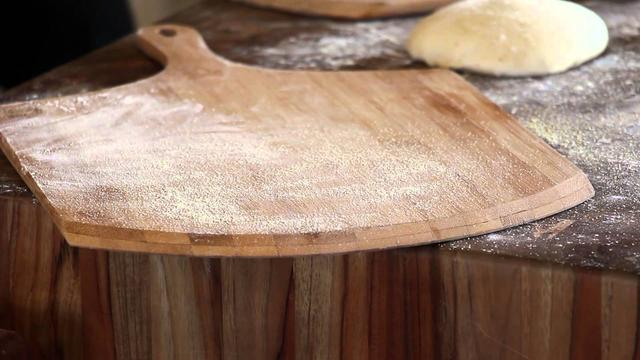
If you accidentally make a hole during baking, simply overlap the dough on either side of the hole and continue baking. Once the pizza base is prepared, it's best to place it on a dedicated pizza peel. If you don't have one, a suitable-sized cutting board can be used instead. The purpose of using a pizza peel is to maintain the oven's temperature. After preheating, use the pizza peel to transfer the pizza directly to the baking sheet or pizza stone (or baking sheet) without removing it.
4. The principles of applying tomato sauce, adding cheese and toppings, and the baking process to create pizza that is as good as the pizza from the pizzeria:
Yesterday we talked about how to “roll” the dough into pizza, and today we’ll cover the rest: the principles of spreading tomato sauce, adding cheese and toppings, and the baking process to make pizza that’s as good as the ones from the pizzeria.
Preheat oven (grill):
When we bake a pizza, the principle is to transfer heat to the bottom of the pizza as quickly as possible . In this way, the air in the dough expands rapidly, and the gaps between starch molecules increase instantly, thus forming a complex texture of the pizza that is crispy and flexible. Therefore, the higher the temperature of the oven, the better, and the higher the thermal conductivity of the baking surface in contact with the bottom of the pizza, the better. The baking tray that comes with the oven is not very suitable for baking pizza because it is too thin and cannot hold the heat. Of course, if there is no baking stone or baking steel plate, you can also use it to bake thicker pizzas, but it is best to use the flat side that is turned over.

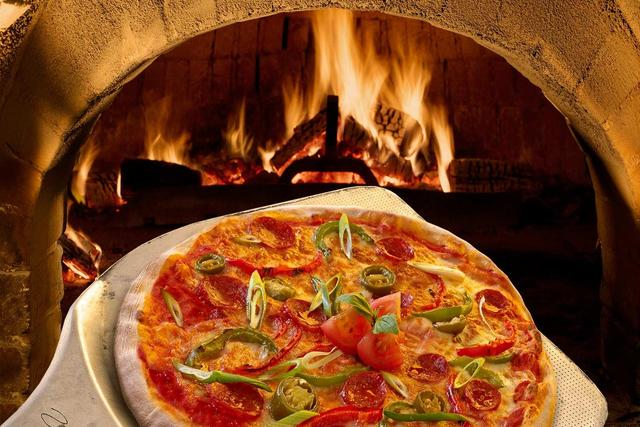
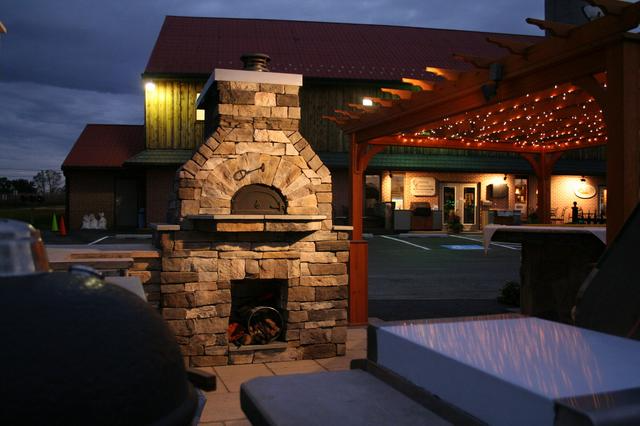
From the Romans' first "pit-baked pizza with olive oil, spices, and honey" in the 3rd century BC to the global success of Pizza Hut, generations of pizzaiolos have followed the tradition of baking pizza on a stone. Even today, many chefs believe that only stone can truly unleash the flavor of this pasta dish. So, it's no surprise that many people used baking stones to bake pizza. But is this the best way?
Serious Eats (an American website focused on the science behind home cooking) and Modernist Cuisine (also from the US, a modernist cooking lab) have conducted extensive experiments and found that dark-colored steel plates of a certain thickness perform significantly better than stone plates. The reason for this is that steel's specific heat capacity is approximately eight times that of stone plates (iron plates tend to concentrate more heat per unit area), while its thermal conductivity is almost 36 times that of stone plates (it transfers heat faster). Another benefit is that steel plates are more durable than stone plates.
The maximum temperature of a home oven generally does not exceed 290 degrees Celsius. If there is no baking steel plate, it is okay for baking thick-crust pizza, but thin-crust pizza basically cannot be relied upon in a home oven. However, if you want a crispy thin-crust pizza, you must use a higher temperature to have a good taste. The lowest acceptable temperature is 315 degrees Celsius. At 370 degrees Celsius, the pizza will be significantly better. The delicious thin-crust pizza in the pizza shop is generally baked in a large wood-burning brick oven, which can easily reach a temperature of 400 or even 480 degrees Celsius. However, basically don't even think about having this kind of oven at home.
If you love thin-crust pizza and want to make it yourself, it's best to invest in a grill that can reach high heat or a large cast iron skillet. A good charcoal grill can reach temperatures over 400 degrees Celsius. Using a cast iron skillet is similar to using a baking stone, which I'll explain in detail later.
oven:
Preheat the baking sheet/stone or baking tray in the oven (grill) and set the oven temperature to the highest setting. Preheat for at least 20 minutes, preferably up to 45 minutes.
BBQ Grill:
Light the grill and preheat for 15 minutes.
Cast Iron Skillet:
Preheat oven to 290°C (490°F), or as hot as you like. Heat an empty cast iron skillet over high heat for at least 5 minutes.
Pre-baked pizza crust (optional):
If you prefer a crispier pizza crust and find that your toppings are burnt but the pizza still isn't the way you want it, try pre-baking the pizza before adding your toppings. Place the pizza in the oven for 3 to 5 minutes. If any bubbles appear, poke a hole in them with a chef's knife and press the expanded area back down. After pre-baking, remove the pizza from the oven, add your toppings, and continue baking.
Spread tomato sauce, add cheese and fillings:
It's best to place the pizza on a pizza peel dusted with flour or cornmeal. If you don't have a pizza peel, use the back of a baking sheet and dust it with flour or cornmeal. Apply a thin, even layer of flour, then tap the pizza peel or baking sheet against the edge of the counter to remove any excess flour. If the pizza tastes like burnt flour, the pizza peel was over-floured. If the pizza sticks, it's likely too little flour.
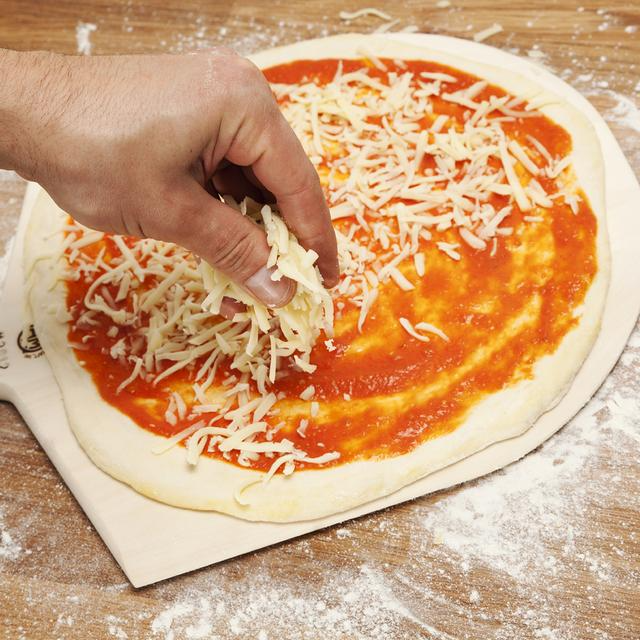
Evenly spread the prepared tomato sauce on the pizza, leaving about a 2cm edge. Be sure not to use too much tomato sauce, as it will make the pizza too soggy, and no one likes a soggy pizza.
Evenly sprinkle the shredded cheese over the sauce. Choose a low-moisture mozzarella cheese, as wet, juicy cheese can drown the pizza. Serious Eats recommends shredding your own cheese, as pre-shredded cheese often uses cornstarch or other similar ingredients to prevent it from sticking in the bag. This can prevent the cheese from melting properly.

The most important thing when adding fillings is to strike a balance. Here are a few principles:
1. No need for fancy things:
All you need are some fresh ingredients that you’d enjoy eating even on their own.
2. It is best to use only 2 to 3 ingredients:
Essentialism is everywhere, using the best ingredients but keeping it simple.
3. Avoid uneven baking:
a. Spread the fillings evenly on the pizza, avoiding piling them in the center.
b. Pre-cook any ingredients that cannot be grilled in 10 minutes or less.
c. Observe the pizza every 3 or 4 minutes. If one side has turned brown but the other has not, it means the temperature of the oven is uneven. You can turn the pizza half a turn.
d. Don’t put too much. If it’s more than 2cm, it may be too much. If there are too many, they will pile up together and may not be heated.
4. Avoid burning:
If you don't like burnt toppings, there are some ingredients that must be placed under the cheese or other ingredients:
a. Spinach
b. Fresh basil leaves
c.Ham
d.Pepperoni、salami
e. Crushed garlic
Officially start baking:
oven:
After adding the toppings, transfer the pizza to the oven. To prevent the oven from losing heat, place the pizza in the oven as quickly as possible.
If you have a baking sheet (stone), transfer the pizza to it. If you have a baking sheet, flip the pizza over and place it face-up. This is better than nothing, but the thin metal won't retain enough heat to transfer heat to the bottom of the pizza.
BBQ Grill:
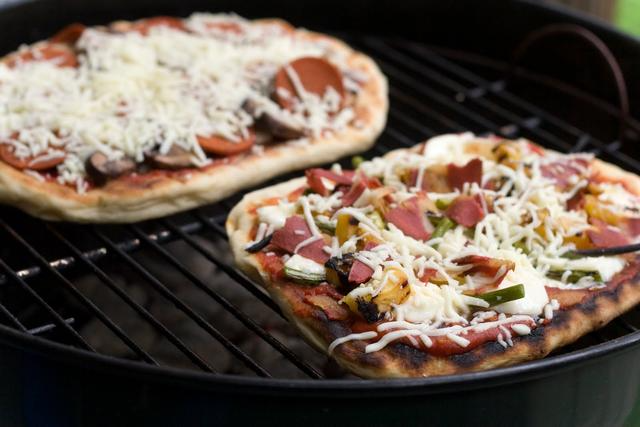
A charcoal or wood-fired grill can easily reach temperatures above 425°C (1125°F). Gas grills generally reach lower temperatures, although propane can theoretically burn even hotter. Place the baking sheet (or slate) on the grill and light it. Once the grill is hot, transfer the pizza to it. Depending on the size of your grill, you can also cook the pizza directly on the grill rack.
Using a grill requires a slight adjustment of the order, grilling one side of the pizza first, adding the toppings, and then grilling the other side.
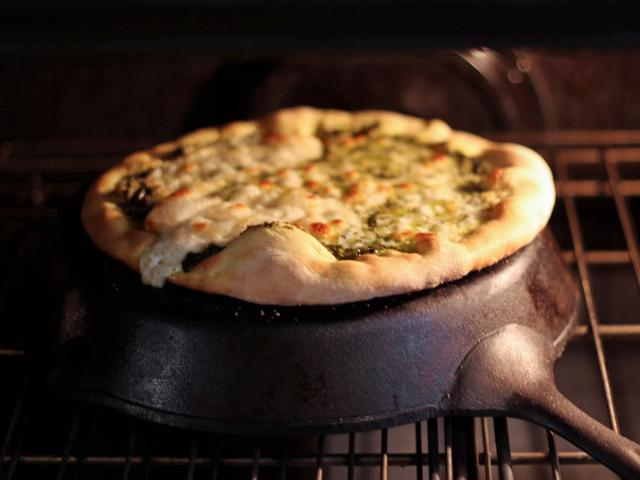
Cast Iron Skillet:
Most ovens have a maximum temperature of 290°C (490°F), but ovens in broiler mode and on the burners can reach higher temperatures. Switch the oven to broiler mode and place the hot cast iron skillet in the oven, flipping it over so it's on the top shelf. Pre-bake the pizza base until it starts to brown, about 1 to 2 minutes. Remove the pizza base and add the tomato sauce, cheese, and toppings. Return the pizza to the cast iron skillet and continue baking.
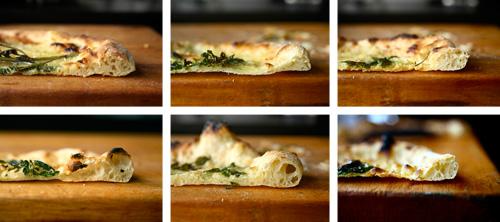
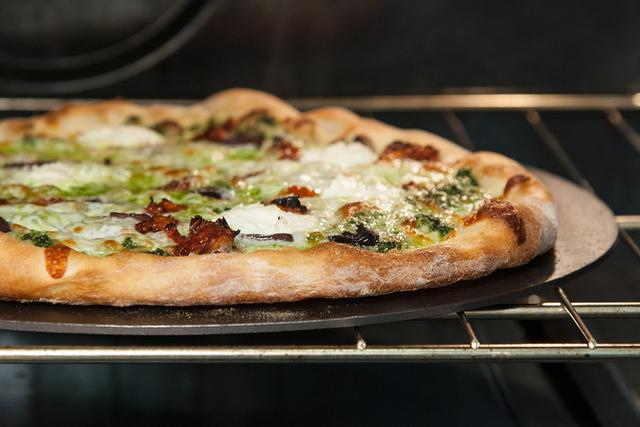
Bake until the pizza begins to turn golden (caused by the Maillard reaction) and the cheese is melted. The pizza should be slightly charred on the bottom. If you're worried about it being too burnt, bake it a little longer. Don't let it get too dark, though. A golden pizza not only looks beautiful, but also tastes delicious.
Enjoy:
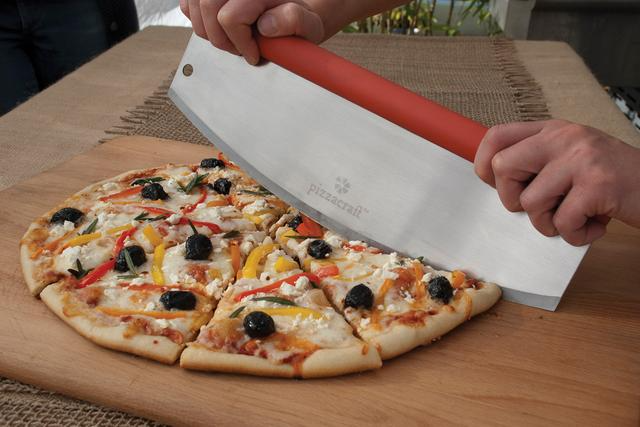
Remove the pizza from the oven using a pizza peel or baking sheet and place it on a cooler surface to help it stay crispy. Once done, let it rest for a few minutes before cutting. Many people prefer to use a special round cutter with a handle, but there are even better tools like a pizza rocker, which works very well. If you don't have a pizza rocker, a chef's knife will also work.
Once you've cut your pizza, you can enjoy it. Of course, you can also season it with olive oil, salt, chili powder, and other seasonings according to your personal preferences.