A complete breakdown of the renovation process, including insider tips and tricks.
● Pre-renovation preparation stage
The following is an introduction to the preparations before renovation: renovation consultation and how to choose a renovation company.
Renovation Consultation
Consultation process
1. When you first step into the design department of a large, reputable decoration company, you will most likely be greeted warmly by an account manager at the entrance. The account manager will first introduce you to the company's general overview and work process, understand your needs, and recommend a designer suitable for your decoration requirements for further discussion.
2. During the renovation process, we will ask for your suggestions and opinions on the construction process and provide feedback to the relevant departments of the company in writing.
3. We will assist you with all payment matters. You only need to hand over the deposit and project payment to the account manager, and she will issue you a receipt.
Common home decoration consultation scenarios:
1. The designer will learn about your family situation, occupation, and hobbies in detail, and discuss with you the decoration style, room function settings, decoration budget, etc., based on your apartment type and specific functional requirements, to create a satisfactory home decoration plan tailored to you.
2. The designer will introduce you to the company's design>
Standard measurement process
1. When the client pays the design fee, the designer shall arrange a measurement time with the client. The designer shall arrive at the agreed time to carry out the measurement work. During the measurement, the designer shall record the measurement>
3. Vague descriptions of quality, grade, and specifications: This is a common trick used by unscrupulous renovation companies. While they may list the materials needed and the quantities, they fail to specify the quality, brand, or specifications. Homeowners should request that each item on the quote be described in as much detail as possible, specifying all the elements of the materials. During the renovation, carefully check whether the materials are purchased according to the specified requirements.
4. Lowering the price of a single item: Homeowners often consult friends who have already renovated or research the prices of certain materials in the market. However, their information is often incomplete. For example, a homeowner might know the current unit price of flooring or tiles, but not necessarily the labor costs for installation. So, they might manage to lower the price of the flooring or tiles but end up overpaying for labor. Therefore, when reviewing a renovation quote, homeowners shouldn't just focus on the price of a single item, but rather consider the overall costs, including labor, wastage, and other expenses.
5. Vague Construction Processes: Many homeowners make the mistake of focusing solely on numbers and ignoring written specifications when reviewing quotes. They assume a numerical error will result in losses, while written descriptions are impossible to manipulate. This is not the case. Whether it's wall coating, flooring, or plumbing installation, each has its own specific construction process requirements. Skipping any step can cause numerous problems later, such as peeling paint or bathroom leaks. Therefore, homeowners should learn more about home renovation basics, understand the construction standards for various interior decoration projects, and regularly visit the construction site to monitor progress. This can help prevent problems.
Factors affecting pricing
1. Walls: The flatness of the wall surface should be measured from three aspects: the solid angle formed by two walls and the floor or ceiling should be straight; the included angle between two walls should be perpendicular; and a single wall should be flat, without undulations or bends. These three aspects are related to the unit price of floor paving and wall decoration.
2. Ceiling surface: Its flatness can be referenced to the requirements for the ground. A light test can be used to check for large shadows to determine its flatness.
3. Doors and windows: Check whether the horizontal and vertical gaps between the door and window sashes and the cabinet are even and tight.
4. Kitchen and bathroom: Check if the floor slopes towards the drain; the condition of the waterproofing; and the area around the floor pipes (water supply, drainage, gas, and heating pipes).
5. Waterproofing: Check for local cracks, water stains, and mold on the walls or ceiling; check for leaks in the sanitary ware's water supply and drainage, and ensure that the drainage is unobstructed; check whether the existing washbasins, toilets, bathtubs, vegetable washing areas, stoves, etc., are in reasonable locations.
6. Flooring: Whether it's cement plaster or tile flooring, the flatness of the floor is crucial, including the flatness of individual rooms and the floors of all rooms. The quality of flatness has a significant impact on the unit price of renovation work such as laying tiles or flooring.
Basic knowledge of design pricing
The designer will schedule a time to visit the site with you to take measurements. Within three days of the survey or within the agreed-upon timeframe, a preliminary design plan and corresponding budget will be provided. The designer will first determine the overall decorating style based on your needs, and then fully reflect this style through the design of specific interior elements, materials, and colors. During the design process, the designer will provide you with a detailed explanation of the materials and techniques outlined in the quote, demonstrate the design plan through renderings, and continuously discuss, communicate, and revise the plan until you are satisfied. You have the right to request the designer to:
1. You must be punctual after the agreed time.
2. After the site measurement, you will see the initial draft of the design plan within the time agreed upon by both parties.
3. In the design process, we will fully consider your and your family's needs, preferences, and the functionality of the room. At the same time, we will provide you with professional advice and modify any plans that you are not satisfied with according to your needs until you are satisfied.
4. We recommend and design the style, shape, and color of main building materials such as tiles, flooring, and finished wooden doors, and provide professional guidance for your purchase.
5. Provide a clear explanation of the process materials used in the design quotation.
6. While preparing the project budget according to the decoration company's quotation system, you must obtain a payment receipt stamped with the decoration company's financial receipt seal after paying the design fee. Say "no" to blank IOUs.
7. Verify the accuracy of the quantities in the quote.
Renovation process – Signing a renovation contract
Contractual Principles
Principle 1: Check whether the decoration company has the necessary qualification certificates.
Principle 2: Check if the decoration company has a business license.
Principle 3: Check whether the decoration company uses a decoration project construction contract issued by the Shanghai Municipal Administration for Industry and Commerce.
Principle 4: Has the decoration company completed its design plan?
Principle 5: Verify that the company name matches the name on the contract.
Principle 6: Check that the contract is stamped with the official contract seal of the decoration company's headquarters, not a branch's seal or other seals.
Principle 7: Review the quote to see if the decoration company is using the industry's guideline price; otherwise, do not sign the contract easily.
Principle 8: Verify that all contract attachments are complete, and carefully read and review any supplementary agreements to the contract.
Principle 9: In some cases, in addition to signing a contract with a decoration company, a market may be required as a third-party certification.

Contract Signing Notes
1. When signing the contract, the cover you'll see is the Shanghai Municipal Home Decoration and Renovation Construction Contract Template (2006 Edition). Below, you need to fill in the names of the client (Party A) and contractor (Party B), their qualification levels, and the contract number. At the bottom, it states that it was supervised by the Shanghai Municipal Administration for Industry and Commerce and the Shanghai Municipal Construction and Transportation Commission, and the date is 2006. Currently, home decoration projects are uniformly issued with home decoration qualification certificates; you must check whether the decoration company has a qualification certificate. Also, please note that the contract must bear the construction unit's contract seal or official seal to ensure its legality.
2. The first page of the contract contains instructions for use. First, this contract is applicable to home decoration and renovation projects within the administrative region. Second, the contractor (Party B) should possess a business license issued by the Administration for Industry and Commerce and have the corresponding qualifications to undertake home decoration and renovation projects. Third, if Party A and Party B sign this contract directly, two copies should be made, with each party holding one copy. If this contract is signed within the home decoration and renovation market in this city, three copies should be made (one copy each for Party A, Party B, and the relevant market management department).
3. The first page of the contract contains the terms and conditions of the Shanghai Home Decoration and Renovation Construction Contract. You must clearly state the contracting party (Party A) and the contractor (Party B) in the contract. In particular, the contractor's section should include the decoration company's name, business license number, registered address, legal representative, authorized agent, project designer, and construction team leader. If the decoration company is a subcontracting or affiliated company, the "Authorized Agent" section should include the name and contact number of the agent authorized by the legal representative, and the company should provide a "Letter of Authorization" issued by the legal representative of the affiliated company.
4. It is essential to clearly identify the site manager of Party B.
5. The first clause of the contract should be the project overview and cost. First, the project location must be detailed. Second, the contracting methods can be in three ways: the contractor is responsible for labor and all materials; the contractor is responsible for labor and some materials, with the client providing some materials; the contractor is responsible for labor and the client provides all materials. The choice of method is entirely up to the client. Next is the project duration, and finally, the total contract cost should be clearly stated.
6. Article 2 of the contract concerns material supply. Firstly, for materials provided by Party A as stipulated in the contract, Party A shall notify Party B before the materials arrive at the construction site, and both parties shall jointly inspect and complete the handover procedures. Secondly, for materials provided by Party B as stipulated in the contract, Party B shall notify Party A before the materials arrive at the construction site, and both parties shall jointly inspect and complete the handover procedures.
7. Article 3 of the contract concerns the quality and acceptance of the project.
8. Article 4 of the contract concerns safety in production and fire prevention.
9. Article 5 of the contract stipulates the project price and settlement.
10. Article 6 of the contract stipulates the construction cooperation between Party A and Party B.
11. Article 7 of the contract addresses liability for breach of contract. It stipulates that if either party fails to perform its obligations under the contract or violates national laws, regulations, or relevant policies, and incurs fines or causes economic losses to the other party, the responsible party shall bear the liability and compensate the other party for any resulting economic losses. Please fill this out carefully; if any problems arise, this clause will be crucial in compensating you for your losses.
12. Article 8 of the contract outlines the dispute resolution process.
13. Article 9 of the contract explains the modification and termination of the contract.
14. Article 10 of the contract outlines other matters agreed upon by both parties. The more detailed the clauses regarding the protection of each party's interests, the better. This will constrain both parties, prevent many disputes, and make resolving disputes much easier if they do arise. Furthermore, the agreed-upon clauses must be stamped with the market's official contract authentication seal, signifying the market's acceptance of the signed terms.
15. Article 11 of this contract is a supplementary provision, which stipulates that the contract shall only become effective after being signed (or sealed) by both parties; the project shall not be subcontracted after the signing of this contract; if Party A and Party B sign the contract directly, this contract shall be made in duplicate, with each party holding one copy.
16. Article 12 of the contract is an appendix to the contract. It includes the decoration and construction content list, materials and equipment list, quotation for main materials, project change order, quality acceptance form, settlement statement, and warranty certificate.
Other points to note:
1. Settlement based on actual work done means calculation based on the actual amount of work completed, not the actual amount of materials used. 2. Electricians must have valid electrician's licenses. 3. Any losses incurred by Party A due to Party B's personnel failing to obtain the necessary permits in a timely manner shall be borne by Party B. 4. Upon completion of the project, Party B must provide as-built drawings of the water and electricity systems. Final settlement will only proceed after Party A signs for and accepts the drawings. 5. Any rework or delays caused by Party B using materials inconsistent with the contract shall be borne by Party B. Party A reserves the right to handle such issues in accordance with the Consumer Rights Protection Law. 6. Party B must provide a project schedule and Party A's material procurement schedule before commencement of work and strictly adhere to them. Payment Method: 1. When making payments, try to use a mutually agreed-upon method and avoid using standard contract forms. If these are used, the renovation company will have more control. For typical home renovation projects, the renovation company can receive 65% of the project payment in less than 7 days, even before the carpentry work has begun, meaning the actual cost may be less than 5000 yuan. 2. Try to get the 5% warranty deposit paid after one year, which will basically guarantee the warranty.
Contract Attachments
When signing a contract with a home renovation company, you must pay close attention to the contract attachments. These attachments are crucial to the contract, and you should ensure that the renovation company fills them out carefully; don't be afraid of the extra work. The main material price list in the contract attachment is the most important part. The material name, unit price, quantity, brand, and grade must be filled in in detail. This will serve as evidence in case of any financial disputes.
Signing Tips:
To protect your legal rights, please read all forms that require your signature. In case of disputes, the law will prevail based on written records; verbal promises are invalid. Many verbal agreements during construction become loopholes for overcharging at the time of settlement. Everything must be written down in black and white. For any additions or subtractions, be sure to clarify the price and write them down! Generally, brand-name companies have higher credibility, so it is recommended to choose a large company for renovation if possible.
Renovation Process - Building Material Selection Considerations
[Introduction] Kitchen cabinets should actually be the first building material ordered because when the plumbing and electrical work begins at the start of the renovation, the plumber will ask you to provide the kitchen's plumbing and electrical diagrams. Most home improvement companies don't provide kitchen plumbing and electrical layouts, as this needs to be determined by the cabinet company based on the cabinet design requirements. (Of course, this doesn't apply to all-inclusive packages!) After choosing the cabinets, the cabinet designer will come to your home to measure the kitchen dimensions and discuss some details with you. At this time, you may need to provide the dimensions of the kitchen appliances (mainly the range hood and gas stove). Therefore, the kitchen appliances need to be ordered before the cabinet designer designs the cabinets for you. To make it easier to remember, you can provide the brochures of the kitchen appliances you purchase to the appliance supplier; they will all have the dimensions. Additionally, the gas stove's packaging box will contain the stove's cutout dimensions, which is convenient for cutting the opening when installing the cabinet countertop.
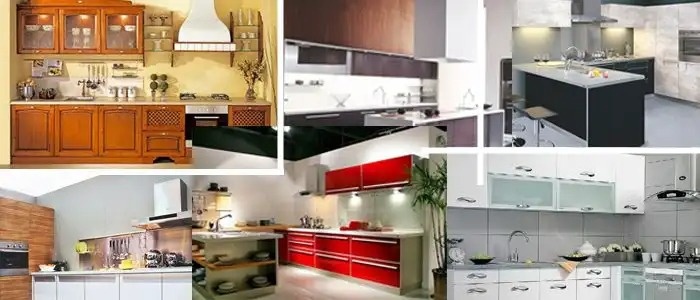
All About Building Materials: Cabinet Edition – Types of Cabinet Panels
1. Fire-resistant board panel (also called fireproof board)
While fire-resistant boards have inherent drawbacks when used for kitchen countertops, they offer irreplaceable advantages for cabinet doors. The enduring popularity and dominant market share of fire-resistant boards stems from their wear resistance, high-temperature resistance, scratch resistance, water resistance, ease of cleaning, and vibrant colors. These combined properties meet the requirements of kitchen cabinets, adapt to the unique environment of a kitchen, and align with the trend of combining aesthetics and practicality in kitchen cabinet design. Therefore, when purchasing kitchen cabinets, fire-resistant boards should be your first choice for the panel; you'll be glad you made a wise decision later. Of course, fire-resistant boards also have their drawbacks, such as a limited variety of colors and patterns to choose from.
II. Painted panels are also called baked enamel panels.
The advantages of spray-painted door panels are that they use a more traditional method, the process is simple, and the cost is lower. The disadvantages are that they are easily stained, difficult to clean, and easily scratched. Since the environment of kitchen cabinets is fundamentally different from that of the living room, ease of cleaning must be a primary consideration when choosing cabinet panel materials.
III. Solid wood panel
Solid wood kitchen cabinet panels offer a natural and rustic aesthetic. While popular overseas, their high price makes them less affordable for the domestic market. Furthermore, solid wood doors are difficult to clean and have poor flame-retardant properties; therefore, they are unlikely to dominate the market for a considerable period.
Solid wood cabinets are currently more commonly used in high-end residences because people living in such houses generally don't cook at home, and even if they do, they have dedicated servants to clean up after them!
IV. PVC Molded Vacuum Forming Panel
Medium-density fiberboard (MDF) is used as the base material, with milled patterns. The surface is covered with PVC and formed by hot pressing and vacuum forming. PVC molded boards have the advantages of rich colors and unique shapes, but compared with fire-resistant boards, they are significantly inferior in terms of ease of cleaning and high-temperature resistance. If practicality is the primary consideration, PVC molded boards are not the most sensible choice.
V. Crystal Plate
It's likely named "crystal board" because of its glossy surface. The base material is medium-density fiberboard (MDF), with an acrylic sheet (commonly known as plexiglass) glued to the surface, approximately 2-3mm thick. Before gluing, it's painted to give the finished board various color variations. Crystal boards have poor wear resistance, scratch resistance, and flame retardancy, and lack impact resistance.
The processing of crystal boards is simple, almost entirely done by hand. The process involves spray painting, gluing, hand-sealing the edges, and light polishing. The raw material cost is slightly lower than that of fire-resistant boards. If the selling price is low, it can be a viable option for people with low incomes.
VI. UV Panel
UV panels are boards whose surfaces have been protected by UV treatment. UV paint, also known as ultraviolet light curing paint or photoinitiating coating, is used to coat ordinary wood boards, calcium silicate boards, and other boards with UV paint, and then dry them in a UV curing machine to form stone slabs.
UV panels have a glossy surface, vibrant colors, and a strong visual impact. They are wear-resistant, chemically resistant, have a long service life, do not discolor, are easy to clean, and are relatively mid-range in price. In my opinion, they are the ideal cabinet panel choice for middle-class families.
All About Building Materials: Cabinet Section - Cabinet Body Materials Cabinet body panels are typically made of three materials: (1) plywood (2) particleboard (3) medium-density fiberboard. The surface layer of the panels used for cabinet bodies is treated with melamine fire-resistant veneer. The thickness of the body panel is 18mm. (Avoid using 16mm, as it may bend and deform. Please pay special attention when purchasing cabinets). The core of plywood is made of natural wood strips glued together, and its waterproof and moisture-proof performance is better than that of particleboard and medium-density fiberboard. Because it is made of natural wood, it is easy to fasten, assemble, and not easy to loosen. Given that plywood is made of wood strips spliced together, the surface flatness is often poor, and "ribs" often appear. When used for cabinet body panels, it gives a visually uneven feeling. Therefore, it is not unreasonable for various cabinet companies to abandon it. If plywood solves the problem of unevenness, it can be said to be the most ideal material. Particleboard is fundamentally different from the particleboard in people's traditional concept. Due to the use of German machinery, the molecular structure is more compact. Therefore, it can bear weight and is not easily deformed or bent. Particleboard is made by crushing natural wood into particles and then pressing them into boards. Its water resistance is better than that of medium-density fiberboard (MDF), making it the main material for kitchen cabinet bodies. Among domestically produced particleboard, Jilin Lushuihe particleboard is considered the best, but there are many counterfeit products on the market, so buyers must be careful to distinguish them. Medium-density fiberboard (MDF) is formed by pressing powder into shape, and its moisture resistance is relatively poor. It has good flatness and is commonly used in panel furniture and office furniture. Because MDF is prone to loosening after fastening, and the strength is insufficient after loosening and re-fastening, there is a reason why it is not widely used by kitchen cabinet companies. Due to its good flatness, MDF is more suitable for door panels and countertops. When used for cabinet bodies, it is subject to certain limitations during assembly and fastening.
All About Building Materials: Cabinet Edition – Types of Cabinet Hardware Cabinet hardware is divided into two types: functional and decorative. Cabinets are located in the humid, smoky environment of a kitchen, so the hardware chosen should be durable and resistant to corrosion, rust, and damage. Functional cabinet hardware refers to hardware used to achieve specific functions, such as connectors like hinges and drawer slides. Hinges, in particular, must withstand the test of time; they must not only close the cabinet doors but also bear the weight of the doors. Drawer slides are equally important, as they are installed in all the heavy drawers. Only high-quality drawer slides ensure that drawers are easy to pull out. Therefore, the selection of these small hardware accessories must be of good quality.
When purchasing functional hardware accessories, firstly, carefully observe the appearance for roughness. Then, test the sliding switches several times to check for comfort and any unusual noises. Don't compare them to furniture hardware; compare them to similar products. Next, consider the materials used; choose manufacturers with a long history and a high-quality reputation. For decorative cabinet hardware accessories, such as handles, consider the coordination with the color and texture of the furniture. Solid wood handles are not recommended for cabinets, as they are prone to warping in humid environments. Antique-style handles are a good option for solid wood cabinets. Building Materials All-Knowing: Cabinet Edition – Expert Reminder: Pay Attention to Details to Choose a Good Cabinet. Judging the quality of a cabinet isn't just about "love at first sight." Some manufacturers use misleading marketing concepts to confuse consumers. Therefore, careless consumers should pay attention; careful consideration is key. Examine the edge banding details, the interior fittings in every corner, and the workmanship of the edges and corners – these are crucial factors in evaluating the quality of a cabinet.
Choose the right hinges so your kitchen doors will look good for a long time.
Due to the dampness and grease in kitchens, the quality of hardware is crucial. For example, some hinges may seem fine initially, but they can loosen over time. This can cause the entire cabinet door to wobble, making it look like it's about to fall off. This is naturally inconvenient to use, not to mention aesthetically displeasing. Good quality drawer slides ensure smooth operation. The most important component in the entire drawer design is the drawer slide. In the humid and grease-filled kitchen, buying inferior slides is like using a slider phone – difficult to push and pull, and awkward to use. Proper edge banding prevents moisture and grease from escaping. Pay attention to the edge banding.
Some small workshops produce cabinets with hand-sealed edges, which are not applied evenly. Over time, the edges will loosen and peel off. For some solid wood cabinets, it's not easy to see the problem from the outside, so you can open the cabinet doors to check the edge sealing. It's important to know that if the edge sealing is faulty, it will greatly affect the cabinet's waterproof performance. When choosing handles, don't just look at the style; consider how easy it is to operate.
Many homeowners focus solely on style when choosing kitchen cabinet handles, assuming that as long as they match the cabinet design, it's fine. However, even something as small as a handle requires careful consideration. If you're installing pull-out baskets, it's best to avoid built-in handles, as they're more difficult to pull open and inconvenient for daily use. Choosing a good kitchen cabinet requires attention to three key aspects.
1. Cabinet height should be determined according to human needs. A modern kitchen should be "human-centered," so when customizing cabinets, pay attention to the height of the worktop. It should ideally be suitable for the height of the family's head chef; otherwise, constantly bending over to work will lead to back pain over time. The height of the wall cabinet door handles should also be convenient for users to access the cabinets.
2. Pay attention to the thickness of the cabinet panels. Generally speaking, for cabinets of the same quality, thicker panels are more expensive and also much heavier. It's important to note that some manufacturers advertise using thicker panels to inflate prices. However, consumers should know that through long-term technological innovation, many kitchen cabinet manufacturers have now achieved a reduction in panel thickness while maintaining quality.
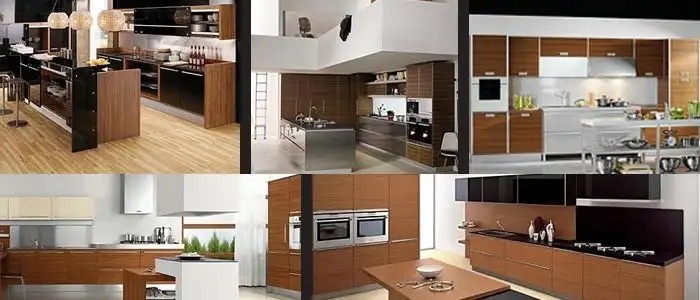
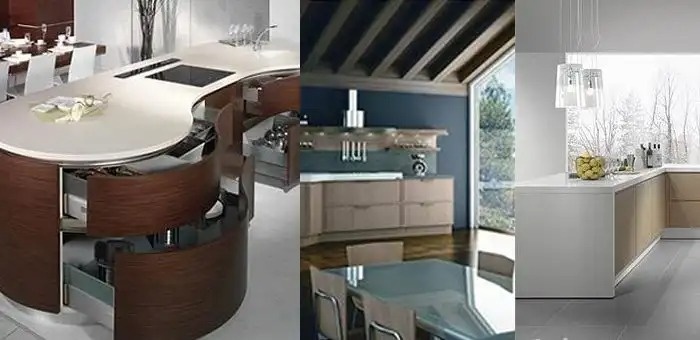
3. Precision during installation is crucial. Whether the cabinet installation is standardized and accurate directly affects its aesthetics and usability. Cabinet installation should proceed in the following order: base cabinets, wall cabinets, countertop, faucet, sink, stove, and appliances. Pay particular attention to whether the ceiling is level and whether the countertop is properly glued. Building Materials All-Knowing: Cabinet Edition – A Stylish Black and White Kitchen "Infernal Affairs" Unfolds
All About Building Materials: Flooring – Types of Flooring
Solid wood flooring is made from natural wood, with the entire floor made from the same tree species. Because it uses natural materials, it retains its natural color, does not produce pollution, and does not easily attract dust, making it a truly green building material.
Advantages: 1. Durable: Made from a single piece of wood, the solid wood flooring has a uniform thickness of 18mm to ensure wear resistance.
2. Environmentally friendly: It is made from natural wood, contains no formaldehyde, and is harmless to the human body.
3. Good foot feel: good elasticity, soft and comfortable temperature, touch and foot feel.
4. Warm in winter and cool in summer: Wood has a low thermal conductivity and has a good temperature regulation effect.
Engineered wood flooring is a replacement product for solid wood flooring. It is made by sawing and planing high-quality solid wood into surface veneer, core veneer, and backing veneer. Then, based on the mechanical principles of different wood varieties, the three veneers are glued together in a three-dimensional arrangement of longitudinal, transverse, and longitudinal directions, and pressed into boards under high temperature. This process controls the anisotropic changes in the wood.
Advantages: 1. It inherits the elegant and natural feel, comfortable underfoot, and good heat insulation properties of solid wood flooring. It also has good dimensional stability, is insect-proof, non-combustible, and does not warp or deform. From the perspective of protecting forest resources, it is a replacement product for solid wood flooring.
2. It has the advantages of easy installation and maintenance of engineered wood flooring. High-end engineered wood flooring uses high-grade matte paint, which has high wear resistance and soft gloss. It does not require waxing or maintenance in general households and does not need to be painted for several years. It is also environmentally friendly.
3. High processing precision: The surface layer, core layer, and bottom layer all have higher processing requirements than other wood flooring, resulting in a stable structure and good installation effect.
Laminate flooring—due to its affordability and ease of maintenance—has captured the vast majority of the flooring market share. Its structure generally consists of a wear layer, a decorative layer, a core engineered wood panel, and a bottom layer that protects the floor from ground moisture and enhances the moisture resistance and balancing properties of the bottom layer.
Advantages: 1. A wide variety of colors and patterns are available, and the colors and patterns can simulate various natural or artificial patterns. They can even imitate stone and create unique patterns that do not exist in nature.
2. Laminate flooring has good wear resistance, pressure resistance, impact resistance, fire resistance, and resistance to chemical pollution. It can be cleaned simply with a dry cloth or vacuum cleaner.
3. Laminate flooring has tongue and groove joints on all four sides. During installation, simply interlock the tongue and groove joints. It can be installed directly without the need for a subfloor. After installation, the color is uniform and the visual effect is good.
4. Laminate flooring is made from fast-growing timber, which is cheaper than solid wood flooring, can be mass-produced, and has a relatively high cost-performance ratio.
Bamboo flooring – with a smooth and soft surface, non-toxic, non-adhesive-resistant, non-deforming, and with superior insect and moth resistance. All six sides of the flooring are sealed with high-quality imported wear-resistant lacquer, making it flame-retardant and wear-resistant, an ideal high-end decorative material for residences, hotels, and offices.
Advantages: 1. Warm in winter and cool in summer: Bamboo has a low thermal conductivity and does not generate or release heat.
2. Minimal color variation: Bamboo flooring can be divided into two types based on color. One type features natural color variation, which is less pronounced than wood flooring, and boasts rich bamboo grain with a uniform color. The other type is artificially varnished, with the varnish available in various colors. However, the bamboo grain is less visible in this type.
3. It is elastic, moisture-proof, mold-resistant, and hard. The curved surface of bamboo gives it a unique charm.
Cork flooring is considered the pinnacle of flooring affordability. Compared to solid wood flooring, it is more environmentally friendly, provides better sound insulation, and offers better moisture resistance, while also providing an excellent feel underfoot. Cork flooring comes in two types: adhesive cork flooring and click-lock cork flooring.
Advantages: 1. Wear-resistant: Cork is not wood, but a specially treated composite material that is more wear-resistant than solid wood flooring and resistant to various liquids such as oil, acid, and soap.
2. Moisture-proof: It is not breathable or waterproof, and it is not easy to warp or deform when exposed to moisture. Its moisture-proof performance is far superior to other wood flooring, and its flame-retardant performance is also good.
3. Flexibility: It is soft, highly elastic, and resilient during use, resisting pressure and maintaining its shape. After furniture or other items are removed, dents will return to their original form. It also has noise reduction, sound absorption, and heat insulation functions, and provides a comfortable feel underfoot.
4. Environmentally friendly. Made from tree bark, it is a renewable resource. Furthermore, cork itself is non-toxic, harmless, and environmentally friendly, and will not be damaged by insects or termites.


All About Building Materials: Flooring - How to Choose Flooring
I. Material Selection:
Flooring is generally made from stable and high-quality wood, such as teak, merbau, ironwood, and ash. The moisture content of the flooring in Shanghai is suitable at 10% to 14%. The boards must be free of knots, of uniform thickness, with corner dimensions not exceeding 0.1mm, and the tongue and groove joints must be tightly closed without any obvious looseness.
The joists are generally made of larch with a moisture content of 16%~18% (most suitable for the Shanghai area). The wood must not be cracked, and the proportion of dead knots should not exceed 2 per log. The ideal size is 30*50mm.
Composite flooring: 1. Measure the room area. 2. Remove the subfloor. 3. Choose the installation method (straight or horizontal) according to the room layout. 4. Composite flooring installation is generally carried out on-site by the manufacturer.
II. Comparing the quality of the flooring
Comparing the actual quality of the flooring is very important. This is because it is the most intuitive and relatively simple method.
First, examine the floor surface. Consumers should ideally choose textured flooring. The textured surface, currently popular in Europe, is gradually replacing the older fine-groove design, aligning with modern families' emphasis on cleanliness. The most obvious drawback of the older grooved structure is its poor hygiene; dust and dirt become trapped, making cleaning very difficult and eventually leading to black seams that not only affect appearance but also provide a breeding ground for bacteria. The new textured flooring overcomes this deficiency.
Secondly, compare the thickness of the flooring. Currently, the thickness of flooring on the market is generally between 6-8.2 millimeters; when choosing, thicker is better. Thicker flooring generally has a longer lifespan.
Thirdly, consider the weight of the flooring. The weight of flooring primarily depends on the density of its core material. The core material determines the flooring's stability and impact resistance, among other properties. Therefore, the better the core material and the higher its density, the heavier the flooring will be. Consumers are advised to choose high-density fiberboard (HDF) core materials.
Fourth, assemble two floorboards together to check if the assembly is neat and tight.
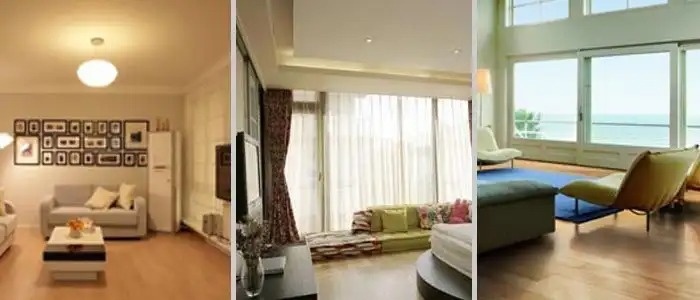
All About Building Materials: Flooring Edition – Showcasing the Charm of Light-Colored Solid Wood Flooring
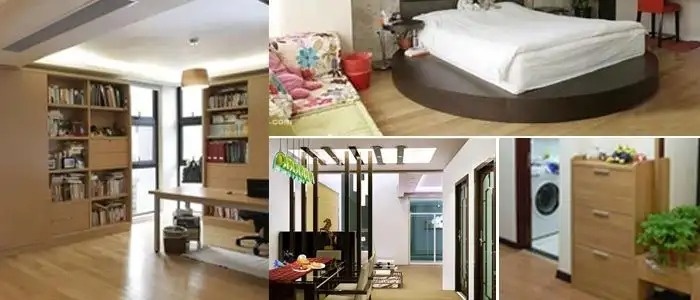
All About Building Materials: Flooring Edition – Maintenance Guide for 4 Types of Wood Flooring
【Part 1】Laminate Flooring Maintenance Guide
Laminate flooring is much easier to maintain than solid wood flooring. When cleaning the floor, be sure to keep it dry and avoid using large amounts of water. Also, avoid prolonged soaking of any area of the floor in water. Use a neutral detergent to clean stains and avoid direct sunlight, rain, and moisture.
In addition, ensuring good indoor ventilation and maintaining a comfortable indoor temperature can also help extend the lifespan of the flooring. Laminate flooring does not require painting or waxing, and unlike solid wood flooring, it should never be sanded or polished.
【Part 2】Solid Wood Flooring Maintenance Guide
Improper installation and use of solid wood flooring can cause even qualified products to develop quality problems. When maintaining solid wood flooring, it's important to keep the subfloor dry and clean. Failure to take moisture-proofing measures during installation, or inadequate isolation between the floor and bathroom/room floors, will affect the lifespan of the flooring. Getting it wet or washing it with alkaline water or soapy water will damage the gloss of the finish. In summer, failing to draw curtains properly can cause the floor near the bed to discolor and crack after being exposed to direct sunlight. Setting the air conditioner to too low a temperature creates large temperature fluctuations between day and night, causing the flooring to expand or contract excessively, resulting in deformation and cracking.
If individual floorboards are found to be peeling or detaching during use, they should be removed immediately, the old adhesive and dust scraped off, and new adhesive applied and pressed firmly. Waxing once a month is also the best maintenance method, but moisture and stains should be wiped clean before waxing.
【Part 3: Solid Wood Composite Flooring Maintenance Guide】
Engineered wood flooring is easier to maintain than solid wood flooring. Keeping the floor dry and clean, avoiding dripping mops, and refraining from using alkaline or soapy water will effectively protect the floor.
If the air in your home is dry, you can dampen the mop or place a bowl of water on the radiator, or use a humidifier. Avoid direct sunlight as much as possible to prevent the surface paint from prematurely aging and cracking under long-term ultraviolet radiation. Clean any stains that accidentally get on the wood surface promptly. For oil stains, use a cloth dampened with warm water and a small amount of laundry detergent to wipe them clean. For stains from medicine or paint, remove them before they penetrate the wood surface.
1. Keep the floor dry and clean. Do not mop the floor with a dripping mop or wipe the floor with alkaline water or soapy water, so as not to damage the gloss of the paint surface. If the air in the house is dry, the mop can be slightly damp, or a basin of water can be placed on the radiator or a humidifier can be used to increase humidity.
2. Avoid direct sunlight as much as possible to prevent the surface paint from aging and cracking prematurely under long-term ultraviolet radiation.
3. Any stains accidentally made on the surface of the board should be removed promptly. If there is oil, you can wipe it with a cloth dampened with warm water and a small amount of laundry detergent. If it is medicine or paint, it must be removed before the stain seeps into the wood surface.
4. Avoid prolonged contact between the floor and water, especially hot water. Therefore, if hot water is spilled on the floor, wipe it dry immediately.
5. It's best to wax the floor every three months. Before waxing, make sure to clean the surface of the floor thoroughly. While waxing isn't strictly necessary, regular waxing will maintain the floor's shine and extend its lifespan.
6. Avoid scratching the floor with sharp objects, do not throw cigarette butts on the floor or place excessively hot items directly on it, and try to avoid dragging heavy furniture.
【Part 4: Maintenance Guide for Laminate Flooring】
1. Do not rinse with water.
2. For daily cleaning, use a vacuum cleaner or a semi-dry cloth.
3. When moving furniture, it is better to lift it rather than drag it.
4. Placing a doormat at the entrance is a good way to maintain the floor.
5. Avoid impacts or scratches from heavy or sharp objects to prevent damage.
6. Avoid walking on the floor or placing heavy objects on it within 48 hours after the floor is laid.
【Part 5 Winter Floor Maintenance Guide】
Floor care, waxing, and sun protection
In winter, the temperature difference between indoors and outdoors is large and the climate is dry. To live comfortably, Mr. Chen suggests that the floor should also be moisturized in the cold winter.
■ Solid wood flooring: Apply a solid wax "mask"
Solid wood flooring holds the most prestigious and exclusive position in the flooring family, but it is also the most susceptible to external environmental disturbances. When humidity and temperature change, it is most prone to deformation and cracking.
Solid wood flooring prefers an environment with a temperature below 28℃ and humidity between 50% and 70%. In winter, when underfloor heating is on, solid wood flooring will shrink due to moisture loss, widening the gaps between the joints. At this time, it's necessary to give the solid wood flooring a "mask"—applying solid wax. Before waxing, wipe the solid wood floor clean, then apply a layer of solid wax evenly. After it dries slightly, buff it with a soft cloth until it shines. To keep solid wood flooring looking its best, it is recommended to wax it twice a year.
Daily care for solid wood floors is simple: just wipe them with a wrung-out cotton mop. Never make them too wet. If there are stubborn stains on the floor, it is recommended to wipe them first with a neutral cleaning solvent, then wipe them with a wrung-out cotton mop. Do not use acidic, alkaline, or gasoline-based solvents, as these can easily damage the solid wood floor.
■ Laminate flooring: Wipe with a damp mop to "replenish moisture"
While engineered wood flooring may not be as luxurious as solid wood flooring, it is widely popular due to its affordability and ease of maintenance. Engineered wood flooring is relatively durable and easy to care for. Generally, winters are drier, so like protecting human skin, you should maintain the moisture content of the engineered wood flooring by frequently wiping it with a damp mop to increase surface humidity. If the engineered wood flooring develops cracks, it is recommended to contact the seller and have a professional perform localized repairs.
■ Bamboo flooring: Sun protection is also necessary in winter.
Bamboo flooring is most vulnerable to sunlight, as strong ultraviolet rays will oxidize the surface paint. Although the sun is not strong in winter, bamboo flooring still needs sun protection. Winter weather is dry, and the surface of bamboo flooring also becomes dry, making it susceptible to damage. If the paint is damaged, it should be repaired with ordinary varnish or by having the manufacturer come to repair it. Of course, if conditions permit, you can also apply a layer of floor wax to the bamboo flooring; waxing will improve its maintenance.
■ Cork flooring: Sand is its biggest enemy
Cork flooring is a rising star in the flooring family, offering unparalleled comfort underfoot. Its biggest enemy is sand. Xi'an, located in Northwest China, experiences frequent sandstorms, so it's best to avoid bringing sand indoors during winter. If you accidentally bring sand indoors, please clean it up immediately to prevent damage to the cork flooring's "skin."
If the surface of cork flooring shows signs of wear, it is recommended to recoat it. The method is simple: first, lightly sand the worn area with sandpaper to remove dirt, then wipe it clean with a dry, soft cloth, and then recoat it, or apply a polyester film.
All About Building Materials: Sanitary Ware – 21 Professional Terms for Sanitary Ware
Damping buffer seat: Unlike ordinary toilet seats, this type of seat with damping buffer function can eliminate the harsh noise when the seat closes with the toilet seat. Instead, it uses the principle of frictional resistance to slow down the closing speed without any noise.
Flange ring: A flange ring is a sealing ring. In fact, many industrial bearings use rubber gaskets for shock absorption and wear prevention, which are called flanges. The flange used in toilets is placed between the toilet drain and the bathroom drain hole to seal it. This prevents air leakage in siphon toilets and makes flushing more effective.
Water seal: The water that remains in the toilet bowl. It prevents odors from escaping from the drain pipe or small insects from crawling out.
Lip: A ring-shaped flushing ring at the bottom of the toilet bowl. Its shape is similar to that of the toilet seat. It can generally be divided into two types: closed rim and open rim. The lower edge of the closed rim has evenly spaced small holes, while the lower edge of the open rim is open. It is the pipe through which water in the tank drains and washes the bowl surface.
Pit distance: Pit distance usually refers to the vertical distance from the wall to the center point of the toilet drain outlet. It is generally divided into 300mm and 400mm pit distances, and there are also special pit distances. So you must measure the dimensions before purchasing a toilet.
Water system: Sewage pipe at the rear of the toilet seat.
Water surface: The water surface in the toilet bowl. The wider the water surface, the less likely the bowl will be covered with dirt.
Flushing type: A flushing method that uses the difference in water level to flush waste out of the toilet bowl.
Siphon type: Low noise (SiphonWashCloset). A siphon toilet uses the suction effect created by water filling the drain pipe (usually called the trap) to remove waste. The structural feature of a siphon toilet is a complete pipe inside the bowl. It is shaped like a sideways "S," utilizing the water level difference during water supply to promote the siphon effect. Because it doesn't rely on water force to flush away waste, the bowl wall slope is gentler, and the water surface area at the bottom is larger. This overcomes the drawback of excessive noise in washdown toilets.
A flushing toilet (blowout water closet) uses a strong water flow (usually a "1" inlet pipe) to flush waste out of the toilet bowl. Waste is quickly flushed away in an instant, resulting in good cleaning and reducing the likelihood of pipe blockage. Flushing toilets utilize the force of the water flow to expel waste. To increase the water pressure falling from the drainage holes around the sill, the bowl walls are usually designed to be steeper. To concentrate the water pressure, the water surface area in the center of the bowl is designed to be smaller. The disadvantages of this flushing method are that it is noisier and, due to the small water seal area, it is prone to scale buildup.
Siphon-jet WaterCloset: Excellent odor and splash prevention. This is an improved version of the siphon toilet. Its structural feature is the addition of a jet channel to the siphon toilet. The jet nozzle is aligned with the center of the sewage pipe inlet, and the jet diameter is usually 20 mm.
When the water supplied from the tank passes through the water ring, part of it flows out through the water distribution hole to clean the pool wall and then falls back into the pool, while the rest is ejected from the spray nozzles through the spray channels. Its function is to use the force of the large water flow to flush waste into the drain pipe. Simultaneously, the large-diameter water flow accelerates the filling of the drain pipe, promoting the formation of a siphon effect. Because the spray occurs underwater, it not only does not increase noise but actually improves the noise problem. This product is intentionally designed to increase the water storage area and limit the water depth, resulting in excellent odor prevention and splash prevention.
Siphon type: This type of toilet uses the siphon effect created by flushing water in the drain to expel waste. During flushing, the flushing water fills the drain, creating a siphon that draws water and waste out of the toilet bowl. The flushing function depends on the pipe structure, water seal height, and the magnitude and direction of the flushing force. A key feature is that it produces less flushing noise than a washdown toilet.
Vortex Siphon Type: Excellent odor and stain prevention, lower noise. It utilizes flushing water sprayed from the side and above the drain hole at the bottom of the bowl to create a vortex. As the water level rises, it fills the drain pipe. When a water level difference is formed between the water surface in the bowl and the drain outlet, a siphon is formed, and waste is discharged. Its structure is basically similar to other siphon types, except that the water supply pipe is located at the bottom of the bowl and extends to the bottom. The biggest advantage of this type of toilet is that it utilizes both vortex and siphon effects. The vortex generates a strong centripetal force on the surrounding water surface, quickly drawing liquid and waste into the vortex, which is then discharged with the siphon. Therefore, the sewage discharge process is fast and thorough, with better odor and stain prevention, and lower noise.
Water-saving toilets: According to the mandatory regulations issued by the Ministry of Construction, the water consumption for each flush cycle should not exceed 6 liters for defecation. When the water pressure is 0.3 MPa, the water consumption for a single flush is 6 to 8 liters for defecation and 2 to 4 liters for urination (if the user performs two flushes, each flush should use the first and second flushes). The flushing time is 3 to 10 seconds.
Bidet basin: As the name suggests, this bathroom fixture is specifically for washing the lower body. Some manufacturers call it a "female wash basin." In fact, it can be used by both men and women, and it is especially useful for people who need to soak in medicinal solutions.
Skirt: In general bathrooms, the "skirt" refers to the edging around the bathtub. Bathtubs with a skirt can usually be installed independently. If not, tiles need to be installed around the bathtub to provide support.
Shower screens: Shower screens are generally installed in the shower area of the bathroom. They come in two styles: wall-mounted and floor-standing. They are equipped with various shower heads, massage spray heads, and water pipes. Some even have other functions such as radios. They allow families who do not want to install a bathtub or whose bathrooms are limited in size to enjoy a comfortable shower.
Bathroom heater: A bathroom heater is a device installed on the ceiling of a bathroom for heating purposes. It is also known as a multi-functional bathroom heater. Its heat source mainly consists of infrared heating lamps, PTC, and nickel-chromium wire. In addition to heating, bathroom heaters also have functions such as ventilation, air blowing, negative ion generation, and lighting.
Shower head: refers to the spray head used in showering.
Integrated ceiling systems: Modern integrated ceiling systems combine heating, ventilation, lighting, and metal ceiling functions into one unit. This means that the installation of heating, ventilation, lighting, and the metal ceiling in the kitchen and bathroom is completed in one step, all by modern manufacturers. Integrated ceiling systems maximize the satisfaction of families' high-standard and personalized needs for kitchen and bathroom renovations.
All About Building Materials: Bathroom Fixtures - Small Bathroom Renovation Case
When decorating a small apartment, are you ever unsure which style to choose because of the limited space? Don't worry, one of these 14 styles is sure to suit you.
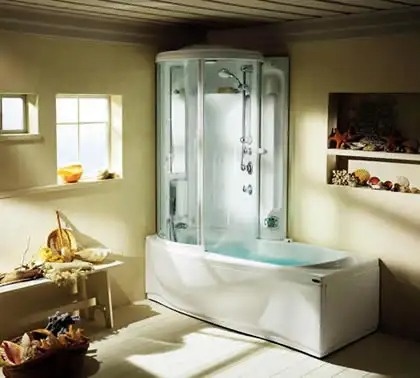
Integrating the shower and bathtub into one unit
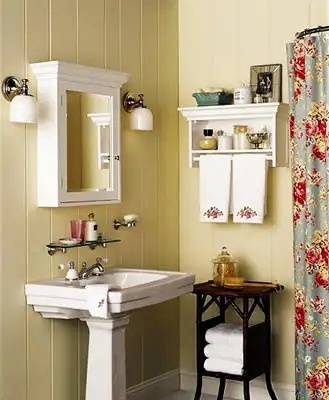
Even small bathrooms can have an English country feel!
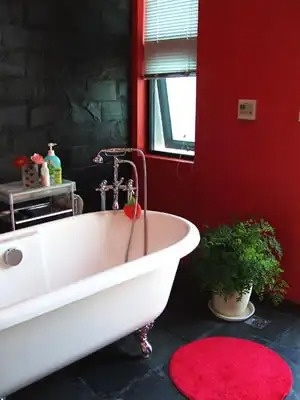
The perfect combination of red and black, along with a bathtub with wheels, makes full use of the small bathroom space.
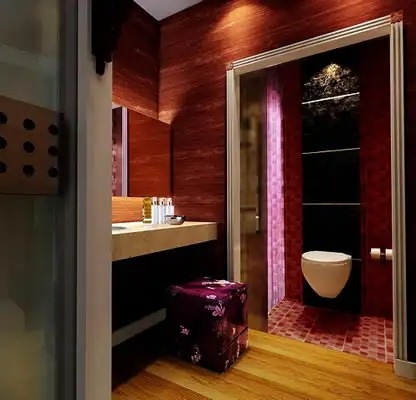
See? You'd never guess this bathroom is only 4 square meters, would you?
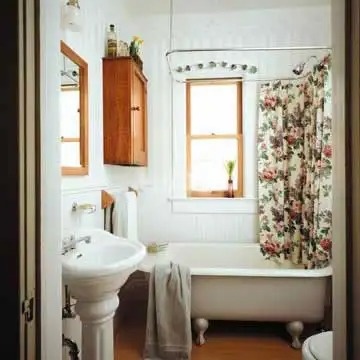
A stunning model bathroom for single women, perfect for sophisticated women.
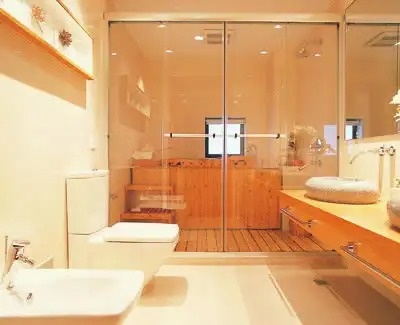
Create a separate shower area in your small bathroom to enhance your bathing experience.
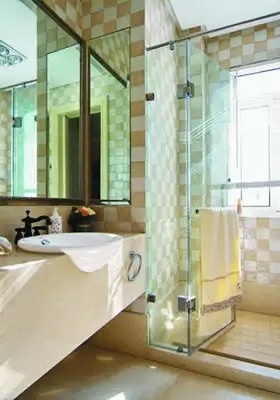
The transparent glass partition makes the bathroom feel less cramped and damp.
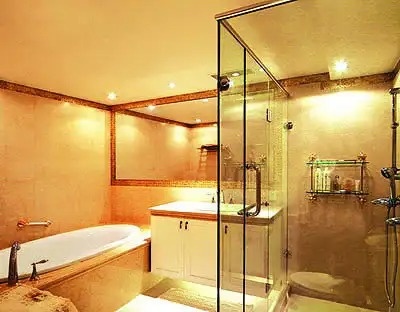
Installing such a large mirror in the bathroom can absolutely transform your small bathroom into a luxurious space.
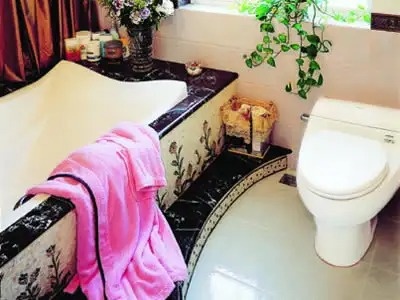
"A toilet that's an inch smaller will make your bathroom a foot bigger."
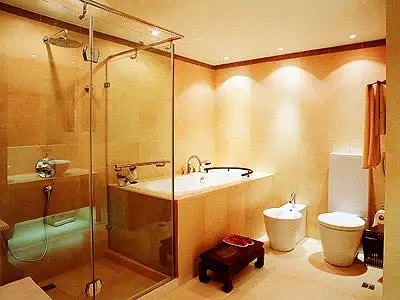
Make full use of the bathroom space to create a dual enjoyment of shower room and bathtub.
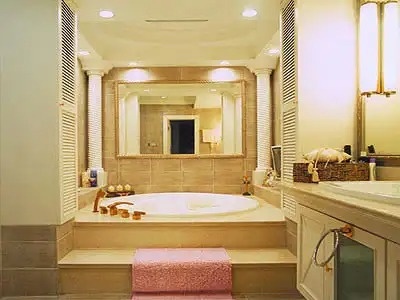
It feels very much like a palace!
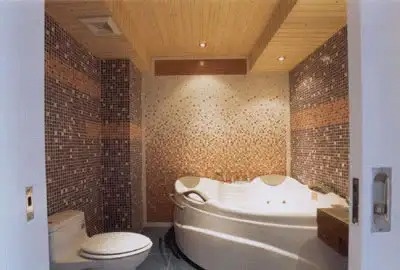
The triangular bathtub makes good use of the corner space in the small bathroom, and the wall design perfectly enhances the overall ambiance.
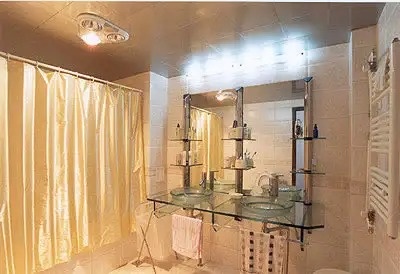
To maintain a clean and refreshing feel in the bathroom, it's essential to separate the shower area.
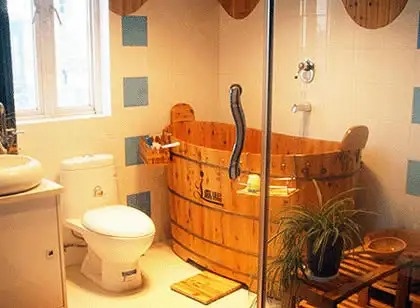
My favorite part of this showroom is the bathtub; it has a unique charm.
All About Building Materials: Sanitary Ware - Washbasins
Washbasins are classified by style
Countertop basin: A basin installed on a countertop with the upper edge of the basin body above the countertop.
Undermount basin: A basin installed on a countertop, with the entire basin body below the countertop.
Pedestal basin: A basin that does not require a countertop and is supported by a pedestal.
Artistic pots: Reflecting the owner's personality, artistic pots have become a trend in coastal areas. When choosing one, consider how it will complement other products.
Washbasins are classified by material
Ceramic basin: A basin made from raw materials such as porcelain clay and fired at high temperatures.
Glass basins: Washbasins made of tempered glass, often sold as a set of countertop basins.
Cast iron basin: A basin made of cast iron through forging, with a layer of enamel glaze on the surface. It is characterized by its long service life.
Acrylic basin: A chemically synthesized material that is processed and molded, usually with the basin body and countertop molded in one piece, mainly used for bathroom countertops.
Methods for identifying washbasins
In addition to the shape, consumers should also pay attention to the quality of the glaze when choosing a washbasin, because a good glaze does not attract dirt, is easy to clean, and remains shiny and new even after long-term use.
Second, when choosing, you can observe the ceramic from multiple angles by holding it up to the light. A good glaze should be free of spots, pinholes, sand holes and bubbles, and the surface should be very smooth.
1. Products with high gloss have pure colors, are not prone to dirt accumulation, are easy to clean, and have good self-cleaning properties. When judging, observe the product's surface reflection carefully from the side under strong light. A good product will have very few or no small pinholes or blemishes. Products with high gloss levels use high-quality glaze materials and excellent glazing techniques, resulting in good and uniform light reflection, thus creating a better visual effect and making the product appear more high-end.
2. When choosing, you can gently stroke the surface with your hand; it should feel very smooth and delicate. You can also touch the back; it should feel slightly rough and gritty.
3: You can also tap the ceramic surface with your hand. Generally, good ceramic materials produce a crisp sound when tapped.
Comparison of washbasin selection
Bathroom decoration and renovation are receiving increasing attention. While practicality is important, aesthetics are also a priority. Therefore, when choosing which washbasin to match, many factors need to be considered.
1. For small bathrooms, a pedestal sink is the best choice.
Ceramic washbasins used in bathrooms are mainly divided into countertop basins and pedestal basins.
Pedestal sinks are more suitable for bathrooms that are small or not used very often (such as guest bathrooms). Generally speaking, pedestal sinks are mostly designed to be very simple. Since the drainage components can be hidden in the pedestal of the main sink, they give people a clean and tidy appearance. Moreover, when washing hands, people can naturally stand in front of the sink, making it more convenient and comfortable to use.
2. For larger bathrooms, a washbasin is an option.
Washbasins are more suitable for installation in larger bathrooms. They can be made with natural or artificial stone countertops and can also be fitted with custom-made bathroom cabinets underneath to store bathroom supplies, making them both beautiful and practical.
The key reference dimensions are the length and width of the installation location.
1. The reference measurements for choosing a countertop basin or pedestal basin are the width and length of the installation location. Generally, as long as the countertop width is greater than 52 cm and the length is greater than 70 cm, it is suitable.
2. You have a lot of leeway in choosing a washbasin. However, if the countertop length is less than 70 cm, it is not recommended to choose a washbasin but a pedestal basin. Choosing a washbasin will affect the installation effect and make the selection of the basin more difficult.
3. In addition, when choosing a washbasin or pedestal sink, you must pay attention to the conditions of the installation location, such as whether it will affect the opening and closing of the door, whether there is a suitable drain outlet, whether there are water pipes in the installation location, etc. If the installation conditions are complicated, you can go to the seller and listen to the advice of professionals.
What are the advantages and disadvantages of countertop basins and undermount basins?
1. Washbasins are divided into two types: countertop basins and undermount basins. This is not a difference in the basins themselves, but a difference in installation. A basin that protrudes above the countertop is called a countertop basin, and a basin that is completely recessed below the countertop is called an undermount basin.
Reverse-mount basins are relatively easy to install. Simply drill a hole in the countertop according to the installation diagram, place the basin in the hole, and seal the gap with silicone sealant. Water won't flow down the gaps during use, making them popular in homes. Reverse-mount basins also offer more design options, providing greater styling flexibility and a more aesthetically pleasing finish. Undermount basins, on the other hand, have a cleaner appearance and are easier to clean, making them more common in public places. However, the joint between the basin and the countertop is more prone to accumulating dirt and grime.
2. Moreover, undermount sinks have higher requirements for installation process: First, an undermount sink mounting bracket needs to be customized according to the size of the undermount sink. Then, the undermount sink is installed in the predetermined position, the bracket is fixed, and then the countertop with the pre-drilled hole is placed on the undermount sink and fixed to the wall. Generally, angle iron is used to support the countertop and then fixed to the wall.
3. Secondly, due to the complex structure of the undermount support frame of an undermount sink, disassembly and assembly are complicated. If the countertop is short, it is difficult to ensure installation quality. Furthermore, undermount sinks have relatively limited design options; the only flexibility lies in the color and shape of the countertop. Therefore, their use in homes is generally driven by ease of cleaning.
What items are used during the installation of a washbasin? Below is a list of the accessories involved in installing a washbasin.
The main accessories for a washbasin include: drain (also called water drain), S-bend, angle valve, and flexible hose.
The drain, also called the water drain, is something we come into contact with every day when washing our hands (the device in the center of the sink). It's generally divided into two types: pull-out type (with a lever control) and fixed type.
10 Classic Bathroom Washbasin Examples with a Stylish and Romantic Style
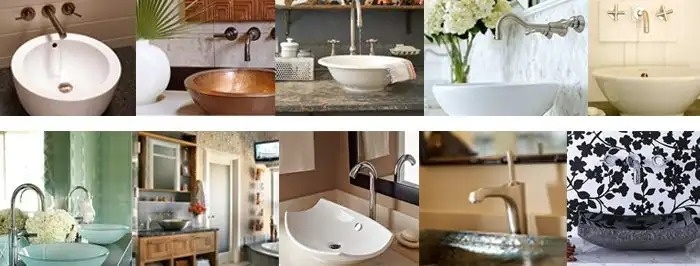
All About Building Materials: Sanitary Ware - Toilets
Classification of toilets
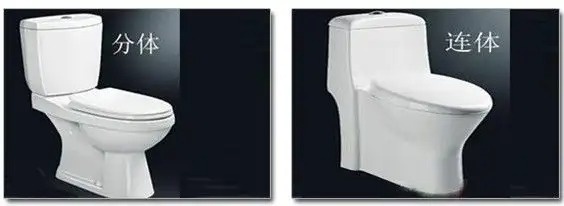
Based on the connection method between the water tank and the base, they are divided into: separate type and integrated type.
1. Two-piece toilet: The water tank and the base are separate, resulting in a larger toilet (taking up more space).
2. One-piece toilet: The water tank is connected to the base, which is beautiful and sturdy and suitable for smaller bathrooms.
Classification diagram:
Toilet Buying Tips
Toilet Buying Tip 1: Weight
The heavier the toilet, the better. A typical toilet weighs around 50 pounds, while a good one weighs around 100 pounds. Heavier toilets generally have higher density and are of better quality. A simple way to test the weight of a toilet is to lift the tank lid with both hands and feel its weight.
Toilet Buying Tip 2: Water Outlet
Ideally, there should only be one drain hole at the bottom of the toilet. Many brands now offer 2-3 drain holes (depending on the diameter), but more drain holes can negatively impact flushing power. Bathroom drains come in two types: bottom-drain and horizontal-drain. Measure the distance from the center of the drain outlet to the back wall of the tank and buy a toilet of the same model to ensure proper installation; otherwise, the toilet cannot be installed. For horizontal-drain toilets, the drain outlet should be at the same height as the drain outlet, or preferably slightly higher, to ensure smooth wastewater flow. A distance of 30 cm indicates a mid-drain toilet; 20-25 cm indicates a rear-drain toilet; and a distance of over 40 cm indicates a front-drain toilet. Even slight discrepancies in the model number can lead to poor drainage.
Toilet Buying Tip 3: Glaze
Pay attention to the glaze of the toilet. A good quality toilet should have a smooth, bubble-free glaze with a saturated color. After inspecting the outer glaze, you should also feel the toilet drain. If it's rough, it's more likely to trap residue later.
Toilet Buying Tip 4: Diameter
Large-diameter sewage pipes with glazed inner surfaces are less prone to dirt buildup, ensuring rapid and powerful sewage drainage and effectively preventing blockages. To test this, place your entire hand into the toilet bowl opening; ideally, it should be able to hold about the size of your palm.
Toilet Buying Tip 5: Water Tank
A leaking toilet tank is usually difficult to detect unless there's a noticeable dripping sound. A simple way to check is to drop some blue ink into the tank, stir it, and then see if any blue liquid flows out of the toilet bowl. If so, there's a leak. A tip: it's best to choose a toilet with a taller tank for better flushing power. (Note: Toilets with a flush volume of 6 liters or less are considered water-saving toilets.)
Toilet Buying Tips 6: Water Fittings
The water fittings directly determine the lifespan of a toilet. There is a significant difference in the quality of water fittings between branded and ordinary toilets. Since almost every household has experienced the frustration of a toilet tank not dispensing water, you should never overlook the water fittings when choosing a toilet. A good way to check this is to listen to the button; a crisp sound indicates the best quality.
Bucket Selection Tip 7: Flushing
From a practical standpoint, a toilet should first and foremost have the basic function of thoroughly flushing. Therefore, the flushing method is very important. Toilet flushing methods are categorized into direct flush, rotary siphon, vortex siphon, and jet siphon. It's important to choose the right flushing method: toilets can be classified by their flushing mechanism as "washdown," "siphon washdown," and "siphon vortex." Washdown and siphon washdown toilets use approximately 6 liters of water and have strong waste removal capabilities, but they are noisier. Vortex toilets use more water but are quieter. Consumers might consider a direct flush siphon toilet, which combines the advantages of both direct flush and siphon flushing, quickly flushing waste while also conserving water.
All About Building Materials: Bathroom Fixtures - Bathtubs
Bathtub Classification
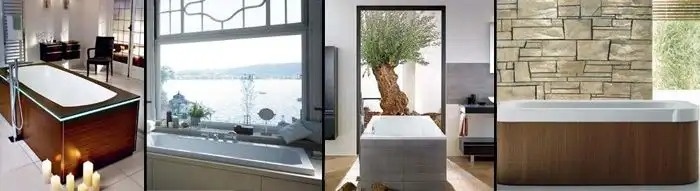
1. Based on style, there are tubs without skirts and tubs with skirts. Styles include heart-shaped, round, oval, rectangular, triangular, etc.
2. According to function, bathtubs can be divided into ordinary bathtubs, massage bathtubs, etc. Massage bathtubs include sit-down massage bathtubs, hydrotherapy massage bathtubs, hydrotherapy air massage bathtubs, pulse massage bathtubs, etc.; according to the material, they can be divided into cast iron bathtubs, acrylic bathtubs, steel plate bathtubs, wooden bathtubs, etc.
Acrylic bathtubs have a large market share. The surface of acrylic material is made of polymethyl methacrylate, and the back is made of resin plaster and fiberglass. Its advantages include ease of molding; good heat retention; excellent gloss; lightweight; easy installation; and a wide variety of colors. Due to these characteristics, acrylic bathtubs are relatively inexpensive. However, compared to ceramic or enamel surfaces, this material has disadvantages such as being prone to getting dirty, producing more noise when filling with water, poor high-temperature resistance, not being wear-resistant, and being prone to aging and discoloration. However, imported acrylic bathtubs are generally of higher quality.
Cast iron bathtubs are known for their long lifespan, high-end appearance, and ease of cleaning. Their thick walls also provide excellent heat retention. Furthermore, cast iron bathtubs have a superior finish and the longest lifespan among the three types of tubs. Cast iron bathtubs offer better acid and alkali resistance and wear resistance than similar products, but their considerable weight makes them challenging to move and install. Due to these factors, cast iron bathtubs are significantly more expensive than acrylic and steel bathtubs, making them the most pricey option.
Steel bathtubs are made of steel plates of a certain thickness, with an enamel coating on the surface. They are not easy to get dirty, easy to clean, do not fade easily, have a long-lasting luster, and are easy to shape and inexpensive. However, because the steel plates are relatively thin, they are not strong enough, produce more noise, the enamel coating is prone to peeling, and the heat insulation performance is poor. Therefore, some bathtubs have an added insulation layer.
Wooden bathtubs are made from various woods, including nanmu, cypress, oak, cedar, and pine. Nanmu bathtubs offer the best overall performance, but are rarely seen on the market. Pine and cedar bathtubs are prone to moisture absorption, blackening, and mold growth, resulting in poorer overall performance. Wooden bathtubs offer advantages such as heat retention, environmental friendliness, small footprint, easy cleaning, long lifespan, and convenient installation. However, they are prone to cracking under prolonged dry conditions, so if the tub is not used for an extended period, it's advisable to keep some water inside.
Jacuzzis utilize circulating water for hydro-massage, but require electricity as a power source. Besides their higher price, jacuzzis require a large bathroom and have stringent requirements for water pressure, electricity supply, and installation. Pulse jacuzzis feature a signal generator that simulates the human body's frequency spectrum, emitting signals that closely resemble the body's spectrum, creating resonance and promoting blood circulation. In addition to massage functions, some jacuzzis are equipped with computer boards that can accommodate telephones, CD players, and radios; others are computer-controlled for automatic water shut-off and refill.
II. Purchase Notes
When choosing a bathtub, you should consider the size and layout of your bathroom. No matter how much you love a bathtub, if it doesn't fit in your bathroom, there's nothing you can do. Here are some tips for choosing a bathtub:
① Compare thickness. You can tap the bathtub to judge its thickness. A thicker bathtub is less likely to crack.
② Listen to the sound. When buying a massage bathtub, also pay attention to the volume of the motor. When purchasing a high-end bathtub, it's best to "test the water" before buying, listening to the sound and testing the temperature.
③ Check the gloss. Examining the surface gloss helps determine the quality of the material and is applicable to bathtubs made of any material.
④ Check the surface smoothness. This applies to steel and cast iron bathtubs, as both require enamel plating, and poor plating processes can result in fine ripples.
⑤ Test the sturdiness by pressing with your hands and stepping on it. The sturdiness of a bathtub is related to the quality and thickness of the materials, which cannot be seen by sight. You need to test it yourself, for example, by standing in it and seeing if you feel it sinking.
⑥ Choose a bathtub that has passed 3C certification.
Wooden bathtubs range in length from approximately 175mm to 86mm, with heights varying from 61mm to 88mm. Generally, older adults should avoid choosing tubs that are too tall. When purchasing a wooden bathtub, consumers should check for cracks on the surface, the tightness of the metal hoops, and whether the knots are loose or tight (tight knots can easily lead to leaks).
All About Building Materials: Bathroom Fixtures - Shower Enclosures
I. The structure can be divided into three types: framed, semi-frameless, and frameless.
(1) Framed: The metal frame is mainly made of aluminum alloy or stainless steel, while the panels are made of tempered glass or PS (Polystyrene). When purchasing, you need to pay attention to whether there are scratches on the surface, whether the joints of the frame materials are tight, whether there is a plastic or metal cover plate on the top of the outer frame, whether the opening and closing is smooth, and whether the door and the gate are fireproof and have magnetic strip design, etc., which directly affect the waterproof effect.
(2) Semi-frameless: The outer frame is made of aluminum alloy or stainless steel, and the panels are mainly made of tempered glass.
(3) Frameless: It is mainly composed of hinges, fixing clips, shear bars and tempered glass. Because it is a frameless design, the wall material and verticality requirements are high. For example, it is not possible to install it in a light partition or integrated bathroom if there is a reinforcement design at the hinge fixing point, otherwise there will be safety hazards.
II. Tempered Glass: It's a common misconception that tempered glass is superior to reinforced glass. Its strength is defined as 4-5 times that of ordinary glass. However, it's important to note that some manufacturers use heat-strengthened glass or semi-tempered glass to reduce costs. These are only 1-2 times stronger than ordinary glass, and their breakage is no different from ordinary glass. The glass used in shower doors must meet safety glass standards, meaning it must pass impact and temperature difference tests before use. Furthermore, the common belief that thicker glass is better is incorrect. As long as it passes the aforementioned tests, thinner glass can actually improve product lifespan (heavier glass puts more strain on pulleys and hinges) and safety. Generally, 3-5mm tempered glass is sufficient for framed glass doors, while 6-8mm tempered glass is adequate for frameless doors.
3. Surface treatment: The metal surface of shower door frame materials can generally be divided into coating (powder or liquid) and electroplating. Regardless of the process used, it is necessary to understand the coating film thickness, hardness, brightness, adhesion, etc., and whether it has passed the thick salt spray and chemical tests. Because it is installed in the bathroom where the temperature is high and chemicals are often used, the surface treatment of metal should not be taken lightly.
4. Type and Size: Bathrooms vary in size and specifications, so both subjective and objective factors must be considered when choosing a door. Generally, door opening methods can be divided into horizontal sliding, outward-opening, and inward-folding types. Additionally, unless the shower space is relatively large, inward-folding doors should be avoided to prevent accidents while someone is showering, which could prevent the door from opening and lead to unfortunate situations.
Shower room selection
① Check the color: Shower enclosure frames come in bone and white, as well as golden yellow, off-gold, bright silver, and matte silver. To maintain a unified color scheme, the shower enclosure color must coordinate with the bathroom fixtures color.
② Check the structure: Shower enclosures come in various shapes and sizes, such as L-shape, diamond shape, and arc shape. The shape of the shower enclosure you choose should be suitable for the structure of your bathroom; otherwise, it will cause installation difficulties. You should also pay attention to whether the frame structure is sturdy and stable, and whether the surface of the materials is smooth and free of wrinkles, peeling, or other defects.
③ Check the workmanship: The shower enclosure must be assembled strictly according to the specifications. The assembled shower enclosure should have a clean and bright appearance. The shower door and sliding door should be parallel and perpendicular to each other, symmetrical from left to right. The sliding door should open and close smoothly and easily, without gaps or leaks. Silicone sealant should be used between the shower enclosure and the shower tray to prevent water seepage.
All About Building Materials: Bathroom Fixtures
Bathroom hardware mainly includes faucets, angle valves, towel racks, towel rings, tissue holders, shelves, soap dishes, and floor drains. Because home bathrooms are used frequently, bathroom hardware must withstand various "severe tests" such as high temperatures and high humidity.
First, product structure and performance: High-quality bathroom hardware products have a stable and sturdy structure. They will not loosen when shaken up and down or left and right by hand. The products have a reasonable and user-friendly design and are easy to use.
Secondly, the surface of the product: High-quality products will undergo surface treatment, and the surface is generally bright chrome. To meet the requirements of consumers with personalized decoration, some products also have an antique or gold finish. The surface is uniform, smooth, without color difference or peeling, and passes the 24-hour acid salt spray test, reaching level 10 or above (regular manufacturers all have test reports from the quality supervision department).
Secondly, consider the product's materials and components: high-quality products use copper as the main material because copper never rusts or oxidizes, ensuring a longer lifespan and high recycling value. When purchasing faucets, pay particular attention to the valve core, which is like the heart of the faucet, controlling its operation. High-quality products on the market use ceramic valve cores, which have excellent sealing performance. Depending on the quality of the valve core, it can generally be used 300,000 to 500,000 times or more. Imported ceramic chips, in particular, have more stable physical properties and a longer lifespan, typically over 10 years under normal use. Lower-end products often use copper or rubber seals, resulting in a shorter lifespan but a lower price.
When choosing a shower head, pay attention to its functionality. The market offers single-function and three-function adjustable shower heads; choose according to your needs. The completeness of the accessories is also crucial. Reputable manufacturers should include the corresponding accessories with the faucet, pull rod, faucet fixing bolts, fixing plates, and washers. Bathtub faucets should also include a shower head, two inlet hoses, and a bracket—all are essential. Some retailers sell accessories separately; when purchasing, be sure to inquire about the standard configuration of each product to avoid missing any accessories.
All About Building Materials: Doors and Windows
Before making a purchase, it is necessary to understand the classification of interior doors and know what kind of interior doors you need. Only by having a clear understanding of your own needs can you choose the ones that you require.
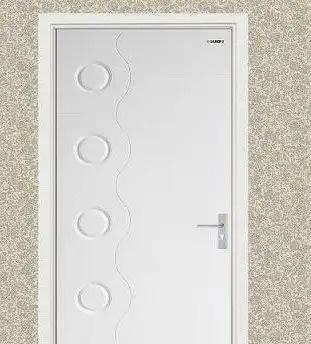
I. Solid wood composite doors
Solid wood composite doors typically have a core made of pine, fir, or imported filling materials bonded together, with an outer layer of MDF and solid wood veneer, manufactured through high-temperature hot pressing and edged with solid wood strips. High-end solid wood composite doors often have a core of high-quality white pine, with a solid wood veneer surface. Because white pine has a low density, is lightweight, and its moisture content is relatively easy to control, finished doors are generally lighter and less prone to warping or cracking. Furthermore, solid wood composite doors also possess heat insulation, impact resistance, and flame retardant properties, and their sound insulation performance is essentially the same as that of solid wood doors.
Because solid wood composite doors come in a variety of shapes and styles, from exquisite European carvings and classic Chinese inlays to modern and fashionable designs, they offer consumers a wide range of choices to suit different decorating styles, hence the name "solid wood decorative doors." High-end solid wood composite doors not only have a smooth feel and soft color, but are also very environmentally friendly, sturdy, and durable.
Compared to the high cost of solid wood doors, modern wooden doors commonly use wood veneer and paper veneer as surface materials. Wood veneer doors are relatively expensive due to their natural texture, beauty, and impact resistance; paper veneer doors, also known as "textured wood doors," are more affordable and popular, but they are more prone to damage and susceptible to water damage.
II. Solid wood doors
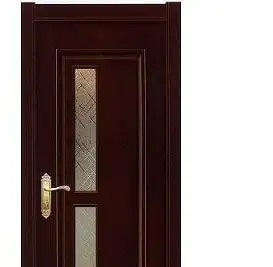
Solid wood doors are made from natural logs sourced from forests. After drying, they undergo scientific processing including cutting, planing, tenoning, drilling, and high-speed milling. Solid wood doors often use high-quality woods such as cherry, walnut, and teak. The finished doors are characterized by their resistance to warping, corrosion, and cracking, as well as their heat insulation properties. Furthermore, solid wood doors effectively provide sound insulation due to their excellent sound absorption.
Solid wood doors, with their natural wood grain and color, are undoubtedly the best choice for families who prefer a natural decorating style. Solid wood doors have always exuded warmth, not only for their luxurious appearance and exquisite carvings, but also for their diverse styles.
The price of solid wood doors varies depending on the type of wood used and its grain. High-end solid woods include walnut, cherry, sapele, and rosewood, while a single top-quality teak door can cost 3,000-4,000 yuan. Generally, high-end solid wood doors undergo a better dehydration process, resulting in a moisture content of around 8%. This makes the finished door less prone to warping and cracking, and extends its lifespan.
III. Molded Wooden Doors
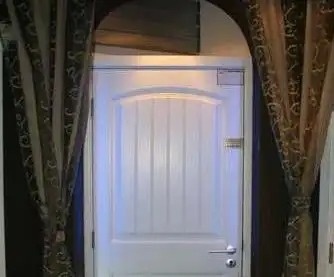
Molded wood doors are favored by middle-income families because they are more economical than solid wood doors and are safe and convenient. Molded wood doors are made by mechanically pressing two pieces of high-density fiberboard with molded shapes and simulated wood grain. Because the door panels are hollow, their sound insulation is naturally worse than that of solid wood doors, and they cannot be exposed to water.
Molded wooden doors use wood veneer panels coated with a clear varnish, preserving the natural texture of the wood. They also allow for panel inlay, making them both aesthetically pleasing and economical. Molded doors are also moisture-proof, have a low coefficient of expansion, and are resistant to deformation. After a period of use, they will not exhibit surface cracking or oxidation discoloration.
Most composite molded wood doors come with a neutral white primer upon delivery, allowing consumers to apply their own paint on top of the primer at home, thus satisfying their personalized needs. Compared to handmade solid wood doors, molded doors are produced using mechanized methods, resulting in lower costs.
All About Building Materials: Doors and Windows – Windows
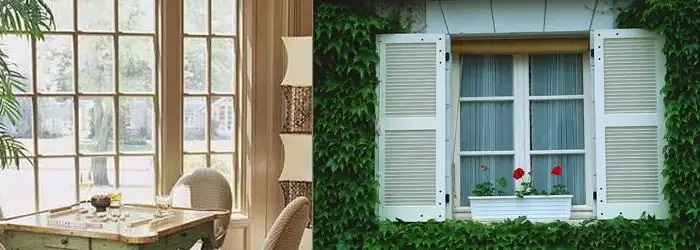
(I) According to the different opening methods, windows can be divided into fixed windows, casement windows, horizontal rotating windows, vertical rotating windows and sliding windows, etc.
1. Fixed Windows: Fixed windows cannot be opened and generally do not have window sashes; the glass is simply fixed to the window frame. Sometimes, to achieve the same facade effect as other windows, window sashes are included, but these sashes are fixed to the window frame. Fixed windows are used solely for lighting and viewing, typically in situations where lighting is the primary consideration and ventilation is secondary. Because the window sash is fixed, the glass area can be slightly larger.
2. Casement Windows: Casement windows have hinges on one side of the window sash, connecting it to the window frame. Like casement doors, they come in single and double sashes and can open inwards or outwards. Casement windows are simple in construction, easy to manufacture and install, and offer good ventilation, making them the most widely used type of window.
3. Horizontal Rotating Windows: Horizontal rotating windows are classified into top-hung, center-hung, and bottom-hung windows depending on the position of their rotation axis. Top-hung and center-hung windows offer better ventilation and rain protection when used as exterior windows, but they are also often used as vents on doors and windows; bottom-hung windows are less commonly used.
4. Vertical Rotating Window: The rotating shaft of the vertical rotating window is located in the middle of the upper and lower sashes, allowing the window sash to rotate vertically. This type of window offers good ventilation and rain protection, and the sash is easy to clean. However, it has a complex structure and poor rainwater leakage prevention performance, so it is not commonly used.
5. Sliding Windows. Sliding windows come in two types: vertical sliding and horizontal sliding. Sliding windows don't take up much space when opened, but the ventilation area is relatively small (only about half the size of an open window). Wooden sliding windows are often heavy and difficult to slide. Currently, aluminum alloy and plastic sliding windows are widely used.
(II) Based on the different materials used, windows can be divided into several types, such as wooden windows, steel windows, aluminum alloy windows, fiberglass windows and plastic windows.
1. Wooden Windows: Wooden windows are a common type of window. They have advantages such as light weight, simple manufacturing, convenient maintenance, and good airtightness. However, wood expands and contracts with changes in climate, sometimes making it inconvenient to open and close, and it consumes wood. At the same time, wood is susceptible to insect infestation and rot, making it less durable than steel windows.
2. Steel Windows. Steel windows are divided into two categories: hollow and solid. The characteristics of steel windows are similar to those of steel doors. Compared to wooden windows, steel windows are sturdy, durable, fire-resistant, moisture-resistant, and have a smaller cross-section. Steel windows have a higher light transmittance, approximately 160% that of wooden windows, but their cost is also higher.
3. Aluminum alloy windows: In addition to the advantages of steel windows, aluminum alloy windows also have the advantages of good airtightness, rust resistance, corrosion resistance, no need for painting, beautiful appearance, and good decoration. However, the cost is relatively high, and they are generally used in buildings with higher standards.
4. Fiberglass windows: Fiberglass windows are lightweight, high-strength, and have excellent corrosion resistance, but the manufacturing process is relatively complex and the cost is relatively high. Currently, they are mainly used in highly corrosive environments.
5. Plastic Windows: Plastic windows come in a variety of colors and, like aluminum alloy windows, are a new type of door and window material. Due to their attractive appearance, durability, and good sealing properties, they are gradually being widely adopted.
(III) According to the different inlay materials, windows can be divided into several types, such as glass windows, screen windows, louvered windows, heat-insulating windows and windproof and sandproof windows.
Glass windows can meet the requirements of lighting; screens can prevent mosquitoes and flies from entering the room while ensuring ventilation; louvers are generally used in rooms that only need ventilation and do not need lighting. There are two types of louvers: fixed louvers and movable louvers. Movable louvers can be added to the outside of glass windows to provide sunshade and ventilation.
(iv) Based on the location of windows on a building, windows can be divided into two main categories: side windows and skylights. Windows installed on the interior or exterior walls are called "side windows"; windows installed on the roof are called "skylights".
The windows described above are all side windows. When side windows cannot meet the requirements for lighting and ventilation, skylights can be installed to increase lighting and improve ventilation. Depending on their construction, skylights can be divided into upward-facing skylights, downward-facing skylights, flat skylights, and sawtooth skylights.
All About Building Materials: Doors and Windows – How to Choose Doors and Windows
1. Examine the frame material: The quality of the frame material directly determines the quality of the doors and windows. Doors and windows made with inferior frame materials have low strength and are prone to discoloration and deformation. Requirements for frame materials:
1. Appearance: Natural color, smooth and flat surface, uniform appearance.
2. Multi-cavity structure: It has independent drainage cavities and steel reinforcement cavities to prevent steel lining corrosion and better perform heat insulation and noise reduction functions.
3. It has a certain degree of strength and elasticity. 4. To prevent lead poisoning, lead-free, environmentally friendly profiles should be selected.
II. Examine the Accessories: The selection of hardware, steel reinforcement, weatherstripping, and other accessories is crucial for the production of high-quality doors and windows. When PVC doors and windows are fitted with insulated glass, the weight per square meter can exceed 40 kilograms, thus requiring high standards for various accessories. The quality of accessories from different manufacturers varies greatly, and the price can differ by several times. Inferior accessories break down after a short period of use, causing window sashes to sag, become difficult to slide, open and close improperly, have poor seals, and even pose safety hazards. There are many painful lessons learned in this regard.
Third, examine the manufacturing process: Production equipment and technology determine the overall performance of doors and windows. According to national standards, the diagonal difference of PVC doors and windows should be controlled within 2-3 millimeters, requiring strict process parameters and control ranges. This necessitates certain production equipment and processes, as well as a highly qualified workforce. Therefore, the quality of PVC doors and windows produced by street workshops and those from reputable manufacturers is vastly different.
IV. Installation Inspection: Installation is 70% installation and 30% manufacturing. Neglecting installation standards can lead to future door and window deformation. The coefficient of thermal expansion for PVC windows and doors is almost six times that of steel, so expansion joints must be left between the window frame and the wall to prevent deformation due to thermal expansion and contraction or slight building settlement. To ensure waterproofing, insulation, and soundproofing, these expansion joints must be filled with elastic material and then sealed with sealant. These materials are relatively expensive and vary greatly in quality; therefore, it is crucial to prevent shoddy workmanship and the use of inferior materials during installation.
5. Check the service: PVC windows and doors have a lifespan of over 15 years. During use, glass breakage and hardware damage are inevitable, which are difficult for users to resolve on their own. This requires manufacturers to provide long-term and comprehensive after-sales service. Choosing a reputable manufacturer is definitely more reliable than choosing a shoddy workshop.
6. Check the price: Compare prices from three different vendors, but only on the basis of the same materials and performance. If you only care about the cheapest price and do not compare the price with the performance, the user will always be the one who suffers.
All About Building Materials: Coatings - Types of Coatings
I. Wood Coating
1. Nitrocellulose Lacquer. Nitrocellulose lacquer is a transparent varnish made from nitrocellulose, alkyd resin, plasticizers, and organic solvents. It is a volatile paint and is characterized by fast drying and a soft gloss. Nitrocellulose lacquer comes in three types: gloss, semi-gloss, and matte, which can be selected according to needs. Nitrocellulose lacquer also has its disadvantages: it is prone to whitening in high humidity, has low fullness, and low hardness.
A) Hand-applied varnish. A type of nitrocellulose varnish, it is a non-transparent varnish made from nitrocellulose, various synthetic resins, pigments, and organic solvents. This varnish is specifically formulated for manual application and features fast drying.
B) Main auxiliary agents for nitrocellulose lacquer:
a. Thinner. It is a colorless, transparent liquid with a banana-like odor, composed of a mixture of organic solvents such as esters, alcohols, benzene, and ketones. Its main functions are to blend nitrocellulose lacquer and to act as a curing agent.
b. Anti-whitening agent, also known as ethylene glycol monobutyl ether. When applying paint in humid weather, the paint film may turn white. This can be eliminated by adding 10-15% nitro-magnetized whitening agent as a diluent.
2. Polyester paint. It is a thick paint made with polyester resin as the main film-forming agent. Polyester paint produces a full, thick, and hard film. Polyester paint also has a clear varnish variety, called polyester varnish.
3. Polyurethane Paint. Polyurethane paint, also known as polyurethane varnish, is a type of paint that produces a tough, glossy film with strong adhesion. It is water-resistant, wear-resistant, and corrosion-resistant. It is widely used in high-end wooden furniture and can also be used on metal surfaces. Its main disadvantages include blistering in damp conditions and chalking of the paint film. Like polyester paint, it also suffers from yellowing. The clear varnish variety of polyurethane paint is called polyurethane clear varnish.
II. Interior Wall Paint
Interior wall paint can be mainly divided into water-soluble paint and latex paint.
Latex paint is commonly used in interior decoration. Latex paint is a type of emulsion paint, which is divided into two main categories based on the base material: polyvinyl acetate emulsion and acrylic emulsion.
Latex paint uses water as a thinner and is a type of paint that is easy to apply, safe, water-resistant, and breathable. It can be mixed to create different colors according to various color schemes. The main components of latex paint are water, pigments, emulsions, fillers, and various additives; these raw materials are not toxic. The potentially toxic components in latex paint are mainly ethylene glycol in the film-forming agent and organic mercury in the mildew inhibitor.
The so-called latex paints on the market that supposedly contain a lot of formaldehyde are actually water-soluble paints, not latex paints. Some unscrupulous manufacturers use inferior water-soluble paints to counterfeit latex paints.
III. Exterior Wall Paint
The basic properties of exterior wall latex paint are similar to those of interior wall latex paint. However, the paint film is harder and has stronger water resistance. Exterior wall latex paint is generally used on exterior walls, but can also be used in high-humidity areas such as bathrooms.
Of course, exterior wall latex paint can be used inside, but please do not try to use interior wall latex paint on the outside.
IV. Fire-retardant paint
Fire-retardant paint is a type of flame-retardant coating made from various materials such as film-forming agents, flame retardants, and foaming agents. Given the extensive use of flammable materials such as wood and fabric in homes today, fire prevention has become a crucial issue.
All About Building Materials: Paints - Latex Paint
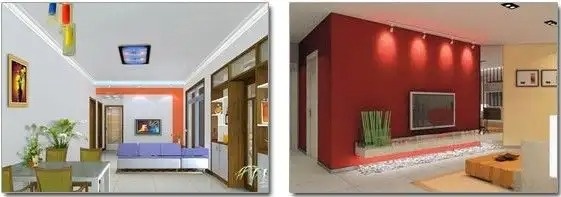
Interior wall paint, exterior wall paint
Based on the gloss effect of the decoration, it can be divided into types such as matte, satin, silk, and gloss.
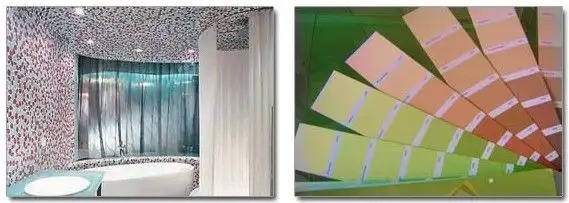
Matte
Silky sheen, glossy sheen
All About Building Materials: Paint Edition – 8 Things to Know When Buying Latex Paint
First, a good price-performance ratio should be the selection criterion. Consumers should choose latex paints with appropriate characteristics based on the different functions of the rooms. For example, bathrooms and basements are best suited for paints with good mold resistance, while kitchens and bathrooms should choose products with good stain resistance and scrub resistance. In addition, considering the impact of the natural environment on buildings, choosing latex paints with a certain degree of elasticity is beneficial for covering cracks and protecting the decorative effect of walls.

2. Determine the purchase quantity based on actual needs. When purchasing paint, carefully read the instructions on the packaging and determine the quantity based on the area to be painted. Never pour leftover paint down the drain to avoid water pollution. Always wash your hands after handling paint to prevent potential hazards.

3. If any clumps remain after stirring the purchased latex paint after opening the can, it should be returned or replaced immediately. Pay attention to the production date and shelf life; the shelf life stated on different brands of latex paint varies from 1 to 5 years.
IV. Choose a multifunctional product that suits your needs
5. Rooms painted with latex paint should not be used until at least one week later. Usually, one week after application, most of the VOCs and free formaldehyde in the paint film will be released into the air and expelled outdoors through ventilation.

VI. Comparative Testing to Guide Latex Paint Selection: Consumers are likely most concerned with environmental friendliness and price. The most important factor in the environmental performance of latex paint is its volatile organic compound (VOC) content. National standards stipulate that the VOC content in each liter of latex paint cannot exceed 200 grams.
VII. Branded paints are generally considered to be environmentally friendly and reliable. According to the published results, the environmental performance of latex paints basically meets the standards. The content of volatile organic compounds (VOCs) and soluble heavy metals in all samples meets the national standards; only one sample exceeded the upper limit of the national standard for formaldehyde content.
8. Higher Price Does Not Equal Better Performance: Regarding the price issue that consumers care about, test results show that a higher price does not necessarily mean better performance. The price of latex paint on the market varies considerably, with 83 samples ranging from 7 yuan to 117 yuan per liter. Comparing the most expensive sample at 117 yuan per liter with one at 63.5 yuan per liter, there was no significant difference in test results for various performance aspects such as environmental friendliness, coverage, stain resistance, and mold resistance. Furthermore, some products with significantly different unit prices showed varying performance characteristics. Special reminder: When purchasing such products, a good price-performance ratio should be the selection criterion. Consumers should choose latex paint with appropriate characteristics based on the different functions of the rooms. For example, bathrooms and basements are best suited for latex paint with better mold resistance, while kitchens and bathrooms require products with better stain resistance and scrub resistance. Choosing latex paint with a certain degree of elasticity is beneficial for covering cracks and protecting the decorative effect of walls. Also, choose multi-functional products that suit your needs.
All About Building Materials: Wallpaper Edition - Types of Wallpaper
Based on their material composition, wallpapers can be roughly divided into the following categories:
1. Plastic wallpaper:
This is a common type of wallpaper on the market, and the plastic used is mostly polyvinyl chloride (or polyethylene), which is abbreviated as PVC plastic wallpaper.
Plastic wallpaper is generally divided into: ordinary wallpaper, foamed wallpaper, etc. Each category is further divided into several varieties, and each variety is further divided into various patterns and colors.
Ordinary wallpaper uses 80g/m² paper as the base material, coated with approximately 100g/m² of PVC paste resin, and then printed and embossed. This type of wallpaper is often divided into several types, including matte printing, glossy printing, monochrome embossing, and printed embossing.
2. Foamed wallpaper:
Foamed wallpaper uses 100g/m² paper as the base material, coated with 300-400g/m² of PVC paste resin mixed with a foaming agent, and then printed before foaming. This type of wallpaper appears thicker and softer than ordinary wallpaper. High-foamed wallpaper has a resilient, textured surface; low-foamed wallpaper has patterns printed on the foamed surface, resembling embossing, wood grain, or tile effects.
3. Pure paper wallpaper:
It is mainly made of grass, bark, and modern high-grade new natural reinforced wood pulp (containing 10% wood fiber). The patterns are natural, elegant and simple. The application technique is simple. It is not easy to peel or bubble. It has no odor, high environmental performance and strong breathability. It is the designated wallpaper for children's rooms in Europe. In particular, the modern new reinforced wood pulp wallpaper has the characteristics of being washable, anti-static and dust-free.
4. Natural Effect Wallpaper
It is a wallpaper with a surface layer made of grass, wood, leaves, etc., with a simple and natural style, elegant and generous, full of life, giving people a feeling of returning to nature.
5. Wood fiber wallpaper
This wallpaper boasts superior performance, overcoming many shortcomings of traditional wallpapers, making it a classic, practical, and high-end option. Made from fine wood fibers extracted from special Nordic tree species or synthetic polyester, it uses matte pigments (extracted from fresh flowers and flax), resulting in a soft, natural finish that easily complements furniture. It comes in a wide variety of patterns and colors; it poses no chemical harm to the human body, has excellent breathability, allowing moisture from the wall to pass through; even with long-term use, it won't feel stuffy—hence the term "breathable wallpaper"—making it a top choice for healthy homes. It is durable, washable with water, and can even be cleaned with a brush. Its tensile strength is 8-10 times greater than ordinary wallpaper. It is mildew-proof, moisture-proof, and insect-proof, with a lifespan 2-3 times longer than ordinary wallpaper.
6. Metallic wallpaper:
Rich and elegant, noble and luxurious—that's the experience metallic wallpaper offers. However, this feeling is usually only found in hotels, restaurants, or nightclubs. It's used in small sections of modern home special effects walls.
This type of metallic wallpaper is made by applying thin sheets of metals such as gold, silver, copper, tin, and aluminum, after special treatment, to the surface of the wallpaper. The lines formed by this type of wallpaper are quite bold and unrestrained. Using a whole sheet on the wall may look tacky, but with appropriate embellishment, it can bring out a dazzling and avant-garde look without leaving a trace.
All About Building Materials: Wallpaper Edition – Five Key Aspects to Consider When Buying Wallpaper
1. Environmental friendliness is the primary consideration when choosing wallpaper. Wallpaper comes in various materials. In the home, try to avoid using PVC synthetic wallpaper, as its environmental performance is inferior to that of natural materials such as wood pulp wallpaper, wood fiber wallpaper, and fabric wallpaper, especially those wallpapers that smell of plastic.
2. Wallpaper quality cannot be judged solely by price. Many wallpapers are now shockingly expensive, even costing thousands of yuan per roll. Therefore, consumers need to learn more about wallpaper selection. When choosing, try wiping it with water and burning it, and compare different options to find truly high-quality, low-priced wallpaper. In particular, learn to identify genuine wood fiber wallpaper, which is considered the finest quality wallpaper, boasting advantages such as high environmental friendliness, high breathability, washability, and stable colorfastness.
3. When choosing wallpaper, consider the overall design. You might really like the pattern and color of a particular wallpaper, but when it's used extensively, the effect might not be great, or it might clash with the overall style of the room and furniture. Therefore, wallpaper selection should start with the overall aesthetic. First, determine your preferred style, and then consider the color, pattern, and characteristics of the wallpaper, ensuring a personalized approach based on individual preferences and room characteristics. Generally, different patterns and colors of wallpaper are chosen for each room based on its function. Also, always try to get a feel for your favorite wallpaper by holding it up to 2 meters away against the light.
4. Wallpaper is generally 0.53 meters wide and 10 meters long, with each roll covering approximately 5.3 square meters. In actual installation, there is a reasonable wastage rate of 10% to 20%, with larger patterns resulting in even greater wastage. Therefore, this should be accounted for when purchasing wallpaper. Furthermore, wallpaper installation is a relatively complex process, and it is essential to hire professional installers.
5. Wallpaper installation must use imported water-based environmentally friendly adhesive, because the raw materials for this adhesive are extracted from wheat and corn.
All About Building Materials: Wallpaper Edition – Wallpapers for a Chic and Refined Look
Rich red, deep black, mysterious blue—any of these colors can perfectly adorn a home.
I. Elegant and Noble Beige Wallpaper
Beige always exudes elegance and nobility, quietly yet undeniably charming. A whole wall of beige wallpaper with small, irregular patterns creates a tranquil and elegant space, paired with a classic leather sofa and chairs full of design flair, making you feel as if you're in a European aristocratic palace.
II. Fresh and natural blue floral wallpaper

The living room features light blue floral wallpaper, creating a fresh and natural feel that brings a touch of coolness to a summer day. Light blue makes the space feel brighter, while the floral pattern adds a sense of intimacy, making the room warm and comfortable. Combined with a simple sofa, pure colors, and a rustic style, the room presents a rational beauty, returning to a simple and natural aesthetic.
III. Mysterious and alluring blue-green wallpaper
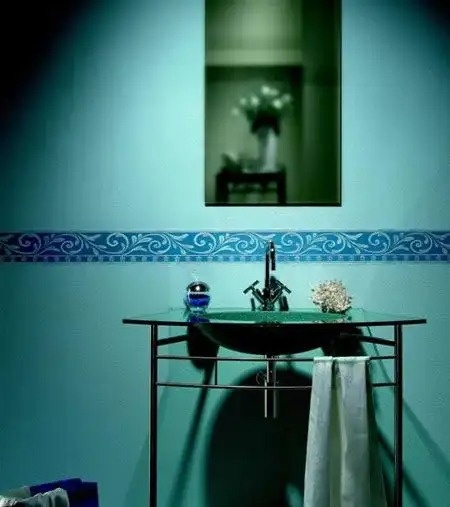
Wallpaper can also be used in the bathroom; blue-green wallpaper instantly gives the space a seductive ambiance. It creates subtle interplay of light and shadow under different lighting angles. Paired with simple, modern bathroom products, it creates a unique and stylish look.
IV. Red Wallpapers with a Myriad of Styles

If you have a fiery personality, and if you want to exude charm, then put up red wallpaper. Red wallpaper makes a space so bright and elegant, and also brings a sense of calm and joy, so there's no room for any "shadow" here.
V. Classic and elegant black wallpaper

This black floral wallpaper perfectly embodies classic elegance. Elegance can be classic, but without the fuss and seriousness of the classic style.
● Construction phase during renovation
Renovation Process - Construction Preparation
Construction preparation includes property registration before construction, acceptance of basic materials according to standards, protection of standard finished products, determination of construction specifications by setting out standard lines, civilized construction standards, and safety production standards.
Construction preparation and property registration matters
The following preparations should be made before starting renovations:
1. Sign the renovation agreement issued by the property management company of the residential community.
2. Provide your own home renovation drawings, mainly for water and electrical circuit modifications and the demolition of non-load-bearing walls.
3. Obtain a "Construction Permit," which is used to affix to your own door during construction to serve as proof of the construction period for property management inspection.
4. Access passes: These are mainly for workers to prevent unauthorized personnel from entering the community during the renovation period.
5. Renovation deposit (the amount varies from community to community, there is no uniform standard. It is generally refunded to the homeowner 3 months after the renovation is completed).
6. Garbage removal fee: This fee is used to pay the property management company for cleaning up construction waste. Different property management companies charge different fees.
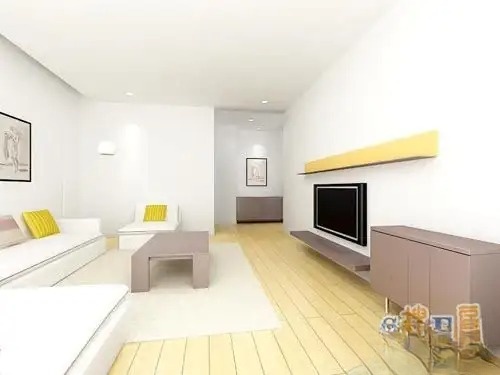
Standard acceptance of basic construction materials
1. After all boards are put into storage, the two narrow edges are painted blue as an identification mark for boards exclusively supplied by Kuoda Company.
2. PP-R cold water pipes and their fittings, such as elbows and tees, are green in appearance, while PP-R hot water pipes and their fittings, such as elbows and tees, are yellow in appearance. During construction, cold and hot water pipes must not be mixed.
3. Electrical conduits and accessories
(1) The appearance of galvanized iron pipes and their fittings is hot-dip galvanized metallic color.
(2) The PVC conduit and its accessories and junction boxes are blue in appearance.
4. Electrical wires: Use national standard wires. Red is the phase wire, blue is the neutral wire, yellow-green is the grounding wire, and white is the lighting circuit wire.
5. Waterproof coating: The waterproof coating is blue. Apply at least two coats to achieve the standard color requirement.
6. Ground hardener: The surface hardener is green in color. After application, it should completely cover the surface and create a green effect.
7. The wall lining is light yellow in color. It is mixed with water to form a paste, which is then applied to the wall and dried to create a uniform yellow color.
8. Various signs
(1) The protective cover of the junction box is blue, and the junction box has the Kuoda logo and the high voltage logo.
(2) The workbench surface is blue, the workbench support and legs are gray, and the signage is red.
(3) All working wooden ladders shall be painted yellow.
(4) Workers’ uniforms are bright yellow with some blue decorations.
(5) The project schedule is white with a blue border and the font color is white and black.
(6) Switches, sockets, hot and cold water, and the direction of floor tiles and flooring installation should be marked in red.
(7) The construction sign for “Completed Surface Standard Line” has an orange-yellow background with black zebra stripes and blue and white lettering. Other signs have a blue background with yellow and black zebra stripes and yellow and white lettering. The advertising nails are made of stainless steel wire.
9. Packaging
(1) Timber: Standard 20mm×30mm planed pine timber, with the ends of the timber painted blue for 100mm, and 6 pieces packaged together in plastic film.
(2) The sand delivered by the unified distribution is in white bags with blue lettering on the surface.
(3) Waterproof coatings, ground curing agents, white latex, etc. are packaged in white plastic buckets and have uniform labels.
(4) The wall lining is in its original factory packaging and has markings.
(5) Latex paint, oil paint, etc. are in original factory packaging and have labels.
10. Prohibited behaviors
(1) Colors and markings are an important part of standard engineering and must not be changed arbitrarily.
(2) Products that do not conform to the standard engineering color recognition standard are prohibited.
Standard Finished Product Protection
Protection standards for front doors
1. The entrance door should be fully wrapped and protected with the company's standard door stickers, and the protective film should be firmly and smoothly attached with transparent tape.
2. The top edge of the outer frame of the words "Please understand" should be 1700mm from the ground. The border of the words "Please understand" on the door should be centered horizontally. If the door is a double door, the border of the words "Please understand" on the door should be on the double door, and the integrity of the pattern should be maintained.
3. Use standard protective film to completely protect the three sides of the door frame and fix it firmly.
4. If there are adhesive residues when removing the protective film after the project is completed, use alcohol or a special cleaning agent to remove them.
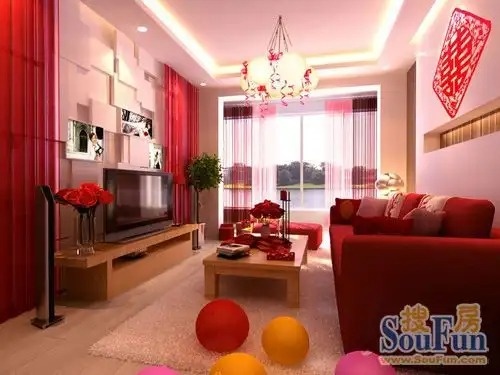
Door handle
1. When protecting the entrance door, leave the corresponding hole diameter on the door handle, and use transparent tape to firmly fix the door sticker below the handle. Cut the standard protective film into strips 50mm wide, wrap it around the door handle for protection, and fix it firmly with transparent tape. It should not fall off during use.
2. After the door handle is installed on the interior door, wrap it completely with plastic wrap and secure it firmly with transparent tape.
Finished product protection standards for windows
1. First, place the company's standardized promotional posters with the text facing outwards in the center of the left and right sides of the window. The bottom edge of the promotional poster should be 500mm from the windowsill, or 1000mm from the ground if there is no windowsill.
2. Protect all interior and exterior window sashes with standard protective film, with the lettering facing outwards and the markings or lettering on the protective film kept horizontal and vertical, and the protective film laid flat and firmly fixed.
3. If there are adhesive residues when removing the protective film after the project is completed, use alcohol or a special cleaning agent to remove them.
Heating equipment (underfloor heating pipes, radiant film, radiators)
1. Underfloor heating
1) Drilling holes or cutting grooves in the floor for underfloor heating is prohibited.
2) It is forbidden to allow large amounts of water to accumulate on the ground when using underfloor heating. Small amounts of water should be cleaned up promptly.
3) It is forbidden to place heavy objects on the water distribution unit of the underfloor heating system.
4) Do not adjust the thermostat switch at will, and do not turn off the heating valve of the water heater during construction.
5) Wrap the temperature control switch and the floor heating hot water valve with a standard protective film.
2. Electric radiant film heating
1) Ceiling construction is prohibited on surfaces with electric heating radiant film.
2) When installing the lamps, the position should be determined according to the distribution diagram of the heating film to ensure that the heating film is not damaged.
3) It is forbidden to drill holes or cut grooves vertically above the control switch of the electrothermal radiation film.
4) Wrap the control switch with a standard protective film.
3. Hot water heating
1) Do not dismantle any heating pipes, valves, or ancillary facilities.
2) It is forbidden to place items on the heating radiator.
3) It is strictly forbidden to hang items on heating pipes and radiators.
4) During construction, care should be taken to protect the heating pipes, accessories, and radiators, especially the air vents.
5) Wrap the radiator fins completely with standard protective film, ensuring the four corners are square. Leave ventilation channels at the top and bottom.
water meter
After the water meter installer arrived, he wrapped the water meter twice with a standard protective film cut to 300mm wide and then secured it with transparent tape, fixing both ends of the water meter firmly with the valve exposed.
Gas meter
After the gas meter installer arrives, they cut a protective strip 300mm wider than the gas meter using standard protective film, wrap it around the gas meter with the lettering facing outwards, and then secure it to the back of the gas meter with transparent tape.
electrical box
1. Use a brush to clean the dust and debris from inside the electrical boxes.
2. Protect the electrical box with a standard protective film. The size of the protective film should be the same as the size of the outer frame of the distribution box. Secure the top of the electrical box firmly with transparent tape.
walkie-talkie
1. Protect the back box of the walkie-talkie with a standard protective film, and mark the hands-free, answer, and door open buttons on the walkie-talkie with a pen to make them convenient to use.
2. Wrap the walkie-talkie microphone with a standard protective film and secure it firmly with transparent tape.
3. After protection, the walkie-talkie should be kept in normal working order.
Sewer outlet
1. Cut a standard protective film into a square with a side length four times the diameter of the drain pipe. Fix the double-layered protective film directly above the drain outlet and secure it with transparent tape along the outer diameter of the drain pipe.
2. Temporary toilets may be used only with the customer's consent.
3. The temporary toilet should be placed at the location of the main drain in the bathroom.
Sockets and switch boxes
1. Before the water and electricity construction, except for the necessary switches and one construction power socket in each room, all other switch panels and sockets should be removed and handed over to the customer for safekeeping, and the customer should sign to acknowledge receipt.
2. Protect the removed switch panels and socket boxes with blue protective covers.
3. When applying wall lining, remove the blue protective cover and reinstall it after application.
4. When tiling the wall, remove the blue protective cover and reinstall it after the tiles are laid.
5. When installing the blue protective cover, the "Kuoda" lettering should face upwards.
Wire ends
1. After the circuit modification is completed, use special wire end protectors to cover and protect all exposed wire ends.
2. After coiling the wires in the wall junction box, put them back into the junction box.
3. The wire ends of the electrical wires inside the ceiling should be coiled up after being pulled back.
4. When installing switch panels and sockets, remove the wire protection caps and store them for continued use at the next construction site.
Buried pipelines
1. Secure the buried pipelines firmly with special clamps.
2. For ordinary functional rooms, use plaster to fill the grooves. For functional rooms such as kitchens and bathrooms, apply waterproof coating to the grooves and then fill them with cement mortar.
3. Apply fiberglass cloth or special caulking tape with white glue to the groove, which is twice the width of the groove.
4. After laying tiles on the concealed pipes in functional rooms such as kitchens and bathrooms, affix "water and electricity line markings" to the tiles along the pipe route.
floor tiles
1. After the floor tiles are laid, use a utility knife to clean all the gaps between the tiles, ensuring that the gap depth is at least 20mm.
2. After tiling a room, clean the surface of the tiles and protect it with Kuoda composite protective film.
3. The protective film should be laid flat, clean and neat. Use transparent tape to fix the edges of the protective film and the seams between the films.
Semi-finished or finished furniture and wood products
1. After the decorative panels arrive, apply two or more coats of clear varnish and place them in pairs.
2. After the furniture is made, use newspaper or the backing paper of Boeing film to fold into a U-shape to protect the inside of the cabinet.
3. When painting or smudging is involved, the cabinet door should be removed before painting or smudging to avoid cross-contamination of colors.
Sanitary ware
1. After the sanitary ware is installed, seal it in the original packaging carton or wrap it tightly with Kuoda standard protective film.
2. Shower heads, faucets and other bathroom hardware should be wrapped with the original protective film or with a pre-made protective film.
wooden floor
1. Before installing the wood flooring, clean the floor with a vacuum cleaner.
2. After the wood flooring is installed, use the moisture-proof pad or standard protective pad provided with the product to protect the passageway.
Air conditioning facilities
1. It is strictly forbidden to dismantle or move air conditioning equipment.
2. Clean the air conditioner return air filter regularly.
3. Wrap the central air conditioning fan coil units and tightly wrap the existing split-type air conditioner cabinet or wall-mounted units in the room.
Temperature control and regulation equipment
1. The air conditioner speed control switch should be set to medium or low fan speed and wrapped with a standard protective film for protection.
2. Protect easily damaged equipment such as pressure gauges in the air conditioning control room by wrapping them with standard protective film.
Other facilities to be protected: 19.1 Smoke detectors and fire sprinkler heads shall be protected by wrapping them with standard protective film.
1. Gas water heaters or heating boilers that have been fixedly installed on the walls of kitchens and bathrooms before construction should be tightly wrapped with Kuoda standard protective film.
2. When leveling the ground, use plastic wrap to protect the bottom of the door frame up to 300mm from the ground.
3. After leveling the ground with cement mortar, apply a protective coating of Kuoda Green Ring environmentally friendly curing agent.
4. When using wooden ladders on finished or semi-finished products, wrap the bottom of the ladders with protective film.
Prohibited behaviors
1. Construction was carried out without protecting the finished product upon arrival at the site, the protective film was removed without permission during the construction process, or the protective film was not replaced in a timely manner after it was damaged.
2. Finished products must not be left unprotected after completion, as this may cause damage.
3. Failure to follow regulations in protecting finished products is prohibited and will damage the company's image.
4. Air conditioning is prohibited during dusty operations.
Standard construction layout determines the inspection standards for construction.
Laying out and measuring:
1.1 Standard for laying out vertical cross lines on the ground:
1.1.1 Before commencing construction, clean the site surface with a mop to facilitate the marking of lines.
1.1.2 Lay out vertical lines on the ground, using the center line of the entrance door as one reference line, and the center line of the living room or the opposite room's door as another reference line to draw corresponding ground cross control lines. Continue this process, drawing ground cross control lines for each room from the outside in. Principles: When drawing lines, use the center line of the door if possible; use the same line for different rooms; use mm as the unit for marking.
1.1.3 When making the door frame opening, make two perpendicular lines on both sides of the opening, perpendicular to the door center line (one of the cross control lines), and fill in the opening according to the two lines.
1.1.4 Determine the horizontal position of the cabinet and its shape based on the ground cross control lines and drawings, and mark the corresponding ground lines for the cabinet and other shapes.
1.1.5 For rooms with wooden floors, use a floor marking template and spray red paint at the center line of the cross control line. For rooms with tiled floors, use a tile marking template and spray red paint.
1.2 Standards for laying out horizontal lines:
1.2.1 Determine the 1200mm horizontal standard line of the room by looking up 1200mm from the highest point of the living room floor. Use the living room line as a reference to mark the horizontal standard lines of other rooms. Fix the "horizontal standard line sign" (the lower edge of the sign should be aligned with the horizontal standard line) above the horizontal standard line using plastic expansion bolts.
1.2.2 Determine the standard line of the finished surface according to the upper edge of the finished surface, and fix the "finished surface standard line sign" above the finished surface standard line with plastic expansion bolts (the lower edge of the sign should be aligned with the finished surface standard line).
1.2.3 Determine the lower horizontal elevation line of the ceiling according to the designed ceiling elevation (leave room for the thickness of the putty application, no marking is required).
1.2.4 When leveling the wall lining, make sure the inside and outside corners are square, then mark the vertical lines of the inside and outside corners.
1.3 Standards for laying out water and electricity lines:
1.3.1 During the project handover, the client, designer, project supervisor, and substitute foreman shall determine the water and electricity construction methods and keep written records.
1.3.2 On the day of the handover, based on the handover record, mark the corresponding water and electricity pipe locations on the walls and floors, and use the corresponding templates. Spray red paint in a conspicuous position next to the corresponding lines.
1.3.3 For sockets or switches on the same wall and at the same height, the corresponding horizontal elevation line should be marked out along the bottom edge of the junction box.
1.3.4 Mark the positions of socket boxes, light boxes, switch boxes, TV boxes, and telephone boxes according to the horizontal elevation line.
1.3.5 Prepare water and electricity construction drawings based on the on-site layout records.
1.3.6 After measuring the dimensions on site, fill out the "Water and Electricity Renovation Confirmation Form" and have it signed and approved by the customer, project supervisor, and construction foreman. If there are any changes, fill out a separate Water and Electricity Project Confirmation Form.
1.3.7 After the lines are laid out, apply two coats of Kuoda Green Ring environmentally friendly protective agent to the ground, being careful not to apply it to the walls. The lines left by the original property management on the ground should be redrawn.
Civilized construction standards
1. Hygiene and Cleaning
1.1 Construction commencement criteria:
1.1.1 Clean the ground thoroughly.
1.1.2 On-site garbage and debris were bagged and transported away.
1.1.3 Wipe the interior surfaces of the room with a mop dampened with clean water (excluding the bathroom, kitchen, and balcony).
1.1.4 Apply one coat of "Green Ring Floor Hardener" by roller (excluding bathrooms, kitchens and balconies).
Hygiene during construction
1.2.1 Ensure that the floor is swept for 5 minutes every hour, and that there are clear cleaning marks on the floor for the day.
1.2.2 Keep the area within 2 meters of the entrance door corridor clean and free of debris and dirt.
1.2.3 Wipe down all the display boards, fire extinguisher boxes, and storage cabinets every morning, noon, and evening.
2. Stacking of construction materials
2.1 The standard display rack should be placed directly opposite the entrance door, 500mm from the wall (due to the room structure, it can also be placed in other prominent locations in the living room).
2.2 The fire extinguisher box is placed in the middle of the base in front of the display shelf.
2.3 The storage cabinet is placed against the wall opposite the entrance to the master bedroom.
2.4 The carpentry workbench is placed in the living room, 1.5 meters away from the balcony opening.
3. Placement of construction signs
3.1 By the number of signs provided in each room:
3.1.1 One-bedroom apartment type: 3 horizontal standard line signs, 3 ground completion line signs, and one sign each for safety production, no smoking, board keel placement area, paint and coating placement area, cement tile placement area, and temporary garbage storage point.
3.1.2 Two-bedroom, one-living-room apartment type: 4 horizontal standard line signs, 4 ground completion line signs, and one sign each for safety production, no smoking, board keel placement area, paint and coating placement area, cement tile placement area, and temporary garbage storage point.
3.1.3 Three-bedroom, one-living-room apartment type: 5 horizontal standard line signs, 5 ground completion line signs, and one sign each for safety production, no smoking, board keel placement area, paint and coating placement area, cement tile placement area, and temporary garbage storage point.
3.1.4 For a three-bedroom, two-living-room apartment: 6 horizontal standard line signs, 6 ground completion line signs, and one sign each for safety production, no smoking, board and keel placement area, paint and coating placement area, cement and tile placement area, and temporary garbage storage point.
3.1.5 Other apartment types follow the same principle.
3.2 Signage Installation Location and Method
3.2.1 Place the main sign in the shape of the Chinese character "王" on the wall opposite the entrance door of the living room. Lay out the vertical line and the sign installation baseline based on the 1200mm horizontal line, and install the signs for "Horizontal Standard Line", "Safety Production", "No Smoking" and "Finished Surface Standard Line" respectively. See the installation standard diagram (Attached Figure 1) for detailed installation location and method.
3.2.2 On the wall opposite the bedroom door, lay out the vertical line and mark the installation baseline according to the 1200mm horizontal line, and install the "Horizontal Standard Line" and "Finished Surface Standard Line" respectively; select one of the three signs, "Plate and Keel Placement Area", "Paint and Coating Placement Area" and "Cement and Tile Placement Area", and install it.
3.2.3 A temporary garbage storage point should be placed approximately 1500mm away from the storage room door, centered on the wall. For units without a storage room, this can be placed on the balcony.
3.2.4 Use a hand drill to drill holes in the wall according to the hole diameter of the sign, and fix them with plastic expansion plugs and self-tapping screws. Install ∮10mm stainless steel advertising nails on the surface.
4. The appearance of construction workers
4.1 Clothing standards for construction workers:
4.1.1 Workers should wear uniform work clothes.
4.1.2 The company-issued name tag shall be worn on the left arm of the work uniform.
4.1.3 Work clothes should be clean and tidy.
4.1.4 Footwear should meet construction safety requirements.
4.2 Construction workers' on-site conduct guidelines:
4.2.1 Workers shall use the company's standardized polite language when communicating with customers.
4.2.2 When clients visit the construction site, noisy work should be stopped, and the client should be promptly and politely informed about the construction progress, area, and the advantages of Kuoda Standard Engineering.
4.2.3 Comply with the company's established engineering management system and standards.
4.2.4 The construction site should be either open for construction or closed but unlocked to allow customers to visit at any time.
4.2.5 Obey the management of all levels of personnel in the company and cooperate with site inspections.
5. Material stacking
5.1 Area division for material stacking:
5.1.1 Construction materials shall not be stacked or piled up in the living room (except for one-bedroom apartments).
5.1.2 Classify and stack the construction materials in the bedrooms and other functional rooms, and stack one or two types of materials in each room according to the wall signage.
5.1.3 No materials shall be placed on balconies, in kitchens, or in bathrooms.
5.2 Specific stacking requirements for various materials:
5.2.1 The board should be placed 600mm away from the wall in the master bedroom, with the blue edge of the board facing the doorway outside the bedroom.
5.2.2 The keel, plaster line, water pipes and electrical conduits are neatly stacked on a special bracket.
5.2.3 Cement tiles should be stacked in the same functional room, 600mm from the wall. Cement should be stacked in piles of 6 bags, and sand in piles of 8 bags. When stacking, the words on the packaging bags should face the same direction. If there is a large quantity of cement tiles, they can be placed in two separate functional rooms.
5.2.4 Paints and coatings should be placed in a well-ventilated functional room, and neatly stacked against the wall in the order of paints and coatings, with a stacking height not exceeding three layers.
6. Construction machinery and facilities
6.1 Cleanliness standards for construction equipment:
6.1.2 When not in use, all hand tools should be kept in a tool bag or toolbox.
6.1.3 Small power tools should be placed in the toolbox after use. Larger power tools (such as air pumps) should be placed in functional rooms such as bedrooms, and should not occupy passageways.
6.1.4 All tools have a clean and tidy appearance.
6.1.5 Power cords and air hoses that come with the tools should be kept out of reach of tangling or tangling during construction. After construction is completed, they should be coiled up and put into the toolbox.
6.2 Cleanliness standards for construction facilities:
6.2.1 The carpentry workbench shall be manufactured according to the company's standard drawings, with a gray surface and yellow lettering. The workbench shall be replaced annually. Any workbench damaged or soiled during construction, resulting in an unsightly appearance, shall be replaced immediately.
6.2.2 The storage cabinets are provided by the company and are for storing personal items such as clothing, shoes, and hats. They must be kept clean, and the cabinet doors must be closed during installation. If the paint wears down due to long-term use, it should be repainted according to the standard color.
6.2.3 The fire extinguisher box is a company-standard configuration, containing two 5L fire extinguishers. The exterior should be free of dirt and kept clean.
6.2.4 The urinals were manufactured by the construction team according to company standards, and are blue in color. They must be cleaned both inside and out daily.
6.2.5 The cement mortar mixing tank is a company-standard configuration. After each day's use, any remaining cement and sand should be cleaned up.
6.2.6 The conduit stacking brackets are made by the construction team according to the company's standards. The conduits should be stacked neatly on the brackets.
7. Filling out the form
7.1 Filling out the "Construction Schedule" on the construction site display board:
7.1.1 This reflects the overall construction schedule and the company's personnel's inspection and supervision.
7.1.2 After entering the site, fill in the names and contact information of the project supervisor, construction foreman, designer, and inspector, and fill in the construction progress with the standard stamp.
7.1.3 During the construction process, the designer and project supervisor shall sign in each time they arrive at the site, and the inspectors and company inspectors shall sign in and score the site.
7.2 Schedule of Main and Auxiliary Materials Arrival
7.2.1 The "Main and Auxiliary Materials Arrival Time Plan" shall be filled out during the project handover.
7.2.2 Fill out the material delivery plan according to the construction schedule to facilitate customers' purchase of main materials and avoid wasting time.
7.3 Completion of the "Main Material Quantity Approval Form":
7.3.1 The "Main Material Quantity Approval Form" shall be filled out during the project handover.
7.3.2 Verify the quantity and technical>
I. Things homeowners need to prepare before water and electricity renovation
1. The handover of the property is complete, and all renovation procedures have been completed;
2. Changes in the interior wall structure (demolition or construction of new walls);
3. Basic specifications and placement of furniture and appliances;
4. Ceiling light fixture arrangement;
5. Floor plan and layout of decorative lighting fixtures;
6. Other personalized needs;
7. The kitchen cabinet designer determines the basic location of kitchen sockets and light fixtures;
8. What type of hot water supply do you need for your home: gas, electric water heater, or another method?
9. Determine the size and specifications of the water heater, and whether to choose a regular bathtub or a whirlpool bathtub;
10. Schedule an appointment in advance for a plumbing and electrical engineer to come to your location to plan the exact location and provide an on-site estimate of the project scope.
II. Sign a water and electricity renovation contract before water and electricity construction.
1. Schedule an appointment in advance for a plumbing and electrical engineer to come to your site to plan the accurate location points and make an on-site budget for the project. If the location point is not changed during construction, the error value should not exceed 10% to avoid overspending on plumbing and electrical work during settlement.
2. The water and electrical circuit renovation contract should specify the brand and model of materials such as water pipes, fittings, BV single copper wire, UPVC flame-retardant electrical conduit, network cable, TV cable, telephone line, and audio cable to prevent counterfeit materials.
3. The water and electricity renovation contract should specify the unit price of each item, the total budget price, and the error value.
III. Specific Procedures for Water and Electricity Renovation Construction
1. The first step is to locate the water and electricity supply.
This means determining the locations of all switches, sockets, and water pipe connections throughout the house based on the user's needs. The electrician must then explain the wiring layout to the user according to the diagram, based on the locations of the switches, sockets, and faucets. It's also important to adhere to the principle of "water pipes run along the ceiling, electricity pipes run along the floor," meaning water pipes should run along the ceiling, while high-voltage and low-voltage wiring should run along the floor as much as possible. Furthermore, high-voltage and low-voltage wiring should not cross each other, and the parallel distance between them should not exceed 30 centimeters.
2. Distribution box
The installation design of electrical boxes should consider ease of use, concealment, and safety, and should also ensure direct connection with the main external power line; electrical wiring should not be hidden in the building's load-bearing walls or columns.
3. Electrical wiring design for sockets, switches, and light fixtures
It is important to consider the variability of the interior space and prepare for possible different uses of the space. This will reduce obstacles to redesign and planning during the use of the space by some users. For example, the impact of moving desks, display cabinets, and electrical appliances on electricity and water usage should be taken into account. At the same time, it should be noted that the price of new wiring and replacement wiring are different.
4. When the light fixture is heavy, it is important to embed load-bearing components in the ceiling. Do not install it directly on wooden wedges to avoid creating unsafe indoor conditions.
5. Grooving
A skilled groover will create grooves that are essentially straight lines with minimal jagged edges. Before creating the grooves, make sure the plumber/electrician marks all the water and electrical lines on the wall, and remember to check against the plumbing and electrical diagrams to ensure they match.
6. When renovating the plumbing system, ensure the surrounding area is clean and tidy. When signing the plumbing renovation contract, it's best to specify the materials used. Additionally, pay attention to the size of the existing drain pipes in the room; the external drain pipes should ideally match the existing ones. Hot and cold water pipes should be on the left (hot) and on the right (cold), with a spacing generally no less than 20cm, depending on the spacing of the faucet's hot and cold water pipes.
IV. Precautions for Water and Electricity Construction and Some Standard Dimensions
1. Standard Size:
(1) The shower outlet is 1100mm from the ground.
(2) Satellite TV external lines are placed in specific locations according to personal preferences for programs.
(3) The socket position should be at a relatively consistent height with the original socket position, generally 300-350mm.
(4) The double-control switch is 850mm from the ground.
(5) The power supply position of the wall-mounted TV should be 1100-1300mm from the ground.
2. Precautions during construction
(1) It is not advisable to arbitrarily cut trenches in the ground to connect pipes, and to avoid pipe areas.
(2) Pipelines should not be fixed to the ground by arbitrarily, and should be avoided in areas with pipelines.
(3) When opening a junction box, avoid encountering reinforcing bars. You can move it up, down, or even change its position, but never cut the reinforcing bars.
(4) Long horizontal grooves cannot be opened for pipes: Load-bearing walls are easily damaged, and lightweight walls, because they are stressed on the top, left and right sides, will still cause problems after the reinforcement is broken.
(5) Electrical conduits should not be run inside plaster lines, as this can easily create sharp bends and dead ends.
(6) For PVC electrical conduits with a diameter of less than 25 mm, use a pipe bender when bending them; do not use elbows. Electrical wiring is not for show; avoid right-angle bends as much as possible.
(7) Except for the kitchen and bathroom, electrical wiring should be run along the floor as much as possible (except for ceiling wiring). After the wiring is completed, the joints should be sealed with PVC glue.
(8) After the conduit is laid out and fixed, then the wire is threaded through it.
V. Acceptance of Water and Electricity Renovation Construction
1. Waterway Inspection
After the plumbing modifications are complete, connect the modified hot and cold water pipes with a flexible hose to ensure that all indoor hot and cold water pipes are pressurized simultaneously. Install the pressure testing device, fill it with water, and release any air from the pipes to ensure the entire circuit is filled with water. Close the water meter and the external gate valve (ensure proper safety precautions are in place). Then begin pressurizing. The test value should be 1.5 times the working pressure. A pressure test is considered successful if there are no leaks or seepage within 30 minutes and the pressure drop does not exceed 0.05 MPa.
2. Acceptance of high-voltage electrical systems
A 500V insulation resistance meter is used to test the insulation resistance value of each circuit, which can also test the quality of the wires used. Substandard wires may be broken down.
3. Low-voltage electrical acceptance
Use specialized network testing tools to test whether the 8-core network signal is unobstructed; only proceed to the next step of construction work after the carrier coaxial cable testing tools, multimeters, etc. have completely passed the tests.
4. Remember to inspect the water and electricity system after it is completed. It will be too late to discover problems after other projects are completed.
Renovation process – Masonry and carpentry
After the hydropower project, the masonry and carpentry project began.
Carpentry construction process
Carpentry is widely used in home renovation projects, typically including the installation of wooden flooring, doors and windows, radiator covers, curtain boxes, wainscoting, wall paneling, and framing. The processes for each type of carpentry work vary. Below is a summary of the carpentry work process, key points, timelines, budgets, and precautions.
I. Wood Flooring Installation
1. Adhesive-bonded wood flooring: A 15mm thick 1:3 cement mortar is used to level the concrete structural layer. Nowadays, most wood flooring is directly glued to the ground without the use of polymer adhesive.
2. Solid Wood Flooring: Solid wood flooring uses trapezoidal cross-section wooden joists (commonly known as wooden beams) as the base layer. The spacing between the joists is generally 400 mm, and lightweight materials can be filled in between to reduce hollow sounds when people walk on them and improve thermal insulation. To enhance the overall integrity, a subfloor is nailed on top of the joists, and finally, the wood flooring is nailed or glued onto the subfloor. At the junction of the wood flooring and the wall, a skirting board should be used to cover it. To allow moisture to escape, ventilation holes can be made in the skirting board.
3. Raised wood flooring: Raised wood flooring involves first building a foundation wall on the ground, then installing wooden joists, subfloor, and the surface flooring. Due to the low ceiling height in homes, this type of raised wood flooring is rarely used in home decoration.
II. Basic Construction Process of Wood Flooring
The adhesive application process is as follows:
Base cleaning → Applying primer → Marking lines and leveling → Drilling holes and installing embedded parts → Installing subfloor, leveling, and planing → Nailing floorboards, leveling, and planing → Nailing baseboards → Planing and sanding → Painting → Waxing.
Laminate flooring installation process:
Clean the base layer → Lay plastic film mats → Attach composite flooring → Install baseboards.
The solid paving method construction process is as follows:
Base cleaning → Marking lines → Drilling holes and installing embedded parts → Ground moisture-proofing and waterproofing treatment → Installing wooden joists → Laying insulation layer → Marking lines and nailing subfloor → Leveling and planing → Nailing wooden floor, leveling and planing → Installing baseboards → Planing and sanding → Painting → Waxing.
III. Key Points for Wood Flooring Installation
1. For solid wood flooring, the subfloor should be installed first, and then the wood flooring should be installed.
2. Installation method of keel: First, pre-embedded parts should be made in the ground to fix the wooden keel. The pre-embedded parts are bolts and lead wires, with a spacing of 800 mm. They are drilled from the ground and inserted.
3. When laying solid wood flooring, a base panel should be used, and the base panel should be made of plywood.
4. After the floor is installed, first use a planer to smooth and polish the surface, then clean the floor surface, apply floor paint, and polish and wax it.
5. After all the wood flooring is delivered to the construction and installation site, it should be unpacked and stored indoors for more than a week to allow it to adapt to the room's temperature and humidity before use.
6. Before installation, the wood flooring should be selected, and substandard products with obvious quality defects should be rejected. Floors with consistent color and pattern should be laid in the same room. Floors with minor quality defects that do not affect usability can be placed under beds, cabinets, or other furniture. The thickness of the boards in the same room must be consistent. When purchasing, it is advisable to add 10% to the actual installation area for wastage and buy all boards at once.
7. The joists for laying wooden floors should be made of wood species that are not easily deformed, such as pine or fir. The back of the wooden joists and skirting boards should be treated with anti-corrosion.
Carpentry Acceptance Form
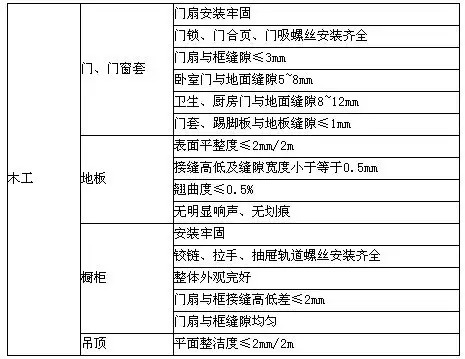
Detailed Explanation of Masonry Construction Process
Masonry work is considered a finishing touch in home renovation, directly showcasing the finished result to the public, unlike concealed works which are invisible. Therefore, homeowners who want their homes to look exquisite and beautiful should not overlook the masonry work process. The general process of masonry work includes the following steps: structural modifications according to design requirements (unless otherwise specified), leveling the plumbing and electrical trenches, waterproofing the floor, leveling the floor, and finally laying tiles. Below, we will break down each step of the masonry work process for homeowners.
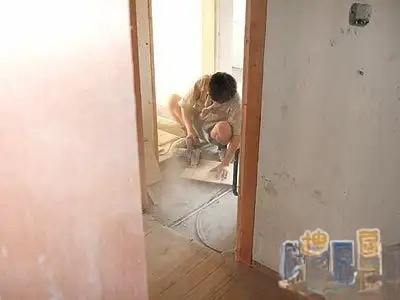
I. Structural Modification
Many homeowners are not satisfied with the original structure of their houses, so they choose to make certain modifications to create a more unique design, such as removing the kitchen partition wall to create an open kitchen. This is certainly a creative idea; however, home structural modifications involve safety issues, so the following five principles should be followed during the modification process:
1. For brick-concrete structures, all precast concrete walls must not be demolished, nor can doors or windows be opened in them. In particular, brick walls with a thickness of more than 24 centimeters are generally load-bearing walls and cannot be easily demolished or modified.
2. The door frame is embedded in concrete and should not be removed. Removing or altering it would damage the building structure, reduce the safety factor, and make it difficult to reinstall the door.
3. The low wall next to the balcony cannot be removed or altered. Generally, there is a door and a window on the wall between the room and the balcony. These doors and windows can be removed, but the wall below the window cannot be removed because this section of wall is a "counterweight wall." It acts like a weight to support the balcony. If this wall is removed, the load-bearing capacity of the balcony will decrease, causing the balcony to collapse.
4. Beams and columns in the room must not be altered. Beams and columns are used to support the upper floor slabs. Removing or altering them will cause the upper floor slabs to collapse, which is extremely dangerous. Therefore, beams and columns must never be removed or altered.
5. The reinforcing steel bars in the wall must not be moved. Damaging the reinforcing steel bars during pipeline installation will affect the load-bearing capacity of the wall and floor slab, creating safety hazards.
2. Smooth the water and electricity construction trench
As the name suggests, it involves smoothing out the trenches left from previous water and electricity projects, using materials such as cement.
III. Waterproofing
Waterproofing is a crucial aspect of home renovation, and like other hidden works, it's often overlooked by homeowners. Generally, bathrooms, shower rooms, and kitchens in apartments have waterproofing layers, which are easily damaged during renovations. If not repaired promptly, leaks can occur, affecting neighbors. Therefore, it's essential to protect the waterproofing layer during renovations and repair any damage immediately to prevent future problems.
Currently, there are two main types of waterproofing materials sold on the market for home renovation: one is modified bitumen waterproofing coating with fiberglass cloth, where the fiberglass cloth enhances strength and flexibility. Using this type of coating results in a more complex waterproofing project, but the price is relatively low, around 100 yuan per square meter. The other type is polyurethane waterproofing coating, which is currently a higher-end option with a polymer film. This type of coating offers excellent waterproofing, but it is more expensive, costing around 140 yuan per square meter.
1. The base layer should be treated first. Remove the original decorative materials, clean away loose soil and cement, and ensure the surface is flat and dry.
2. Applying Waterproof Coating. Apply a layer of modified bitumen to the waterproofed substrate, then lay a layer of fiberglass cloth, repeating the application once more. Finally, apply another coat of waterproof coating over the second layer of fiberglass cloth. This completes the waterproofing process. The waterproof coating should be applied evenly, and the fiberglass cloth should be tightly sealed to the waterproof layer without any missed areas, blistering, or peeling, otherwise the waterproofing effect will be compromised. If polyurethane is used as the waterproof coating, fiberglass cloth is generally not necessary; 2-3 coats are sufficient. This is because polyurethane coating itself forms an elastic protective film with certain tensile strength. To improve the waterproofing effect, a layer of fiberglass cloth can be added, but this will increase the cost.
It is important to note that when waterproofing the floor, the waterproof coating and fiberglass cloth should be applied to the walls 20-30cm above the floor to prevent leakage at the junction of the wall and the floor, thus forming a sealed and solid waterproof layer. For shower walls, lightweight soft-walled walls, and interior walls susceptible to leakage, the waterproof coating should be applied up to 1.8 meters or to the entire wall to prevent leaks.
3. Conduct a "water-tightness" test. This test is a crucial method for verifying the quality of indoor waterproofing. After the waterproofing work is completed, seal the doorways and drains, fill the room with water to a certain level, and if the water level does not drop significantly within 24 hours, it is considered合格 (qualified). After the "water-tightness" test, apply a protective layer of cement mortar over the waterproof coating, being careful not to damage the existing waterproof coating. Once the cement mortar protective layer is completely dry, you can then lay wall and floor tiles or paint on top for normal decoration and finishing work.
IV. Ground leveling
Currently, there are generally three methods for leveling the ground: machine grinding plus gypsum leveling, cement mortar leveling, and self-leveling leveling.
1. Machine grinding and gypsum leveling: (1) Does not raise the ground level; (2) You can walk on it and carry out construction 2 hours after construction; (3) You can lay wood flooring 3 days after construction. The construction is quick (only one day per household) and the price is affordable, much cheaper than cement leveling and self-leveling.
2. Cement mortar leveling: (1) Raise the ground by at least 2 cm; (2) After construction, you can walk on it and carry out other construction work 3 days later; (3) After construction is completed, you should wait at least 15 days before laying wood flooring. The price is moderate.
3. Self-leveling compound: (1) Go to the highest point of the room; (2) No one can enter the room for 24 hours after construction; (3) After construction, it is similar to cement, so it will take about 15 days before laying wood flooring. Highest price.
Construction conditions for ground leveling:
1. Machine grinding and plaster leveling: This can be done at any time during the renovation (but is best done after the wall and floor tiles in the kitchen and bathroom have been laid).
2. Cement leveling and self-leveling: These must be done after the wall and floor tiles in the kitchen and bathroom have been laid and between the wall treatment.
V. Laying Tiles
Cement is commonly used for tiling, but it shrinks easily as it hardens, making tiles prone to hollowing. Furthermore, as a rigid material, it cannot absorb stress from the wall, leading to cracking or detachment. Traditional materials are prone to shrinkage due to water loss, resulting in hollowing and cracking. This means that even skilled and responsible tilers often cannot guarantee standardized installation procedures. Sometimes, even expensive tiles can cause problems like uneven laying, cracking, and detachment. You might blame the tiler's skill or the quality of the tiles, but in reality, these issues are mostly caused by the tiling materials and improper installation procedures.
Precautions before tiling:
1. When preparing the base layer, all kinds of dirt on the wall surface should be cleaned and moistened with water one day in advance. If the base layer is a new wall, the bricklaying, line marking, and wall tile pasting should be carried out when the cement mortar is 70% dry.
2. Before tiling, the tiles must be soaked in clean water for more than two hours, until no more bubbles appear on the tiles. Then remove them and let them dry before use.
3. When laying tiles, if you encounter pipes, light switches, bathroom fixtures, or other supporting parts, you must use whole tiles to fit them perfectly. It is forbidden to use non-whole tiles to piece together the tiles.
Main steps for tiling:
1. Soak the tiles in water for half a day before tiling, until no more bubbles appear;
2. When laying the tiles, the cement mortar should be fully applied to the back of the ceramic floor tiles, avoiding applying it only around the edges;
3. After laying, tap it firmly with a rubber mallet;
4. Use temporary supports during installation to prevent tiles from sliding down before the adhesive and cement have dried;
5. Level immediately;
6. Tamp it down again;
7. The tiling must be firm, without any skewing, warping, or hollow areas; the overall surface must be flat, and the flatness error must meet the allowable deviation requirements; the joints should be filled tightly, straight, uniform in width, and without obvious misalignment.
Masonry Acceptance Form
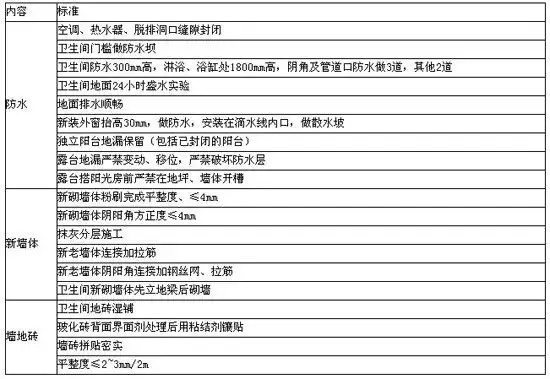
Renovation process – Painting work
After the masonry and carpentry work, the painting stage begins. Painting is the final step in all construction and also the most aesthetically pleasing. In home renovation, painting generally marks the near completion of the hard furnishings. Since painting is often considered a finishing touch, poor workmanship will fail to protect or enhance the appearance of wood products. Similarly, when using latex paint, it's crucial to pay attention to the application techniques and principles; neglecting these steps can result in a poor overall quality of the home renovation.
Decoration painting process
Paint is a general term encompassing both wood coatings and latex paints. Wood coatings are divided into two types: polyester paints and nitrocellulose lacquer. Polyester paints require high skill to apply and have strict and complex mixing ratios. While a single coat produces a good finish, it is difficult to repair if damaged, has unstable resistance to yellowing, and may yellow the latex paint if applied simultaneously. Nitrocellulose lacquer is simple to apply, easy to repair if damaged, and has good resistance to yellowing. However, a single coat produces a thin film, and a good finish is achieved after a certain number of coats.

I. Latex Paint Application Process
(I) Main construction techniques
Clean the base layer → fill in the putty, apply putty locally, and sand smooth → apply the first full coat of putty and sand smooth → apply the second full coat of putty and sand smooth → apply a sealing primer → apply the first coat of paint → touch up the putty again and sand smooth → apply the second coat of paint → polish and finish.
(II) Key Points of Construction
Substrate preparation is a crucial step in ensuring construction quality. Ensuring the wall is completely dry is the most basic requirement, generally requiring at least 10 days. The wall surface must be smooth and should be coated with at least two coats of putty to meet standard requirements. Latex paint can be applied by hand brushing, rolling, or spraying. Application should be continuous and rapid, completing the coat in one stroke. The paint should be applied evenly, without any missed spots or runs. Sand after each coat. Generally, two or more coats are necessary.
(III) Wall paint: Hand-brushed paint process
If the wall is old, you need to wet the surface first and then scrape it off. After it dries completely, apply a coat of clear varnish. If it is an old house with a good substrate, you can sand it once or twice with coarse sandpaper; there is no need to scrape it off.
1) First, mix 108 glue, cooked glue powder and double-flying powder to make gray putty, and then apply it to the entire wall surface.
2) After it dries completely, polish it with fine sandpaper.
The above steps generally need to be repeated three times until the wall surface is smooth.
3) Apply one coat of topcoat (latex paint)
4) After it dries completely, polish it with fine sandpaper.
5) Apply the second coat of topcoat.
Spray painting process
If the wall is old, you need to wet the surface first and then scrape it off. After it dries completely, apply a coat of clear varnish. If it is an old house with a good substrate, you can sand it once or twice with coarse sandpaper; there is no need to scrape it off.
1) Mix 108 glue, cooked glue powder and double-flying powder to make gray putty and then apply it to the entire wall surface.
2) After it dries completely, polish it with sandpaper.
The above steps generally need to be repeated three times until the wall surface is smooth.
3) Spray the first coat of topcoat (latex paint)
4) After it dries completely, polish it with fine sandpaper.
5) Spray the second coat of topcoat.
Precautions
(1) The putty should be compatible with the paint, be firm and solid, and should not powder, peel or crack. Water-resistant putty should be used in damp places such as bathrooms.
(2) The coating liquid should be thoroughly stirred. If the viscosity is too high, an appropriate amount of thickener can be added; if the viscosity is too low, a thickener can be added.
(3) The construction temperature should be above 10 degrees Celsius. There should be no excessive dust indoors. It is best to avoid rainy days.
Application methods: brushing, rolling, and spraying each have their advantages and disadvantages; choose the method that best suits your needs.
Roller coating is suitable for large-area application and is more efficient than brush coating, but it can produce a rough, fish-skin-like finish. This method is unpopular with those who dislike a rough texture. Furthermore, roller coating uses nearly 20% more material than brush coating, artificially increasing costs.
Brush painting is a common construction method where paint is applied manually with a brush. Its advantages include saving paint, simple tools, convenient application, ease of mastery, high flexibility, and strong adaptability to various paint types, making it suitable for most paints.
However, the disadvantages of brushing are that manual operation is labor-intensive and inefficient, and it is not suitable for quick-drying paints. If the operator is not skilled or quick, the paint film will have defects such as brush marks, runs, and uneven coating.
There are two types of spraying: air spraying and high-pressure airless spraying.
Air spraying leaves many air bubbles on the wall surface. Although the construction speed is fast, the effect will be very poor. It is not recommended to use it indoors.
High-pressure airless spraying has only recently become popular in China, but it has long been widely used for interior and exterior wall latex paints abroad. The specific application method involves using a specialized high-pressure airless sprayer to deliver high-pressure paint through a high-pressure hose to the spray gun. The pressure is then released through the spray gun to atomize the paint, forming a smooth and dense coating on the wall surface.
II. Wood Painting Application Process
(1) Varnish application process
Clean the wood surface → Sand it smooth → Apply putty powder → Sand it smooth → Apply the first coat of putty and sand it smooth → Apply the second coat of putty and sand it smooth with fine sandpaper → Apply the paint color → Apply the first coat of clear varnish → Match the color, touch up the putty, and sand it smooth with fine sandpaper → Apply the second coat of clear varnish and sand it smooth with fine sandpaper → Apply the third coat of clear varnish and sand it smooth → Sand with wet sandpaper to remove gloss, wax, and polish.
(2) Mixed-color paint application process:
First, clean the dust off the base surface and repair the base layer → smooth it with sandpaper.
→ Apply sheet metal to the knot/scar area → Apply base coat and putty → Apply drying oil → Apply first coat of putty → Sanding → Apply base coat → Apply base coat → Apply top coat → Repair with putty → Sanding and cleaning → Apply third coat of top coat → Sanding → Apply third coat of top coat → Polish and wax.
Painting sequence:
1. Remove dust and dirt from the surface of wood products and moldings (wood base layer).
2. Repair burrs, splinters, and other defects on the surface of the wooden base layer, and sand it smooth to make the edges and corners neat.
3. Apply oil-based putty (or transparent putty), sand it, and then sand it again after applying more putty (when using varnish, first fill in the pinholes and nail holes, and do some local color touch-up work).
4. Apply the first coat of paint, touch up any imperfections with putty, sand smooth, and remove surface dust.
5. Apply the second coat of paint, sand it smooth, remove surface dust, and wet sand with sandpaper. Repair any areas with excess paint.
6. Apply the third coat of paint until the desired effect is achieved.
Tips for judging construction quality
The simplest and most practical method is to shine a flashlight along the wall. Under strong, horizontal light, any cracks or unevenness will be clearly visible.
Buy:
Don't blindly pursue products with numerous performance features; it's best to buy from well-known brands. To prevent unscrupulous construction companies from substituting inferior products for superior ones, consumers should consult with their contractors before purchasing. The current paint market offers a wide variety of paints, and vendors offer numerous performance claims. Consumers must carefully consider their actual construction needs when choosing a product and avoid solely pursuing products with the most advanced features.
17 Key Points for Ensuring Safety and Quality in Home Decoration and Painting
1. When applying medium and dark-colored latex paint, try not to add water, otherwise color differences may occur.
2. The joints of the plasterboard should be reinforced with tape.
3. It's best to apply a piece of absorbent cloth to any gaps in the wall.
4. It's best to remove any existing putty from the wall or apply a coat of glue to seal it.
5. Try to buy paint from well-known brands. Avoid using paints that are not from well-known brands, even if recommended by the decorating company or foreman.
6. Do not paint when the weather is too humid.
7. Sanding of paint and coatings should only be done after they are completely dry.
8. The next coat of paint must be applied only after the previous coat has completely dried.
9. The paint on metal surfaces must be treated with rust prevention.
10. Cold weather will result in poor paint application quality.
11. When painting doors, use masking tape to cover the hinges and locks.
12. It's too hot, so make sure to ventilate.
13. When applying wallpaper, apply a coat of clear oil to the wall.
14. When installing wallpaper, the switch and socket panels must be removed.
15. Glossy and satin-finish latex paints should be applied in one coat; touch-ups are prone to color differences.
16. After the baseboards are installed, the gaps should be filled with putty and latex paint.
17. Frosted glass should be protected with newspaper.
Key points for acceptance of painting projects
For furniture, the consistency of varnish thickness, the saturation and cleanliness of the finish, and the absence of particles are all important aspects of paint acceptance. For wall latex paint, the smoothness and uniform reflectivity, and the absence of hollow spots, bubbles, or cracks are also crucial. Below is a summary of the methods, characteristics, and points to note regarding paint application and acceptance.
Latex paint application and acceptance
If you choose to decorate your walls with latex paint, there are actually some ways to make the latex paint more expressive:
1. Treat the putty: Make the putty into various textures such as rough, wavy, or messy, and then apply latex paint on it.
2. Treatment of latex paint: After applying latex paint, use a special patterned roller to create patterns on the paint surface.
3. Creative touches on latex paint surfaces: After the latex paint is applied, you can draw some patterns on the paint film surface. You can use hand-painting, stencils to print, or stickers to create shapes. There are many methods.
4. Base treatment: After the putty is applied, you can apply some textured paintable wallpaper and then paint it. The final result is quite good.
Key points for latex paint project acceptance:
1. The types and colors of materials used for latex paint application meet the design requirements.
2. The painted surface should have a consistent color, be free of pinholes and brush marks, and should not have any defects such as bleed-through, missed areas, powdering, alkali residue, peeling, or color bleeding.
3. When using a spray gun, the spray dots should be evenly spaced, without any overlapping or dripping. The paint film should be smooth to the touch, without any powdering, and doors, windows, light fixtures, furniture, etc. should be clean and free of paint residue.
4. There should be no powder falling off, peeling, missed brushing, showing through the bottom, peeling, dripping, lumps, brush marks, etc.
5. The wall should be smooth and free of ripples when viewed from the side. If repairs are needed, the entire wall should be repainted.
Common quality problems and solutions in latex paint application:
Common quality defects in latex paint application include blistering, efflorescence, powdering, dripping, showing through the base coat, and uneven coating.
1. Blistering: The main causes are improper substrate preparation and excessively thick coating, especially when using plywood as the substrate. To prevent this, besides stirring the paint thoroughly before use and ensuring the correct consistency, a coat of 107 glue can be applied to the base putty layer before painting. During repairs, the blistering and peeling areas should be cleaned thoroughly, and 107 glue should be applied before any repairs are made.
2. The main causes of efflorescence and powdering are applying paint to damp surfaces before the substrate is dry, failing to apply a sealing primer, and using paint that is too thin. If efflorescence and powdering are observed, the paint should be repainted, removing the already applied material and allowing the substrate to dry completely before proceeding. A sealing primer must be applied first, especially on new walls. The consistency of the topcoat should be appropriate; it should be slightly thicker for white walls.
3. Sagging: The main cause is paint viscosity that is too low or coating thickness that is too thick. During application, the paint consistency must be properly adjusted; excessive water should not be added. When using the brush, dip it frequently but in small amounts, and apply smoothly to avoid sagging or dripping. If sagging occurs, wait for the paint film to dry, then sand it with fine sandpaper, clean the surface, and apply another coat of topcoat.
4. Show-through: This is mainly caused by paint that is too thin, insufficient coats, or poor material quality. During application, choose products with high solids content and strong hiding power. If show-through is observed, increase the number of coats of topcoat to achieve the required wall finish.
5. Uneven coating is mainly caused by impurities in the paint, excessively thick paint, or poor quality latex paint. During application, use a brand with good leveling properties. Before applying the final coat of paint, the paint should be filtered. The paint should not be too thick. If an uneven coating occurs, it can be smoothed with fine sandpaper before applying another coat of paint.
Renovation process - finishing touches
Introduction: After the painting work is completed, the renovation enters its final stage. So, what specific items are included in this final stage? What materials need to be purchased for each item? Furthermore, during this stage, the electrician and plumber will return to install lights, switches, hardware, bathroom fixtures, etc. What should be paid attention to during installation? First, it's important to note that when buying switches, the electrician and plumber need to prepare a complete invoice. This invoice should be quite long, so it's better to buy them separately. It's best to get everything else done at once to avoid trouble. At this point, you also need to notify the cabinet installer and bathroom fixture delivery so they can be installed together. Once the topcoat is finished, you can notify the flooring installer. After that, if the homeowner has ordered custom-made cabinets, they can also be installed. Okay, let's take a look at some specific precautions for the final stage.
Final stage construction considerations – key points and precautions
What should be noted when installing switches and sockets?
Height: Power switches are generally between 120 cm and 135 cm from the ground (the standard switch height is shoulder height for an adult). Wall sockets for audio-visual equipment, table lamps, power strips, etc., are generally 30 cm from the ground (living room sockets depend on the TV cabinet and sofa). Washing machine sockets are 120 cm to 150 cm from the ground, refrigerator sockets are 150 cm to 180 cm, and air conditioner and exhaust fan sockets are 190 cm to 200 cm from the ground. Kitchen function sockets are 1100 mm from the ground, spaced 600 mm apart.

Location: Switches are generally turned on and off using the opposite hand, and the right hand is used more often than the left. Therefore, most home switches are installed on the left side of the entrance for easy right-hand operation upon entering. This aligns with behavioral logic. However, this approach has prerequisites, and you must ensure these prerequisites are met:
1. The door next to this switch opens to the right.
2. The height of furniture in front of the door switch (This issue needs attention for furniture such as shoe cabinets, large wardrobes, and five-drawer chests; they should not be wider or higher than the switch, as this will cause inconvenience in daily use.)
3. It's generally recommended to use a light-up switch for the entrance, making it easier to use at night. Otherwise, the wall around the switch will get dirty over time. Also, fumbling for the light switch can be quite stressful for timid women.
Connection of multi-gang switches:
A multi-gang switch is a switch with several buttons that can control the switching of multiple lights.
1. When instructing an electrician to connect a multi-gang switch, there must be a logical standard, or the switches should be connected one by one in the order of the lights' positions.
2. If the kitchen exhaust fan switch is also to be connected to a multi-gang switch, place it at the last position. Do not skip the switches controlling the lights in the middle. This separates the functions, making it easier to remember when to turn them on. Otherwise, you'll often find yourself turning on all the switches just to find the light you want to turn on.
Two-way or three-way switch:
This kind of switch is very useful when you're both watching TV in bed and arguing about who should get up to turn off the light. A two-way switch can solve this problem.
Other frequently used areas include: the space between the kitchen and living room, the two ends of the large living room, the inside and outside sides of the balcony, etc. These depend on each person's lifestyle, so you should be mindful when considering them to avoid future regrets.
Other points to note:
1. You can install some sockets with switches so that you can cut off the power without unplugging the plug, and the unplugged cord will not hang there and affect the appearance. For example, the washing machine socket can be turned off when not in use, and the air conditioner socket can be turned off during the off-season without being unplugged.
2. Do not install kitchen sockets above the stove to prevent overheating;
3. When installing the bathroom heater switch, remember to leave a few extra centimeters of space, because this switch is usually a size larger than the light switch. It will be troublesome if it doesn't fit even by a little bit.
4. Do not install the switch too close to water. If it is installed on an open balcony, remember to use a splash-proof cover for the switch and socket.
5. Consider the sockets and corresponding control switches for the lights inside the bookcase and cabinet;
6. Consider the sockets and corresponding control switches for burglar alarms, gas alarms, wall-mounted LCD screens, entryway lights, etc.
7. Consider the sockets needed for vacuum cleaners in each room, as well as special sockets for satellite power outlets, wall-mounted aquariums, etc. In any case, it's always better to have extra sockets than to solve the problem of not having enough and using extension cords later.
Special attention should be paid to toilet installation.
(1) For low-tank toilets, the tank should be fixed with galvanized open-foot bolts or galvanized metal expansion bolts. If the wall is made of porous bricks, expansion bolts are strictly prohibited. Soft gaskets should be used between the tank and the nut, and hard metal gaskets are strictly prohibited.
(2) For toilets with water tanks and one-piece toilets, the distance between the back of the water tank and the wall should not exceed 20mm.
(3. The toilet should be fixed with galvanized expansion bolts of not less than 6mm. Soft washers should be used between the toilet and the nut. The sewage pipe should protrude 10mm above the ground.)
What should you pay attention to when installing a washbasin?
Washbasins are favored by many consumers due to their beautiful design, small footprint, and strong decorative appeal. As one of the three traditional bathroom fixtures, consumers should pay attention to style and quality when choosing one, and there are also some installation tips.
It's best to pre-install a power outlet near the sink. Even with the best initial design, oversights are inevitable, so installing an outlet near the sink easily solves the charging problem for small bathroom appliances like hair dryers, rechargeable shavers, and even small water heaters. Additionally, it's advisable to pre-determine the sink's cutting hole when purchasing, and if possible, avoid drilling it on-site. Generally, it's better to have the cutting hole for an undermount sink pre-drilled at the factory than on-site, as on-site grinding is time-consuming and the results may not be satisfactory. If a cutting hole is absolutely necessary, ensure the pre-drilled hole location is accurate.
Many people believe that undermount basins are more elegant and aesthetically pleasing than overmount basins, and are also easier to clean. However, special attention must be paid to the faucet chosen for an undermount basin. Considering the thickness of the basin rim, the faucet spout needs to be as long as possible to ensure proper use. At the same time, the installation height of the bathroom basin should be appropriate, meeting the height requirements and usage habits of family members.
Finally, pay attention to the location of the water supply and drainage pipes during installation. Improper placement will result in the need for additional pipes, which is time-consuming, expensive, and unsightly. Therefore, when purchasing these products, if you are not very knowledgeable, it's best to ask questions carefully. Some accessories that look nice may not be compatible with your home, so be sure to find out beforehand.
Final Finishing Considerations – List of Required Materials
The main materials to be purchased for the finishing touches include: for the kitchen and bathroom, you will need to buy a toilet, bathtub (if there is only a shower design, then a bathtub is not needed), shower room, integrated glass partition (you can choose according to the specific interior design), washbasin (generally referring to the sink and basin in the bathroom), bathroom hardware, faucets (there are many types of faucets, you should choose according to your needs), sink (generally referring to the sink used in the kitchen), etc.; for hardware, you will need to buy door locks, hinges, doorstops; for switches and electrical appliances, you will need to buy switch panels, socket panels, bathroom heaters, various light fixtures (the light fixtures required for each area need to be selected according to the situation), exhaust fans, etc.
Kitchen and bathroom
Toilets, bathtubs, shower rooms, integrated glass partitions, washbasins, bathroom hardware, faucets, and sinks.
Hardware
Door locks, hinges, door catches.
Switchgear
Switch panels, socket panels, bathroom heaters, various light fixtures, and exhaust fans.
Tips: When purchasing these materials, pay attention to some selection details. Poor selection can significantly impact installation and future use. Special care should be taken when choosing bathroom fixtures. Many bathroom problems are related to the selection of bathroom fixtures.
1. When choosing a toilet, pay attention to the distance between the toilet bowl and the wall.
First, you should determine your purchase based on your actual situation and personal preferences, such as whether to choose a one-piece or two-piece toilet, an extended toilet or a regular toilet; second, you should confirm whether your toilet's drainage is horizontally installed in the wall or downward installed in the floor.
When confirming that a drain toilet is required, it's crucial to understand the concept of wall distance. Wall distance refers to the distance from the center line of the floor drain to the finished wall surface, not the distance from the center line of the toilet drain outlet to the vertical line behind the toilet tank.
When it is confirmed that a horizontally draining toilet is required: it is essential to understand the concept of "ground distance". The ground distance refers to the distance from the center line of the drain outlet at the back of the toilet to the finished floor level.
2. The selection of faucets and spare parts for the washbasin is also important.
First, choose the size of the washbasin based on the actual area of your bathroom. If the area is small, a pedestal basin is generally recommended to enhance the feeling of ventilation in the bathroom; if the area is large, various countertop basins should be selected, as they can enhance the perceived quality of the purchase.
When choosing a faucet, pay attention to the requirements of the faucet valve core. Some faucets leak shortly after installation because of a substandard valve core. Generally, a ceramic valve core made in Germany is the best choice.
TIPS: A U-bend in a drain is a device used to manage drain water from a washbasin and isolate odors. When purchasing this product, be sure to distinguish whether your drain U-bend is an S-bend (ground-mounted U-bend) or a P-bend (wall-mounted U-bend).
3. Pay attention to the skirt of the bathtub.
Bathtubs come in skirted and non-skirted styles. When purchasing a non-skirted bathtub, pay attention to the specific specifications of the product. When purchasing a skirted bathtub, pay attention to the direction of the left and right skirts, which corresponds to the location of the drain outlet on the floor. Specifically, when facing the wall against which the bathtub will be installed, if the drain outlet is on your left, you should purchase a left-skirted bathtub; otherwise, you should purchase a right-skirted bathtub.
Renovation Process - Precautions for Main Material Installation
The main materials installation includes: ceiling, cabinets, flooring, finished doors, sanitary ware, shower room, and wallpaper.
Main Material Installation > Ceiling
1. Paper-faced gypsum board
1) Construction method
Paper-faced gypsum board is the most basic intermediate material in ceiling engineering. It must be surface-decorated before it can be used. Therefore, the use of gypsum board is the same as that of wood panels. It can be processed by sawing, planing, nailing and other techniques to make various decorative structures. Then, it can be decorated with latex paint, wallpaper and ceramics (waterproof gypsum board should be used) to complete the decoration project.
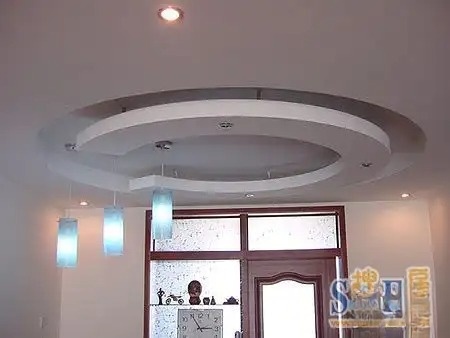
2) Analysis of common problems
Phenomenon 1: About six months after the completion of the gypsum board ceiling, cracks begin to appear at the joints. As time goes on, some cracks can reach 1-2mm. The main reasons for this are:
The joints of the gypsum board are constructed in a reasonable manner;
The plate expands and contracts, resulting in poor stiffness;
The joint filler was of poor quality;
Preventive measures:
Choose high-quality gypsum board and matching joint filler, keel and fastening screws. The spacing must be strictly in accordance with the design requirements to reduce board deformation and increase strength. During construction, tight joints are strictly prohibited, and debris in the joints must be removed. High-quality putty must be used to fill the board joints. Wait until the putty has initially set (30-40 minutes) before applying a 1mm thick layer of thinner putty.
Phenomenon 2: Analysis of the reasons for the appearance of regular wavy patterns in the suspended ceiling:
Arbitrarily create an arch with uniform curvature;
The ceiling perimeter is grilled or the four corners are flat;
Wood with high moisture content will shrink and deform.
The keel joints have flat or hard bends, resulting in a flat ceiling; the spacing between the hangers or hanger rods is too large, and the keel deforms and produces regular deflection.
The top of the wooden hanger split, and the keel collapsed under the stress.
When steel bars were used as hangers, they were not tightened properly, causing the keel to sag under stress.
The suspension rods are attached to supports of other pipes or equipment. Due to vibration or the support falling, the ceiling becomes flat.
The joints at the stress-bearing nodes are tightly connected, resulting in displacement and deformation after being subjected to force.
Preventive measures:
The ceiling should be made of high-quality wood, such as pine or fir, with a moisture content controlled below 12%. The joists should be straight and free of twists or knots with transverse cross-sections. During ceiling construction, the ceiling should be leveled by marking lines on the perimeter walls according to the design elevation. When installing the ceiling, the perimeter should be aligned with the horizontal line, and the arch height between the horizontal lines in the center should be 1/200 of the shorter span of the room. The longitudinal arch should be evenly distributed. The load-bearing nodes should be tightly and firmly nailed to ensure the overall rigidity of the joists. 2. Mineral wool sound-absorbing panels.
1) Key points of construction: Installation can only be carried out after the heating, ventilation and air conditioning systems have been installed and debugged; installation can only be carried out after other damp works such as gypsum cement have been completed and dried; other heat insulation and sound insulation materials such as glass wool and rock wool can be laid on the mineral wool ceiling; after construction, the surface of the mineral wool ceiling can be painted, otherwise it will affect the sound absorption and fire resistance performance of the ceiling.
2) Common problems analysis: color difference, bending or sagging. Preventive measures: accurately calculate the amount used; use mineral wool ceilings of the same brand and batch number in the same location; use matching keel and accessories for mineral wool; the keel should be firmly hung and adjusted for levelness to avoid bending.
2. Plastic PVC panels
1) Key points of construction: First, mark the elevation line on the wall, fix the strips at both ends of the wall, and fix them firmly with cement nails. Make the boards according to the actual size, insert the boards into the strips, and make sure the tongue and groove of the boards face outwards. After installation, fix them to the keel with self-tapping screws, and then insert the second board. The last board should be cut according to the actual size. When cutting, use a sharp cutter and use a steel ruler to press the marked line to cut. When inserting, bend it slightly to insert it into the tongue and groove of the board. After installation, seal the two sides with strips.
2) Common Problem Analysis: Flat surface, tight and straight seams, and straight and tight corners of the frame. Causes: High moisture content in the keel causes shrinkage and deformation; flat keel joints; firmly fixed trim strips; properly cut corners of the frame; insufficient fixing points on each strip, leading to deformation under stress. Preventive Measures: Use high-quality wood with a moisture content controlled below 12%; ensure the keel is straight and free from twists or transverse knots; use a sharp cutter to cut corners precisely; ensure the strips are securely nailed to prevent deformation under stress.
3) Maintenance and upkeep: PVC ceiling profiles are highly water-resistant and washable. In daily use, they can be wiped with detergent and then rinsed with water. The seams between the panels are easily contaminated by oil stains. When cleaning, you can use a brush dipped in detergent to scrub them and then rinse them with water. Note that the lighting circuit should be wetted. If the PVC ceiling profile is damaged, it is very easy to replace. Just remove the end strip, pull the panels out one by one from the strip, replace the damaged panels with new ones, and then reinstall and press the strip back in place. When replacing, pay attention to the color of the new and old panels to ensure there is a color difference.
4. Metal ceiling products
1) Key points of construction: Hoist the main keel and adjust it to be level; install according to the direction shown on the board surface, and apply appropriate force; during the installation process, avoid the board strips from being bumped or hit by other objects; after installation, remove the surface protective film in time.
2) Common problems analysis: color difference, surface flatness, warped seams, straight seams. Prevention measures: accurately calculate the amount used, use metal ceiling products of the same brand and batch number in the same place; use standard original accessories and matching keel; adjust the level of the keel; pay attention to the direction when installing the panels.
Main Material Installation > Cabinet
1. The wiring diagrams before and after the water and electricity renovation were not kept. During construction, the holes were drilled into the pipelines, resulting in water leakage or short circuits.
Solution: Keep the wiring diagrams before and after the water and electricity renovation.
2. Hollow tiles and cracks at the edges and corners.
Solution: Have the workers drill through the tile with a glass drill bit, and then use a hammer drill to make a hole.
3. The phone number left by the customer for the factory is unreachable, causing delays.
Solution: Leave one more contact method.
4. The oven or sterilizer is located under the base cabinet, with an electrical outlet installed behind it, making it difficult to plug and unplug.
Solution: Install a switch directly above the socket or elsewhere.
5. When traveling, if the main power is turned off, the food in the refrigerator will spoil. However, if the main power is not turned off, you may not feel safe leaving other appliances.
Solution: Give the refrigerator a separate power line.
6. If the power outlet between the base cabinet and wall cabinet is too low, small appliances on the countertop may block the plug.
Solution: Position the power source higher than the ground.
Flooring installation methods and precautions
Floor installation method
1. The variety, specifications, grade, quality, and moisture content of the timber at the time of laying shall comply with the relevant provisions of the "Code for Construction and Acceptance of Timber Structures" (GBJ206-83).
2. All types of wood-based panels must be firmly nailed to the base layer without any looseness (or firmly glued), and the adhesive used for bonding must meet the design requirements.
Inspection methods: Observe, step on or tap with a small hammer to check, and check the type of adhesive and the certificate of conformity.
Note: Hollow areas not exceeding 1/8 of a single board surface and not exceeding 5% of the total number of samples in each room can be disregarded.
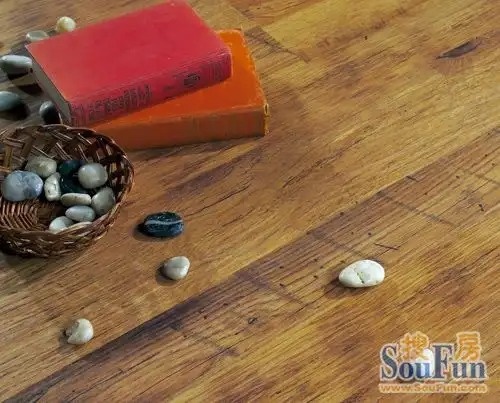
Flooring Installation Precautions
1. The surface quality of the wood surface layer shall meet the following requirements:
Qualified: The surface of the wood board is flat and smooth, without planing marks, splinters and burrs, the pattern is clear, and the color of the oil film is uniform.
Excellent: The surface of the wood panel is flat and smooth, without planing marks, splinters, or burrs. The pattern is clear and beautiful, and the oil film has a consistent color.
Inspection methods: observation, touch, and foot examination.
2. The quality of the joints in the wood panel surface layer shall meet the following requirements:
(1) Wood panel surface:
1. Pass: Seams are tight, joints are staggered, and surfaces are clean.
2. Excellent: Seams are tight, joints are staggered, surfaces are clean, and seams are straight and square.
(2) Parquet board surface layer:
1. Qualified: The joints are tight, the nails are firmly attached, the surface is clean, and there is no obvious excess glue.
2. Excellent: Joints are tight, nails are firmly attached, the surface is clean, there is no excess glue, the panels are arranged reasonably and aesthetically, and the edging width is consistent around the perimeter. Inspection method: Visual inspection.
3. The quality of wood floor waxing must meet the following requirements:
Acceptable: Joints are tight, surface is smooth, and height and thickness protruding from the wall are consistent.
Excellent: Tight joints, smooth and flat surface, consistent height and thickness protruding from the wall, reasonable and aesthetically pleasing joint arrangement, straight top edge, and accurate corner cuts.
Inspection method: Observational examination.
4. The quality of wood floor waxing must meet the following requirements:
Qualified: The wood flooring is coated with hard wax, soft wax, and the wax is evenly applied without any exposed base material. The color is consistent and the surface is clean.
Excellent: The wood flooring is coated with hard wax, soft wax, and the wax is applied evenly without any unevenness or exposed wood grain. It is smooth, bright, uniform in color, even in thickness, with clear wood grain and a clean surface.
Inspection method: observation and manual examination.
Installation methods and precautions for finished doors
Installation Standards
1. Door leaf: Horizontal, vertical, and opens smoothly; door gaps are uniform in size; hinge gaps should not exceed 2 mm, and lock gaps should not exceed 3 mm.
2. Sleeves: Horizontal and vertical alignment is required. Vertical sleeves should be fitted tightly with a ruler without gaps. The vertical tolerance should not exceed 2 mm. The sleeves should be 3 mm off the ground.
3. Face line: The excess part at the top should be consistent, and there should be no cracks in the silicone sealant inside.
4. Hardware: The height of the lock should be 95 cm above the bottom. The lock plate should be horizontal and vertical. There should be no white edges on the door edge after the lock body is recessed (including the hinge recess). The hinge trademark should not be reversed.
5. Apply sealant: Apply the white sealant evenly and consistently, without any obvious breaks, and apply the transparent sealant to the ground properly.
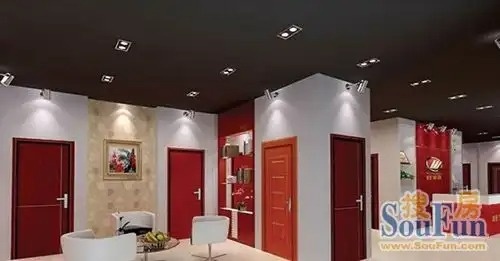
Installation method:
1. Fix the top rail so that the front surface of the rail is on the same plane as the cabinet surface, and place the upper and lower rails flat in the reserved positions.
2. Install the two doors into the tracks, use a level or ruler to measure the verticality of the doors, adjust the position of the upper and lower tracks and fix them in place.
3. Check if the door is parallel to both sides. You can adjust the door by adjusting the bottom rollers to make the frame level with both sides.
4. Secure the anti-jump device and provide a quality assurance certificate. Users can use this installation procedure to verify the professionalism of the selected wardrobe door brand.
Installation requirements:
According to the measurement sheet, the height, width, and thickness of the opening after construction should have a horizontal and vertical error of no more than 1cm.
The reinforcement of the opening was completed before the wooden door was installed.
The floor tiles, wooden flooring, and threshold have been installed.
Bathroom fixture installation methods and precautions
Sanitary ware installation and piping requirements:
1. Pipes should be installed horizontally and vertically, firmly without loosening, and the slope should meet the specified requirements. Concealed pipes embedded in walls and floors should be treated with anti-corrosion measures and protected with cement mortar.
2. Hot and cold water pipes should be installed with hot water on the left and cold water on the right. The parallel spacing between hot and cold water pipes should not be less than 20mm. When a manifold is used in the hot and cold water system, semi-flexible pipes should be used for connection.
3. Faucets and valves are installed level and in the correct position for easy use and maintenance.
4. All contact surfaces of sanitary ware, such as stone surfaces, walls, and floors, should be sealed with silicone sealant or waterproof sealing strips. Cement mortar should not be used to embed ceramic ware.
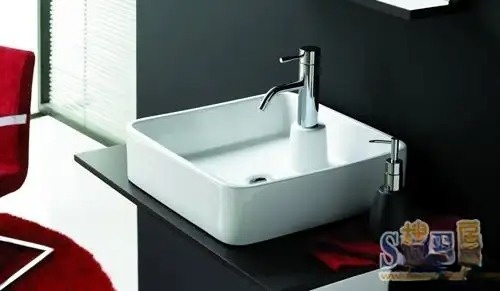
5. The bathtub drain outlet should be aligned with the drain pipe outlet and sealed properly; plastic flexible hoses should not be used for connection.
6. The water supply pipes and accessories/appliances are tightly connected, and there is no leakage when water is flowing.
7. Drainage pipes should be unobstructed, without backflow, blockages, or leaks. Floor drain grates should be slightly lower than the floor level for smooth water flow.
8. Sanitary fixtures are installed in the correct position, firmly and upright, with the top edge horizontal and the surface smooth and undamaged.
Shower enclosure installation methods and precautions
Shower enclosure installation method:
1. Prepare the necessary tools.
2. Install the base basin: Assemble the base basin parts, adjust the base basin to be level, and ensure that there is no water accumulation inside or at the bottom of the basin. The flexible hose can be extended or retracted as needed to securely connect the bottom of the basin to the drain.
3. Testing and Protection: After installation, a water test is required to ensure unobstructed drainage. 4. Locating and Drilling: Use a pencil and level to determine the drilling positions for the aluminum profile against the wall, and then drill the holes using an impact drill.
4. Install aluminum profiles: Tap adhesive granules into the drilled holes and use screws to lock the aluminum strips to the wall.
5. Secure the glass: Clamp the glass into the drilled hole in the base basin and then secure it with screws.
6. Install the jacking pipe: Drill holes at the appropriate positions above the fixed glass, install (straight/angled) mounting brackets and connect the jacking pipe. Secure it to the top of the glass using a curved pipe sleeve.
7. Install the shelves: Accurately locate the shelves, tighten the shelf nuts, and secure the glass shelves, ensuring they are vertical and horizontal. Note that waterproofing should be applied under the aluminum frame securing the glass.
8. Install the sliding door: Install the hardware of the sliding door and attach the hinges to the pre-drilled holes on the fixed door. After installation, adjust the position of the hinge axis until the door closes smoothly.
9. Ensure proper waterproofing: Install suction strips or water-blocking strips on the sides or bottom of the glass as required. Seal the joints between the aluminum frame and the wall, and between the glass and the base basin, with silicone sealant.
10. Adjustment and Tightening: Check if each part operates smoothly and comfortably. Adjust promptly if any problems are found. After adjustment, tighten the corresponding screws to make the entire shower enclosure more secure.
11. Finishing touches: Insert the decorative aluminum strips into the wall-mounted aluminum profile to ensure a neat and presentable appearance. Finally, wipe the entire shower room clean with a cloth.
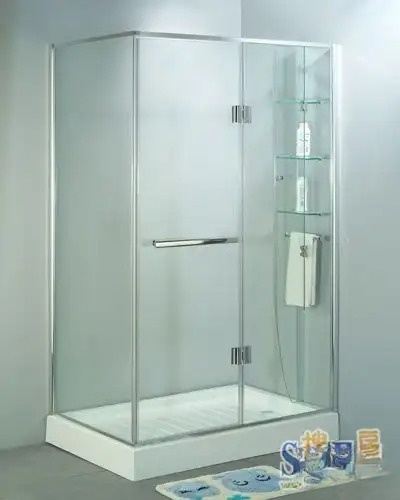
The following points should be noted when installing a shower enclosure:
1. The pre-embedded holes for the shower room should be designed before the bathroom is renovated.
2. It is best to customize a shower room if the water supply system and tiles have already been installed.
3. Wiring and leakage protection switches should be considered before the shower room is installed to avoid rework.
4. The style of the shower room depends on the layout of the bathroom. Common types include corner shower rooms and linear shower rooms.
5. Shower enclosures should be installed strictly according to the assembly process.
6. The shower room must be firmly connected to the building structure and must not wobble.
7. Open-type shower rooms must be fixed to non-hollow walls with expansion bolts. After drainage, the amount of water in the basin should not exceed 500 grams.
8. The shower room should be clean and bright after installation. The sliding doors should be parallel or perpendicular to each other, symmetrical, and the sliding doors should open and close smoothly without gaps or water leakage. The shower room and the basin should be sealed with silicone.
Acceptance standards for shower enclosure installation:
Check dimensions: Verify whether there is any error between the measured dimensions and the actual product dimensions.
Check the level: the error should be controlled within 2mm/1000mm.
Check verticality: The horizontal error between the top and bottom vertices on both sides of the shower enclosure should be controlled within 10mm.
Check the silicone: The silicone should be thin, uniform, and aesthetically pleasing.
Check for magnetic attraction: The gap between the magnetic door bars should be uniform, the opening and closing should be flexible, and the opening and closing force should be between 15-40 Newtons.
Check the hinges: The hinges should open and close smoothly without any noise.
Wallpaper installation methods and precautions
I. Preparation of tools and materials
1. Tools: center weight, ruler, pencil (colored chalk), roller, glue container, water container, seam roller, cardboard cutter, paintbrush, scraper, utility knife, sponge (towel), small paintbrush, ladder, workbench (at least 53cm wide and 1.5m long).
2. Accessories: Wallpaper powder, white glue
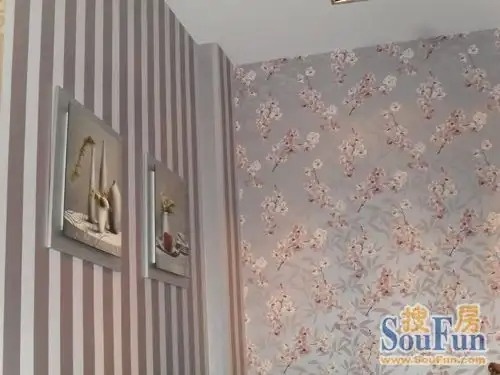
II. Wallpaper Installation Process
Wallpaper installation can be divided into three steps: cutting the wallpaper → applying adhesive → pasting the wallpaper.
Detailed Wallpaper Installation Process
1. Cutting paper
(1) Preliminary preparations:
Carefully check that the wallpaper's color code and batch number match. Also, understand the type of wallpaper to be installed; patterned wallpaper must be matched, and solid wallpaper must be installed in both directions.
(2) Wallpaper cutting:
Step 1: How to cut wallpaper to save the most space?
First, determine the height of the house to determine how many wallpapers can be cut from 10 meters.
Secondly, the maximum size of a wallpaper pattern is generally 53cm per unit. However, if there are two units within 53cm, then each unit is 26.5cm long and tall. If there are three units within 53cm, then each unit is 17.7cm long, and so on. Therefore, the number of wallpapers that can be cut from one roll of wallpaper generally needs to be determined based on the pattern matching waste and the height of the room.
Step 2: Cut the wallpaper according to the height calculated in the previous step.
*Note: The length of the decorative paper must be 5cm longer than the top and bottom of the wall surface to allow for trimming.
Secondly: After cutting out one piece, use a pencil to mark the number and orientation on the back of the wallpaper.
*Note: The serial numbers should be consistent, and the numbers and characters should be clear and legible. The direction should be consistently upward.
Again: When cutting the second piece of floral wallpaper, align the flowers with the first piece before cutting. Finally, check for color differences after every three pieces are cut. All wallpaper should be cut at once.
*Note: After all wallpaper has been cut, it should be stacked in order of its serial number. Leftover scraps should not be discarded carelessly; they should be neatly arranged aside.
● Move-in stage after renovation
Renovation process - completion inspection
The construction and acceptance of the final installation work are subject to certain standards. Although we cannot strictly follow the regulations, they still have some reference value. Below, we have summarized the installation characteristics of bathroom heaters, exhaust fans, etc. for your understanding.
Connection between bathroom heater/ventilation fan installation and ceiling installation
Many homeowners install bathroom heaters or exhaust fans after installing aluminum ceiling panels. Some installers will directly fix them to the aluminum ceiling panels, which will cause many problems later on.
1. It will make a lot of noise when it is venting because it resonates with the aluminum ceiling panels.
2. Over time, the aluminum ceiling panels will be deformed and bent under pressure, and the bathroom heater or exhaust fan will become unstable and precarious.
Therefore, if you are installing a bathroom heater or exhaust fan, you should first determine the location and, according to the product model, have the workers install a frame on the roof before installing the aluminum ceiling panels. After installing the aluminum ceiling panels, you can directly fix the bathroom heater or exhaust fan to this frame, which is both sturdy and safe.

Features of Radiators
Steel radiators come in a variety of shapes and sizes, making them aesthetically pleasing and smooth, combining practicality and decoration.
Ordinary steel has poor corrosion resistance, and high-quality low-carbon steel such as T12 or T14 is best used for making steel radiators. However, many small businesses use inferior substitute steel, which is one of the reasons for the huge price difference between different brands. Consumers find it difficult to distinguish these differences with the naked eye, so it's best to choose reputable brands when buying radiators. Additionally, when purchasing steel radiators, it's crucial to check if the radiator's inner wall has internal anti-corrosion treatment. Good radiators should have double-layer internal anti-corrosion treatment; many radiators lack even this, which is extremely unsafe. Currently, internal anti-corrosion technology for steel radiators is quite mature, and reputable companies can ensure high-quality internal anti-corrosion treatment. Therefore, steel radiators can be used in both centralized heating systems and self-heating systems. However, wide-channel radiators are suitable for centralized heating systems, while small-channel radiators are better suited for self-heating systems.
Let's first talk about the characteristics of aluminum alloys: aluminum alloys have excellent heat dissipation, but very poor corrosion resistance.
Those familiar with aluminum know that aluminum alloys are chemically highly reactive, readily reacting with oxygen in the air to form a dense aluminum oxide protective film, approximately 1 μm thick. This film bonds strongly to the substrate, passivating the coating surface and preventing further oxidation. Therefore, aluminum alloys are not susceptible to oxygen corrosion. Now let's discuss the internal corrosion protection principle of radiators: Internal corrosion protection involves coating the inner surface of the radiator with a layer of organic paint with good adhesion and corrosion resistance, isolating water from the steel or aluminum material, thus providing corrosion protection. However, because aluminum alloys have a dense aluminum oxide protective film on their surface, anti-corrosion paint is difficult to adhere to. Even if applied, the paint easily peels off under the scouring effect of water inside the radiator. Therefore, aluminum alloy radiators should never be used in centralized heating systems, but are very suitable for self-heating systems. Compared to steel radiators, aluminum alloy radiators have significant advantages in self-heating systems. As a result, some domestic manufacturers have launched energy-saving combinations of wall-hung boilers and aluminum alloy radiators, specifically for families with self-heating systems, which should be a very good choice.
Important points to note when installing an electric water heater
1. Electric water heaters must be hung on a load-bearing wall. If there is no suitable load-bearing wall in the bathroom, a bracket can be installed from the top or a beam to support the water heater.
2. To save space, the electric water heater can be hidden inside the ceiling (usually partially enclosed). Therefore, the water heater needs to be installed first, and then the aluminum ceiling panels can be installed. However, it is important to leave room for maintenance of the electric water heater. For example, the part of the aluminum ceiling panel near the water heater can be made movable.
3. The circuit must be effectively grounded to avoid short circuits between the circuit and the water system.
4. The socket for the electric water heater should be located as far away from the shower area as possible, and it is best to choose a socket with a switch. A waterproof box is also required.
Important points to note when installing a gas water heater
1. The installation of a gas water heater needs to be fully planned during the water and electricity renovation stage. There are three pipes related to the gas water heater: cold water inlet pipe, hot water outlet pipe, and gas inlet pipe. It should be noted that the relative positions of these three pipes are different for different models of gas water heaters. Therefore, you need to first determine the model of the gas water heater you are buying, and then reserve the positions of these three pipes according to the actual model of the machine.
2. Another often overlooked point is that gas water heaters also require electricity, so it is essential to reserve a socket for the gas water heater (preferably a socket with a switch).
3. Since water pipes are generally run along the ceiling, the hot and cold water inlets of the gas water heater usually run upwards, and the pipe routing position is usually located exactly in the center of the future water heater installation position. It should be noted that since fixing the gas water heater requires nails to the wall, the pipe routing should deliberately avoid the nail locations where the water heater will be fixed in the future. Similarly, the wiring of the socket reserved for the gas water heater should also avoid the nail locations.
4. Modern gas water heaters are all forced-draft type, which needs to exhaust gas outdoors. This gas usually has a certain temperature, so the exhaust pipe of the gas water heater is made of metal. During use, this metal exhaust pipe will also be hot. Therefore, the installation of this exhaust pipe should avoid the range hood exhaust pipe, which is usually installed in the ceiling. This is because the range hood exhaust pipe is made of plastic and is prone to aging and damage due to long-term local heat.
5. Some gas water heater models can be housed in cabinets, but for others, this can lead to incomplete combustion or even frequent flameouts. It's best to consult a professional for specific advice. Even for gas water heaters that can be housed in cabinets, ventilation should be maximized. For example, the cabinet walls should not have top or bottom panels, and louvered doors should be installed.
Key points for water treatment equipment installation
1. Most families install water treatment equipment in the cabinet under the sink. Note that it is best not to fix the sink before the water treatment equipment is installed, as this will make the installation of the water equipment much easier.
2. Try to schedule the installation of water equipment and cabinets on the same day. This way, they can coordinate with each other. For example, if the distance between the bottom of the sink and the bottom of the cabinet is not high enough, you can drill a hole in the bottom of the cabinet so that the water equipment can be placed directly on the ground.
3. Generally, water softeners and other water treatment equipment can adjust the water flow rate. Make sure the technician adjusts it to the appropriate water volume.
4. Additionally, pay attention to the safety and reliability of the water pipes and fittings used when installing the water treatment system. Accidents frequently occur where burst hoses from these machines cause leaks and flood entire homes.
During the final installation and acceptance phases, we must pay special attention to the disposal of garbage and the selection of heating methods.
Do not dump construction waste indiscriminately.
Most property management companies in residential communities require homeowners to dispose of renovation waste at a designated location, or charge a "waste removal fee" to transport the waste to a specific location on their behalf. Many homeowners find this incomprehensible, often saying, "The property management fee already includes the waste removal fee, why should I pay extra for renovation waste removal?"
"Why must we throw construction waste into designated areas and trash cans downstairs? The property management can just throw it wherever they want."
Actually, this is due to a lack of understanding of relevant regulations. In 2005, the Ministry of Construction issued the "Regulations on the Management of Urban Construction Waste," Article 2 of which clearly states that "construction waste, as referred to in these regulations, means the excavated soil, materials, and other waste generated by construction units and contractors during the construction, renovation, expansion, and demolition of various buildings, structures, pipelines, etc., as well as during the decoration and renovation of houses by residents." This regulation specifically addresses waste generated during the decoration and renovation of houses. Article 11 further stipulates that "residents shall collect construction waste and domestic waste generated during the decoration and renovation of houses separately and place them in designated locations." In other words, transporting renovation waste to designated locations is not a property management regulation, but a national regulation. Therefore, we should properly dispose of renovation waste according to the property management's requirements.
After the tiles are laid, be sure to check the floor drain.
To ensure smooth drainage in the future, the drain should be at the lowest point. This is achieved by the tile setter. Therefore, it's best to check the level before the tiles are completely dry to see if the drain is at the lowest point. If not, it needs to be redone immediately; don't hesitate. It's also advisable to run water and measure the drainage speed, removing the drain cover to observe the flow.
Characteristics of different heating methods
When choosing radiators, you must first understand your home's heating system, as different heating systems require completely different radiators. Most residential areas in northern China use centralized heating: a central hot water center heats the heating water and then distributes it to each household through laid heating pipes.
Central heating has the following characteristics:
1. The heating water in the heating pipes is generally at a high temperature and has a relatively high pressure.
2. The quality of heating water in China is generally very poor and highly corrosive.
3. Since most of the pipes are galvanized pipes, the system inevitably contains many old radiators that are prone to "shedding slag" from other users. Therefore, the heating water generally contains a lot of residue, which causes greater wear and tear on the inside of the radiators and can easily cause blockages.
Central heating systems are currently mostly charged based on indoor square footage, rather than water flow rate. Given these characteristics of central heating, radiators selected for central heating systems must possess the following features:
1. Strong corrosion resistance and high pressure resistance.
2. Wide water channels prevent blockages and facilitate the circulation of heating water, increasing heat dissipation.
Features of self-heating:
When choosing a radiator, you must first understand your home's heating system, because different heating systems require completely different radiators.
Most homeowners in the south and some in the north use self-heating systems, and currently, the proportion using wall-hung boilers for self-heating is very large. Simply put, the working principle of a wall-hung boiler is as follows: a certain amount of water is first injected into the heating system from outside. The boiler heats this water (the working principle here is almost the same as that of a familiar gas water heater), and then it circulates in a closed loop within the home's heating system: hot water flows from the boiler, passes through indoor radiators (or underfloor heating pipes), and finally circulates back to the boiler. The boiler detects the temperature of the heating water in the loop; if it is lower than the set value, it reheats it. The circulation is powered by the water pump that comes with the boiler.
Features of wall-hung boilers for self-heating:
1. Since the system only adds water once during the initial operation, and the water then circulates in a closed loop within the system, the water quality is controllable and generally quite good (some households directly add purified water when initially adding water), with almost no acid or alkali corrosion.
2. The water only circulates within the household system. Since most households use high-quality pipes and radiators, the system has almost no impurities and cannot have any impurities. This is because the heating water system pipes inside the wall-mounted boiler are very thin, and impurities would cause blockages and damage. Therefore, the heating water does not cause much wear and tear on the radiators and will not cause blockages.
3. Since the heating capacity of a self-heating wall-mounted boiler is definitely not as good as that of a large boiler in a centralized heating system, the water temperature is generally lower than that of a centralized heating system.
4. The system water pressure comes from a household water pump, and the system water pressure is relatively low.
Based on the above characteristics of wall-hung boilers for self-heating, radiators for such systems should be selected from products with the following features:
1. The height of the radiator should not be too high, generally not exceeding 1500mm. Because the system pressure is low, a radiator that is too high will prevent circulation.
2. Radiators with smaller water channels are more suitable – Under the same pressure, it is obvious that the narrower the water channels, the better the circulation.
3. Under the same heat dissipation, radiators with smaller water capacity are more suitable - for heating the same area, less water means less energy consumption of the system.
4. The radiator does not need to be internally protected against acid and alkali corrosion - the water quality in the system is good and there is no acid or alkali corrosion, but oxygen corrosion still exists.
Home renovation process – Home pollution testing and treatment methods
Practice and numerous phenomena have proven that air pollution can cause great harm to human health, especially in newly renovated homes. Gases emitted from various furniture and paints used in the renovation can all become sources of pollution. Therefore, it is best to conduct a renovation pollution test after the renovation is completed to determine the quality of the indoor environment.
I. Pollution Detection Items
Radon, ammonia, formaldehyde, benzene, TVOC

Radon: A radioactive inert gas, colorless and odorless. It exists in cement and sand. Hazards: Indoor radon pollution is second only to smoking as a cause of lung cancer.
Formaldehyde: Has a strong odor. Adhesives used in engineered wood products contain formaldehyde. Hazards: Inhaling high concentrations of formaldehyde can cause severe respiratory irritation. Direct skin contact with formaldehyde can cause dermatitis. Frequent inhalation of small amounts of formaldehyde can lead to chronic poisoning.
Benzene: Benzene is a colorless liquid with a characteristic aromatic odor. Hazards: Long-term inhalation of benzene can lead to aplastic anemia.
TVOC: Total Volatile Organic Compounds (TVOC), mainly from paints, adhesives, etc. Hazards: TVOC can cause symptoms such as dizziness, headache, drowsiness, weakness, and chest tightness.
Ammonia: Ammonia gas is highly soluble in water and has a rapid and strong irritant effect on the eyes, throat, and upper respiratory tract.
Hazards: Prolonged exposure to low concentrations of ammonia can cause laryngitis, hoarseness, and pulmonary edema.
II. Pollution Detection Standards
Limits on indoor environmental pollutant concentrations in building construction projects

III. Fee Standard
Radon, ammonia, formaldehyde, benzene, and TVOC: Unit price (300 yuan/point/item); Total for all five: 1500 yuan.
IV. Pollution Testing Fee Collection Time
When the testing personnel come to the site for testing
V. Preparatory work before pollution detection
All tests must be conducted 7 days after the renovation is completed and the space is naturally ventilated.
The concentration tests for ammonia, formaldehyde, benzene, and total volatile organic compounds (TVOC) should be conducted immediately after the doors and windows have been closed for one hour.
Radon concentration testing should be conducted 24 hours after the exterior doors and windows have been closed.
VI. Time required for pollution testing on the same day
It takes 30 minutes to one or two hours to wait for the test results at a single sampling point.
7. How long does it take to get the pollution test results?
Generally, the time we agree on is about a week.
The treatment of pollution from home renovations is divided into treatment during the renovation process and treatment after renovation, and it needs to be treated with care.
8. How to reduce indoor air pollution from home renovations
1. Design schemes should use minimal amounts of materials such as plywood, particleboard, and decorative adhesives, as these can easily cause indoor air pollution. Using less of these materials will reduce indoor air pollution. When purchasing building materials, choose environmentally friendly products that have passed authoritative testing to avoid using low-quality materials and causing unnecessary pollution.
2. Managing indoor air pollution is a crucial step in the renovation process. For example, formaldehyde removal is primarily done on plywood and other wood-based panels. Before painting, apply a formaldehyde remover to both sides of the panels to effectively remove free formaldehyde. In rooms where children and the elderly live, minimize or avoid using paint. Use children's paint or water-based paint in children's rooms. Avoid indoor pollution from formaldehyde, benzene, and other substances released by paint.
For example, some charcoal (bamboo charcoal is also acceptable) should be placed in the duct before laying the floor. During the painting process, the ends of the furniture should also be painted to seal them.
3. After renovation, leave the room vacant for 2-3 months with windows open for ventilation. Place some green plants. This is provided that the building materials are environmentally friendly. Place activated carbon near sources of pollution. These sources are typically radiators, drawers, wardrobes, bookcases, bed frames, and other areas with high usage of engineered wood products. After placing activated carbon, ensure the furniture is tightly closed; the activated carbon will absorb any released formaldehyde and other harmful gases, thus preventing pollution.
Renovation process – after-sales service, environmental monitoring, furniture maintenance
Post-renovation maintenance services are also very important. Below is an introduction to after-sales service and maintenance tips from decorating companies.
After-sales service of decoration companies
Key points of after-sales service
1. Warranty service will be provided for problems caused by weather or construction quality, according to the items in the contract quotation (including additional items).
2. Outside the warranty period, appropriate repair services will be provided for problems caused by weather, construction quality, or human damage, according to the items in the contract quotation (including additional items).
3. Provide free consultation on decoration-related matters (design and engineering, etc.).
4. Provide maintenance knowledge.

After-sales service process:
1. Customer Service Department:
(1) Upon receiving a customer's repair request, the customer service department assistant shall record the customer's information, the name of the construction team leader (repair personnel), and the details of the repair request in detail and accurately; if the customer has specific requirements for the repair time, these shall be specified.
(2) The Customer Service Department Assistant will notify the repair personnel to contact the customer for on-site repair. If the customer has not specified a repair time when they call, the repair personnel are required to schedule an initial repair time with the customer within 24 hours of receiving the notification and report back to the Customer Service Department. The Customer Service Department Assistant will follow up with the repair personnel within 24 hours. If the repair personnel fail to contact the customer or schedule a repair time, the Customer Service Department will reschedule the repair personnel.
(3) After receiving a customer's repair request, the customer service department assistant will print an engineering repair task order and forward it to the engineering department for repair personnel to pick up. At the same time, the customer's repair request will be recorded in the "Repair Statistics Table".
2. Engineering Department:
Upon receiving a customer's repair request, detailed warranty information is recorded, and the repair order is given to the repair personnel. The "Main Material Repair Notification Form" is forwarded to the Customer Service Department Assistant for processing, who simultaneously enters the repair information into the "Repair Statistics Table." For branch offices and others: Detailed records and relevant customer information from branch offices are communicated to the Customer Service Department in writing for processing. The Customer Service Department Assistant prints out the corresponding repair order based on the repair items and forwards it to the appropriate department for processing.
3. Common after-sales issues
3.1 Wall cracks:
3.1.1 Causes of wall cracking:
A. Cracks in lightweight walls:
B, Cracks in the construction opening of the load-bearing wall:
C. Cracking occurred because the construction process and materials were not used in accordance with the normal procedures.
3.1.2 During the first year after moving in, wall cracks may occur due to climate conditions. In winter, the climate is dry, indoor temperatures are high, and moisture in the air evaporates quickly, making latex paint on the walls prone to cracking. The best season for such repairs is in the spring after the heating has stopped. After the repairs are completed, similar repairs are unlikely to occur in the second year.
3.2 Tile chipping:
The main areas where tiles chip or break are most likely to occur: the external corners of pipes.
3.3 Short circuit and water pipe leakage;
3.4 Waterproofing and leak prevention.
Common after-sales issues
1. Wall cracks:
Causes of wall cracks:
A. Cracks in lightweight walls.
B. Cracks in the construction openings of the load-bearing wall.
C. Cracking occurred because the construction process and materials were not used in accordance with normal procedures.
During the first year after moving in, wall cracks may occur due to climate conditions. In winter, the dry climate and higher indoor temperatures cause rapid moisture loss from the air, making latex paint on the walls prone to cracking. The best season for such repairs is in the spring after the heating has stopped. After the repairs are completed, similar repairs are unlikely to occur in the second year.
2. Tile chipping:
The main areas where tiles chip or break are most likely to occur are the external corners of pipes.
3. Waterproofing and leak prevention:
The water pipes are leaking or not discharging water.
It is recommended that homeowners hire well-known, large home improvement companies during the renovation process. If any after-sales issues arise, they can call the home improvement company's after-sales service, which will then arrange for relevant personnel to repair the issues for them.
After-sales service standards
The main after-sales service items include: water and electricity construction projects, carpentry construction projects, tiling construction projects, painting construction projects, and basic installation.
Maintenance Tips
Environmental testing:
The main items tested in indoor environmental testing include formaldehyde, benzene, radioactive materials, total volatile organic compounds (TVOC), and radon. If a newly renovated house passes all of these environmental testing standards, it is generally considered合格 (qualified/compliant).
Key points for indoor environmental testing:
1. The inspection must be conducted at least 7 days after the completion of the renovation.
2. Ensure adequate ventilation before testing.
3. Testing should be conducted after all indoor furniture has been moved in.
4. Portable instruments cannot be used during testing.
5. Close doors and windows for 12 hours before sampling and close doors and windows during sampling.
6. Sample for at least 45 minutes.
7. It is best if there is no rainy weather three days before the test.
8. It is best to select a room with a lot of furniture and boards, such as a bedroom, for sampling and testing.
9. If necessary, it is best to find a professional indoor environmental testing agency to conduct the test.
Main methods for purifying the indoor environment:
1. Buy activated carbon to adsorb pollutants. Adsorption is a solid surface phenomenon that utilizes porous solid adsorbents to treat gaseous pollutants, causing one or more components to be adsorbed onto the surface of the solid adsorbent under the influence of molecular attraction or chemical bonding, thus achieving separation. Commonly used solid adsorbents include coke and activated carbon, with activated carbon being the most widely used. Activated carbon has adsorption capabilities for substances such as benzene, toluene, xylene, ethanol, diethyl ether, kerosene, gasoline, styrene, and vinyl chloride. According to professionals, the formaldehyde levels in your home are seriously excessive.
2. Planting plants is possible, but they must receive sunlight. Without sunlight, it's useless. Besides using activated carbon, tea leaves can also help, but you need a large quantity of tea leaves, not necessarily high-quality ones. The main purpose is to allow the tea leaves to absorb harmful substances.
3. Ventilation. To prevent indoor air pollution in winter, the first step is to improve ventilation as much as possible to reduce the degree of air pollution. According to research, viruses and bacteria in poorly ventilated rooms can float in droplets for more than 30 hours. If doors and windows are opened frequently for ventilation, polluted air can dissipate, making it difficult for viruses and bacteria to breed and multiply indoors. Public places such as office buildings and department stores should pay particular attention to increasing the amount of fresh air indoors. Families should open windows for ventilation for at least 15 minutes in the morning. Schools should ideally use physical education classes and 10 minutes between classes for ventilation. Increase outdoor activities. When the weather is sunny and windless, the elderly and children can engage in moderate outdoor activities, but should avoid staying in large public places for extended periods.
4. Plant-based air purification method (spider plant, aloe vera): Spider plants, aloe vera, and snake plants can absorb large amounts of indoor pollutants such as formaldehyde, eliminating and preventing indoor air pollution. Jasmine, lilac, honeysuckle, and morning glory secrete bactericides that can kill certain bacteria in the air and inhibit the growth of tuberculosis, dysentery pathogens, and typhoid bacteria, thus keeping indoor air clean and hygienic. Most plants perform photosynthesis during the day, absorbing carbon dioxide and releasing oxygen; at night, they perform respiration, absorbing oxygen and releasing carbon dioxide. However, some plants do the opposite. For example, cacti release carbon dioxide during the day and absorb carbon dioxide and release oxygen at night. Therefore, placing a cactus indoors at night can supplement oxygen and promote sleep.
Furniture placement and maintenance

1. Do not place furniture in high-temperature or extremely cold environments to prevent the wood from cracking, warping, or becoming moldy, and the metal parts from rusting.
2. Furniture must be placed stably to prevent parts from becoming loose due to prolonged wobbling or instability.
3. Handle furniture gently when moving it.
4. The place where furniture is placed should be well ventilated to prevent dampness or the generation of harmful chemicals.
5. Do not use alcohol, banana oil, gasoline, nail polish, strong acids, alkalis, etc., to come into contact with the furniture surface to prevent the furniture from being corroded.
6. When using furniture, consider its load-bearing capacity.
7. Furniture should be cleaned and maintained regularly. Use a soft cotton cloth when cleaning, and avoid using hot water, alkaline water, or disinfectant to prevent the paint on the furniture surface from peeling off.
8. Do not place items above 100 degrees Celsius or excessively cold items on furniture.
9. You can place camphor or tobacco leaves inside the furniture to prevent moths and cockroaches; add some peppercorns to prevent rats.
Renovation process – Precautions for cleaning after renovation
The most troublesome thing after moving is cleaning. The furniture is messy and there is dirt and garbage everywhere. It is always very hard to clean by yourself and you can't achieve the desired effect. At this time, most people will choose to hire a professional cleaner to take care of it, which saves effort and can make the cleaning more thorough.
Many cleaning companies will try to sell you cleaning services when you visit building material markets, or you can choose a cleaning company you are familiar with. However, we should pay special attention to whether they use highly polluting and corrosive chemical agents during the initial cleaning process, because the frequent use of these agents can damage household items.

When hiring cleaning staff, it's essential to supervise the process to prevent them from using rough methods that superficially clean the house but actually damage your hard-earned belongings.
1. Oxalic acid: To save time, many cleaners use oxalic acid for cleaning. However, oxalic acid is very damaging to stainless steel products, causing them to lose their luster and making them difficult to restore.
2. Steel wool: Ceramic glaze is easily damaged by steel wool and cannot be restored.
3. Window cleaner: Many cleaning staff use very dirty window cleaners, which may even have a lot of hard objects on them. As a result, when they clean your window, they may scratch it.
4. Floor drain: Cleaning staff are often not as careful as we are when cleaning. They may wash the floor directly with water, but sometimes there are a lot of residues or even cement dust on the newly renovated floor. If these are washed directly into the floor drain, they can easily clog it.
Additionally, they might scratch your floor while moving their equipment, or damage doors, furniture, or walls while retrieving items. However, cleaning companies usually make their cleaners pay for these issues out of their own pockets, and since their income is often very low, you generally don't want to make them pay. Therefore, it's best to be present during the initial cleaning to remind them to avoid these problems.
● Home Decor Tips
Analyzing the pitfalls of home renovation budgets and how to deal with them!
Comprehensive Analysis of Renovation Budget
I. The Role of a Renovation Budget
It serves as the basis for the renovation company and the homeowner to sign the contract, make payments for the project, and settle project accounts; it also serves as the basis for the homeowner to develop plans and implement economic accounting.
II. Basis for preparing the renovation budget
1. Decoration engineering design drawings. This includes planning drawings, i.e., floor plans before and during interior decoration, as well as detailed drawings of specific areas such as the kitchen, living room, and bedrooms; 2. Decoration renderings; 3. Decoration engineering construction plan.
III. Methods and Steps for Preparing a Renovation Budget
1. Collect data; 2. Familiarize yourself with the drawings and understand the design intent; 3. Read the quota instructions and calculate the quantities of work; 4. Apply the quota or unit price list to calculate the direct costs.
IV. Composition of Renovation Costs
The total cost of home renovation should be: cost of main materials + cost of auxiliary materials + labor cost + design fee + management fee + tax.
Main materials refer to finished and semi-finished materials used in decoration construction, based on the construction area or individual project, such as wood.
Flooring, tiles, sanitary ware, lighting fixtures, hardware, etc.
V. Four Factors Affecting Renovation Budget
Material prices are the basis for quotations. The quality of materials is also one of the factors that determine the price. Materials that are sturdy and well-made are relatively more expensive, while those that are less durable are relatively cheaper. In addition, brand is also important. Materials from well-known brands with good reputations will definitely be more expensive than those from unknown small factories.
The quality of workmanship affects the final price, referring to the skill level and craftsmanship of the construction workers. With the same materials, the workers' skill directly impacts the quality of the renovation. Skilled and well-trained workers will naturally command a higher price.
Construction management incurs higher costs. The construction process is complex, involving various trades working simultaneously, and the sequence of procedures is crucial for ensuring quality. Hiring a reputable decoration company with dedicated personnel to manage the construction will incur additional expenses.
The qualifications of the decoration company are also a factor. A good decoration company should have an office, design department, project supervision department, material supply center, finance department, and audit department. These all require certain fees, which will naturally be reflected in the price.
5 common pitfalls in home renovation budgets:
Trap 1: Lowering the price of a single item
For example, a homeowner might know the current unit price of flooring and tiles, but he might not know the labor costs for flooring installation and tile laying. So he might manage to negotiate down the price of the flooring and tiles, but end up losing out on the labor costs.
Solution: When reviewing a renovation quote, don't just focus on the price of a single item. Instead, consider the overall costs, including labor, wear and tear, machinery, and other items. If you find a price that is unusually low, then you need to examine the prices of other items.
Trap Two: Omitting certain main materials for hard decoration
The renovation quote deliberately omitted certain main materials. The homeowner was attracted by the reasonable overall price and signed the contract readily. However, during the subsequent renovation process, the homeowner will continue to pay more money for these malicious omissions by the renovation company.
Solution: Be cautious from the start and insist on clearly specifying all main materials in the renovation contract or agreement, based on the design drawings, and clearly indicating whether the purchaser is the renovation company or the homeowner. Materials often overlooked include those used in corners, such as feature walls and ceilings.
Trap Three: Obscuring the quality, grade, and specifications of the selected main materials
This is a common trick used by unscrupulous renovation companies. Although they specify the materials needed and indicate the quantity, they do not specify the quality, brand, or specifications of the materials to be used.
Solution: Require the renovation company to clearly indicate the quality, grade, specifications, and other parameters of the materials used in the budget, so that it can be used as a reference during installation and use.
Trap 4: Changing the unit of measurement for materials
Homeowners rarely pay attention to the units on the quote, unaware that different units mean significant price discrepancies. For example, a custom-made shoe cabinet might seem reasonable, but the dimensions aren't specified, leaving ample opportunity for later renovators to take advantage of the situation.
How to calculate the price of water and electricity for home renovation
Renovation tracking
From finding a decorating team to the completion of the renovation, there are undoubtedly many confusions and questions.
The first hurdle in home renovation is undoubtedly the modification of water and electrical circuits. Prices for water and electrical modifications vary widely in the home renovation market, and some renovation companies even refuse to provide upfront quotes.
Tell them exactly how much the water and electricity renovation will cost. What if it costs two or three thousand yuan more than the budget? It turns out that water and electricity renovations currently still...
There is no standardized price.
Market research
There are as many as four ways to quote for water and electricity.
There are four types of pricing: pricing by meter, pricing by square meter, pricing by item/unit, and pricing by pure labor. Pricing by meter is...
This is the most widely used method. Many home improvement companies use this pricing method. Using this method, the home improvement company will include plumbing modifications,
The unit price for upgrading both high-voltage and low-voltage circuits is quoted per meter. The final settlement is then made based on the unit price on the quotation and the actual amount used in the project.
That is, after the water and electricity renovation is completed, the fee is collected after measuring and verifying the amount of work done.
Pricing by building area per square meter is a method currently used by large companies. Its calculation method is relatively simple, involving...
The cost of labor, materials, etc., is all integrated and quoted per square meter. The total cost of a complete water and electrical system renovation = cost per square meter.
The actual measured building area is used. However, market prices vary; it is understood that workers with slightly inferior craftsmanship charge approximately 75 yuan per square meter.
Right. Some decoration companies charge around 100 yuan per square meter if they decorate according to national standards, while the common market price is 80 or 90 yuan per square meter.
Around ten yuan.
Priced per item/unit is a pricing method that categorizes and sets prices based on different apartment types and areas. For each "item" or switch...
The water and electricity costs per person are averaged and then quoted uniformly. Currently, the market price is approximately 75 yuan per person for a three-bedroom, two-living room apartment.
There are approximately 80 positions in the room.
Pricing based on pure manual labor is a convenient option for many workers, mainly based on the semi-package model, where prices are quoted per square meter.
For example, the common market price is 18 yuan per square meter, but if grooving and cement mortar filling are included, the renovation company will generally charge 35 yuan per square meter.
Meters. Generally speaking, the water and electricity needs vary depending on the functional areas: dining room, living room, bedroom, bathroom, kitchen, and balcony.
The prices vary from room to room. To make the calculations more transparent, companies that use per-unit pricing often also use per-meter pricing methods.
This led to the development of hybrid pricing methods.
Focus of the dispute
Large budget and final accounts errors spark dissatisfaction
Budget overruns are largely due to the ambiguity of renovation quotes. But with so many pricing methods available, which one is the most accurate and transparent?
Theoretically speaking, pricing by the meter, which involves charging based on usage, is fairer to both home improvement companies and consumers.
However, in practice, some small companies may operate improperly, maliciously add extra lines, or make careless estimates in the early stages, which is most likely to cause problems.
The existence of "shady dealings" led to large discrepancies in the budget and final accounts, causing dissatisfaction and complaints from consumers.
Comparatively, calculation methods based on square meters or items/units are more transparent. Once the unit price is determined, the error rate between the budget and the final account is very small.
This makes it less likely for disputes to arise later. However, these calculation methods also have a drawback: they cannot accurately calculate the actual cost of hydropower projects, which can lead to discrepancies.
Some small companies or unlicensed contractors cut corners, reuse materials, and use the nearest available wiring, which has its drawbacks. Therefore, if possible, homeowners should ideally...
The company should conduct a market survey of the prices of water, electricity, and building materials used, and combine this with current quotes from home decoration companies to gain a clear understanding of their pricing.
Engineer Liu offers advice
Water and electrical circuit renovations require careful consideration; consumers must be vigilant. First and foremost, they must have a clear understanding of the process. (Home decoration design)
Designers typically create designs based on the user's needs: How many outlets and switches does the bedroom need? Should there be a refrigerator in the kitchen? Is it necessary?
Do you need a sterilizing cabinet? Does the bathroom need an electric water heater? Besides the study, which other rooms need a network cable? The homeowner must provide the following information.
Be aware of the living habits of family members. Secondly, pay attention to the acceptance process for water and electricity projects, carefully inspect them, and sign off cautiously.
Given the special nature of concealed works, we must not wait until other projects are completed before investigating the problems.
It is essential to require the electrician to have an electrician's license. Furthermore, the renovation company should prepare detailed water and electrical circuit modification drawings before signing the contract, and the work should be strictly carried out according to the drawings.
Calculate the possible quantities of the following items: telephone line modifications, power outlet modifications, switch panel modifications, plumbing modifications, and cable TV modifications.
Depending on the wiring and network cable upgrades, request the renovation company to calculate a reasonable cost accordingly. Minimize additional charges to avoid excessive costs.
At the same time, ensure your home renovation contract is leak-free. Some contracts will state "subject to change based on actual work volume." If the home renovation company...
If you're confident there won't be any additional charges, then you shouldn't be afraid to include it in the contract. Require the home renovation company to control the percentage difference between the initial budget and the final settlement for water and electrical circuit renovation projects.
Limiting these costs to a certain range and ensuring they are included in the contract terms will effectively reduce overdraft costs incurred by homeowners due to additional items.
In addition, it is also necessary to have the home improvement company clearly explain all items with specified unit prices in the contract. This can prevent some home improvement companies from deliberately omitting items, and the renovation team from being misled.
Adding or removing items. Furthermore, different home improvement companies have different pricing methods for basic construction costs, material costs, etc.
Different construction projects have different names. Therefore, when consumers inquire about quotes from different home improvement companies, they often encounter difficulties, especially when dealing with different companies.
When budgeting for home renovations from smaller companies, it's best to learn some professional knowledge and choose well-known, reputable large companies.
10 Common Shoddy Construction Practices Explained
1. Substrate treatment shoddy workmanship index: ★★★★★
Problem: Before painting with latex paint or laying wall and floor tiles, it is essential to properly prepare the substrate. Some workers cut corners in this area, which can result in uneven walls and color differences after painting, or even discoloration and peeling of the latex paint, or tiles that do not adhere properly.
Experts advise that during wall and floor tile installation, tiles should not be laid directly on lime mortar, lime plaster, paper-reinforced lime plaster, hemp-reinforced lime plaster, or latex paint surfaces. The substrate must be cleaned and roughened before laying. The adhesive mortar used between the tiles and the substrate should be mixed strictly according to construction standards and proportions, using the specified grade of cement and adhesive materials; arbitrary mixing is not permitted. When applying latex paint, pay close attention to whether the wall putty is applied evenly and smoothly, and whether sanding and rolling are done properly. Additionally, ensure the latex paint is diluted appropriately.
2. Ground leveling work shoddy work index: ★★★★★
Phenomenon: Some houses have uneven floors that need to be leveled during renovations. If the workers are not careful or intentionally do shoddy work, it can lead to a situation where "the more they level, the more uneven it becomes." Furthermore, the cement mortar used in the construction can significantly increase the floor load, posing a safety hazard to the building. Proper procedures without proper protection can result in severe sand backflow; some workers simply sprinkle a layer of cement on top of the sand to deceive the homeowner.
Experts advise that before leveling the ground, the substrate must be properly prepared first, followed by leveling with cement mortar. After the cement has completely dried, use a dedicated level to check the flatness of the entire surface. If any peeling cement is found, pry it off to inspect the surface. Only then should you proceed to the next step of the construction.
3. Noodle preparation shoddy workmanship index: ★★★★☆
Phenomenon: The so-called "small parts" are small places that consumers cannot see or pay much attention to, such as the top edge of the door, the bottom of the window sill, and the inside of the radiator cover. Some workers will cut corners or even leave these areas untouched.
Experts remind us that every object has six planes, and we should not overlook any detail when inspecting the quality of a project.
4. Electrical wiring in conduit: ★★★★☆ (shoddy workmanship index)
The phenomenon: In home renovations, almost all electrical wires are run through PVC conduits and concealed within the walls. Therefore, once the wires are inside the conduits, consumers cannot see them, and replacement is difficult. If workers are not careful during the process, the wires can become tangled inside the conduits, creating a potential electrical hazard. If workers intentionally cut corners, they may use wires with joints or run multiple wires through the same PVC conduit.
Experts advise consumers to inspect the electrical wires they purchase and supervise the installation process on-site. A power-on test should be conducted after installation. Additionally, consumers must obtain a wiring diagram from the contractor. As soon as the electrician buries the wires in the walls, these walls should be numbered and a floor plan drawn. The wiring routes and specific locations should then be drawn, noting the distance from the floor slab, the distance from the ground, and the location of adjacent walls. Particular attention should be paid to marking the locations of wire joints. This will allow for immediate location of the wiring in case of a fault.
5. Seam finishing quality (shoddy workmanship): ★★★★
The problem: At the junctions of walls and doors/windows, and where two different colors of paint meet, these are precisely where workers often cut corners. You'll often see latex paint mixed with the woodwork, and various problems at the joints. Even worse, some workers paint wall paint directly onto the woodwork.
Experts advise that proper seam treatment is crucial, and you must supervise the workers to ensure careful application. When two colors of paint meet on a wall, apply masking tape along the edge of the first color before painting the second color. After painting, simply remove the tape for a clean, neat seam.
6. Wall grooving workmanship index: ★★★☆
Problem: Concealed wiring requires cutting grooves in walls and floors to bury the pipes. Some workers perform this task carelessly, damaging the building's load-bearing structure and potentially harming other nearby pipes.
Experts advise that before construction, the route and location of pipelines should be confirmed again with the construction foreman. The requirements for grooving vary depending on the wall structure: grooving is not allowed in load-bearing walls, and grooving walls with insulation layers can easily cause surface cracks. Grooving on the ground requires extra care to avoid damaging the floor slab and causing problems for downstairs residents.
7. Wall and floor tile installation shoddy workmanship index: ★★★
Phenomenon: Laying wall and floor tiles is a highly technical process. If workers cut corners, problems such as hollow tiles and uneven joints are most likely to occur. Furthermore, the cement and adhesive used for tiling are also crucial; improper mixing ratios can lead to tiles falling off. Additionally, gaps are easily created along the entire wall, so it's essential to plan the placement of these gaps in advance.
Experts remind that, according to the "Quality Acceptance Standards for Home Decoration Projects" issued by the Beijing Municipal Commission of Housing and Urban-Rural Development, wall and floor tiles should be laid flat and firmly, with clear patterns, no dirt or grout residue, and the surface color should be basically consistent. The joints should be uniform, and the tiles should be free of cracks, chipped corners, and missing edges. Local hollow areas should not exceed 5% of the total.
8. Wire joint defects index: ★★☆
Problem: Electricians are not following wiring requirements when installing sockets, switches, and light fixtures. This is especially problematic when consumers use high-power appliances such as water heaters and air conditioners, causing switches and sockets to overheat or even burn out, resulting in significant losses for consumers.
Experts advise that during construction, electricians should be supervised to strictly follow operating procedures. After all switches and sockets are installed, they must be tested to check for overheating.
9. Drainage pipe shoddy workmanship index: ★★
Phenomenon: During renovations, construction teams sometimes try to save time by dumping large amounts of cement, sand, and concrete debris into the sewers. The direct consequence is severe sewer blockage, causing flooding in kitchens and bathrooms due to poor drainage. Some projects may pass final inspection without issues, but drainage problems persist.
Experts advise: Strictly supervise the construction team to ensure that sewers are not used as garbage chutes. After the plumbing work is completed, fill all basins, sinks, and bathtubs with water, then drain them simultaneously to check for proper drainage and leaks.
10. Wall painting shoddy workmanship index: ★☆
Phenomenon: Latex paint is currently the most common wall decoration material, and it can be applied by brushing, rolling, or spraying. If workers are not careful or perform the work carelessly, slight color differences often occur. This problem is especially common with darker latex paints. Diluting the paint with too much water results in poor paint quality.
Experts advise that latex paint needs to be mixed with some water before use, and the mixed paint should be used up immediately. It's also best to finish painting the same color in one go. If the wall needs repairs after painting, the entire wall should be repainted.
The above 10 common construction tricks basically cover all aspects of hard decoration construction. Many of them are hidden works. Research has found that contractors cut corners in most of the hidden works. So, we would like to remind friends who are going to renovate to keep their eyes open, otherwise they will have endless troubles in the future.
4 ways to check home renovation quality, 3 steps to avoid renovation traps
I. Four ways to check the quality of home decoration
First trick: Look at the wallpaper and light switch.
To check how well the wallpaper is installed, look at the seams between the switch box and the wallpaper to see if they are smooth or rough.
The leading home renovation website suggests that this is because the order of wallpapering and light switch installation differs. Zhong Kaili Decoration recommends wallpapering first, then installing the switches. This prevents the wallpaper edges from peeling, extending its lifespan and ensuring a more aesthetically pleasing finish.
The second trick: Observe the Yin and Yang lines.
The simplest way to judge the quality of a renovation is to check if the lines on the walls are straight and regular. Homeowners can stand at the edge of the wall and look at it perpendicularly with one eye to see if it's a straight line. If it is, it proves the decorator's skill is good.
The third trick: Roll a coin and listen to the sound.
The simplest way to check if the floor tiles are properly installed is to drop a coin vertically onto the ground and listen to the sound. If the sound is dull, it means the floor tiles are not hollow. If the sound is crisp and loud, it's possible that the floor tiles are hollow.
Fourth tip: Inspect the light fixtures, especially the edges.
To check the quality of the ceiling installation, look at the edges of the chandelier for obvious repair marks. If they are very obvious, it indicates that the worker's skills are not up to par. If the repair marks around the light fixture are not obvious and are almost invisible, it indicates that the worker's craftsmanship is good.
II. Three Steps to Avoid Renovation Traps
First, before signing a contract with a decoration company, you should carefully check the brand and price of all the main materials and have a clear understanding of all the costs.
Second, during the renovation process, reputable decoration companies generally require homeowners to inspect and sign off on each main material before it can be used, in order to prevent the use of inferior materials.
Third, some unregulated small renovation companies may add extra items during the renovation process, charging homeowners additional fees. This happens when homeowners haven't communicated adequately with the designer beforehand. Resolving all issues upfront will prevent this from happening.
How to spot the deceptive tactics of decoration companies
Whether construction management is standardized, whether the construction team is stable, and whether the design is professional are all essential qualities that a reputable renovation company must possess. However, today's chaotic renovation market can be overwhelming for consumers. Therefore, consumers need to have some knowledge and experience before making a choice to avoid being deceived.
Clear and transparent pricing
Home renovation and home purchase both involve financial investment, but the expenditures differ. While the amount paid for a house is relatively predictable, there's no fixed price for home renovation, regardless of the level of decoration, style, materials, or labor. This leaves homeowners bewildered by the exorbitant prices quoted by decoration companies. So, how much does it actually cost to renovate a house? Wanting to make your home comfortable is understandable, but renovation involves how much money you invest and what kind of effect you want to achieve. Generally, depending on the needs of different residents and their aesthetic tastes, renovations can be categorized as economical and practical, spacious and luxurious, or high-end and luxurious. Each level requires investment, and the amount of investment varies significantly between levels. Therefore, homeowners need to "pay according to their budget" when renovating their homes.
Simple renovation. Ordinary solid-body tiles are used for the floors of bedrooms, living room, and balcony. Domestic latex paint is used for the walls and ceilings. Domestic wall and floor tiles and DVC panel ceilings are used in the kitchen and bathroom. Plaster moldings are used at the corners of the ceilings in bedrooms and living room. It costs about 15,000 to 25,000 yuan to upgrade from a one-bedroom to a three-bedroom apartment. On average, it costs about 300 yuan per square meter of usable area.
Complex renovation. Imported composite wood flooring or domestic solid wood flooring is chosen for the bedrooms, while joint-venture tiles are used in the living room. Nippon Paint is used for the walls and ceiling. Other materials are upgraded one level at a time. This upgrade from a one-bedroom to a three-bedroom apartment would cost approximately 20,000 to 40,000 yuan, averaging 400 yuan per square meter.
Luxury renovation. Wooden floors are used in the bedrooms and living room, and other materials are upgraded to a higher level, with imported raw materials being used in some areas. This upgrade from a one-bedroom to a three-bedroom apartment would cost approximately 30,000 to 50,000 yuan, averaging 500 to 700 yuan per square meter.
The prices listed above only cover the renovation costs and do not include the cost of decorations. Sometimes, depending on the homeowner's requirements or the designer's ideas, additional decorations may be added. If the design is commissioned to someone else, the design fee generally accounts for 5% to 20% of the total renovation cost.
Reasonable estimation of material usage
Whether you purchase the materials yourself or entrust a renovation company to do so, you should have a clear idea of how much material you need for home renovation to avoid wasting money. How can you reasonably estimate the amount of decorative materials needed?
Wallpaper or wall covering usage. After determining the pattern and type of wallpaper or wall covering, calculate the required material size based on the room area. Considering potential wastage during installation, buy about 10% more than the actual amount needed. There are two methods for calculating wallpaper or wall covering usage. One is a rough calculation, multiplying the room area by 2 or 5 to get the amount of material needed. The other method is on-site measurement, which is more accurate. First, determine the width of the wallpaper or wall covering needed. Then, measure the perimeter of the room's walls (excluding doors, windows, etc.) based on this width. Count how many widths of wallpaper or wall covering are within this perimeter, indicating how many strips are needed. Then, measure the length (in meters) of the wallpaper or wall covering. Finally, use the same method to measure the length needed for areas such as under windows and irregular corners. Add this to the calculated length to get the total length. This method is more suitable for wallpapers or wall coverings with intricate patterns and those where precise alignment during installation is not required.
Paint usage. With improved housing conditions, many homes are adding a layer of colored paint to their white walls. Before painting, it's essential to estimate the amount of paint needed. Too much will be wasteful, while too little will be insufficient, and adding water will make the color inconsistent. Here's a simple calculation method: Divide the room area by 4, and multiply the wall height to be painted by 10 and divide by 4. Add the two results together to get the required amount of paint in kilograms. For example, if a room is 20 square meters and the wall height is 1.6 meters (excluding the 1.2-meter wainscoting), then (20 ÷ 4) + (16 ÷ 4) = 9, meaning 9 kilograms of paint are enough to paint the walls twice.
The amount of floor tiles needed. For example, if the floor tile size is 30.5 cm x 30.5 cm, approximately 10 tiles are needed to cover 1 square meter of floor space. Multiply this by the square meterage of the room to get the total number of tiles required. Since cut tiles are often used to join the edges of the floor, it's best to draw a sketch based on the room's dimensions beforehand. When choosing a pattern, determine the number of light and dark tiles needed, and accurately calculate the number of whole tiles required. Many types of adhesives are available for floor tiles; most adhesives used for bonding rubber and plastics can be used. Common types on the market include 401 adhesive, 4116 adhesive, and floor adhesive. Generally, 1 kg of adhesive can bond 4-6 square meters of floor tiles. Using too much adhesive can cause it to seep out from the gaps in the floor and stain the surface, making it difficult to clean. Using too little adhesive can cause the tiles to detach from the floor after drying.
Plug the "black hole" of shoddy workmanship.
Taking a renovation project with a total cost of 50,000 yuan as an example, there are countless areas where shoddy workmanship can be achieved:
Masonry work: 1. Buying substandard cement can save about 5 yuan per bag, totaling about 100-200 yuan; 2. Buying substandard tiles can save 0.1-1.0 yuan or more per tile, totaling about 900 yuan; 3. Using cement that doesn't completely fill the tiles can save about 150-250 yuan in labor costs.
Carpentry. 1. Buying substandard, low-quality plywood: For example, a 9cm plywood board costs 75-80 yuan per piece for imported boards, while some inferior domestic boards cost only 55-60 yuan per piece, a difference of 20 yuan per piece. For an 80-square-meter room, about 50 9cm boards would be needed, saving 1000 yuan from this alone. 2. Using inferior panels or taking advantage of the homeowner's unfamiliarity with materials when the contract doesn't clearly specify costs can save 400 yuan. 3. Using inferior wood flooring can save approximately 1500-2000 yuan. 4. Quickly laying the flooring can save approximately 500 yuan in labor costs.
Painters can save around 500 yuan by: 1. Using counterfeit latex paint (recent rumors suggest that latex paint poisoning incidents are caused by this kind of shoddy workmanship); 2. Reducing the number of coats, which can save around 500-1000 yuan; 3. Using inferior varnish, which can also save a considerable amount, around 200 yuan.
Metalworking. 1. Using lower-grade materials can save about 400 yuan; 2. Fewer solder joints reduce grinding and save 200 yuan in labor.
Electrician's tips: 1. Using inferior wires can save 100-200 yuan. 2. Not using protective conduits can save 50-100 yuan in materials and about 100-200 yuan in labor costs.
Don't try to save time where it's not necessary.
In home renovation for working-class families, many try to save money, but sometimes their efforts to cut costs backfire and create more problems later. Experts believe that the following three aspects should absolutely not be skimped on.
The use of cheap, low-grade floor tiles is a common mistake. Many working-class people are reluctant to spend money on high-quality floor tiles to save money. Floor tiles are easily worn, and if they are too cheap, they won't be durable. Over time, quality problems will appear, and it will be difficult to repair them later. Furthermore, cheap floor tiles are not slip-resistant, increasing the risk of accidents and injuries, ultimately making the purchase more trouble than it's worth. Therefore, when buying floor tiles, you shouldn't prioritize price; at least buy mid-range tiles.
Buying cheap electrical wires and water pipes is a common mistake. Electrical wires and water pipes are essential expenses in home renovation, and some working-class people try to cut corners on this, focusing only on price and neglecting quality. This is a serious error. Substandard electrical wires and water pipes can create significant safety hazards after installation. Therefore, even for those on a budget, standards should not be lowered when purchasing electrical wires and water pipes; high-quality products should be chosen.
Minimize the number of power outlets installed. Driven by the desire to save money, many working-class families try to cut costs on small things during home renovations, including power outlets. Some believe that saving on outlets also saves on wiring, a win-win situation. Therefore, they try to minimize the number of power outlets installed when considering their current appliances. This approach is incorrect. With the increasing electrification of homes, the number of appliances is growing. If a new appliance is added but there isn't enough outlet, it becomes difficult to install one later. Furthermore, using too few outlets simultaneously increases the risk of accidents. The correct approach is to install power outlets reasonably based on the size of the house, a professional electrician's design, and the actual number of appliances, leaving some spare outlets for future expansion.
No matter what kind of renovation company you hire, you need to be careful and have a keen eye to see through their tricks so that you don't waste money and you can be satisfied with the finished house!
Disputes that may arise during the final settlement of renovation costs
As the renovation project nears completion, the renovation company will usually proactively begin discussing the final settlement with the homeowner. The final settlement will generally differ from the initial budget. What problems are likely to arise during renovation settlement?
I. Confusion of concepts and over-calculation of fees
Home renovation projects involve many technical terms, and some renovation companies take advantage of homeowners' lack of expertise, using deceptive terminology to overcharge during the final settlement. For example, one clause in the home decoration and renovation contract signed between a renovation company and Mr. Wang stipulated that all furniture such as cabinets, low cabinets, and wall cabinets with a height of less than 1 meter would be calculated by linear meter; any work less than 1 meter would be calculated as 1 meter, and anything exceeding 1 meter would be calculated by the actual length. Most consumers would understand this to mean that anything less than 1 meter would be calculated as 1 meter, and anything exceeding 1 meter would be calculated based on the actual length. However, this is not the case. The renovation company's so-called linear meter calculation means that regardless of the actual length, any fraction less than 1 meter is counted as 1 meter. For instance, when Mr. Wang settled his home renovation, the renovation company calculated his master bedroom wardrobe as 25 meters when it was 24.7 meters long and his TV cabinet as 5 meters when it was 4.24 meters long. This linear meter calculation alone resulted in an over 1000 yuan increase in the renovation cost.
II. Additional charges are prone to disputes.
Some decorating companies attract customers with low prices during the initial contact process. However, most consumers lack knowledge about home decoration techniques and simply evaluate a decorating company's entryway price based on the initial quote, neglecting to verify the overall design and decoration project. Once consumers choose these companies, various additional items will arise during construction, and the final decoration cost may be higher than that of similar companies.
Common issues include: decorating companies quoting only labor costs for a process, excluding material costs, without clarifying this beforehand. During construction, whether the consumer purchases the materials themselves or entrusts the company to do so, the consumer has to pay extra. Alternatively, designers may intentionally omit necessary items in the initial quote, thus lowering the total price. During construction, the consumer must add these items to achieve their desired results, incurring additional costs. Another common issue is that some decorating companies' quotes only include a portion of the construction process; to complete the process, additional items are required. For example, when painting, they might only quote the price for the paint and the painting process, seemingly lower than other companies, but this doesn't include the pre-painting preparation of the wall surface.
Furthermore, during water and electrical circuit renovations, the length of water and electrical pipes may be intentionally extended, especially in bathrooms. As construction progresses, some changes and additions become reasonable and necessary, exceeding the original contract stipulations. How to charge for these changes and additions is the most common source of disputes during settlement. This billing requires careful calculation by both parties.