30 tips for home cleaning and maintenance! The cleaning lady's 'secrets'!
Home Work is tough enough! Home life needs improvement! How? Start with cleaning! Come on! Little Bunny will light up your home skills right away! ?? ??
1. Tips for removing indoor damp smell

(1) Intermittent ventilation
When the indoor humidity is high, close the doors and windows facing the wind (usually south), or only open the air vents to reduce the amount of moisture from the outside entering the room. When the weather is clear, open all the doors and windows to allow the room to be ventilated and well-lit, allowing air to circulate and accelerate the evaporation of moisture.
(2) Quicklime absorbs moisture
Buy some quicklime, wrap it in newspaper, and place it under the bed, next to cabinets, tables and chairs, and around the room. This will make the air in the house drier.
(3) Sawdust absorbs water
The corridors and aisles in public places are very damp, so you can sprinkle some wood chips or rice husks on them. This will absorb moisture and prevent pedestrians from slipping.
(4) Wet storage room exterior
Try not to leave raincoats, umbrellas, or washed clothes indoors that have been soaked by the rain. Also, it's best to put a mat at the door and wipe the soles of your shoes dry when you enter or leave to reduce moisture indoors.
2. How to deal with waste oil
Households often struggle with dealing with used frying oil. Dumping it directly down the sink raises concerns about water pollution, while pouring it into a plastic bag raises concerns about leaks.
In fact, you can use an empty milk carton, stuff it with newspaper, and then pour the waste oil in. Since the newspaper will absorb the oil, and the inside of the milk carton has been processed to prevent the liquid from leaking out, you can safely throw it in the trash.
3. Dispose of kitchen waste
Kitchen trash cans are often filled with wet garbage. If the garbage bag has a hole, it will not only drip all over the trash can, but also fill the trash can with a foul smell.
Before putting the garbage bag in, you can put a few layers of thick newspapers at the bottom of the trash can. This can not only absorb water and keep the inside of the can dry, but also prevent the trash can from emitting bad odors.
4. Disposal of hazardous waste
Broken glass, old kitchen knives, needles, and sharp bamboo chopsticks from barbecues are common hazardous waste. They should be processed and packaged before disposal. Broken glass and old kitchen knives can be wrapped in newspaper and placed in an empty cardboard box. Mark the box with the word "hazard" in marker . Sharp bamboo chopsticks should be broken off and then wrapped in newspaper or placed in an empty can and sealed. This also applies to needles.
5. Do not discard the desiccant at will
When discarding desiccant, accidentally placing it in the same bag with wet trash can create a dangerous situation due to the moisture it contains. Therefore, it's best to avoid discarding large quantities of desiccant at once or completely isolate it from moisture. If large quantities must be disposed of, they must be sealed in a plastic bag before being placed in the trash.
6. Tips for cleaning duvet covers
Washing a duvet cover is laborious. Soak the cover thoroughly in water, discard any remaining water, smear it with soap (apply more soap to heavily stained areas), and gently rub it. Place it in a clear plastic bag, tie the bag tightly, and place it in the sun for three hours before washing. This method will ensure a very clean surface. This method only works for plain white covers ; it's not suitable for patterned or colored covers, as it may cause discoloration.
7. Remove dust from the bed
Beds often collect dust, and brushing them will cause it to fly everywhere, moving the dust everywhere. This not only pollutes the indoor air but is also harmful to human health. Wash and dry an old acrylic garment. When you need to remove dust, quickly wipe it across the bed in one direction. The strong static electricity generated will attract the dust, just like a dry cleaning, with excellent results and saving time and effort. After several uses, wash and dry it, then reuse it economically.
8. Remove dust from velvet sofas
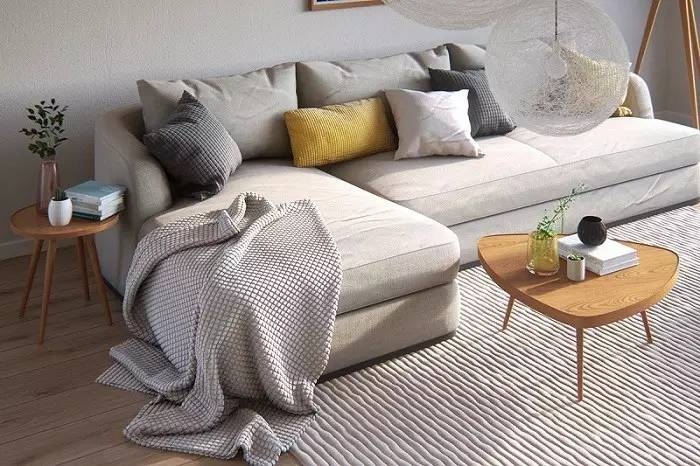
If you do it indoors, you can soak a towel or sofa cover, wring it out, spread it on the sofa, and then gently whip it with a wooden stick. The dust will be adsorbed on the wet towel or sofa cover.
If it doesn't work once, you can wash the towel or sofa cover and beat it repeatedly. Alternatively, you can move the sofa outdoors and gently tap the velvet surface with a wooden stick to remove the dust on the sofa and let the wind blow it away.
9. Tips for cleaning pillowcases
Because hair oil or hair dye will adhere to the pillowcase as the head contacts the pillow, the pillowcase will appear visibly greasy. When washing the pillowcase, add an appropriate amount of detergent to warm or hot water, put the pillowcase in, and soak it for 2-3 hours to remove the dirt.
10. Tips for cleaning velvet curtains
First wash away the dust with clean water, squeeze out the water, put it into a warm detergent solution, and gently rub it. You can also put it in the washing machine and wash it with a weak wash mode for no more than 3 minutes.
Rinse with clean water, place the fabric with the reverse side facing outward in a cool place. After drying, lay it flat on the floor, cover it with a damp and well-wrung cloth, and gently iron it with an iron. Remove the damp cloth immediately after ironing and use a soft brush to smooth the velvet while it is still hot to restore the velvet surface.
11. Tips for cleaning gauze curtains
(1) Milk washing method
When washing gauze curtains, add a little milk to the detergent solution, and the washed gauze curtains will be like new.
(2) Baking soda water soaking method
First remove the floating dust, then put it into warm water with detergent and rub it slowly. After washing, rinse it with clean water several times. Finally, soak the gauze curtains in water with 500 grams of baking soda and rinse them. This can keep the gauze curtains white.
(3) Tea-dyed curtain method
If the gauze curtains have turned yellow and are difficult to clean, you can soak them in tea overnight to turn them into light brown.
12. Tips for removing mirror frame marks on the wall

(1) Detergent method
It can be wiped with a cloth dampened with detergent.
(2) Eraser method
You can use an eraser to erase it. If it cannot be erased, gently grind it off with sandpaper.
13. Tips for removing wall stickers
(1) Ironing method
You can first cover the old paper with a wet cloth, then iron it with an iron, and the paper stuck on the wall will be easily removed.
(2) Drying method
If you want to remove wallpaper, you can use a sponge dipped in water to dry the wallpaper thoroughly, then you can remove it.
14. Wood floor waxing tips
If you want to protect your wooden floor from long-term wear and tear and keep it shiny, you can apply a layer of wood floor wax after cleaning the floor. However, be careful not to wax the floor until it is completely clean and air-dried , otherwise the wax layer will not fully adhere to the wooden floor, causing white spots to appear on the floor.
It is also best to use a flat sponge mop to avoid the lint from a regular mop and wax residue on the floor. Waxed wood floors do not need to be cleaned, just sweep them regularly and polish them with wax occasionally, which is easier with liquid wax.
15. How to clean a cutting board
After each use, scrub the cutting board with a scrub brush and clean water to remove any dirt and sawdust. If there is any fishy smell, such as fish or meat, scrub it with detergent, then rinse it with warm water and scald it with boiling water, then stand it upright to dry.
After using the cutting board for a period of time, you can scrape off the wood chips with a kitchen knife, or use a wood plane to completely remove the dirt on the cutting board.
16. How to clean a kitchen knife

After using the kitchen knife, be sure to wash it clean and wipe off the moisture to prevent it from rusting. In addition, after using and washing the kitchen knife, it is best to scald it with hot water or apply some salad oil to prevent it from rusting.
If the surface of the kitchen knife has rusted, you can use a cork dipped in some detergent to gently wipe it to remove the rust. Taking advantage of sunny days to expose the kitchen knife to the sun can also allow the knife to be naturally sterilized and disinfected.
17. Tips for cleaning the food storage box
The bottom of the fruit and vegetable storage box is a hotbed for bacteria to grow, as vegetable scraps or rotten leaves produce a suffocating stench. If you have to pull out the entire cabinet every time to clean it, it will be very troublesome and difficult to clean.
You may want to use single-sided printed flyers to lay on the bottom with the blank part on the back facing up. Due to the characteristics of flyers, any dirt will be obvious at a glance. Once it gets dirty, you can replace it immediately and it can be kept clean without brushing.
18. Tips for cleaning rice cookers
The inner pot can be washed with water, but the outer surface must be wiped dry before placing it in the rice cooker. The outer shell and heating plate must not be submerged in water. The area between the heating plate and the inner pot must be kept clean and can only be cleaned with a damp cloth after disconnecting the power. Avoid dropping rice grains into the inner pot, as this can affect thermal efficiency and even damage the heating plate.
19. How to keep the refrigerator clean?
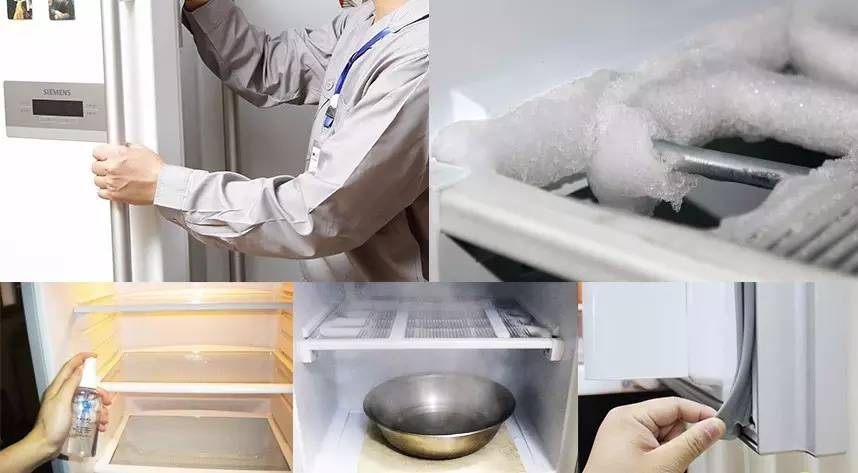
First, neutralize alcohol and water in a ratio of 7:3 into a dilute solution and pour it into a sprayer. Then, wipe the inside of the refrigerator clean while spraying. Then, use an old toothbrush to remove dirt in dead corners. As for the caulking areas of the refrigerator door that are prone to mold, they should be cleaned once half a month. In addition, check the refrigerator once a week to remove unnecessary items or dispose of food that is about to expire as soon as possible.
20. Clean the back and sides of the refrigerator
Dust easily accumulates on the back and sides of the refrigerator. Clean them every six months with a feather duster or vacuum cleaner. Failure to remove dust can lead to poor heat dissipation, resulting in poor cooling and wasted energy. When cleaning the back of the refrigerator, be careful not to get burned by the hot areas of the radiator or compressor.
Also, be careful around the back of the refrigerator to prevent cockroaches from nesting there. Avoid using chemicals like toluene, abrasive powder, brushes, or chemical wipes to clean the refrigerator, as these may damage the finish or internal parts. When cleaning around electrical components, unplug the power cord and check for damage.
21. How to clean a gas stove
After a household gas stove has been used for a long time, the flame will turn red or change color when burning, and the bottom of the stove will often turn black. This is because oil and dust fall into the small holes of the stove burner.
At this time, you can remove the burner, brush around the small holes of the burner with an old toothbrush, then poke the small holes one by one with a thin wire, tap them on the table a few times to remove the dirt. If you have a bicycle pump, it will be better to blow at the small holes one by one.
If the flame of the burner is still red after cleaning, it means that the nozzle is stuck with dirt. You can remove the burner to expose the nozzle and poke it a few times with a hard plastic wire or wool. Do not use copper, iron or other metal wires to avoid fuzzing the nozzle pores and affecting the nozzle's performance. Then install the burner. If the flame is blue, it indicates that the stove is operating normally.
22. Tips for cleaning summer mats
(1) Use a vacuum cleaner to clean the mat regularly, but be gentle when vacuuming to avoid damaging the mat.
(2) Dip a rag in diluted vinegar, wring it out as much as possible, and wipe the mat. This will make the mat shiny and avoid yellowing.
(3) If the mat is moldy, you can wipe it with a dry cloth dipped in phenol solution to remove the mold.
(4) If it is yellowed by cigarette butts, you can wipe it with a cotton swab dipped in hydrogen peroxide.
(5) When powdery items are spilled on a straw mat, sprinkle some coarse salt on it, pat the mat vigorously to mix the dirt and coarse salt, and then use a vacuum cleaner to clean it up.
(6) After wiping, the mat should be ventilated and dried in the shade to prevent it from getting moldy.
(7) Avoid direct sunlight on the mat to prevent fading.
23. Tips for keeping blankets clean
The edges of blankets are particularly prone to staining, so sewing a towel along the edge will quickly clean any stains. A large sports towel is particularly practical, but if sewing a towel along is too much of a hassle, using safety pins like those used for bedding and sheets will also work.
24. Pillow cleaning tips
Pillows can harbor pathogens, mites, dust, and other allergens. Failure to clean pillows regularly can lead to respiratory and skin infections and trigger allergic asthma. Wash and clean pillowcases frequently. The best way to disinfect and clean pillow cores is to expose them to sunlight for at least an hour.
25. Common knowledge on bedding disinfection

The main method of disinfecting pure cotton bedding is sun exposure. Sunlight can heat and dry pure cotton bedding, and the ultraviolet rays in sunlight have a strong killing effect on bacteria.
The bactericidal ability of sunlight is related to the intensity of the light and the exposure time. Generally speaking, 3 to 6 hours of exposure to direct sunlight can kill most pathogenic bacteria with weak resistance, such as typhoid Salmonella, Pneumococcus, diphtheria Corynebacterium, and hemolytic Streptococcus.
However, for pathogens with strong resistance, such as the hepatitis virus, continuous exposure to the sun for several days is necessary to kill them. For home patients (especially those with hepatitis), bedding should be frequently removed and washed, with the cotton inside exposed to the sun for several days. Removed covers and sheets should be soaked in disinfectant, or the entire bedding can be fumigated with ethylene oxide.
26. Mattress maintenance and cleaning
(1) Turn the mattress over once a month for the first six months, and then every three months thereafter. This will evenly distribute the force on the mattress and prevent some springs from prematurely becoming fatigued due to excessive use.
(2) Vacuum the mattress several times a year to keep it clean. Air the mattress regularly to keep it fresh and comfortable for sleeping.
(3) When the mattress is accidentally stained with dirt, it can be cleaned with soapy water. Do not use strong acid or strong alkaline detergents to avoid fading the mattress.
(4) Using sheets and bedspreads not only has the function of absorbing sweat, but also can change the color and the atmosphere of the room. The most important purpose is that they are easy to remove and wash, which can ensure sleep hygiene.
(5) Avoid sitting on the edge of the mattress frequently to prevent uneven stress on the springs, which may cause deformation. Do not let children jump on the mattress to avoid direct damage to the springs.
(6) Frequently rotating the mattress head to tail can increase sleeping comfort and make the mattress more evenly stressed.
(7) Do not smoke or use electrical appliances in bed to avoid accidentally burning the bedding and mattress.
27. Tips for removing carpet mites
Most carpets in homes are infested with mites. These mites are extremely tiny and can reproduce at an incredible rate in moist air. They also release a large amount of substances that can cause allergies, causing nasal congestion, itchy eyes, and sore throats. Carpet mites are generally flour mites and dust mites. The specific removal methods are:
(1) Powder cleaning method
Sprinkle powder on the carpet, then brush it with a brush and vacuum it. This method does not require water and can be used on the carpet quickly after cleaning, but its cleaning power is poor.
(2) Spray cleaning method
Spray the detergent onto the carpet and rub it with a foam pad to absorb the stain. This method uses less water and can be used in a short time after cleaning. It is not suitable for wool carpets.
(3) Warm and wet wiping method
In addition to vacuuming the carpet every day, you should also wipe it with a warm and wet towel. It is worth reminding that the bottom and back of the carpet should also be cleaned.
28. How to remove chewing gum from carpet
Chewing gum stuck on carpet is difficult to remove. You can put ice cubes in a plastic bag and cover the chewing gum. After about 30 minutes, when it feels hard when you press it with your hand, remove the ice cubes and brush it off with a brush.
For liquid chocolate stains on carpet, blot them with a dry cloth, then gently wipe them with a sponge dipped in a little baking soda, then scrub them again with a sponge dipped in clean water and let them dry completely. For dry, hard chocolate stains that have been walked on, first use a dull knife to gently scrape off the thick flakes, then wipe the remaining stains with carbon tetrachloride.
29. Tips for cleaning wooden floors

Never wipe it directly with a wet mop. Use a special cleaner for wooden floors to clean it, so that the floor can maintain its original warm texture and natural color, and prevent the wood boards from drying out and cracking.
Note that in order to avoid excessive moisture penetrating into the inner layer of the wooden floor and causing mold and rot, you should try to wring the mop dry when using floor cleaner.
If the surface is not polished, it is best to test it in an inconspicuous area because it will not come into direct contact with water. After confirming that there are no problems, use it on a large area. Do not soak the wooden floor with water, and do not wash it with very hot water, as this will soften the wood and cause it to crack.
30. Maintenance tips for wooden furniture
(1) Burn marks on the surface of wooden furniture
If you place hot cups and plates directly on furniture, it will often leave a circle of burn marks on the paint surface. You can use a rag dipped in alcohol, toilet water, iodine, or strong tea to gently wipe the burn marks. Alternatively, apply a layer of vaseline on the burn marks and wipe them with a rag every two days to remove the burn marks.
(2) Scorch marks on the surface of wooden furniture
Fireworks, cigarette ashes, or unextinguished matches can sometimes leave scorch marks on furniture finishes. If only the finish is burned, you can wrap a toothpick in a piece of hard cloth and gently rub the burnt area. Then apply a layer of wax to remove the scorch mark.
For more healthy home knowledge, please continue to pay attention to Tubatu Home Decoration~