Rookie Practical Wealth Stool
I only know that this stool is called the Fortune Stool. I liked it very much when I saw it for the first time, but I really couldn't afford it. There are cheaper ones for about 200 yuan, but the workmanship and materials are really bad, so I have always wanted to make one.
But as a rookie, I only started to play with wood in April last year, and it is really difficult to make this thing. So I have kept this idea for a year,
and I didn't dare to make it until now. It is said that in the past, when a disciple wants to become a master, he must make something like this, but I don't have a teacher, so I have to figure everything out by myself, look at pictures on the Internet, go to physical stores to touch, and measure other people's finished products. I regret it no matter how many times I get the cold shoulder.
The thing is not finished yet, and I am still working hard on it. I will post some of the process first, and it should be roughly completed in the next few days.
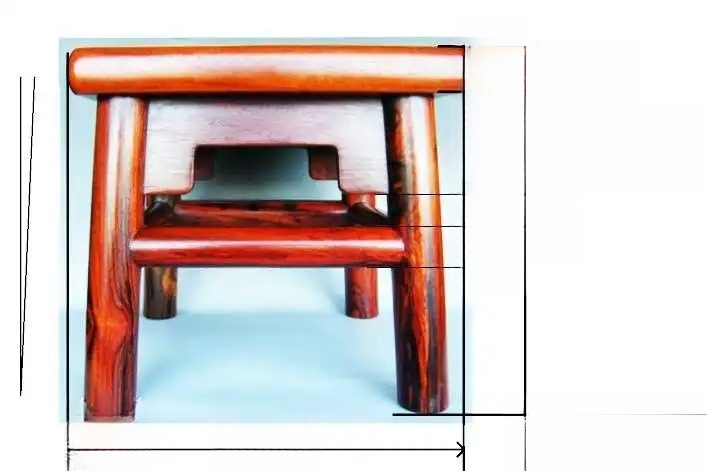
This is the size diagram. The actual leg angle is about 3.2 degrees, and the lower horizontal tent is 10cm from the ground. I have a few hand-made drawings myself, but they are very bad, so I won’t post them.
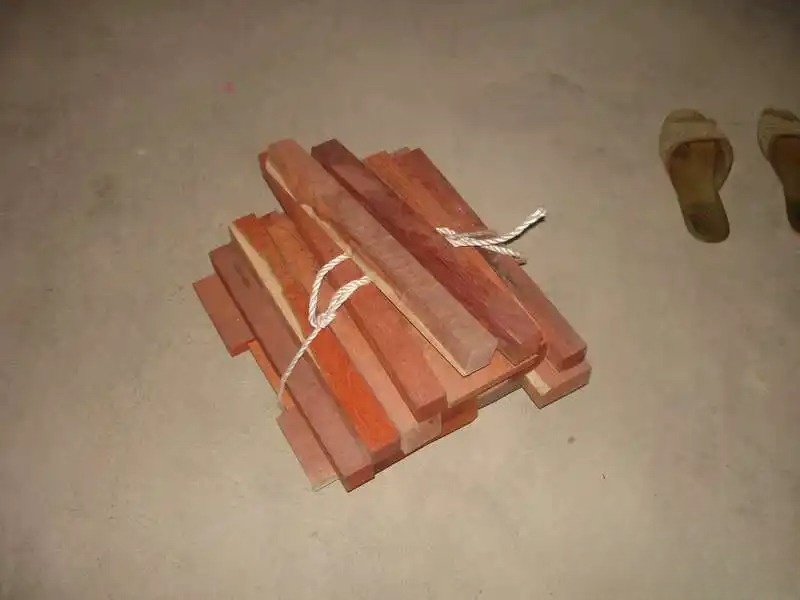
First prepare the materials. This is a set of materials I bought from a friend at a friendly price. I bought ten sets at once. I'll take two sets to practice with.
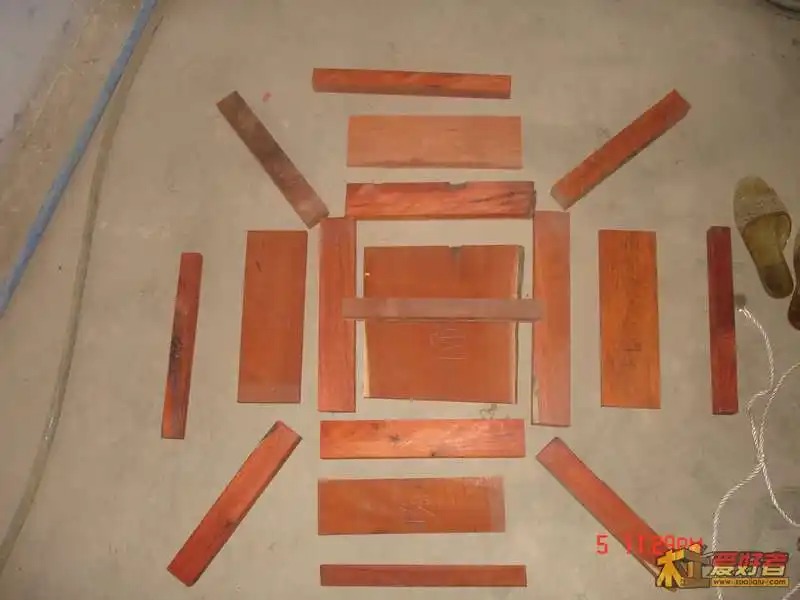
Open, all the parts are like this
At the same time, I also prepared some materials. This is the upper and lower thresholds of an old house that is hundreds of years old. It is made of nanmu wood from my hometown. It is about 7.5 centimeters thick and is very good.
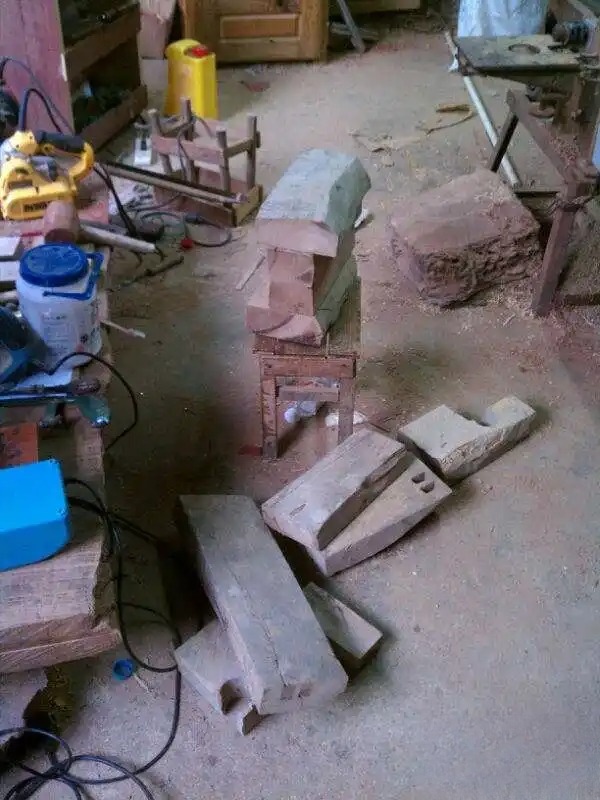
Calculate and decompose
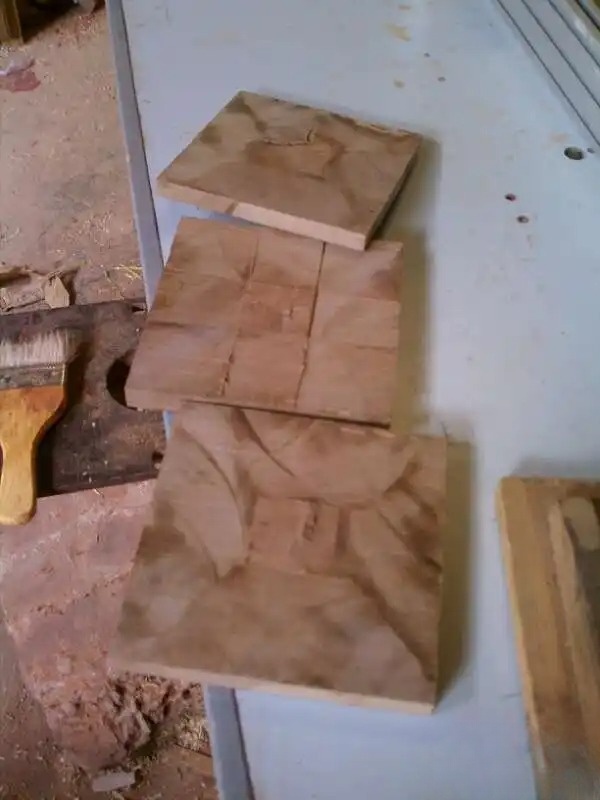
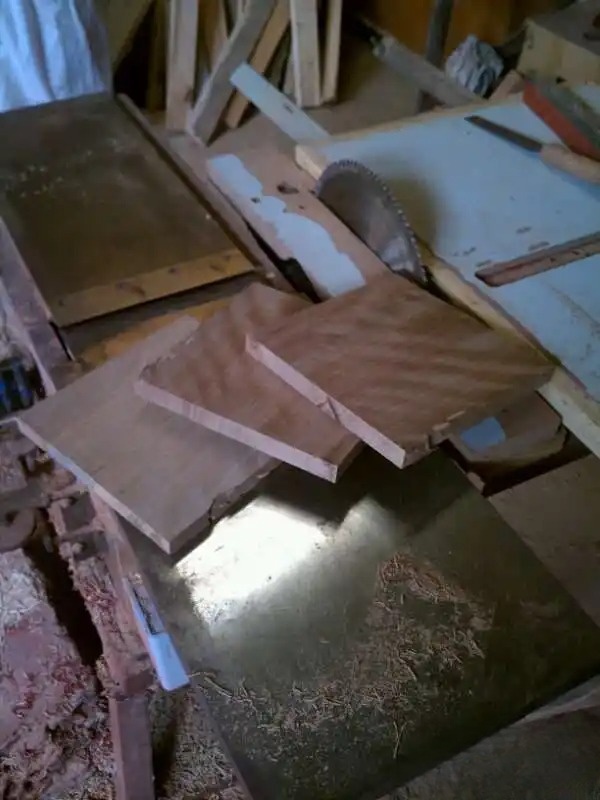
This piece needs to be cut into three pieces for the stool surface
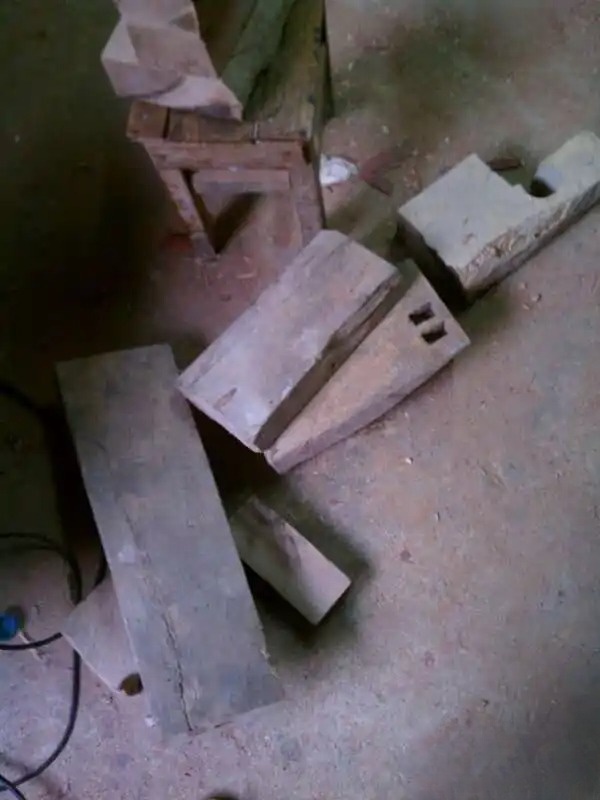
I didn't have a band saw, I only had a table saw and manual labor, which was tiring and a lot of material was wasted.
Planed, looks much better
Open side.
Cutting angle
A pile of scraps.
Looks good, right?
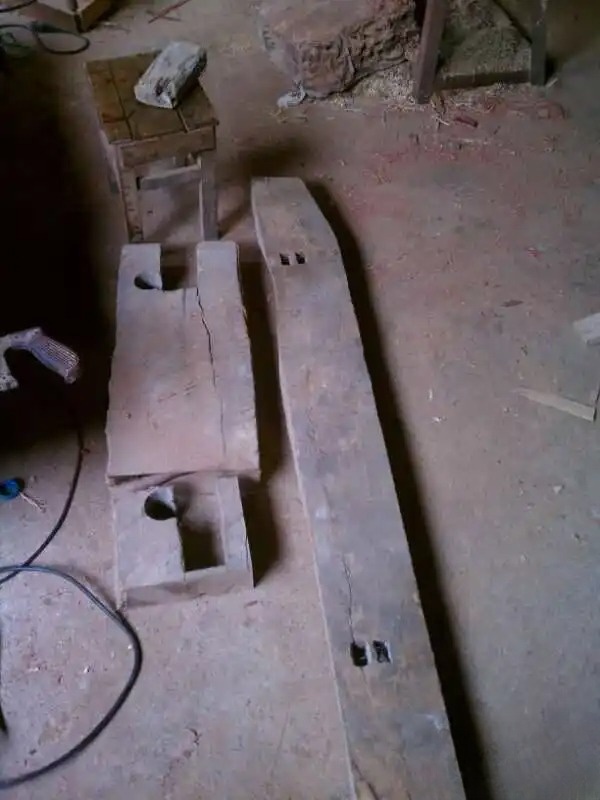
This is a handheld engraving machine to open the mortise. The size of the inner frame of the upper board is fixed, and the front, back, left and right are precisely limited.
Then push the engraving machine back and forth on it, and slowly press down to make a standard eye.
Group photo
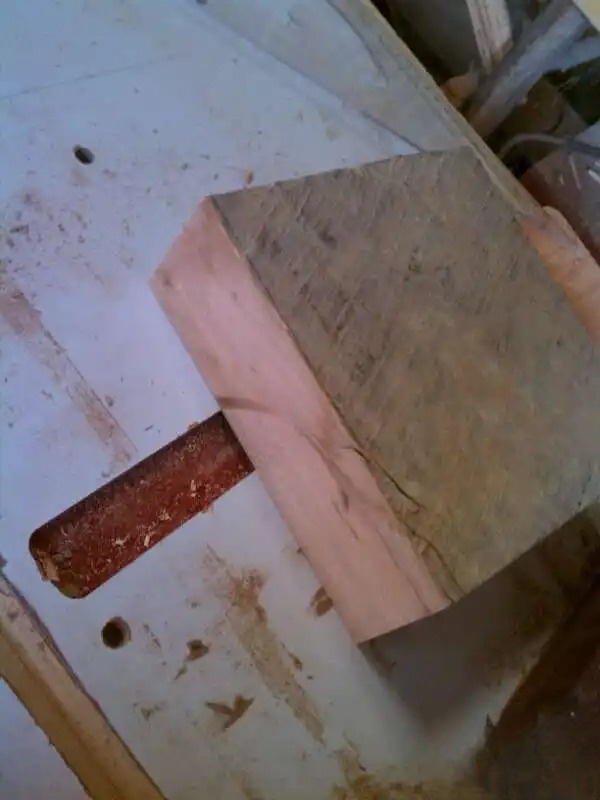
The tenon was rounded. Actually, this step was wrong. I shouldn't use a round tenon. I didn't know it when I was doing it. After I finished it, many people in the group pointed it out.
However, I don't have a good chisel and my hand skills are not good enough. I guess it's not going to be a good idea to make it a square hole.
Try to assemble. I forgot to take a photo when I made the panel. Anyway, everyone should understand. The T-shaped knife of the engraving machine can make the groove.
Because there is no planer, the thickness of the panel is a little bit off, so when assembling, you need to slowly grind the tenon little by little until the face frame fits.
Assembly. Take a photo with the three hand tools I made myself
Home
Furniture
But as a rookie, I only started to play with wood in April last year, and it is really difficult to make this thing. So I have kept this idea for a year,
and I didn't dare to make it until now. It is said that in the past, when a disciple wants to become a master, he must make something like this, but I don't have a teacher, so I have to figure everything out by myself, look at pictures on the Internet, go to physical stores to touch, and measure other people's finished products. I regret it no matter how many times I get the cold shoulder.
The thing is not finished yet, and I am still working hard on it. I will post some of the process first, and it should be roughly completed in the next few days.
This is the size diagram. The actual leg angle is about 3.2 degrees, and the lower horizontal tent is 10cm from the ground. I have a few hand-made drawings myself, but they are very bad, so I won’t post them.
First prepare the materials. This is a set of materials I bought from a friend at a friendly price. I bought ten sets at once. I'll take two sets to practice with.
Open, all the parts are like this
At the same time, I also prepared some materials. This is the upper and lower thresholds of an old house that is hundreds of years old. It is made of nanmu wood from my hometown. It is about 7.5 centimeters thick and is very good.
Calculate and decompose
This piece needs to be cut into three pieces for the stool surface
I didn't have a band saw, I only had a table saw and manual labor, which was tiring and a lot of material was wasted.
Planed, looks much better
Open side.
Cutting angle
A pile of scraps.
Looks good, right?
This is a handheld engraving machine to open the mortise. The size of the inner frame of the upper board is fixed, and the front, back, left and right are precisely limited.
Then push the engraving machine back and forth on it, and slowly press down to make a standard eye.
Group photo
The tenon was rounded. Actually, this step was wrong. I shouldn't use a round tenon. I didn't know it when I was doing it. After I finished it, many people in the group pointed it out.
However, I don't have a good chisel and my hand skills are not good enough. I guess it's not going to be a good idea to make it a square hole.
Try to assemble. I forgot to take a photo when I made the panel. Anyway, everyone should understand. The T-shaped knife of the engraving machine can make the groove.
Because there is no planer, the thickness of the panel is a little bit off, so when assembling, you need to slowly grind the tenon little by little until the face frame fits.
Assembly. Take a photo with the three hand tools I made myself
Uploaded on 2012-5-6 00:01
Download attachment (19.99 KB)
The panel is basically done. Later, we need to level, polish and fillet the board. We will continue tomorrow.
In fact, the above things cannot be done in one day. I am not that amazing. It took me a long time, almost four or five days off. I have to work on weekdays, so I have to find time to do it.
I will post so much tonight. If you want to know what happens next, please listen to the next article.
| This post was last edited by Working Pig on 2012-5-6 20:55 Add two pictures of dovetail and crossbeam. After the panel was basically finished, I started to work on the horizontal tent. Back to the point, I couldn't get the panel to fit at a 45-degree angle. It took me a long time to make it fit. There was a 2mm gap on one edge of one board, all caused by accumulated errors. Because there was no planer, the thickness of the four panels was a little different during processing, and the four sides were not vertical, which directly affected the accuracy of the mortising and opening. For the horizontal tent material, if there is no planer, use a bench planer to make a right angle first, and then use a bench saw and a backing saw to cut out the other two sides. You can barely make a square material with a size of 28*28mm. Cut the edges and set the length. The length of the horizontal tent can be calculated using the triangle formula. An angled template was made so that the lengths of the upper and lower sides of the horizontal tent can match the legs. This template is very useful and is also used for the tooth plate. After the length is determined, the tenon is cut on the engraving machine. The template is also used here, and one cut is made on the top and bottom. I like to use a 1/2 inch straight knife to cut the mortise, so the size of the tenon is 12mm. The cut straight tenon should be a few mm shorter than the actual insertion, leaving enough for rounding. Use this knife to round corners This arc is not standard. The description of Hardware King is R=22.2, but the actual circle should be smaller than 18. Next time I will buy a bigger one or grind it myself. R=14 rounding knife Finished product. Open the tooth plate, the thickness of the tooth plate is about 10mm, the length of the tooth plate is 195, the height is 70mm, and the insertion depth is 9mm. Use the template to cut out two angled edges. I helped my friend get two rulers, but I regretted it after I finished it. When my friends saw it, they all asked me for a pair... Now I started making the legs. I wanted to make a stool with four legs and eight forks. The angle of the legs is very important. This angle is diagonally inclined, so I need a platform to cut out the slope. The limit is stuck to achieve batch processing. When cutting the other knife of the leg, the compound bevel surface is also used to avoid cutting wrongly. The advantage of using power tools is that you don’t need to draw lines... When I said this, many people BS Set the saw to the right height and cut out the two sides of the tenon. With these two sides, it will be easier to find the angle when cutting by hand later. Playing tic-tac-toe and making mortises. It is tragic that two cuts were made wrong here, which directly resulted in the two tenons being one large and one small, which caused endless troubles and directly made the mortise and tenon holes in the panel much more complicated. This step can't be done by machine. One is big and the other is small. Ha, because there are two corners cut by the electric saw, the bottom angle of the tenon is very accurate. Prepare the mortise holes on the legs. There is a small triangular piece of wood in front of the backrest, and the angle is still the same. When using a straight knife to cut a mortise, there are limits on the left and right. Because it is at an angle, you can only cut it side by side. After cutting one side, you need to adjust the limit before you can cut the second hole. Manually trimming the holes into square holes is actually a superfluous step. If it is not a big in and a small out, there is no need to make it square. Even if it is a big in and a small out, it should not be square. When the horizontal tent is rounded, the tenon is also a bit round, and there will be a small black corner without flesh after assembly. I used a straight knife to make the grooves. I would use a T-shaped knife next time. I used an R19 fillet knife to make the corners round. This is basically the completion of the overall design. Here is a picture of the finished dental plate. It is easy to make a dental plate. You can fix dozens of plates with clips and grind them. The fillet below is made with a fillet knife. I wanted to make a line on the edge of the dental plate, but I didn't have a suitable knife. I looked at many sold ones, but they didn't make a line either. It seems that only large stools and chairs have that line. The great contributor to the large circle This picture represents two working days of endless scraping and grinding. The fillet knife had to be scraped slowly to get a satisfactory round shape, and then it was polished to more than 600 grit sandpaper. I felt like crying. My fingernails were worn off. This is the easiest, but if you're not careful you'll end up eating a large piece of meat. The back of the panel needs to be rounded The corners also need to be rounded. These are very easy jobs that don't require any brainpower. It would be great if all the jobs were like this. The electric stuff is done, I put it in the car and go home to assemble it slowly. Although the workshop is not too far away, I can travel two kilometers less, and the time and money saved can buy a knife. This time I really don’t have a picture, I have to wait a few days to see if I have time, and I will post it after the assembly. The biggest experience in these days is scraping, scraping, scraping, scraping, I have never used it before, I always used sandpaper, and now I know the benefits of scrapers, smooth, you won’t scrape wrong, you won’t know if you make a mistake, and it doesn’t cost money (someone said that buying sandpaper can also make you poor.) |
| I'm just starting to drill the mortise holes in the panel. I can't help it. Who told me to drill the legs wrong at the beginning? Hand chiseling is probably my worst basic skill. I seldom do it. Make a mark, watch your legs open, After opening, try to fit it. It is best if it can be pressed in by hand but is a little tight. Four legs up In order to avoid mistakes, I can only saw this short one now, but fortunately it is not a big project. Similarly, you should also try to fit the horizontal tent. It should be tighter on the top so that it can be used for a long time. Dental plate trial installation, it is a little higher here If it is high, repair the bottom surface of the dental plate After I fixed it, I had no confidence in myself and didn't dare to make a mistake, for fear that I wouldn't be able to install it if I made a mistake. Corresponding mark There is one last auxiliary tool to be made before gluing 280*280 frame on the bottom The rope is used to fix the panel before installation, and it is no longer needed after the panel is installed. I can't wait to take a look. Ha, those plastic ones in the background can be thrown away in a few days. Uploaded on 2012-5-7 21:27 Download attachment (57.87 KB) An 80-jin stool is pressing down on the small stool that has just been finished. It will be scraped and polished and waxed tomorrow when it is dry. I just checked it and felt that the lower horizontal tent is too low. It should be 8mm higher, and the size will remain the same. The combination will be tighter. The tent I made now is about 1mm shorter. |