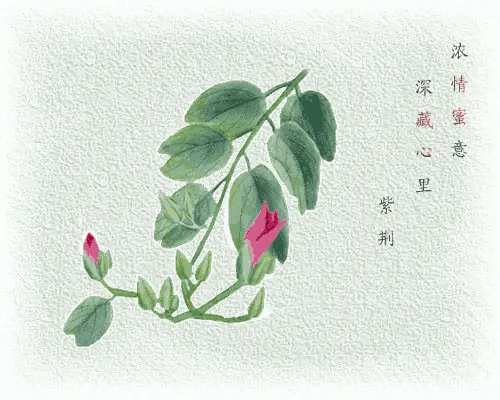
Practical flowergrowing tips 20
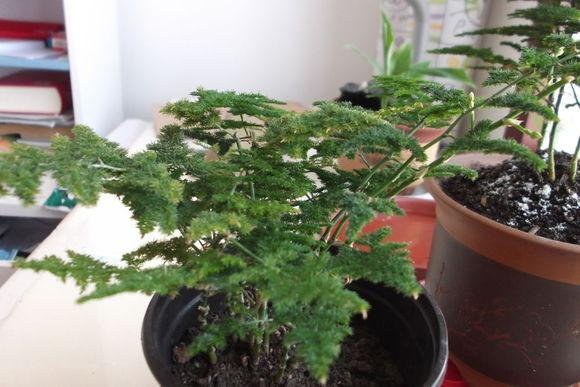
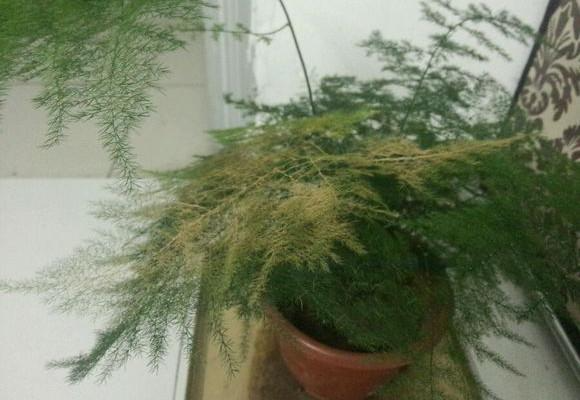
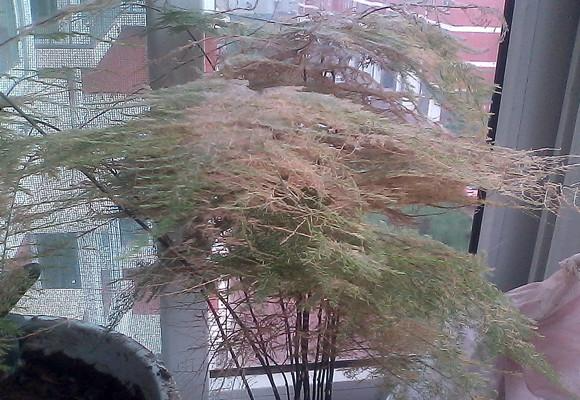
Asparagus fern is loved by people because of its graceful posture and is suitable for decoration on desks, windowsills, coffee tables and other places. However, the leaves of asparagus fern are prone to yellowing in winter, which is quite a headache. Winter is coming, so let's talk about the problem of yellowing leaves of asparagus fern in winter. If you do these 4 points, you don't have to worry about the leaves of asparagus fern turning yellow in winter.
1. Don’t water asparagus too much
Although asparagus fern likes moisture, the water in the pot soil evaporates slowly in winter. If you water it too much at this time, the asparagus fern will not only easily rot its roots, but also turn its leaves yellow or even wither. Therefore, you should reduce the number of watering in winter and place the flower pot in a warm place with sunlight.
2. Spray water frequently
Do you think this is contradictory to what I said above? Actually, it is not. As the leaves of asparagus fern are very small, the dry air indoors in winter will cause the leaves to turn yellow due to dehydration. Therefore, you should often spray water on the branches and leaves of asparagus fern or sprinkle some water around the flower pot to form a humid microclimate around the flower pot. This will not only prevent the leaves of asparagus fern from turning yellow, but also make the asparagus fern grow lush and beautiful.
3. Prevent smoke and dust hazards
Asparagus fern is afraid of smoke and dust, because smoke and dust not only affect the photosynthesis of asparagus fern, but also make it difficult for asparagus fern to breathe, thus making the leaves of asparagus fern turn yellow. Therefore, asparagus fern should be kept away from various smoke sources to prevent dust from falling on the leaves of asparagus fern.
4. Control the indoor temperature
Because asparagus fern grows best in an environment of 12℃~18℃, if the room temperature exceeds 20℃ or is lower than -5℃, the leaves of asparagus fern will turn yellow due to heat or freezing. Therefore, if the room temperature is higher than 20℃ in winter, it is best to open the windows to adjust the temperature.
If you achieve the 4 points mentioned above, the leaves of asparagus fern will basically not turn yellow in winter. However, there will definitely be special circumstances. As long as you take good care of it and make appropriate adjustments, you will be able to grow an asparagus fern that will satisfy you.
Nowadays, in order to make their living environment more beautiful and vibrant, more and more people have begun to grow green plants. Orchids, as one of the "Four Gentlemen", are also very popular among people. However, for novice orchid growers, it takes a lot of effort to grow orchids well. Today we are going to solve this problem. If you master these three important links, it would be strange if you can't grow orchids well.
1. Reasonable fertilization
Orchids cannot be fertilized without fertilizer, and too much fertilizer or heavy fertilizer is even worse. If the soil in a new orchid is too fertile, it often cannot survive; even if it can survive, it will rarely bloom. What is the best way to fertilize? Generally speaking, when the leaf buds emerge, a small amount of light fertilizer can be applied several times. The best time to fertilize is in the evening, and then water it once in the early morning of the next day, and fertilize once every 2 to 3 weeks. It is a safer way to fertilize according to the color of the leaves. If the leaves are yellow and thin, it means that there is a lack of fertilizer, and topdressing should be applied; if the leaves are black and the tips are burnt, it means that there is too much fertilizer, and fertilization should be stopped.
2. Watering
Regarding watering, there is a saying about flowers: "Dry orchids, wet chrysanthemums." This makes sense, but it is rather general. Practice has shown that it is best for orchids to be 80% dry and 20% wet. Water less during the flowering period and the leaf bud period, and move them back indoors during the rainy season.
In summer, the temperature is high, the amount of water evaporates is large, and the orchids grow vigorously. You can water them once in the early morning and evening. Avoid watering at noon. In the rainy season, pay attention to draining the flower pots to avoid excessive water accumulation in the flower pots. Watering should be done according to the moisture level of the potting soil.
In late autumn, the temperature begins to drop and the plant growth slows down. At this time, you can gradually reduce the amount and frequency of watering, and water it every 2 to 3 days. In winter, the temperature is low, and most orchids will enter a dormant period. At this time, you can water them every 5 to 7 days to keep the pot soil dry and wet. However, Molan and Hanlan, which bloom in winter, can be watered more as appropriate to ensure that they have enough water for growth.
3. Lighting
Light is an important factor in the formation of orchid flower buds. Although orchids like shade, they rarely bloom if they are placed in a shaded place all year round. Therefore, attention must be paid to light issues when cultivating orchids. In spring and summer, orchids are best shaded with reed curtains, or placed in a ventilated window facing east or south indoors. It is best to rotate the orchid pot under the curtain once every half a month so that the orchid can receive light from all sides, which is conducive to the balanced growth of the plant. When autumn cools down, the potted flowers should be moved out of the shade and allowed to bask in the sun for half a day, but care should be taken not to dry out in autumn.
If you master these three important steps, growing orchids will not be a problem. If you have better experience to share, please leave a message below to let more people know how to grow orchids.
If you like green plants but don’t have confidence in watering flowers, you might as well try growing this kind of plant that can grow with water. It will definitely not disappoint you.

This plant that can grow as long as there is water is called pennywort. It not only has a cute round appearance, but also has an easy-going character that "can grow as long as there is water", and it also has a vigorous vitality that grows every day. It can be said that it has many advantages!

The reproduction ability of this pennywort is very strong. I brought a small plant home from a friend before, and after 3 months it became a large plant that needed a large porcelain jar to hold it. So I had to divide the plant and give it to friends... endlessly. Sometimes I wonder if this pennywort can really grow money, then I don't have to go to work and fiddle with these flowers and plants every day.

Don't think that the pennywort is just a grass, it can also bloom. Its flowers are very small and beautiful, you must open your eyes and observe carefully to discover them! If you are worried about not being able to grow flowers, what are you waiting for? Go and grow some to feast your eyes! The pennywort really can grow as long as there is water!
The fortune tree is very popular because of its beautiful shape, thick rhizome, soft branches, and can be woven into shapes. It is suitable for home decoration and beautification. In addition, it has auspicious meanings, so it is loved by people. However, it is not so easy to keep it well. So how can we keep the fortune tree well? Preventing the leaves of the fortune tree from withering is the key.
Knowing the problem, we have to find the reason. There are generally the following reasons for the withering of the leaves of the fortune tree:
1. Cold damage
The fortune tree likes warm climates. If the temperature is below 5℃, it will suffer from cold damage, causing the leaves to wither and fall off. Therefore, in winter, the fortune tree must be moved to a warm place to prevent cold damage and cause the death of the plant.
2. Excessive moisture or water accumulation
The swollen part at the base of the fortune tree's stem can store water, so it is a relatively drought-resistant plant. Therefore, avoid excessive moisture and waterlogging in the soil, otherwise it will cause the fortune tree to grow poorly, even rot and die, and cause the leaves to wither. Therefore, if you want to keep the fortune tree well, the correct watering method is very important.
3. Smoking
The money tree is a plant that is extremely afraid of smoke. After being smoked, its leaves will turn yellow and wither.
Therefore, the above three points are all important, but after the leaves of the money tree wither, we need to analyze the cause and then take appropriate measures. If it is caused by cold damage, but the branches and stems have not been frozen, they will still sprout branches and leaves in the spring of the second year; if it is too wet and the roots are rotten but not serious, the potting soil should be kept relatively dry and the branches and stems should be sprayed with water frequently; if it is shrunken due to frost damage or root rot, it is difficult to save it.
A friend sent me a picture of a lotus in bloom. I was so envious of its beauty. My lotus has never bloomed (have you ever encountered such a situation?). I was very depressed, so I asked my friend for advice. She told me that the lotus may not bloom because the following 5 points have not been done well:
1. Germplasm selection.
Good seedlings can produce good flowers. If you accidentally buy degraded seedlings, they may not bloom. Therefore, purchasing strong seedlings is the key.
2. Insufficient light
The lotus is a plant that likes sunlight, so it needs sufficient sunlight to grow. If the lotus does not get enough light, it will affect its growth and cause it not to bloom. And when the leaves grow too much or too densely, it will also affect the differentiation of flower buds and flowering, so choosing a suitable location is also very important.
3. Fertilizer and pH
The lotus plant prefers an acidic to neutral soil environment, and generally requires a pH value of 6 to 7. If the container is too small and the nutrient medium is too little, it cannot meet the growth needs of the plant, and it will also make it difficult for the root system to stretch, resulting in the lotus plant not blooming or a decrease in the amount of flowering. Therefore, if you want the lotus plant to bloom, fertilizer and soil pH are also very important.
4. Protect the terminal bud
If the top bud of the seedling is accidentally damaged during the cultivation process, it will be difficult for the water lily to bloom that year. Therefore, you must be especially careful not to harm it during normal cultivation.
5. Water level control
Bowl lotus is an aquatic plant, so water is very important to it. If too much water is added when cultivating bowl lotus, the soil temperature will drop, which is not conducive to rooting, thus affecting the respiration of the root system. This will cause the roots of the bowl lotus to rot, thus affecting growth and flowering.
Friends who have lotus flowers that don't bloom, please check yourself! Find out what is the cause of your lotus flowers. Once you find the cause, treat it accordingly. You will definitely have a good harvest of lotus flowers next year.
I went to a flower shop with my friends before. We were dizzy with all the flowers in the shop. In the end, we could only listen to the advice of the flower shop owner and randomly picked a few to take home. After buying them, we found that they were not satisfactory. Later, I heard from netizens that there are actually some skills to buying flowers. If you choose flowers in this way, you don’t have to worry about being cheated by the flower shop owner.
1. Understand the habits of flowers
You need to understand the habits and origin of the flowers you want to buy, whether they are easy to maintain, whether they are suitable for you, and whether there is an environment that they like.
2. How to choose foliage plants
When choosing foliage plants, choose those with dense branches and leaves, even branches, and dark green leaves. Also, carefully check whether there are aphids on the tips of the branches and red spider mites on the back of the leaves. Be sure to check carefully to ensure that the plants are not infested with diseases and pests.
3. How to choose flowering plants
When choosing flowering plants, choose those with many buds that have not yet bloomed. Do not choose plants whose flowers are in full bloom or whose buds are damaged. When choosing potted flowers, it is better to choose those that have been in the pot for a long time.
4. How to choose evergreen flowers
Do not buy bare-root seedlings of evergreen flowers. Be sure to buy plants with their original soil. Do not buy plants with thin or leggy branches. Also, choose plants with a regular shape, lush, dark green leaves, a shiny, and healthy appearance. Also carefully check whether there are aphids on the branch tips and red spider mites on the back of the leaves.
5. Be clear about your purpose of buying flowers
Do you like to watch flowers or leaves? Do you plan to grow them on the balcony, in the living room, in the bedroom, in the bathroom or in the office? Because different environments have different suitable flowers, you must tell your boss the purpose of buying flowers. This is crucial to whether you can grow these flowers well! Don't be lazy.
Most people buy flowers and grow them to beautify the environment, so porcelain pots are the first choice for people to grow flowers (because they are beautiful, easy to match, and easy to clean). However, many plants have high requirements for the air permeability and water permeability of the pots. What should we do? 3 steps to make your porcelain pots as breathable and water permeable as clay pots
Step 1: Pelvic floor treatment
First, place a layer of chestnut-sized stones at the bottom of the flowerpot, then put a plastic mesh on the stones, and then put a layer of coarse sand about 2 cm thick. The gaps between the stones will be very breathable. Put another layer of coarse sand to prevent the soil from blocking the gaps. This way, the bottom will be both breathable and water-permeable.
Step 2: Basin wall treatment
Grow a piece of cardboard or tinplate to form a cylinder that is 2 cm smaller than the diameter of the porcelain basin. But be careful that the cylinder should be slightly higher than the porcelain basin. Place the cylinder in the porcelain basin.
Step 3: Fill with coarse sand
Fill about 2 cm thick coarse sand between the cardboard and the inner wall of the porcelain pot, like a wall. After planting flowers and trees in the cardboard cylinder, you can pull out the cardboard cylinder.
After completing the above three steps, just water the pot soil and the coarse sand layer to make them one, and the coarse sand layer will become a breathable and water-permeable channel for the pot soil. It will be like a mud pot. How about it? It's simple! Then act quickly!
Lucky bamboo is rich, elegant, exquisite and unique. Because its stems and leaves are like green bamboo, verdant and full of vitality, it can give people a feeling of wealth and auspiciousness, so it is loved by people. But how to keep lucky bamboo green all year round? Then you need to do the following 6 points.
1. Winter temperature
Lucky bamboo is a plant that prefers warmth, so the wintering temperature for lucky bamboo should not be lower than 8℃ to avoid frost damage.
2. Water during the growth period
The moisture mentioned here refers to the potted lucky bamboo. During the period of vigorous growth of lucky bamboo (the hot and humid seasons in summer and autumn are very beneficial to the growth of lucky bamboo cultivated in groups, and are its best growth period), it is necessary to keep the potting soil moist and spray water on the leaves and the surrounding areas regularly.
3. Placement
Lucky bamboo likes scattered light, so you can usually put it in a bright place indoors. In summer, you should put it in a place where there is no direct sunlight, otherwise the leaves of lucky bamboo will become dark. In winter, you should move it to a place near the south-facing windowsill so that it can see more sunlight, grow strong, and have green leaves.
4. Pot soil selection
The best potting soil for lucky bamboo is made of garden soil, leaf mold and a small amount of river sand. It is best to add a small amount of dried and crushed eggshells as base fertilizer. Never use clay soil and alkaline soil, otherwise it will cause the lucky bamboo to grow poorly and the leaves will turn yellow.
5. Apply fertilizer at the right time
For indoor lucky bamboo potted plants, a small amount of multi-element slow-release compound fertilizer granules can be buried in the pot soil. For convenience and hygiene, for families growing on the balcony or indoors, 0.2% urea plus 0.1% potassium dihydrogen phosphate mixed solution can be directly applied once every half a month. For soilless potted plants, a prepared special nutrient solution can be added once every half a month.
6. Timely pruning
It is best to repot lucky bamboo once every 1 to 2 years in spring. When repotting, you can cut off some old roots and add new culture soil. For lucky bamboo that has been cultivated for many years, if the branches are too many or too long, you should prune them in time to make the plant shape neat and show the upright, unrestrained, strong and powerful charm of bamboo.
If you do the above 6 points, you can keep your lucky bamboo green all year round. If your lucky bamboo is always not as you expected, you can try to grow it this way. Experts may have better experience, you can also leave a message below to share with us!
As people's requirements for quality of life are getting higher and higher, growing flowers has become a new hobby for everyone. If they can't grow flowers indoors, they will go to the balcony. However, many flower lovers have reported that the flowers they grow on the balcony are always not good. Why is this? Most of the time, it is caused by the special environment of the balcony. Therefore, if you want to grow flowers well on the balcony, it is very important to choose the right plants.
1. South-facing balcony
If your balcony faces south, you should choose plants that like light, are drought-resistant and heat-resistant, such as chrysanthemum, jasmine, pomegranate, coral bean, osmanthus, cactus, five-color pepper, rose, Milan, half-branch lotus, zinnia, etc.; if you can take shading measures on the south-facing balcony, you can cultivate shade-loving flowers or foliage plants.
2. East-facing balcony
If your balcony faces east, you should choose to place flowers that are slightly shade-tolerant, such as camellia, Clivia, azalea, Christmas cactus, etc.
3. West-facing balcony
If your balcony faces west, it is more suitable for planting climbing plants such as grapes, wisteria, honeysuckle, morning glory, morning glory, ivy, and creeper.
4. North-facing balcony
If your balcony faces north, it is basically not suitable for cultivating potted flowers, but after the temperature warms up in spring, you can plant some asparagus fern, palm bamboo, monstera, rubber tree, etc. In autumn, they need to be moved indoors or into a greenhouse for maintenance, which is more troublesome.
In general, it is necessary to understand the habits of your plants and see if your balcony can provide an environment suitable for their growth. If it can, they can grow well. If not, they will not grow well. Therefore, if you want to grow flowers well on the balcony, it is important to choose the right plants.
Maybe you will say that we can wait until winter comes, and what does it have to do with autumn? Just like our lives, we need to make good plans to better deal with problems. So, what should we do in autumn to make potted flowers better and safer in winter? That is to do cold-resistant training for potted flowers. This training is mainly for some flowers that do not hibernate or semi-dormant in winter, and it is not necessary for plants that hibernate in winter.
What is cold-weather training? It means putting flowers outdoors when the temperature drops in autumn, allowing them to experience a temperature change process and develop physiological adaptability to low temperatures.
What should we do? Put the flowers outdoors before the temperature drops in late autumn. After the temperature drops naturally, do not move the flowers indoors to let them adapt to the temperature. When doing cold-resistant exercises, pay attention to the following points:
1. When the temperature drops suddenly, move the flowers back indoors.
2. Move the flowers indoors before the frost, as the leaves of plants hit by frost are prone to frostbite.
3. Remember that cold-resistance training has its limits. Plants cannot adapt to lower temperatures indefinitely, and cold-resistance training cannot make flowers break through their own cold-resistance capabilities. Flowers that have undergone cold-resistance training are only slightly more resistant to freezing than those that have not.
4. Not every type of flower can be trained to be cold-resistant. Flowers that prefer high temperatures, such as anthuriums and colorful taro, should be moved indoors for cultivation before the temperature drops in autumn.
Although doing the above work cannot guarantee that the flowers can survive the winter safely, it can make it easier for the flowers to survive the winter than before. It is not complicated anyway, so friends who are interested can try it!
Last weekend, I went to a friend's house and saw that the leaves of a 2-year-old orchid had turned yellow and black. When I asked her why, she couldn't tell me. Later, I looked up some information and found that the yellowing and blackening of orchid leaves are usually caused by the following three reasons:
1. Improper watering
If the orchid is watered too much, causing the soil to be too wet, it will easily cause the orchid roots to rot, which will manifest as the entire leaves turning yellow at first, then turning black, and finally the entire orchid will die.
Solution: If this happens, you should reduce the amount of watering. If the problem is serious, you can remove the orchid from the pot, remove the cultivation soil, trim the rotten roots and blackened orchid leaves, and then disinfect the roots and place them in a cool and ventilated place for 1 to 2 days. Then you can change the soil and replant.
2. Improper lighting
If you place orchids in direct sunlight for a long time, you will find that a large area of yellow will appear in the upper and middle parts of the leaves exposed to direct sunlight, and then turn black, and finally these orchid leaves will dry up.
Solution: If this happens, you should move the orchid to a place with scattered light but not direct light, then cut off the yellow and black parts, and spray the orchid frequently to keep it moist, which will promote the growth of new buds.
3. Diseases
Diseases are also a common cause of yellowing and blackening of orchid leaves. In the early stage of the disease, only spots of yellowing and blackening appear on the leaves, and then spread to the entire leaf.
Solution: If this happens, cut off the diseased leaves and then spray the entire orchid plant with pesticide.
Many friends who love to grow flowers want to have their own garden, but in this era of high land prices, it is too difficult to have a garden. However, this does not stop flower lovers. They can turn their balconies into gardens. Do you also want to have a balcony garden? Because of the special nature of the balcony, if you want to turn it into a garden, you must pay attention to the following points:
1. Water and humidity
The balcony has good ventilation and dry air, so watering is still the key. You should pay attention to watering frequently and spray water on the leaves and the ground frequently to maintain the environmental humidity of the plants. The flower pot should not be too large, because the more soil in the pot, the more water it will store, and the soil in the pot will not dry out easily; you can also put the flower pot in a shallow basin of water to continuously supply water to meet the needs of flowers through the capillary action of the roots.
2. Lighting
If it is a south-facing balcony, the sunlight is relatively strong, the plants absorb more heat, and the transpiration is relatively large, which is more suitable for planting sun-loving and drought-tolerant flowers. If it is a north-facing balcony including the corridor, it is not suitable to plant sun-loving flowers because it does not receive direct sunlight. Only shade-loving and neutral flowers can be planted, so that the plants can grow better.
3. Beware of strong winds
Always pay attention. If there is a strong wind passing through, you need to strengthen the wind protection measures on the balcony, because too strong wind is not conducive to plant growth and may also cause damage, so special attention should be paid.
4. Temperature
When sunlight shines on the balcony, the temperature of the balcony will rise due to the reflection of the cement floor and walls, especially the west-facing balcony. This high temperature is very unfavorable for the growth of flowers. At this time, watering should be done frequently to drive away the heat on the balcony.
After choosing the right plants and paying attention to the light and temperature, it is not difficult to grow flowers on the balcony. It just takes more time and effort. In order to have a balcony garden, take action now! Grow various flowers.
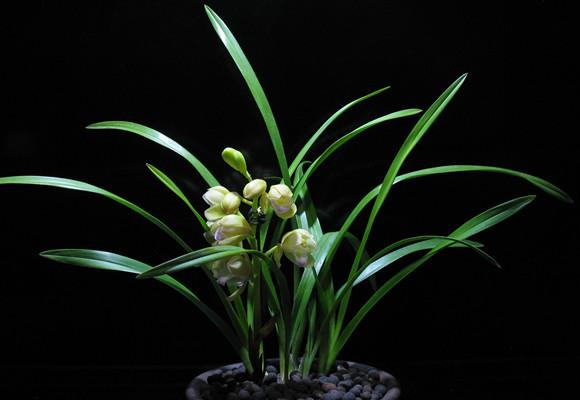
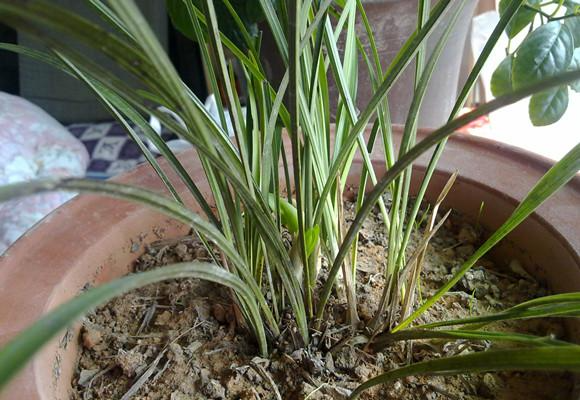
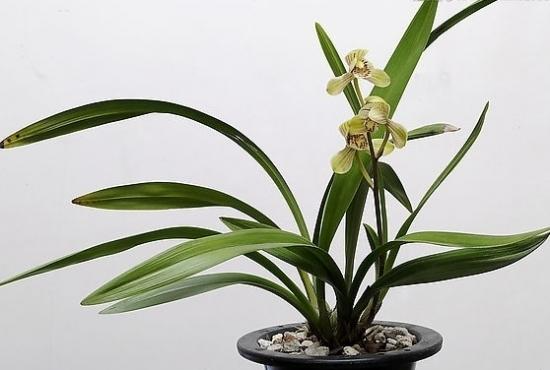
Autumn is here, and it is also the season for most flowers to grow and reproduce. For flower lovers, autumn is very popular. Friends who like Clivia must not miss the opportunity to reproduce in autumn. In autumn, Clivia can be propagated by repotting and division. Generally, Clivia will bloom about two years after division.
The specific operation method of Clivia division propagation is:
① Pour the Clivia with side buds out of the flowerpot, then hold the rhizome of the Clivia mother plant with one hand, and use the other hand to grab the base of the Clivia sub-plant and gently break the sub-plant apart.
② Use a sharp knife to quickly cut off the side buds of the Clivia, and then apply grass ash on the wounds of the mother plant and daughter plants to prevent the wounds from rotting.
③ After the wound is dry, place the mother plant and the rooted daughter plants directly into the culture soil. The rootless daughter plants should be planted in clean sand to promote rooting before cultivation. The culture soil should be loose, well-ventilated, fertile and slightly acidic.
④Control the water and fertilizer within one month after division, and then gradually return to normal management. Fertilization should be light rather than heavy, mainly using decomposed bean cake fertilizer and hemp residue fertilizer. Phosphorus fertilizer should be applied mainly within one month before flowering.
Clivia propagated in this way will generally bloom in about two years. Friends who have Clivia, take action quickly! You will definitely harvest more Clivia potted plants next year.
Autumn is here. Do orchid lovers know what to pay attention to during the usual maintenance process? Today, I have sorted out the experience of orchid lovers and shared it with you. These 6 points are indispensable for orchid management in autumn:
1. Typhoon prevention
Early autumn every year is the season with frequent typhoons. Special attention should be paid to typhoon prevention preparations, and they should never be taken lightly; otherwise, the consequences will be disastrous.
2. Shade and sun protection
The climate contrast in autumn is quite large. It is like summer for a period of time and like winter for another period of time. Especially in early autumn, it is known as the "autumn tiger". The weather at this time is mainly hot and hot. When the weather is sunny, it is no different from summer. Therefore, during this period, we must do a good job of shade and sun protection.
3. Water in time to prevent dryness and wetness
The climate in autumn is very dry. There is a saying that "the autumn wind blows and the dust flies". Therefore, the surface of the orchid pot will dry out very quickly in autumn. If you use clay pots and large-grained planting materials to plant orchids, you must water them in time to prevent them from dehydrating and drying up. If you use purple clay pots and plastic pots to grow orchids, you must prevent the soil from being too wet and causing root rot, especially if the planting materials are fine and the orchid pots have poor air permeability. Watering and shading are very important for orchids in autumn. If the water is not poured in place, the orchid roots will dry up and die; if the water is poured too much, the new orchid roots will be affected by heat and become diseased, causing immeasurable losses. Therefore, watering is the key to orchid cultivation.
4. Timely repotting and division
After the autumnal equinox, the weather starts to gradually turn cooler. At this time, you can repot orchids and divide them. The advantage of repotting in cool weather is that the old orchid heads that have been cut off will sprout new buds much faster than the old orchid heads that were repotted in winter, and the germination rate is also high, and the survival rate of new buds is also high. However, when dividing the orchids at this time, special attention should be paid to disinfecting the wound to prevent pathogens from taking the opportunity to invade.
5. Disease prevention, treatment and pest control
Autumn is the peak season for orchid diseases and pests, so it is very important to prevent and control orchid diseases and pests in autumn. If not properly maintained, once diseases and pests occur, the orchid will burn (burnt tip); in severe cases, it will cause the plant to die.
6. Enter the room in time
On rainy days in autumn, the temperature drops significantly, especially in late autumn, when the temperature sometimes drops to 10℃. When cold air moves south, the temperature will be even lower. If you still keep your orchids outdoors at this time, you should move them indoors in time (because orchids basically stop growing when the temperature drops below 10℃). Remember to close the windows at night when the temperature is low.
I bought a money tree in the summer, and it has been growing well. But in the fall, the leaves fell off every day, and it is almost bare. I asked a few friends who have raised money trees well, and most of them have encountered this problem. Experienced friends said that this situation may be caused by the following two reasons:
1. Improper environment
The money tree may shed leaves because the indoor environment of the potted money tree is not appropriate. First, there is a lack of light, and second, there is no air circulation or poor ventilation. As we all know, any flower or tree can only survive with light (or brightness) and air. Otherwise, it cannot exist. This is because it needs light and air to photosynthesize and then obtain nutrition and living conditions.
If you place the money tree potted in a corner of the room where there is no sunlight and air circulation, the leaves of the money tree will fall off or fall off at the touch of a finger due to the lack of light and air living conditions. Therefore, no matter what season, pay attention to the light (luminosity) and air circulation of the environment where the potted flowers are placed.
2. Overwatering
Another reason for the money tree to shed leaves every day may be excessive watering, too frequent watering, and too wet soil for a long time. If the money tree is watered too much, the soil is often too wet, or the holes at the bottom of the pot are blocked, the drainage is poor, etc., it will cause the plant to have difficulty breathing, the leaves will flow back, the roots will suffocate and rot, and the leaves will fall off one after another.
Therefore, it is necessary to water reasonably and appropriately, especially as winter is coming. For cold-sensitive plants like the money tree, it is crucial to control the dryness and wetness of the potting soil.
These two points are the main reasons why the money tree sheds leaves every day in autumn. However, you also need to judge according to your specific situation and find solutions based on the symptoms of the flowers to grow satisfactory flowers.
During the holiday, I visited a friend's house and saw the balcony full of orchids. I was very envious, so I asked my friend how she did it. My friend said that in addition to careful care at ordinary times, it is also necessary to repot and divide the plants in the autumn, so that a few more pots of orchids can be added every year. So that's how it is. I asked about the specific operation methods, and I would like to share them with you here.
Late autumn is one of the best times for orchid repotting and plant division. If handled well, it can not only breed small orchids, but also be very beneficial for the orchid's flowering and growth next year. Therefore, orchid lovers should attach great importance to the work of repotting and plant division in autumn.
Things to note when repotting and dividing orchids:
① The soil in the pot should be slightly dry before repotting and dividing the plants to prevent damage to the orchid roots;
② Tools for division, such as scissors or sharp knives, must be disinfected.
③ The cuts of orchid division and root pruning should be coated with sterilizing powder or grass ash to prevent wound infection;
④ The division site should be clean, and the water used to wash the orchid plants should be hygienic. Do not use up all the water in a basin. It is best to rinse with tap water. The washed orchid plants should not be exposed to the sun and should be placed in the shade to dry.
⑤ As the pseudobulb of iris is too small and the nutrients stored are limited, it is not suitable to divide the plants too frequently. Generally, 4 to 5 plants are planted together. Except for some plants with good root systems and natural "roads" to grow strong grass, it is generally not suitable to plant them alone.
⑥ As long as the orchid pseudobulb is full and the root system is well developed and intact, it can be cultivated as a single plant. If 4 to 5 generations of "coexistence in the same house" is not conducive to growth, it must be divided at the right time.
Generally speaking, if the orchid has been cultivated for more than two years, the nutrients in the planting materials will be mostly exhausted, and it is necessary to repot and replace the planting materials in time to meet the growth needs of the orchid; however, the repotting period for weak seedlings can be appropriately extended, and repotting too frequently is not conducive to the rejuvenation of the orchid.
It is autumn now. Flower lovers can choose the appropriate time to repot and divide the orchids according to the different temperatures in different places. The above is just for reference. You should still operate according to the actual situation of your orchids to avoid counterproductive results.