#GardeningDoctor# Lily planting diagram
Author: qingyi90
I've been selling lily bulbs at Hongyue for over a decade. I've witnessed countless growers reap the joy of success, earning millions in annual profits, but I've also seen them fail due to various issues (such as growing media, fertilizers, facilities, and climate), leading to losses exceeding millions. If it weren't for the overwhelming enthusiasm of my fellow flower lovers, I'd have lost interest in lilies,
and I'm ashamed of myself. Like all living things, for lilies to thrive and ultimately bloom beautifully, the most fundamental conditions are: high-quality bulbs, a suitable environment, and adequate management. Careful attention and meticulous management, from the moment they're planted until they finally wither, will ensure your lilies bloom as you desire and delight you. Whether you can make money depends on market support, but those who grow lilies for their own enjoyment are beyond the scope of this article.
The botanical characteristics and classification of lilies have already been covered in relevant posts on the Horticulturalist Forum, so I won't elaborate here. Below, we will expand on these aspects:
1. Bulbs: Ordering high-quality bulbs is the foundation of successful planting. However, since bulbs are not industrial products but agricultural products, and are also imported, they face various national quality inspection requirements and are always prone to various problems. Any company, domestic or foreign, that dares to guarantee that there will be no problems with your order (supply or quality) is definitely a scammer. Therefore, you can only choose reliable suppliers to reduce the probability of bulb problems.
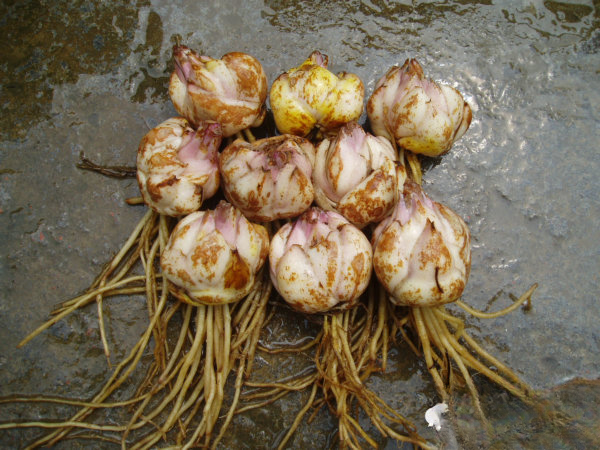
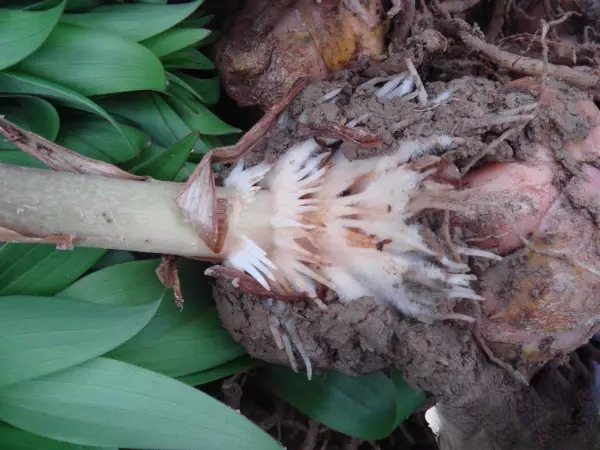
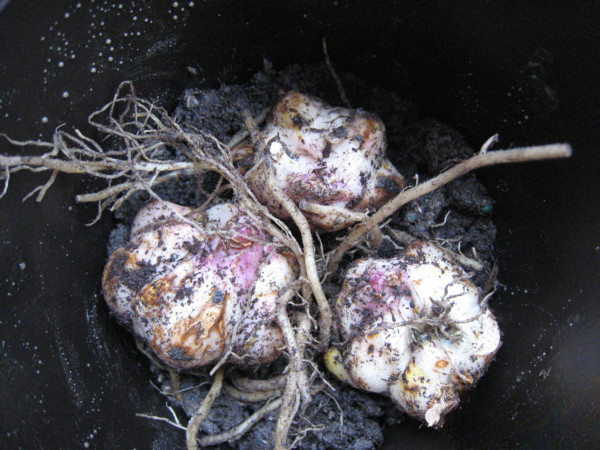
High-quality lily bulbs: firm, clean, and with a good root system.
Bulbs are always prone to problems, such as severe Penicillium infection and frost damage. Whenever possible, we'll negotiate and replace the variety. If this isn't possible, we'll simply give up and cancel the planting plan.
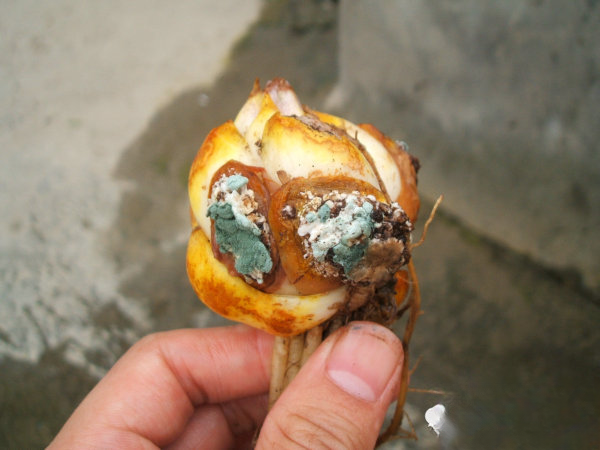
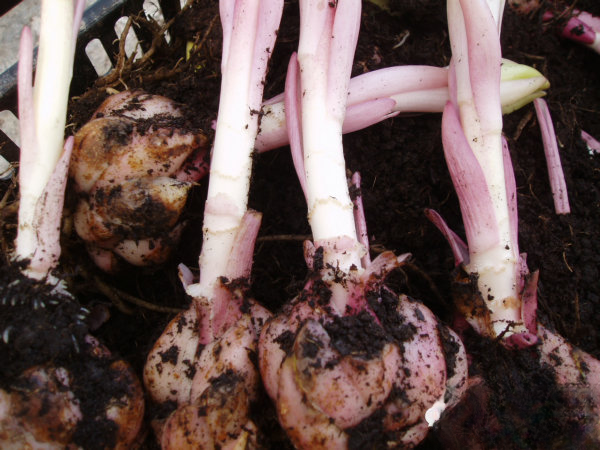
A common problem with lily bulbs is Penicillium infection (as shown below). If the infection doesn't endanger the bulb's base, it's not a major issue.
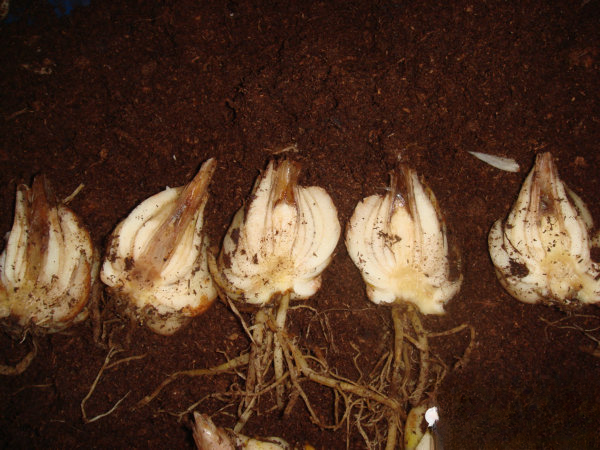
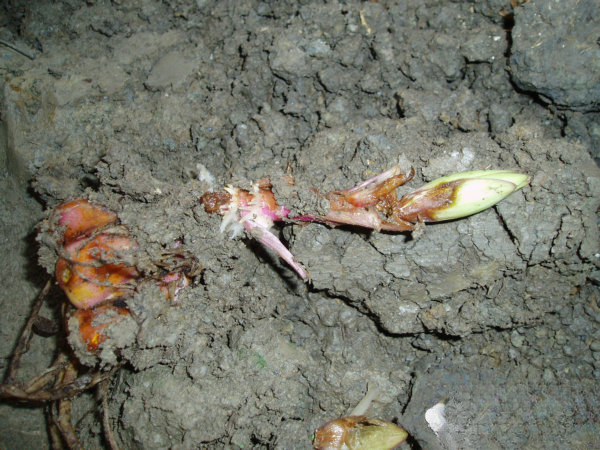
Frost damage - the buds of the bulbs turn black (as shown below). In severe cases, the bulbs have to be scrapped.
2. Environment: A common slogan is "Grass has life too." I remember a Dutch expert saying, "The water you can drink, it can drink; the environment you can live in, it can live in." This truly speaks to the truth: you must treat it like your own baby, touching it, feeling it, and constantly changing its environment. Only then will it reward you with beautiful flowers.
1) Soil:
Soil Structure: While lilies can grow in all soils, it's crucial to ensure the soil has a good structure and maintains good drainage throughout the growing season. Poor soil structure and compaction often lead to lily root system failure due to lack of oxygen, resulting in weak growth or even death. Poor drainage can also lead to the infestation of Pythium, which can cause root death and ultimately poor growth or even death.
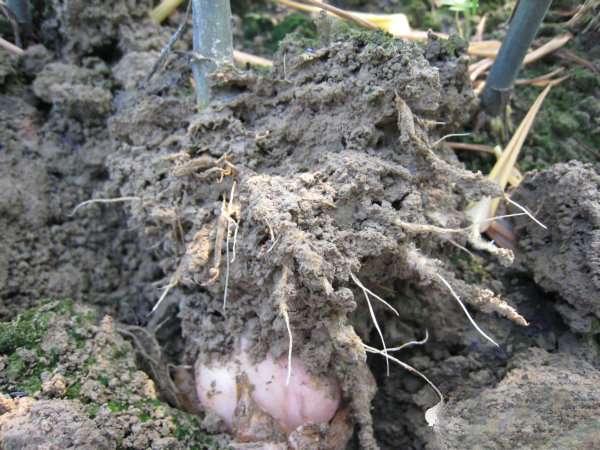
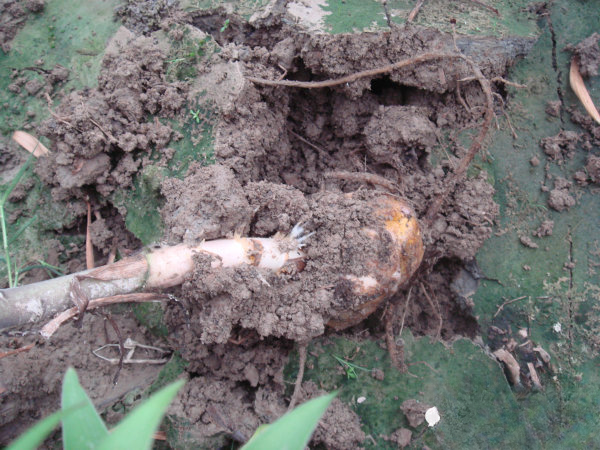
The picture below shows the situation where the roots died due to lack of oxygen due to heavy rain during the typhoon. Of course, the situation is more serious if the soil is too compacted.

Soil pH and salt: Maintaining proper soil pH is very important for the development of lily roots and the correct absorption of nutrients. If the pH is too low, it will lead to excessive absorption of mineral nutrients (such as iron, manganese, and aluminum), while if the pH is too high, it will lead to insufficient absorption of phosphorus, manganese, and iron. Everyone knows that insufficiency is bad, but not everyone knows that too much is as bad as too little.
Lilies are also sensitive to salt. Excessive salt will form hard, fragile, and yellow or brown roots, reduce the root system's absorption of water, affect the quality of lilies, and even cause the death of lily roots and lily plants in severe cases. Soil salinity is often affected by the fertilizer and water used.
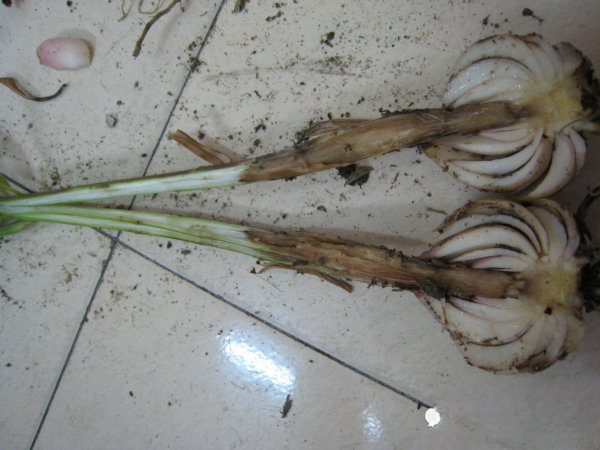
The picture below originally showed very beautiful roots, but the use of uncomposted organic fertilizers caused partial or complete death of the roots, which is a pity.
Soil pathogens: Lilies often die due to soil fungi that damage their roots. Common fungi include Rhizoctonia, Pythium, and Phytophthora. Rhizoctonia only harms buds while they are still in the soil, while Pythium can be reduced by improving soil drainage. In general, it is necessary to use a broad-spectrum fungicide several times throughout the growth process, such as chlorothalonil.
The following figure shows the damage caused by Rhizoctonia and Phytophthora.
From the above, we can see how crucial suitable soil is to successful cultivation. If the soil is bad, no matter how diligently you manage it, you'll end up with nothing but tears. Therefore, it's best to choose soil that hasn't been used for lily cultivation. Ideally, peat (domestic peat is fine). To ease management, it's wise to use 80% peat with 20% perlite or pine scale. If you're considering base fertilizer, a controlled-release fertilizer with a controlled release rate is ideal. If you prefer organic fertilizer, be sure to use well-rotted organic fertilizer.
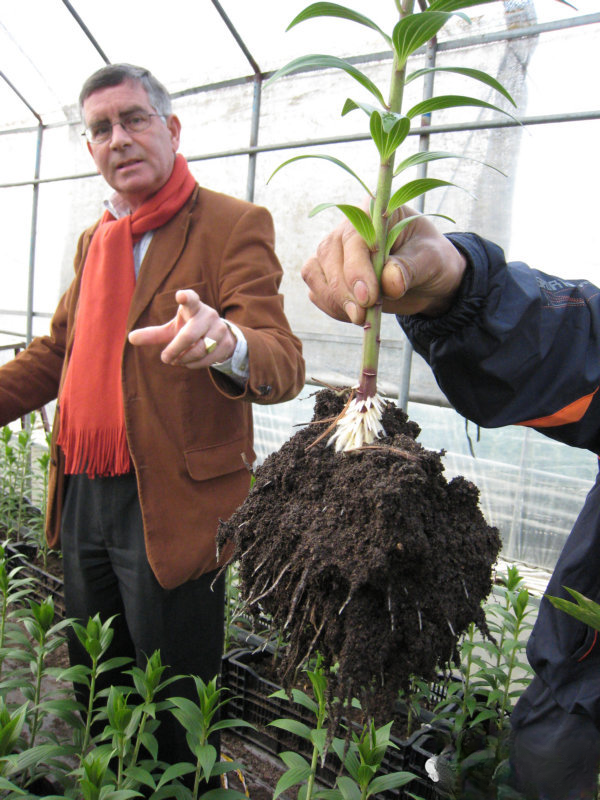
With such a good root system, why worry about not having beautiful lilies?
2) Temperature
during the rooting period: Maintaining a moderately low temperature (10-12°C) for 2-3 weeks after planting is crucial to ensure the lilies develop good stem roots. However, ideal weather is often unavailable, as is the case with the lily bulbs pre-sold in June. Therefore, professional growers use cold storage for rooting. However, a good idea is to use the refrigerator's fresh-keeping layer. Wrapping the lily bulbs in peat (not too wet, just enough to drip water when squeezed) and placing them in the refrigerator's fresh-keeping layer for rooting is a good idea. While lower temperatures will extend the growing season, I think you shouldn't mind a few extra days of care.
If the roots have already taken root, in hot seasons, first root them before planting.
Growing Temperature: While the ideal growing temperature for lilies is 15-25 degrees Celsius, we have no way to control the natural temperature, but we still need to avoid extreme conditions. Lilies are prone to frost damage if the temperature drops below 5 degrees Celsius, and above 35 degrees Celsius, the growing season will be significantly shortened, and the quality will decline accordingly. In the summer, when the sun is strong, we can lower the temperature by providing shade and increasing ventilation. How pleasant it is to enjoy the cool breeze under the shade of a tree in the summer.
3) Relative Humidity: Lilies require an optimal relative humidity of 70-80%, though this applies to professional growers operating in greenhouses. Lilies grown in yards or on balconies don't need to worry about this. High humidity often causes poor growth in greenhouses, but even continuous rainy weather has not yet affected outdoor lilies (assuming the soil is well-drained and fungicides are used regularly to control gray mold). However, minor effects can occur. This is because greenhouse ventilation is very suboptimal, making it feel stuffy for humans and plants alike.
Here are some pictures showing damage to lily leaves caused by high temperature and humidity.
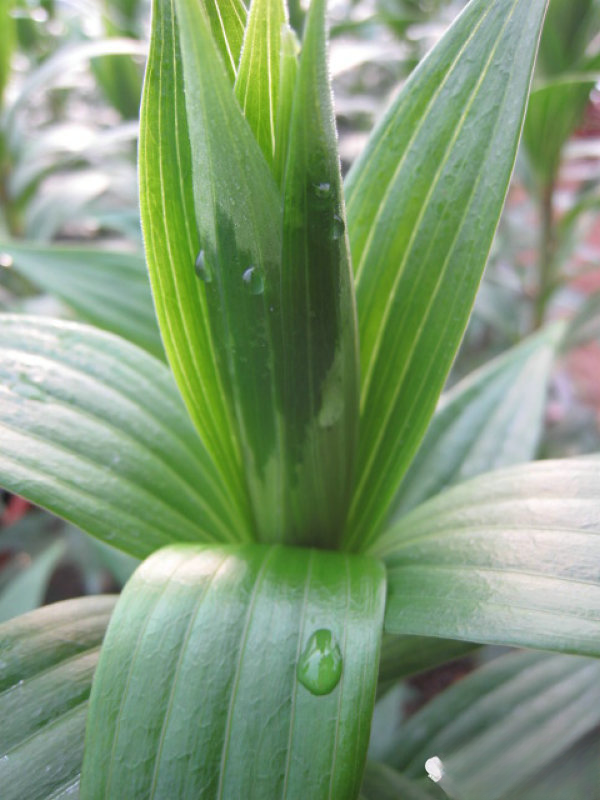
High humidity creates excessive water pressure within the plant, ultimately damaging the leaves due to ruptured cell walls, and in severe cases, even the flower buds. This is a physiological disease, not a pathogenic one, so applying fungicides is ineffective. Using calcium fertilizer can increase the resistance of the cell walls and mitigate the damage.
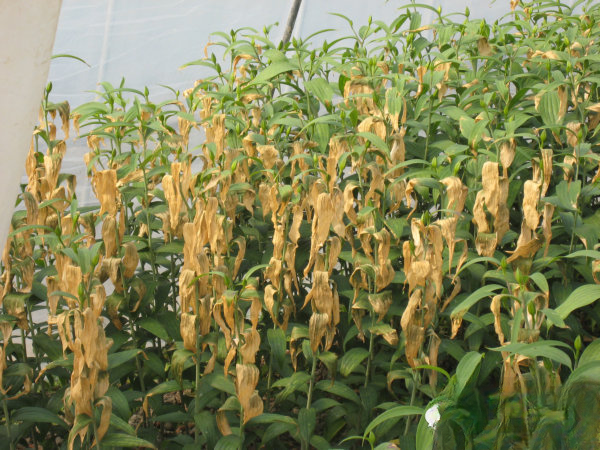
Prolonged periods of rain and overcast weather leave the leaves very tender. Furthermore, as the plant tries to expel excess water, the stomata remain open. This prolonged openness eventually causes the stomata to lose their ability to close (they normally open and close automatically based on weather conditions). Even after the rain, the stomata remain open, allowing transpiration to drain, ultimately causing the leaves to lose water, become papery, and even scorch.
4) Shading: Shading can control temperature, relative humidity, and light exposure. In summer, sunlight is often very strong. For 2-3 weeks after planting (before bud formation), shade the buds from 80% of the sunlight. After bud formation, Asiatic and LA hybrid lilies are light-sensitive, and lack of light can cause bud loss. Therefore, shade can be reduced to 50%, for example. Oriental lilies are less sensitive to light and can still be shaded to 50-70%.
Here are the general steps for growing lilies in pots at home:
1. Preparation:
1) Growing Medium: We recommend peat moss as the primary medium.
2) Fertilizer: We recommend a base fertilizer of 3 kg of 14-14-14 slow-release fertilizer and 0.5 kg of calcium nitrate per cubic meter of medium.
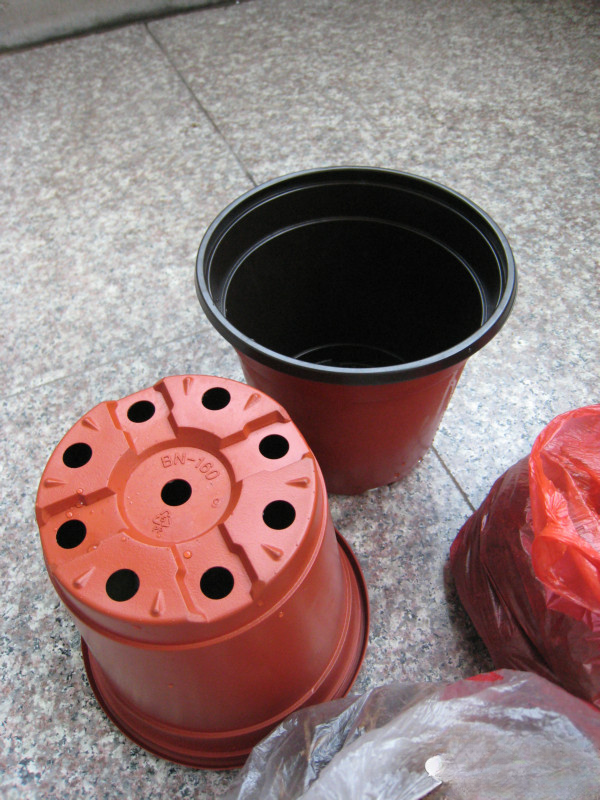
3) Pot: A 13 cm pot can accommodate three 12-14 cm bulbs; a 15 cm pot can accommodate three 12-14 cm and 14-16 cm bulbs. Choose a pot based on your needs. Ideally, the pot should be at least 12 cm tall.
2. Receiving the Lily Bulbs: After long-distance shipping, your lily bulbs will be thawed when you receive them. Normally, they should have a few small buds. As long as the buds are no longer than 5 cm and are not broken, even curved buds are fine. Feel free to plant them.
Upon receiving the bulbs, soak them in a 600-800 times diluted chlorothalonil for 30 minutes.
3. Planting:
1) First, mix the medium and base fertilizer evenly, then water until water drips from the pot.
2) Spread 2-3 cm of the mixed medium at the bottom of the pot.
3) Plant the bulbs in the pot with the buds facing outward.
4) Cover the bulbs with about 8 cm of medium.
5) Water thoroughly and place in a shaded area, avoiding direct sunlight as much as possible.
It's recommended to plant 1, 3, or 5 bulbs per pot. Odd numbers look best, but for 5 or more, even or odd numbers don't matter.
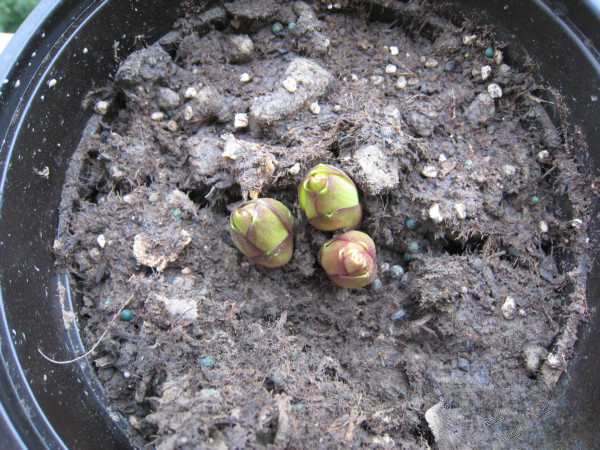
At temperatures between June and July, sprouts should generally appear within 7 days!
Above:
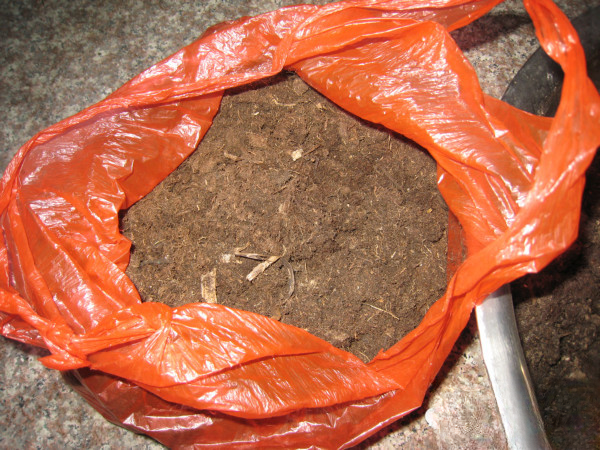
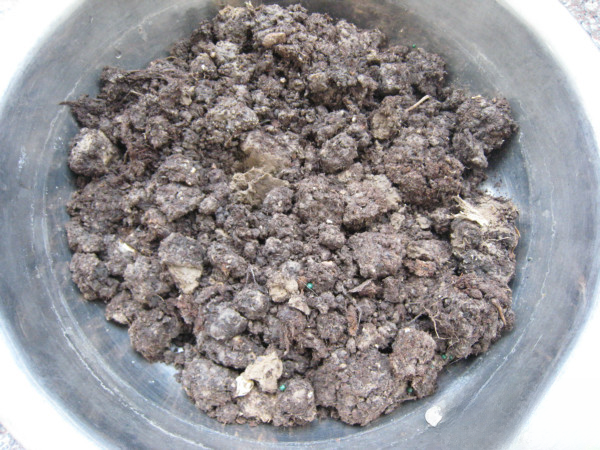
1. Medium
peat soil garden soil
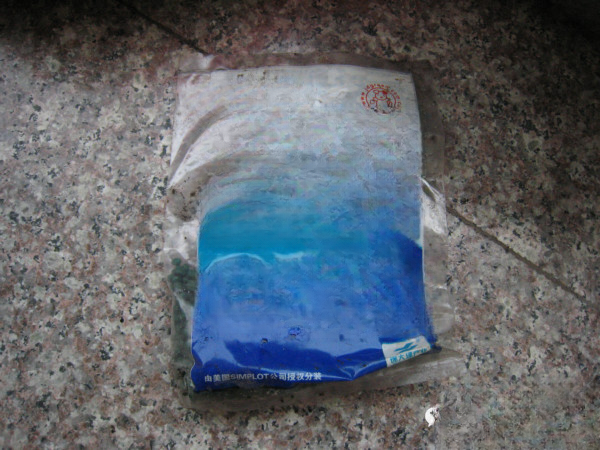
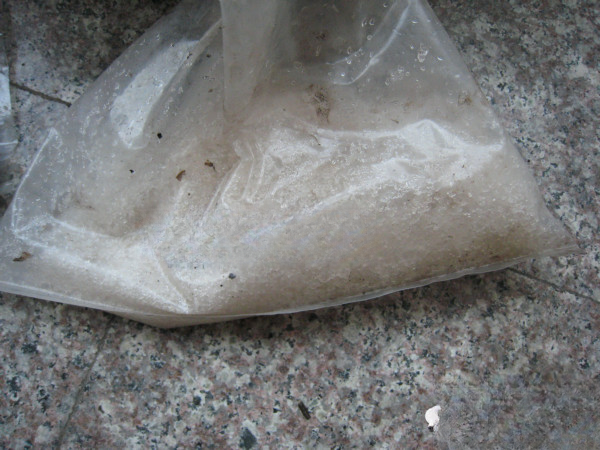
2. Fertilizer
controlled-release fertilizer calcium nitrate
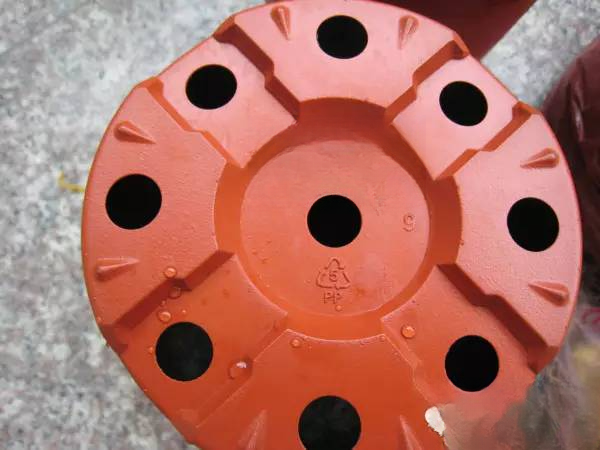
3. Use a 160cm double-color pot to plant 3 balls
4. Planting
1) Correct planting method: The buds of the balls should be close to the pot wall.

2) Incorrect planting method: The buds are placed towards the center. Consequence: All the buds are concentrated in the center, which is not good looking.
Of course, if you plant them randomly, when the sprouts emerge, they will be messy and unsightly.
As for potted plants, it is best to wait until the bulbs have buds of 3-5 cm before planting them. This way you can control the direction of the buds, and the overall appearance of the plant will be better.